


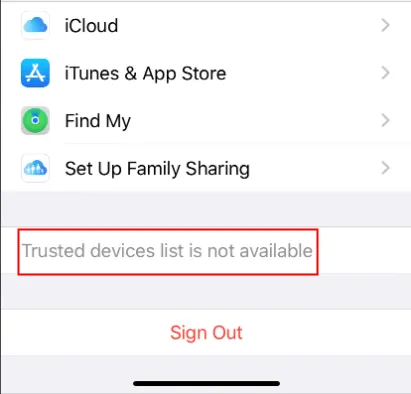
Seeing the Trusted devices list is not available message on your Apple ID settings when trying to manage your device?
This message can be annoying, especially when you need to verify your identity or remove an old device. In this guide, we'll walk you through the reasons behind this error and show you how to fix it step by step.
In this article:
- Why Trusted Devices List Is Not Available on iPhone?
- How to Fix Trusted Devices List Is Not Available?
- Check Network
- Force Restart iPhone
- Sign Out of Apple ID & Sign Back In
- Enable 2FA
- Check Apple ID via Another Device
- Update iPhone System
- Reset All Settings
- How to Sign Out of Apple ID Without Password?

- FAQs About iPhone Trusted Devices
Why Trusted Devices List Is Not Available on iPhone?
A trusted device is any Apple device linked to your Apple ID that can receive verification codes for two-factor authentication (2FA). When you sign in on a new device, you'll need to verify your identity using a code sent to a trusted device.
This makes trusted devices crucial for securing your account, especially when logging in or making changes to your Apple ID.
However, if you see the message "Trusted devices list is not available" on your iPhone, it means you're unable to manage your Apple ID or approve login requests. There are several reasons behind, let's explore:
- 2FA Not Enabled: Without two-factor authentication enabled, the list will not be available.
- Network Issues: If your device is not connecting to Apple's servers under a strong and stable network, it may fail to retrieve the trusted devices list.
- Problems with Apple ID Login: If the Apple ID sign-in process didn't run smoothly, you won't see any trusted devices.
How to Fix Trusted Devices List Is Not Available?
Now that you understand the main reasons for the iPhone Trusted devices list is not available error, the next step is figuring out how to fix it. Let's walk through the solutions.
1 Check Your Internet Connection
If you've logged in the Apple ID, the iPhone will load the trusted devices when you go manage the account.
However, if you notice that the Apple ID Trusted devices list is not available, the possible reason is that the iPhone is not in a stable network. Therefore, you can try the following troubleshooting steps.
- Settings: Allow the Settings app to use the network by going to Settings > WLAN > Apps Using WLAN & Cellular > Settings, then allow it to use WLAN & Cellular Data.
- WiFi: Turn on and off the WiFi to refresh the network, you can also forget the WiFi and join in again.
- Cellular Data: If the WiFi connection is not stable, you can switch to cellular data.
- VPN: Disable any activated VPN, which may slow down the internet to some extent.
- Airplane Mode: Toggle on and off the Airplane Mode, which can refresh the network and re-establish fresh connection.
- Reset Network Settings: If you can't see the trusted devices list after trying the above methods, you can go Settings > General > Transfer or Reset iPhone > Reset > Reset Network Settings to perform a network reset, which should help.

2 Force Restart iPhone
If the network isn't the culprit, the next step is to force restart your iPhone. Unlike a regular restart, a force restart helps clear out minor system glitches that could be affecting how your device loads the trusted devices list. Here's how to do it.
- For iPhone 8/X/11/12/13/14/15/16: Quickly press and release the Volume Up button, then do the same to the Volume Down button. Hold down the Power button and wait for the Apple logo to appear.
- For iPhone 7/7 Plus: Press and hold the Volume Down + Side buttons together. Wait for a few seconds and release them when the Apple logo appears.
- For iPhone 6s or earlier versions: Tap and hold the Home + Side buttons at the same time. Let go of them when you see the Apple logo shows up.

After performing a force-restart, you can go check if the trusted devices list shows up.
3 Sign Out of Apple ID & Sign Back In
If a force restart doesn't do the trick, the issue might be with the Apple ID itself. You can try to sign out of your Apple ID and then sign back in to reset the connection between your device and Apple's servers.
After that, it can refresh your account settings and restore access to the trusted devices list. Here's how to do it properly.
Step 1: Turn on the Settings app, then go to General.
Step 2: Tap Your Apple ID Name], then scroll down and click the Sign Out button.

Step 3: When prompted, enter the Apple ID password to turn off Find My iPhone, then click the Turn Off at the upper right corner to completely sign out of the Apple ID.
Step 4: Later, force close the Settings app then sign back in the Apple ID by the same procesures to see the trusted devices on your iPhone.
4 Enable Two-factor Authentication
If you're still seeing the Trusted devices list is not available message, it's possible that two-factor authentication (2FA) hasn't been enabled on your account.
Since the trusted devices list is directly tied to 2FA, turning it on is essential for the feature to work. Enabling 2FA not only helps resolve this issue but also protects your Apple ID. Here's how to do.
Step 1: On your iPhone go to Settings > [your name] > Sign-In & Security.
Step 2: Tap Turn On Two-Factor Authentication, then tap Continue.

Step 3: Enter a trusted phone number (the number you an use to receive verification codes), then tap Next.
Step 4: A few seconds later, a verification code will be sent to your trusted phone number, then enter the code on your iPhone.
Step 5: Once 2FA is enabled, your current device will automatically become a trusted device, and the trusted devices list should become available.
5 Check Apple ID via Another Device
If enabling two-factor authentication doesn't solve the issue, it's suggested to check the Apple ID from another trusted device, like a Mac, iPad, or even through the Apple ID website, to verify whether your account is working properly and if the trusted devices list appears there.
Follow the normal steps to check the trusted devices list on another device, if the list do appear as expected, you can fix the iPhone via the next solutions.
6 Update iPhone System
If the Trusted devices list is not available on iPhone, it could be due to a software glitch or compatibility issue. Apple often releases iOS updates that fix bugs and enhance account-related features like two-factor authentication.
In that case, updating your iPhone to the latest version can help resolve underlying system issues that may be preventing the trusted devices list from loading properly. Here's how to install updates.
Step 1: Navigate to Settings > General > Software Update.
Step 2: When the new update shows up, click Update Now.

Step 3: After updating the system, you may be able to see trusted devices on your iPhone.
7 Reset All Settings
Still having trouble seeing the trusted devices list? At this point, it might be due to hidden system glitches or conflicting settings.
The last step is to reset all settings on your iPhone. This won't erase your personal data, but it will restore system settings, like Wi-Fi networks, location preferences, and other configurations to their default state. Here's how it works.
Step 1: Head to Settings > General , then scroll down.
Step 2: Click Transfer or Reset iPhone > Reset > Reset All Settings.

Step 3: Enter the screen passcode to confirm and click Reset All Settings again.
Step 4: When your iPhone restarts automatically, you can enter the Settings again to find the trusted devices list.
How to Sign Out of Apple ID Without Password?
If you can't sign out of Apple ID because it's greyed out or the Find My iPhone is enabled, you can try this iMyFone LockWiper Apple ID Unlocker.
As a professional iPhone unlocker, LockWiper can help you remove Apple ID/iCloud account without password from iPhone/iPad. You can then log in with your Apple ID or a new account to add or view the trusted device lists.

Key Features of iMyFone LockWiper:
- No Password Required: It can remove Apple ID from iPhone/iPad without password.
- 100% Secure: You can log in or create a new Apple ID after removal, 100% secure without worrying about being tracked.
- Wide Compatibility: Compatible with iPhone X/11/12/13/14/15/16 running iOS 16/17/18 to remove the Apple ID.
- 5 Minutes Done: When old Apple ID keeps popping up, it can delete it within 5 minutes.
- Other Features: It can bypass different screen locks, turn off the Screen Time passcode and remove remote management lock.
Let's see how to remove Apple ID from your iPhone without password.
Step 1: Download and install LockWiper. Launch it on your computer and select the Unlock Apple ID from the home page of the program.

Step 2: Connect your iPhone to the computer and the program will start recognizing your device. Once detected, click the Start to proceed.

If "Find My" is turned off on your iPhone:
Step 3: LockWiper will automatically remove Apple ID from your iPhone. Wait for a few minutes for the process to complete.

If "Find My" is turned on on your iPhone and the device is running iOS 11.4 and above:
Step 3: If FMI is enabled, you will enter this screen. Go check if you can meet the two requirements. If not, follow the on-screen instructions to enable them. Then, click Unlock button.

Step 4: A warning screen will pop up to ask you enter 000000 and then click the Unlock button again.

Step 5: Wait for your Apple ID to be removed. Then, you can regain access to your device without interruptions.

FAQ About iPhone Trusted Devices
1 Where is my list of trusted devices?
Here's how to see trusted devices on iPhone, you can go to Settings > Apple ID Name > Sign-In & Security. In this section, you'll view your list of trusted devices.
2 How do I enable trusted devices on my iPhone?
To enable trusted devices on your iPhone, you should turn on two-factor authentication: Go to Settings > Your Name > Sign-in & Security > Turn on Two-Factor Authentication > Continue. Enter the phone number that can be used to receive the verification code, then enter the code on your device. Your iPhone will be listed as the trusted device now.
3 How do I add another trusted device?
After enabling the 2FA, you can access the device you want to add, then sign in to the same Apple Account you used to turn on the 2FA. When prompted, enter the six-digit verification code on the new device, which appears on your first trusted device.
4 How do I reset trusted devices on my Macbook?
To reset trusted devices on your MacBook, you can click the Apple menu, then go to System Setting to select your Apple ID at the top of the sidebar. Later, scroll down to find the device you want to reset from the list. Click on it and tap Remove from Account to reset its status.
Conclusion
Now, you know network issues, outdated iOS version and other reasons can cause this Trusted devices list is not available error. Hope 7 solutions mentioned in this guide work for you. Also, iMyFone LockWiper is recommended if you can't sign out of your Apple ID to resolve the issue.
![]()
![]()
Melvin Cooper has over 10 years of experience in the technology industry and is an expert at providing tips and handy solutions to Apple and Android users. Dedicated to helping millions of users improve their experience with mobile devices, he has maintained an impressive record of solving problems.
-
[2025] How to Use iforgot.apple.com Unlock Apple ID?
iforgot.apple.com can unlock Apple ID and reset Apple ID password. Let's see how it works to help you regain control of your device.
3 mins read -
[2025] How to Use 3uTools MDM Bypass & Its Alternatives
How to use 3uTools MDM bypass tool? This article gives a full review of how to bypass MDM with 3uTools and its best alternatives as well.
3 mins read -
What Is iOS 18 iPhone Inactivity Reboot Feature? How Does It Work?
Do you know the feature of iPhone inactivity reboot after 3 days in iOS 18.1? What is it and how does it work? This article tells you all!
2 mins read -
Explore the Best Free iPad Unlock Software: Unlock with Ease
If you are looking for a real free iPad unlocker, you can't miss the free iPad unlock software this article has put together for you, you can choose the best.
4 mins read -
[2025] What Is iOS Account Manager & How to Remove It
What is iOS Account Manager? Can I remove it? This guide will explain what does iOS Account Manager mean and provide steps for you to remove it with ease.
3 mins read -
How to Fix This Apple ID Is Not Valid or Supported
This guide focuses on explaining and resolving why this apple id is not valid or not supported issues to help you fix Apple ID not working on iPhone problems.
3 mins read
Was this page helpful?
Thanks for your rating
Rated successfully!
You have already rated this article, please do not repeat scoring!