Restrictions are known as parental control that allow you to manage the features, applications, and content that are accessible to your kids. It offers the option to restrict access to certain apps, the download of some sensitive music or books, the ability to make in-app purchases.
To enable Restrictions feature, you will need to create a 4 digit passcode. Since you are not often to change a restricted setting, you may forget the Restrictions passcode easily. Here we will provide your 3 effective Restrictions passcode finders. Most importantly, you will not lose any data!
Find Restrictions Passcode Directly in 5 Minutes
The iMyFone LockWiper is the best Restrictions passcode finder in 2019 that can directly find back the Restrictions passcode in your Apple device. It features the advanced technology that can unlock your Restrictions passcode while not erasing any data. It is very easy to use and does not require any technical skills. Let's go through its brilliant features.
- It can find your current Restrictions passcode in 5 minutes.
- Recover Restrictions passcode easily without losing any data on your Apple device.
- It can also unlock iPhone passcode even without password.
Here is the video tutorial to reset restrictions passcode with ease.
The best Restrictions passcode finder - iMyFone LockWiper:
Step 1. Open iMyFone LockWiper and choose "Unlock Screen Time Passcode".

Step 2. Connect your Apple device to a computer.

Step 3. Click the "Start to Unlock" button to start recovering your Restrictions passcode.

Step 4. You will see your current Restrictions passcode on the screen while your data is intact and safe.

Find Restrictions Passcode by Pinfinder
Pinfinder is a small Restrictions passcode finder, that can help to recover your Restrictions passcode via scanning your iTunes backup. You will need to take time to back up and encrypt your data to iTunes at first. Please take the following guide carefully.
The small Restrictions passcode finder - Pinfinder:
Step 1. Update your iTunes to the latest version. Connect your iPhone or iPad to a computer.
Step 2. Select your device icon when it comes out in iTunes.
Step 3. Choose "Encrypt [your device] backup".
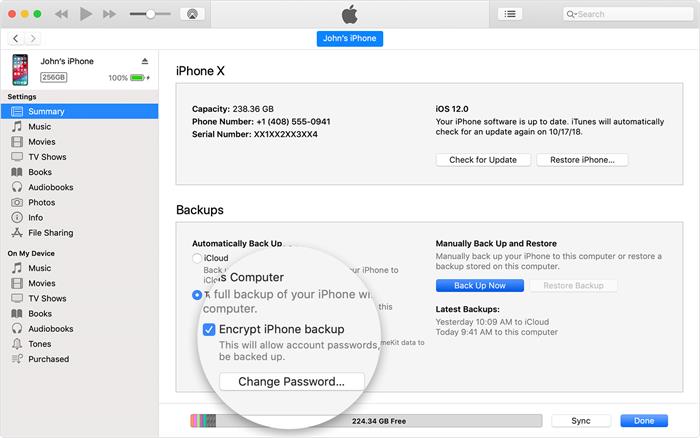
Step 4. Create an iTunes encryption password for your data and keep it in mind.
Step 5. You need to wait a while until the backup process is completed.
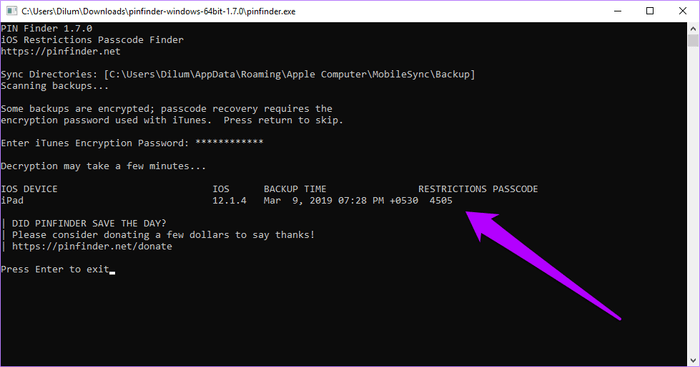
Step 6. Open the Pinfinder by right-clicking.
Step 7. Choose the "Open" button. You will see a warning on the screen, just accept it to run the program.
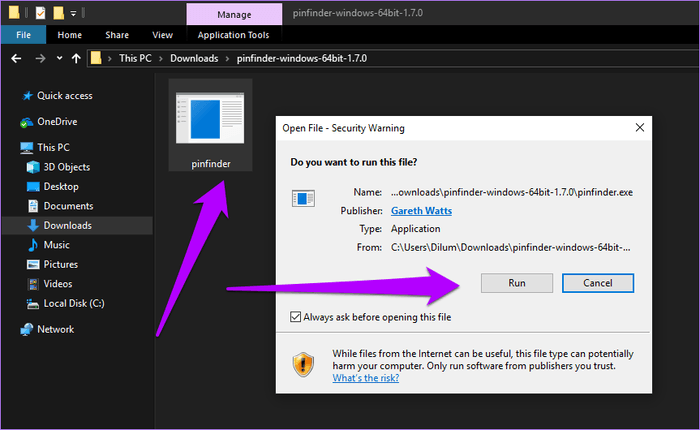
Step 8. Enter your iTunes encryption password, and press Enter on the keyboard.
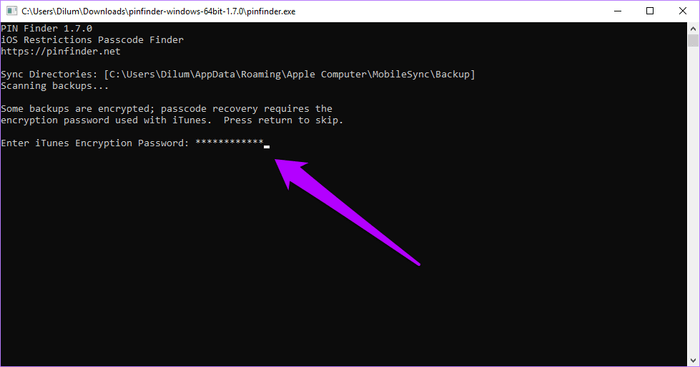
Step 9. You should wait until Pinfinder decrypts your backup completely.
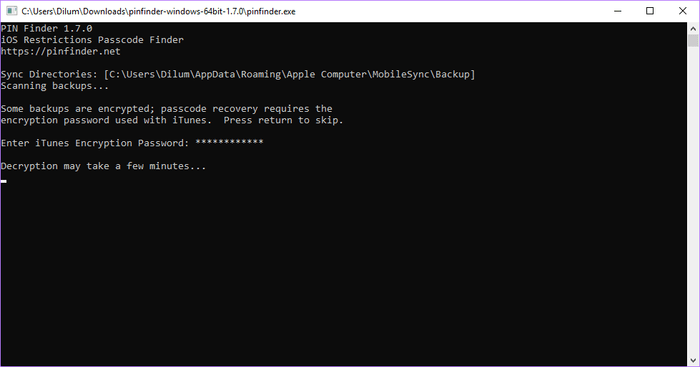
Step 10. Your Restrictions passcode will be displayed on the screen.
Note:
If you are using Mac OS X Mojave (10.14), you have to allow terminal programs at first. Go to "System Preferences > Security & Privacy", select the "Privacy" button and add the terminal program which is located in the "Application > Utility folder".
Find Restrictions Passcode by iPhone Backup Extractor
Reincubate iPhone Backup Extractor is a backup reader that works with your iTunes or iCloud backup. You can extract and edit your backup, retrieve and restore your lost data using iPhone Backup Extractor. It can find back your Restrictions passcode via reading your iTunes backup. As it uses the same principle as Pinfinder, you have to make an encrypted iTunes backup at first.
The Restrictions passcode finder - Reincubate iPhone Backup Extractor:
Step 1. Update your iTunes to the latest version. Connect your iPhone or iPad to a computer.
Step 2. Select your device icon when it comes out in iTunes.
Step 3. Choose "Encrypt [your device] backup".

Step 4. Create an iTunes encryption password for your data and keep it in mind.
Step 5. Open Reincubate iPhone Backup Extractor. Select the backup including your Restrictions passcode among a list of backups.
Step 6. Select the "Utilities" button, then choose the "Recover Screen Time/restrictions passcode" feature.

Step 7. Press the "Recover" button. The software will take a while to scanning your iTunes backup.
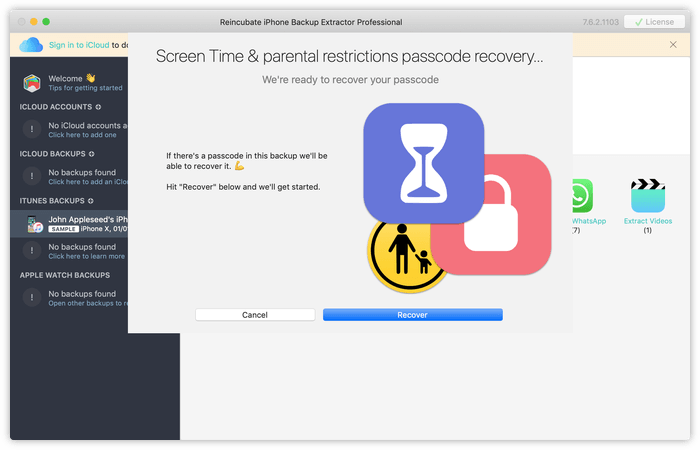
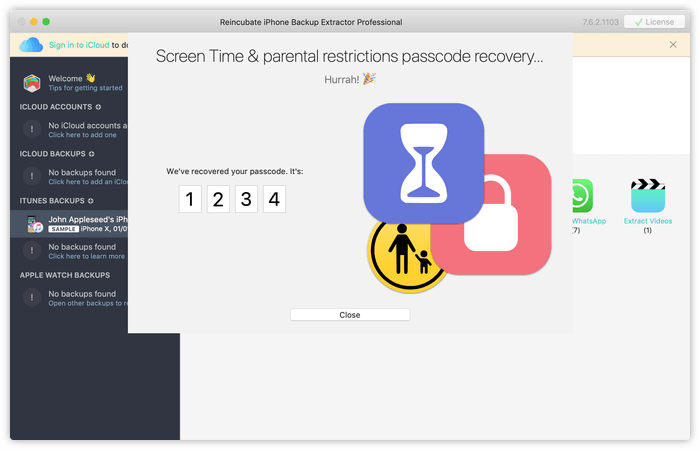
Step 8. Your Restrictions passcode will be dispalyed on the screen.
Compare the Three Restrictions Passcode Finders
If you don't know which software is suitable for you, you can view this form. We have compared the three Restrictions passcode finder as your reference.
|
Apps and Metrics
|
Pinfinder
|
Reincubate iPhone Backup Extractor
|
|
|---|---|---|---|
|
Unlock Restrictions passcode without Losing Data
|

|

|

|
|
Unlock Screen Time Passcode without Losing Data
|

|

|

|
|
No Need of iTunes Backup
|

|
||
|
No Need of Encrypting iTunes Backup
|

|
||
|
No Need of Technique Skill
|

|
||
|
Unlock Disabled/Broken Devices
|

|
||
|
Unlock Apple ID/iCloud Account
|

|
||
|
Time for Unlocking Restrictions Passcode
|
Less than 5 Minutes
|
50 - 120 Minutes
|
50 - 120 Minutes
|
All of the three methods can find back your Restrictions passcode while keeping all of the data safe and complete. The Pinfinder and Reincubate iPhone Backup Extractor recover your Restrictions passcode by scanning and reading your encrypted iTunes backup, which may take a long time. If you want to access the restricted feature instantly and look for a more efficient and direct way, we recommend you to use iMyFone LockWiper. It recovers the Restrictions passcode directly and the whole process will just take 5 minutes. iMyFone offers a free trial now, just download to try it!


 November 8, 2024


![Reset Restrictions Passcode in 1 Min! [2022 Latest Solution]](https://img.youtube.com/vi/RDMbi9BROOY/sddefault.jpg)