The Auto lock feature came into exist almost the same time when the first smartphone was introduced to the world. If there is one feature that most people would use every day, it is auto lock.
Nowadays, the design has become so intuitive that sometimes we don’t even feel its existence.
Until it starts to cause us inconvenience.
One obvious downside of this design is that, for people who need to continuously check out their screens, this feature is definitely more irritating than helpful. It forces us to unlock the device again and again, and eventually affect our work efficiency, as well as our mood.
Not to mention it could also sometimes cause some confusions, like when it’s greyed out for some reason.
Fortunately, turning off auto lock on iPhone is not rocket science, neither is changing the auto lock time, or fix the auto lock greyed out problem. And today we are going to take a look at all these problems one by one.
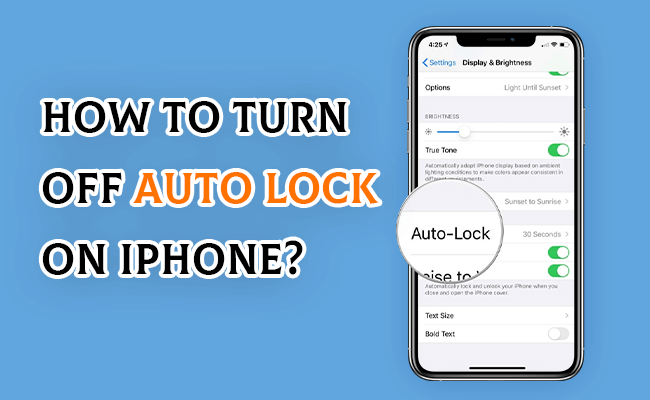
Part 1. How to Turn Off Auto Lock on iPhone (Change Auto Lock Time)
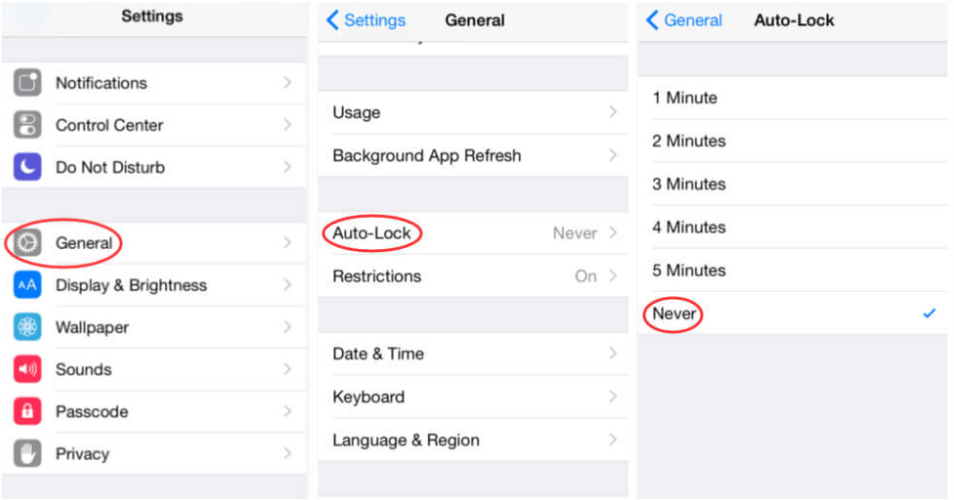
You can easily turn off the auto lock in the “Settings” app. The location of this option may vary from different iOS versions. First let’s see how to turn off auto lock, or change auto lock time on iOS versions older than iOS 6.
Turn off auto lock or change auto lock time on older iOS versions:
Step 1: Navigate to “Settings”, “General”.
Step 2: Under “General”, find “Auto-Lock”.
Step 3: Tap “Never” to turn off the Auto lock feature.
Step 4: You can also change auto lock time on the same page.
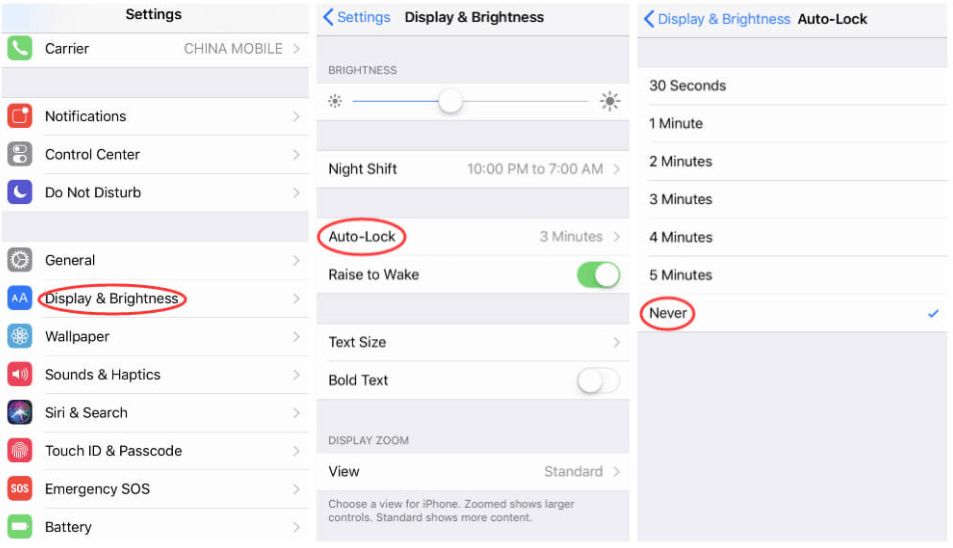
Now here is how you can turn off auto lock or change auto lock time for iOS versions newer than iOS 6, including iOS 7, 8, 9, 10 and newer.
Turn off auto lock or change auto lock time on newer iOS versions:
Step 1: Open the “Settings” app.
Step 2: Find “Display & brightness”, then go to “Auto-Lock”.
Step 3: Tap “Never” to turn off auto lock, or tap to choose another auto lock time.
Part 2. Auto Lock Greyed Out? Here is the Fix
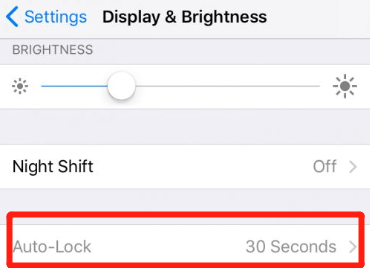
Normally by going through the steps introduced above, you should be able to turn off auto lock or change auto lock time in no time. However, sometimes when you need to change the auto lock settings, you might see the “Auto-Lock” option greyed out and not available. What’s the deal with that?
Why would “Auto-Lock” grey out?
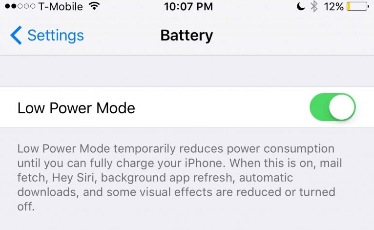
“Auto-Lock” greying out is mainly due to the “Low Power Mode”.
Under “Low Power Mode”, iPhone will force the “Auto-Lock” feature to be turned on and lock the auto lock time at “30 seconds” in order to maximumly save power. At this moment, you are not supposed to be able to make any changes to the auto lock feature, therefore it is greyed out.
How to fix “Auto-Lock” greying out?
As mentioned above, to fix “Auto-Lock” greying out, you need to turn off the “Low Power Mode”. Here is how to do that:
Step 1: Go to “Settings”, then “Battery”.
Step 2: At the top pf the “Battery” page, there is a “Low Power Mode” switch. Tap to turn it off.
Step 3: Now you can go back to turn off auto lock or change auto lock time.
Part 3. An Alternative Solution: Raise to Wake
As you can see, turning off Auto lock is simple enough as long as you know where the option is located. However, despite Auto lock sometimes causes us inconveniences, it is still necessary to make sure your screen is locked when you are not using your device. And turning off Auto lock will for sure putting the security and privacy of your iPhone at risk, more or less.
So instead of turning off Auto lock, you may want to consider an alternative approach: Turning on the “Raise to Wake” feature.
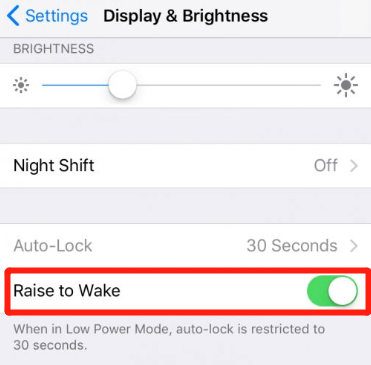
The “Raise to Wake” feature makes the screen lights up itself whenever you pick up your device from the table or your pocket, without asking you to push any button. It is convenient, and most importantly, it is safer than turning off the auto lock feature.
Here is how to turn on “Raise to Wake”.
Step 1: Go to “Settings”, then “Battery”.
Step 2: Enter “Display & Brightness”.
Step 3: Find the “Raise to Wake” switch and tap to turn it on.


 March 31, 2025