Nobody intentionally damages a picture file, but you can accidentally damage one when exporting, transferring, editing, or downloading. If you have also come across this problem, you do not need to worry. Repairing damaged photos with Photoshop is not as difficult as it seems. So, here, we will discussing the right way to perform this and achieve perfect results.
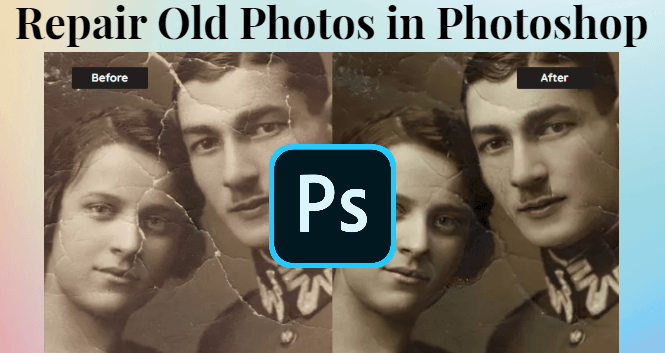
Table of Content [Hide]
Part 1. Repair Damaged Photos in Photoshop
Photoshop is an ultimate tool for photo editing, repairing old photos and damaged photos. However, the issue is that most people do not know the right way to achieve the best results when repairing old photos in Photoshop. So, we have made this complete guide that can help in the damage photo repair in the Photoshop process.
Step 1. Digitize and Open a Damaged Photo in Photoshop
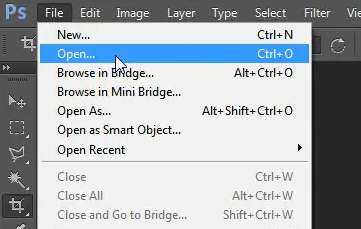
If you want to repair damaged images with Photoshop, then the first thing you need to do is to digitize your image. Follow these steps to digitize your image:
- Scan your image and save it to your computer.
- Open the image with Photoshop.
Step 2. Crop, Straighten or Rotate the Damaged Photo
Once your image opens and loads in Photoshop, you can proceed with the next step of repairing old photos in Photoshop. In this part, you will repair damaged images with photoshop using crop, straightening, and then rotating the image. It is important to note that you only need to do any of these things if necessary for your image. Here is how you can do:
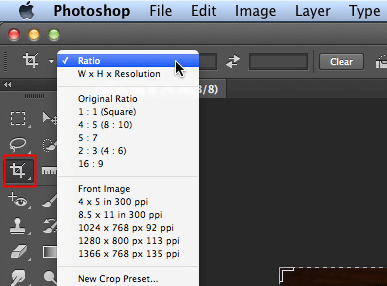
Cropping
- Select the crop icon from the tools.
- Make selections in your image using a grid.
Straightening
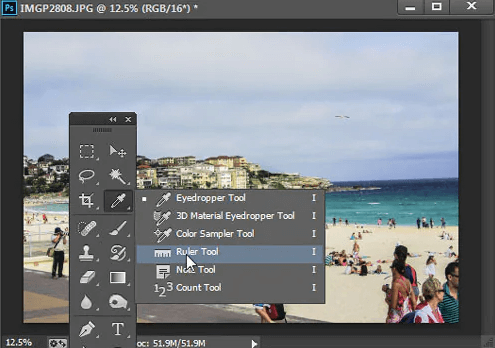
- Right-click on the image and get the Ruler Tool.
- Straighten image with using glid lines of interface.
Rotating
- Go to Image and select Image Rotation.
- Rotate or flip the image as per requirements.
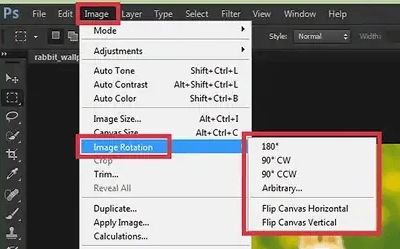
Now you will have an image that you can apply other tools and repairing functions.
Step 3. Reduce Noise in Different Mode
This step is going to be the most important step of all. Here we will be doing most of the repair of damaged images with photoshop work. There are 3 different modes to reduce noise, and here is all you need to know about each of them. When you go to the filter option and then into the noise reduction menu, you can use these different methods:
Basic Mode
- Select Basic from reducing noise popup.
- Set all the details using sliders.
- Preview results.
- Click OK to confirm.
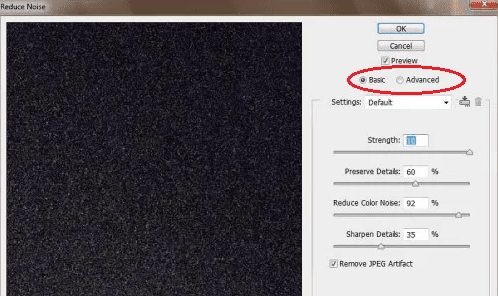
Advanced Mode
- Select Advanced and then Per Channel.
- Select each channel individually and keep setting the details using sliders.
- Preview results and click OK to confirm.
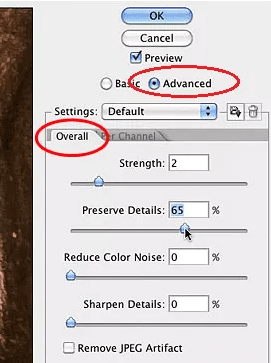
Lab Color Mode
It is a bit different but brings amazing noise reduction results. Here is how you can use this:
- Go to Image, then Mode, and then Lab Color option.
- Select Layers and make a copy layer of the image.
- Select the Channels tab and make a copy channel.
- Adjust different settings for brightness and colors to reduce image noise.
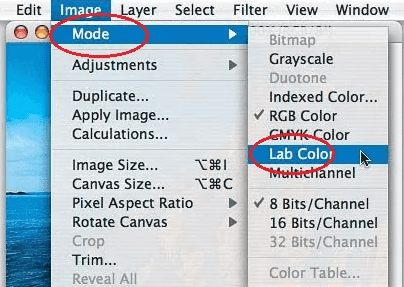
Step 4. Use Retouch and Repair Tools to Fix Imperfections
With the noise removed from the image, the next step will be making sure that there are no imperfections left in the image. Photoshop comes with different tools and options for this purpose as well, and here is how you will use different tools to repair damaged images with photoshop.
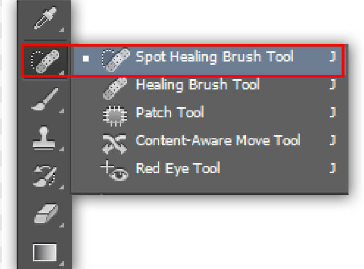
Spot Healing Brush Tool
- Select Spot Healing Brush Tool and choose your brush size.
- Now select Replace. It will preserve original effects like grain noise and texture on the edges of places where you stroke your brush.
- Now choose any option according to the requirements.
- Select sample only from the active layer.
- Click area that needs repairing.
- By clicking the brush, Photoshop will automatically retouch and repair the image from that area.
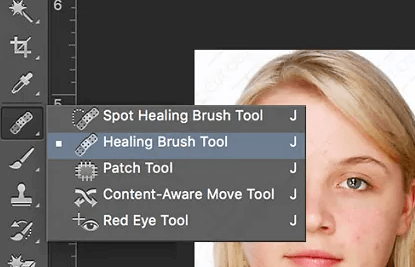
Healing Brush Tool
- Select the Healing Brush Tool.
- Click on the sample and set different options.
- Set sampling points on the image.
- With these steps, Photoshop will blend all the imperfections.
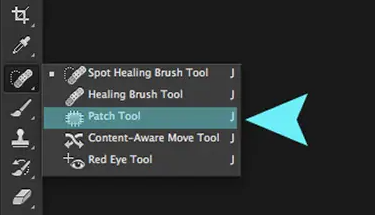
Patch Tool
- Select Patch Tool.
- Select area to repair.
- Adjust different patch tool settings as per requirements.
- Hold and drag the cursor on the required area and release the button.
Step 5. Apply Filter and Make Color Adjustments
The last thing you need to do is to make sure that the picture colors are correct. Here is how you can apply different filters and other options.
- Apply Filter. Go to the Photo Filter option
- Go to filter menu.
- Select and apply any filter that you want to apply.
- Go to Image and then Adjustments, then select Vibrance.
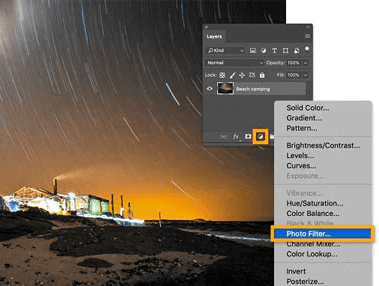
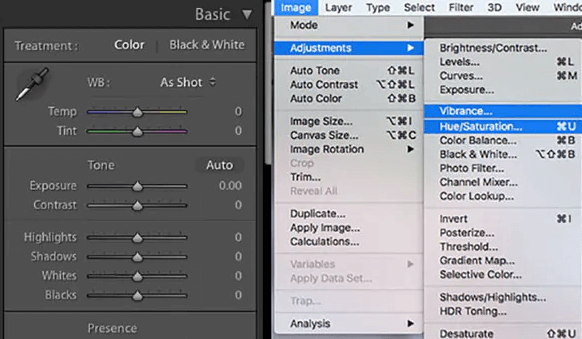
From the popup screen, select any tone-changing options and set them to the best appearance.
Step 6. Export the Newly Restored Photo
Everything is done at your end, and now you only need to export the photo. Here is how you can do it:
- Go to File and then Export.
- Save the image in the location you want to.
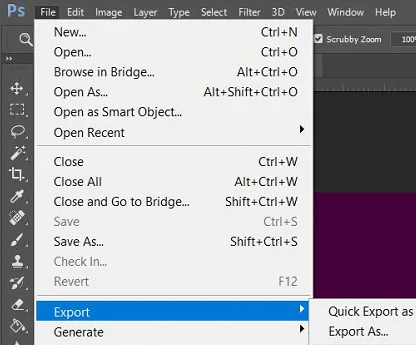
Now, wait for the saving to complete, and you will be done with the process of repairing damaged images with photoshop.
Part 2. Repair Damaged Photos with Alternative Tool
The method of damage photo repair in Photoshop is very comprehensive and effective. However, it is not the most efficient choice for many people. The reason is that this process needs a lot of time and expertise in Photoshop. So, the best alternative to this for repairing old photos in Photoshop is to go for iMyFone UltraRepair.
This is a tool that focuses on bringing repairing features for photos of all types. Apart from that, it can also repair things like files, videos, and other digital things. The best part here is that you do not need to do anything as the tool itself will do the job of repairing your damaged photos.
Step 1.Install UltraRepair and choose Photo Repair from the left pannel. Click Add photo to upload the damaged photos you want to repair in Photoshop.
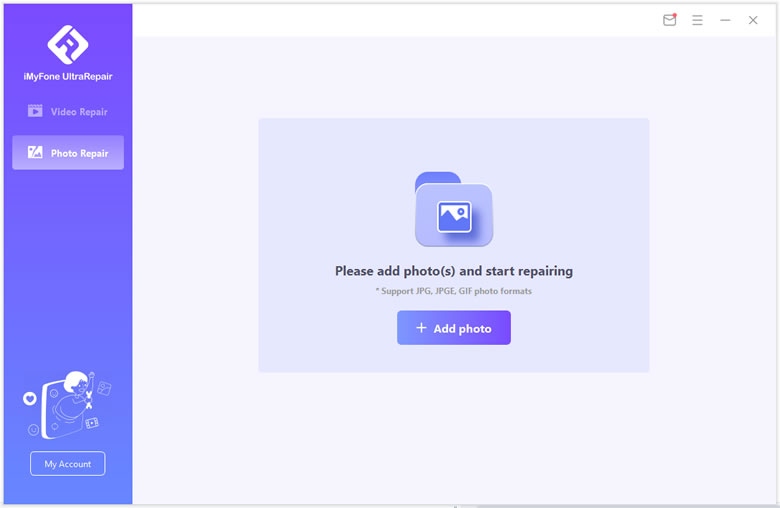
Step 2.Preview the detail information of the uploaded photos. Start by clicking Repair after making sure that no photos lost.

Step 3.Now you can save specific photos separately. You can also click Save All to save photos at one time.
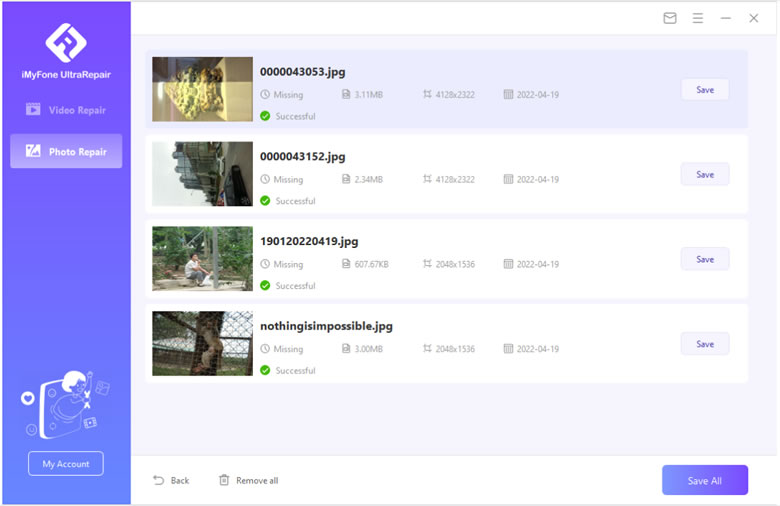
In most cases, your damaged photos would be brandly new after the repair process. If you fail, please do not give up since we will provide you with Advance Repair mode.
Part 3. FAQs about Repairing Damaged Photos
1. Can I repair damaged photos online for free?
Yes, there are some online tools available that can repair your damaged photos for free. However, the effectiveness and customizability of all these tools are not so good. So, if you want the best results, it is always a better choice to go through the proper damage repairing process or select the tool carefully.
2. How can I fix a corrupted photo?
There are different ways to fix the corrupted photos. You can use different applications like Photoshop to do it, or restore the image by formatting your files.
Conclusion
Repairing old photos in photoshop can save you in many different situations. Whether you have a damaged picture or a pixelated photo that you need to repair, the repair process in the Photoshop maybe difficult for you. So, the best way for you is to use iMyFone UltraRepair. It will make it even easier for you to complete and achieve the best results.


 January 4, 2023
