5 Quick Techniques on How to Reduce Noise in Photoshop
Category: Repair Files

5 mins read
Are you tired of noisy images ruining your perfect shot? Noise can be an annoying problem for photographers, whether it's caused by low light, a high ISO, or other factors. Fortunately, Adobe Photoshop offers a variety of tools and methods to assist in reducing noise and regaining clarity in your images.
In this blog, we will go over five easy techniques you can use to reduce noise in your photos and give them a polished appearance. So, let’s start our noise reduction photoshop guide!
Free download UltraRepair to repair and enhance broken or blurry photos, videos & files.
In this article:
- Part 1. What is Noise in Photography?
- Part 2. What are the Basic Types of Digital Noise?
- Part 3. 5 Ways to Remove Noise from Images in Photoshop
- 1. Use Photoshop Noise Reduction Filter
- 2. Use Bracketing Noise Reduction
- 3. Use Adobe Camera Raw Filter
- 4. Use Noise Reduction Plugin
- 5. Create Luminosity Masks
- Part 4. An Easy & Better Alternative for Photoshop Noise Reduction

What is Noise in Photography?
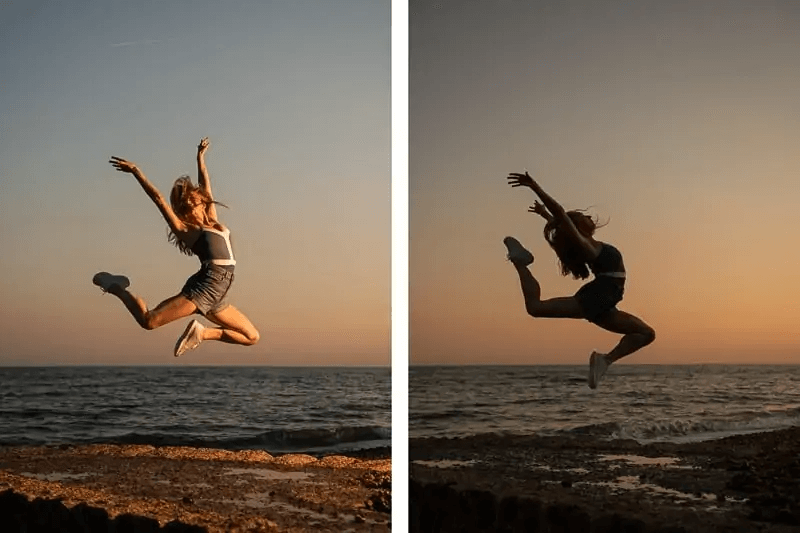
Digital noise also called "grain" or "static", is a problem many photographers encounter when using their cameras digitally. It describes the haphazard variation in color and brightness that appears in an image and can be particularly obvious in dim lighting or when using high ISO settings.
Digital noise is caused by the way digital cameras capture and process images. The light that strikes a camera sensor is converted into an electrical signal when it records an image. The camera's electronic system then amplifies and processes this signal to create a digital image.
In low-light situations, the sensor has less light to work with, resulting in a weaker electrical signal. The camera's electronics amplify the signal more to compensate for this, which can contaminate the image with noise. Similarly, when the ISO is set high, the camera amplifies the signal to produce a brighter image, which may also produce more noise.
What are the Basic Types of Digital Noise?
There are two main types of digital noise:
1 Color Noise:
It is also known as chrominance noise and is caused by variations in an image's color channels. It appears as tiny spots or blotches of color, frequently in shadowed or low-detail areas. The least light-sensitive channel, the blue one, typically has the most pronounced color noise.
2 Luminance Noise
This kind of noise impacts the brightness or luminance of an image. In areas of the image that are dark or underexposed, it often manifests as random variations in brightness or "grain" and is, therefore, most obvious there.
5 Ways to Remove Noise from Images in Photoshop
1 Use Photoshop Noise Reduction Filter
Photoshop's noise reduction filter is a powerful tool to help photographers reduce digital noise in their images. Getting the settings right may take trial and error, but you can produce clear, noise-free images with practice.
Steps to Use Photoshop Noise Reduction Filter
Step 1: Open your image in Photoshop and duplicate the background layer by pressing Ctrl+J on a PC or Command+J on a Mac.
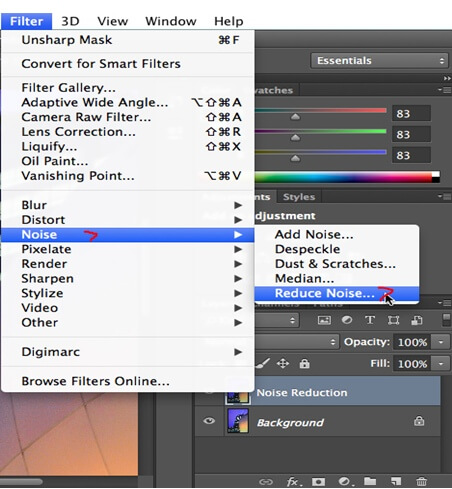
Step 2: Go to the "Filter" menu, select "Noise", and then choose "Reduce Noise". This will open the "Reduce Noise" dialog box.
Step 3: In the "Reduce Noise" dialog box, you will see several sliders that you can adjust to control the amount and type of noise reduction. The "Strength" slider controls the overall noise reduction, while the "Preserve Details" slider helps maintain sharpness and detail in the image. You can also adjust the "Reduce Color Noise" and "Sharpen Details" sliders to refine the noise reduction settings further.
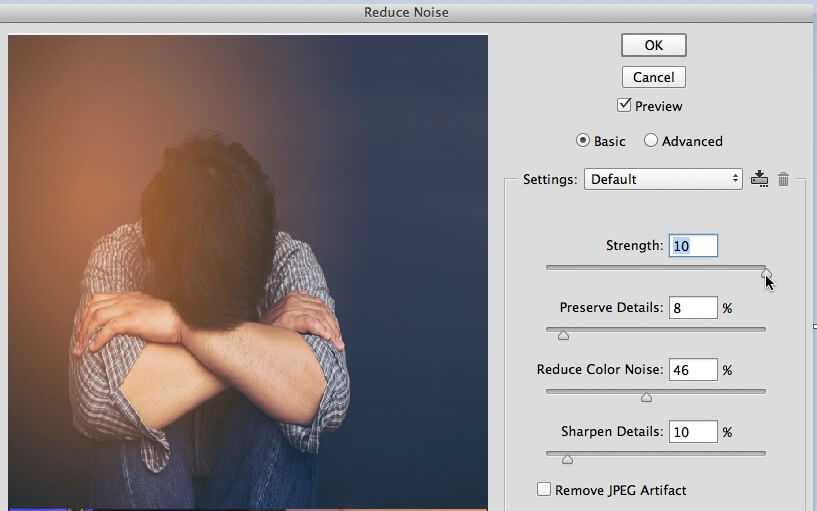
Step 4: To see a preview of how the noise reduction filter will affect your image, check the "Preview" box at the bottom of the dialog box.
Step 5: Once satisfied with your noise reduction settings, click "OK" to apply the filter to your image.
Step 6: When you are finished, save your image as a new file, so you don't overwrite your original image.
2 Use Bracketing Noise Reduction
Bracketing noise reduction is a technique that entails taking multiple exposures of the same scene, each with a different exposure setting, and combining them in post-processing to reduce noise and enhance image quality.
Steps to Remove Noise From Image Photoshop
Step 1: Use your camera's bracketing mode to capture the same scene at various shutter speeds. For each shot, change the exposure settings, such as the shutter speed, aperture, or ISO.
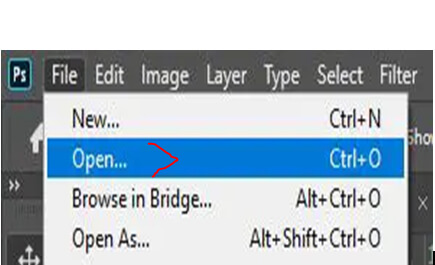
Step 2: Then, open the images in Photoshop.
Step 3: Next, remove the relevant areas of each grainy photo using layer masks to create a grain-free final image.
Step 4: To do this, decide on the brush's color, size, softness, and opacity.
Step 5: Use a hard, black brush with 100% opacity to make distinct areas of the layer invisible and produce a harsher effect.
Step 6: After that, repeat the process for each layer: create a layer mask, paint any areas you want to keep black, and then restore any areas you want to keep through a white brush.
Step 7: Once you have achieved your desired result, it is time to export and save the image.
3 Use Adobe Camera Raw Filter
In Adobe Photoshop, Adobe Camera Raw (ACR) is an effective tool for lowering noise. It allows you to fine-tune the noise reduction settings on your raw images before you begin editing in Photoshop.
Quick steps to remove noise from photo photoshop:
Step 1: Open Photoshop and the image.
Step 2: Then choose "Filter" > "Camera Raw Filter" from the drop-down menu. The Camera Raw dialog box will open as a result.
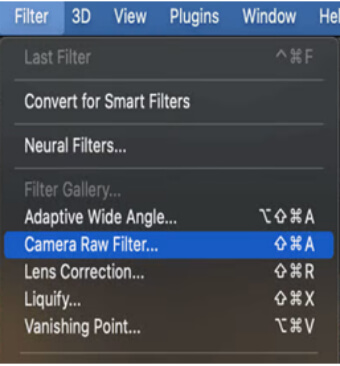
Step 3: Its dialogue box will appear. Click the "Detail" tab in the Camera Raw dialog box.
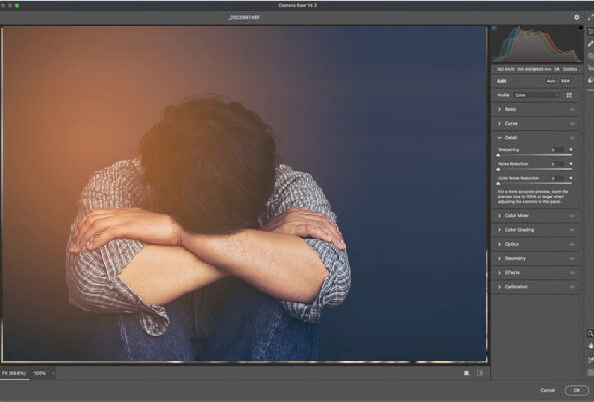
Step 4: To reduce noise in your image, move the "Sharpening", "Noise Reduction", and "Color Noise Reduction" sliders.
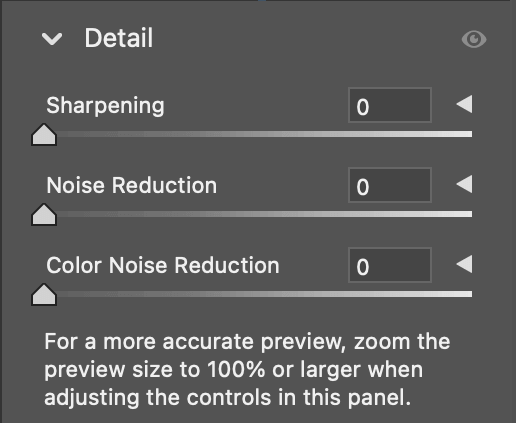
Step 5: When finished, click "Ok" to save your file.
4 Use Noise Reduction Plugin
A great way to quickly and easily reduce noise in your photos is by using a noise reduction plugin in Photoshop. This is how you, remove grain from photo photoshop:
Step 1: First, find and install a Photoshop-compatible noise reduction plugin such as Noise Ninja.
Step 2: Open the image in Photoshop after installing the plugin.
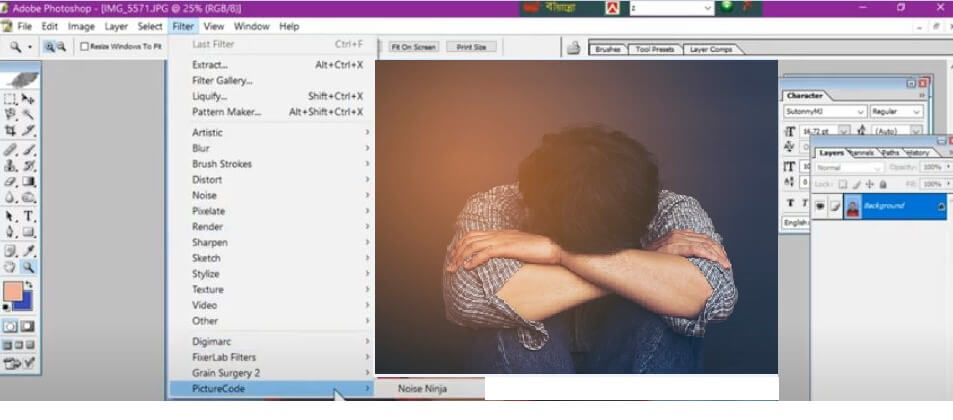
Step 3: Navigate to the plugin menu, typically found in the top menu bar under "Filters" or "Plugins".
Step 4: Select the noise reduction plugin you previously installed.
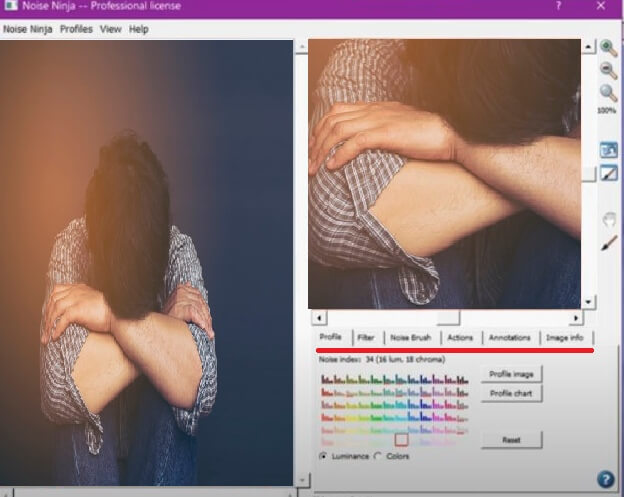
Step 5: Depending on the plugin, you might be given a variety of settings and sliders to modify. Lower the sharpness, color noise, and luminance noise as per your liking.
5 Create Luminosity Masks
Luminance noise consists of dots of various brightness levels (black, white, and gray). However, it can be eliminated using a simple three-step procedure:
Step 1: Open the Reduce Noise dialog box after opening your image in Photoshop.
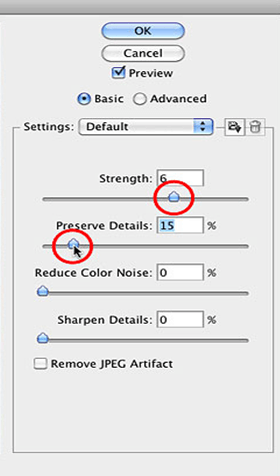
Step 2: Set the Strength value to 0% and slowly move the slider to the right while watching the image in the preview area until the maximum amount of luminance noise is eliminated.
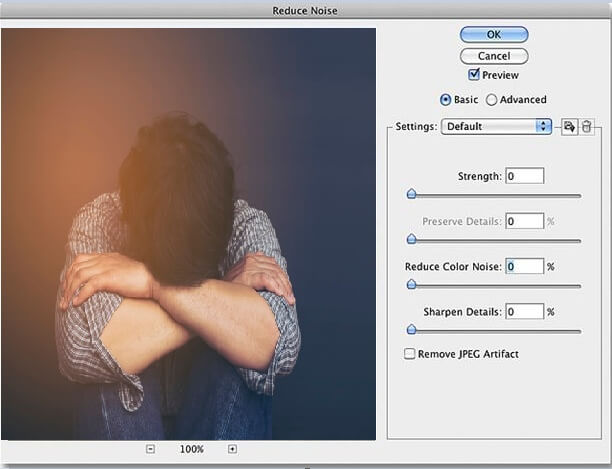
Step 3: To see the image's original appearance, click inside the preview area and hold the button down. When you let go, you will see how much noise reduction has been applied.
Step 4: Once you have eliminated all the noise you can, start dragging the ‘Preserve Details’ slider to the right to restore the most image detail while avoiding reintroducing noise. When finished, select "Ok".
An Easy & Better Alternative for Photoshop Noise Reduction
While Photoshop has long been the go-to software for noise reduction, it can be a complex and time-consuming process. Fortunately, the iMyFone UltraRepair is an excellent alternative. With the help of this smart software, you can easily improve the clarity of your photos and reduce noise in a few minutes. Additionally, thanks to its user-friendly and intuitive interface, you don't need to be an expert in Photoshop to produce results of a professional caliber.
The Photo Defogging tool in iMyFone UltraRepair is one of its best features. Useful for landscape or outdoor photography, this tool can help you lessen the appearance of haze and fog in your pictures.
Here's How to Reduce Photo Noise by UltraRepair
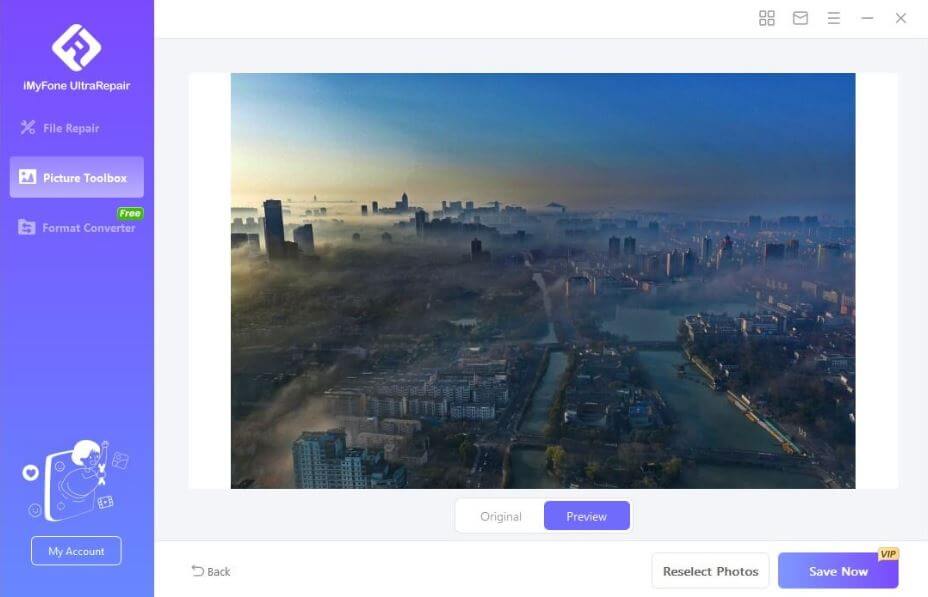
Step 1 Install and open iMyFone UltraRepair and select "Photo Defogging" from the Picture Toolbox.

Step 2: Import the picture you want to edit. The program will start to reduce your photo noise.
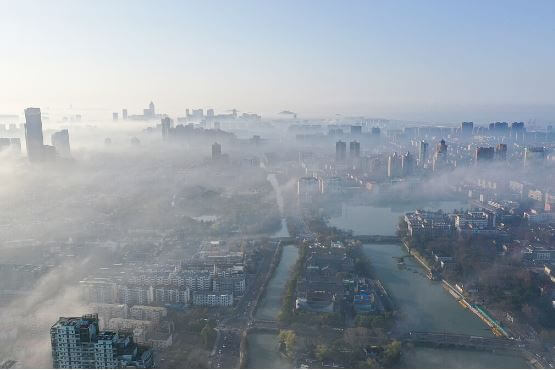
Step 3: After a while, your photo will be successfully enhanced. Click "Save" to save the edited photo once you are happy with the results.
Conclusion
Noise reduction in Photoshop is an important step in achieving high-quality and professional-looking photos. However, it is difficult to use, especially for beginners and immature users.
So, if you want a simpler and more effective alternative to Photoshop, we highly recommend trying iMyFone UltraRepair. It provides an easy-to-use method for improving the clarity and caliber of your photos with its potent noise reduction and photo-defogging tools. Try it out for yourself to see how it can help give your pictures a new look!


