How to Use Photoshop Photo Enhancer to Improve Image Quality
Category: Repair Files

5 mins read
When it comes to image editing, Photoshop is a one-stop destination for all requirements. This excellent software created by Adobe comes loaded with a wide array of features that can be used to unblur photos, increase resolution, adjust brightness, and many others for enhancing the overall image quality and looks.
Though the software has a steep learning curve, once you get the hang of it, working with images will be easy and fast. In the content below we will talk about how photo enhancer Photoshop can be used for processing and increasing image quality and also an easy and simple alternative to the tool.
In this article:
Free download UltraRepair to repair and enhance broken or blurry photos, videos & files.
Part 1. Situations to Enhance Photos in Photoshop
Adobe Photoshop is a professional and one of the most acclaimed image editing tools that are used by diverse users including photographers, artists, website developers, business owners, content creators, and several others. The software is known for its long list of supported features that offer flexibility and accuracy while enhancing overall images. There are several situations when you would need to enhance and improve the photos using Photoshop and some of them are listed below.
- Editing the photos when the color, contrast, exposure, and other parameters and not apt with the recorded images.
- Removing the blur from the old photos.
- Enhancing the images that were captured in not-so-ideal light conditions.
- Remove unwanted objects and other backgrounds from the images.
- The software can also be used in situations when there are distractions in the captured images.
- The software works great to enhance the images that would come out great in a print.
Part 2. How to Use Photoshop Photo Enhancer to Make Blurry Photos Clear
Several times when you are back from a trip and check your photos, you find a few of your favorite ones to be blurry. No need to worry as Photoshop has tools that will help make the blurry photos clear and sharpen them. There might be different methods and tools in the software that can be used for this task and below is the guide for the most popular way of doing it.
Step 1. First of all, launch the software on your system and add the image that you want to correct. Tap on the lock button next to the image at the Layers panel for unlocking the background layer.
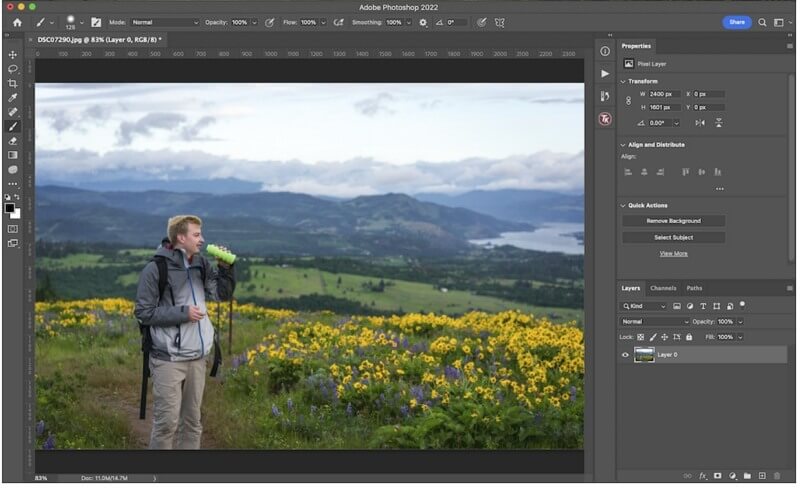
Step 2. In this step, you need to duplicate the background layer for which use Ctrl + J option ( CMD +J on Mac). Sharpening can be now applied to this identical layer that is created.
Step 3. Now select Filter > Sharpen > Unsharp Mask option for sharpening the image and removing the blur. After the Unsharp Mask is selected, a box will appear where you need to adjust the amount, radius, and threshold by moving the respective sliders.
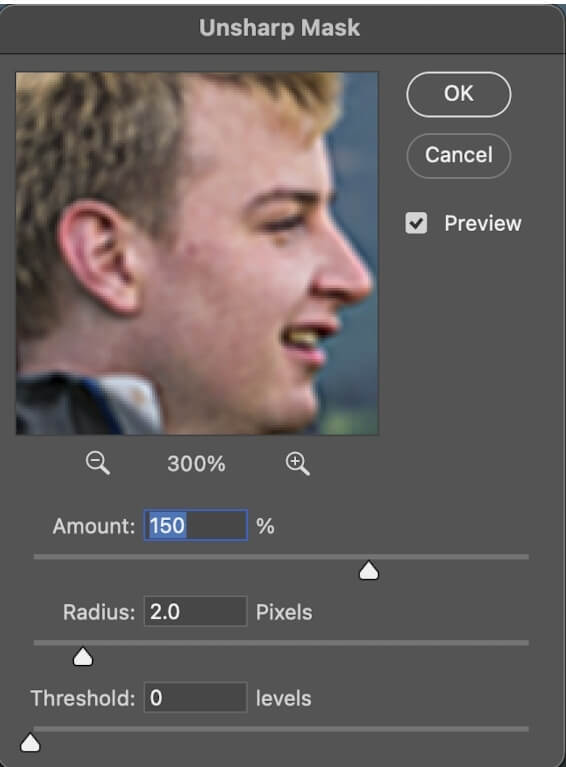
Step 4. Once the settings are done, click on the OK button. Next, you can make the final settings and adjustments to your image. Next, tap on the eye symbol from the Layers panel. To see what the difference of Unsharp Mask is making to your photo, toggle the layer on and off.
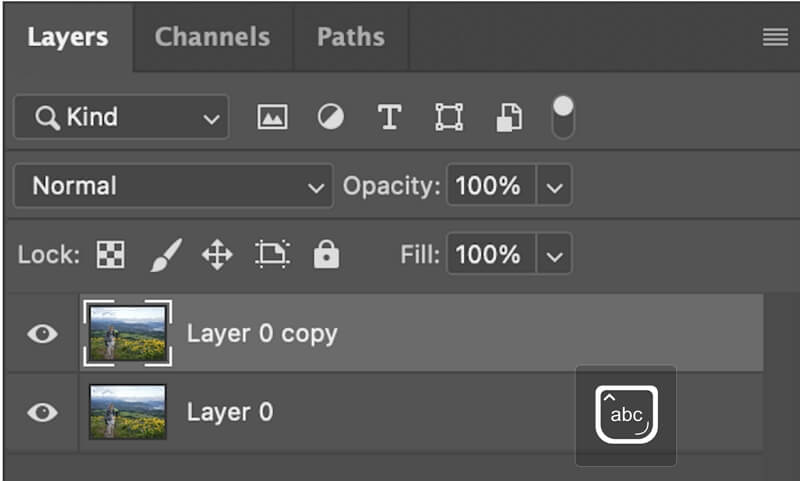
If the effect looks very strong, you can make the adjustment to the opacity slider from the Layers panel.
Part 3. How to Use Super Resolution Feature in Photoshop
Super Resolution is an excellent feature that uses Adobe Sensei which is the AI platform of Adobe to double the horizontal as well as the vertical resolution of an image. The feature is basically an Adobe Camera RAW (ACR) function and is available for Creative Cloud subscribers. Using Super Resolution, the details of the RAW files can be enhanced. The feature can also work on other file formats like JPEG, PNG, and TIFF. Whatever file format is used, post-processing the images will be saved in. DNG RAW file format.
Steps to use the Super Resolution feature in Photoshop
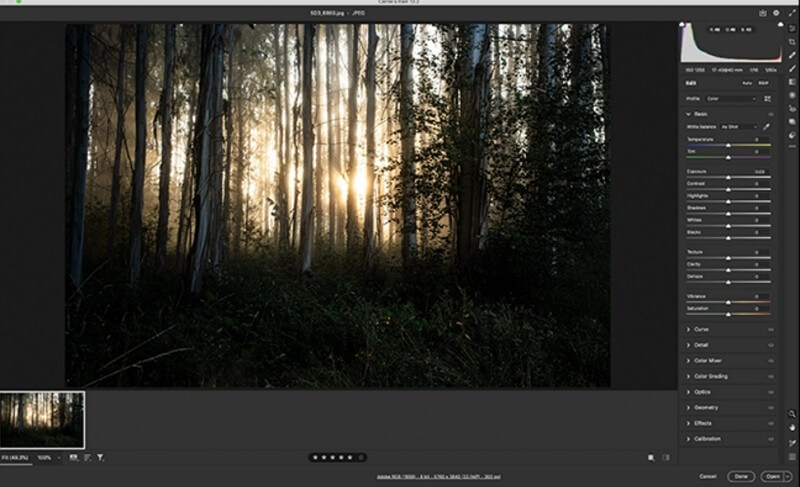
To use the feature, the image has to be opened in an editor that is ACR supported.
Step 1. Launch the software and add the desired image that needs to be enhanced.
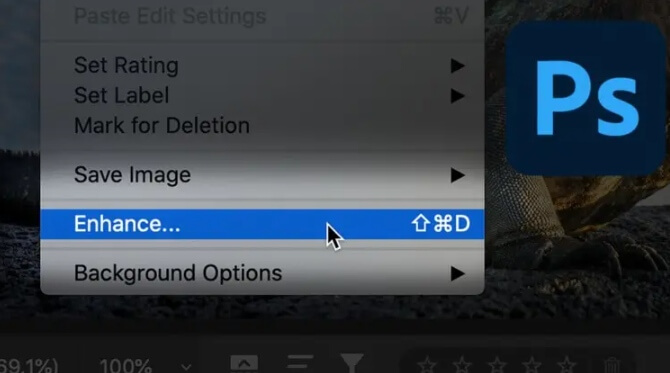
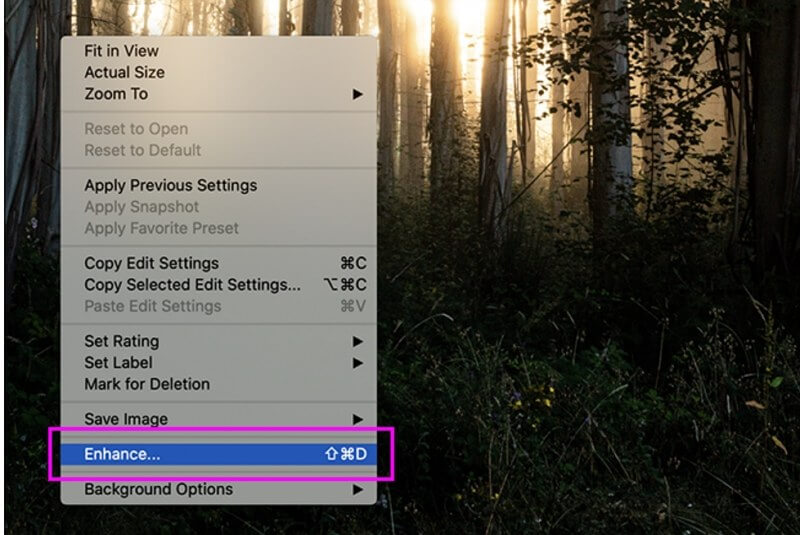
Step 2. Right-click on the added image and choose Enhance. Next, tick the box that is marked as Super Resolution.
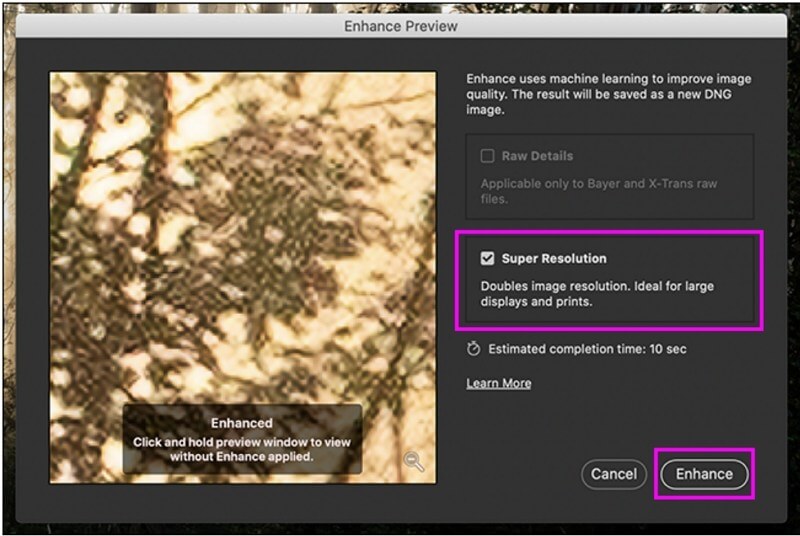
Step 3. The tool will do the upscaling work and the effect can be checked from the Preview box.
Step 4. If you are fine with the file tap on the Enhance button and the processing will start.
In a few minutes, when the process completes, a duplicate file with double the vertical and horizontal resolution will be created having a name like “XXX.Enhanced.dng.
Part 4. How to Use an Easy Photoshop Alternative to Enhance Photos
Photoshop is undoubtedly a feature-rich image editing tool but is definitely not an easy one to use and handle. For first-timers and beginners, the software will look quite complicated.
So, if you are looking for a simple yet effective alternative for enhancing your photos, we recommend iMyFone UltraRepair as the best option. Without any tecnical skills, anyone can repair and enhance blurry images or videos in an array of formats in a few clicks.

Key Features:
- Easily enhance and improve several aspects like red-eye, low resolution, blur photos, and more.
- Allow enhance images in all key formats including JPEG, JPG, TIFF, DNG, GPR, NRW, RAF, and many more.
- Support batch processing of images to save time and effort.
- Use AI technology to deliver excellent image results.
- Also support repairing videos, PDF, Word, Excel, and other file types as well.
Steps to enhance old photos using iMyFone UltraRepair
Step 1. Launch the software on your system and from the main interface choose Picture Toolbox > Image Coloring. Tap on the Add File button to browse and add the image that you want to enhance.

Step 2. Once the image is added, the AI technology of the software will start enhancing and repairing the image. The processed file can be checked using the Preview button.

Step 3. Finally, tap on the Save Now button to save the enhanced image to your system.

Conclusion
Photoshop is a great image editing tool but has a steep learning curve and requires a lot of expertise and experience to use its features seamlessly. Moreover, with too many options and features the interface of the photo enhancer Photoshop is complicated. iMyFone UltraRepair here works as a great alternative that is simple to use and also facilitates enhancing your images, videos, and other files automatically in no time. Simply download the software on your computer or mobile devices, drag the files and the rest will be taken care of by the tool.


