You can use different image viewing apps on Windows PC, but the Microsoft Photos app is the best. It makes viewing, editing, and filtering pictures very easy for offline storage. However, it can be very frustrating if your Photos app keeps crashing. Here we will discuss all you need to know about this issue.

Part 1: Why Does Photos App Keep Crashing on Windows
If you use the photos app on your Windows PC, you may feel frustrated when the app crashes repeatedly. At the same time, some people may say that it is no significant. Certain issues can cause this problem. So, when you want to fix the Photos app, what you need to do is to fix those issues, and the problem will be settled dowm. Some of those issues are listed as follows.
- Bugs in the Photos app.
- Malware in the system.
- OS glitches in Windows 10 or 11.
- Image files are corrupted.
All of them can be the reason that our Photos app keeps crashing.
5 Best Solutions to Fix Photos App Keeps Crashing
To fix Photos app keeps crashing on windows can be very simple if you know the right method. However, there are different reasons can explain why you are faced with this problem. Here are 5 workable ways to fix Photos app.
1 Use Repair Tool
If you have the problem, like Photos app keeps crashing, then this problem maybe due to some corrupted image. In this case, using some image file repair tools will be the best choice, like iMyFone UltraRepair. It comes with all the technical features and latest technology that can solve all your issues.
Key Features of iMyFone UltraRepair
- Allow you to repair more than 7 different types of corrupted media files.
- Repair images from many devices.
- Available to fix red eyes, blur and pixelated photos.
- Repair images in batches to complete the process quickly.
UltraRepair gives you the best solution to repair your damaged, incomplete, or corrupted photos.

Simple steps to use iMyFone UltraRepair.
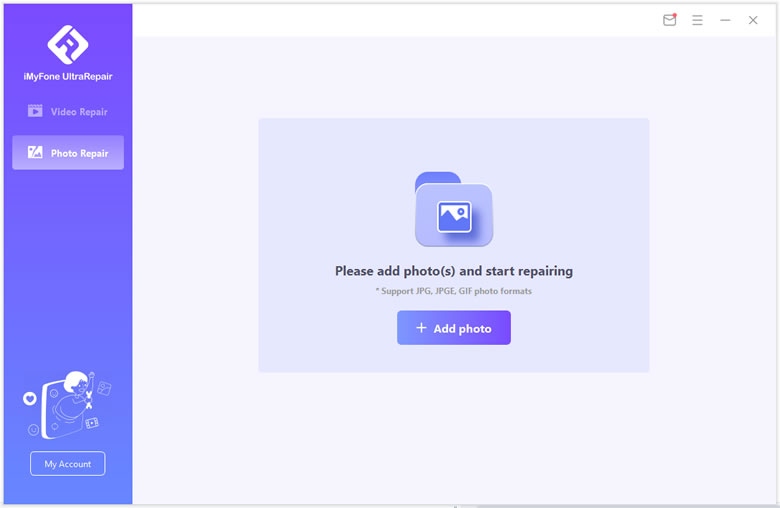
Step 1.Add Photos
First, you will need to open the tool on your computer and add images by clicking the Add button.
Step 2.Start Repairing
Once you have all the photos added to the iMyFone UltraRepair tool, you can start repairing them. Click the Repair button at the bottom.

Step 3.Save to Computer
When the repairing process is complete, you can save the images on your device's storage.

2 Upgrade or Reinstall Photos App
You can be faced with this problem due to having an order version of Photos app on your computer. In this case, simply upgrading or reinstalling the app can solve the problem. It is a very short process that you first need to uninstall the older app and its packages. Then, you will need to install a new one from the beginning.
If there are some bugs or technical matters with the Photos app on your PC, they will be fixed by this updating. So, here are the steps that you can follow.
Step 1.Click the Windows icon or press the Windows button on the keyboard. Then, search for Windows PowerShell, and click to run it as an Admin.
Step 2.Type get-appxpackage *Microsoft.Windows.Photos* | remove-appxpackage. Then, confirm by pressing Enter, and wait for the system to reboot.

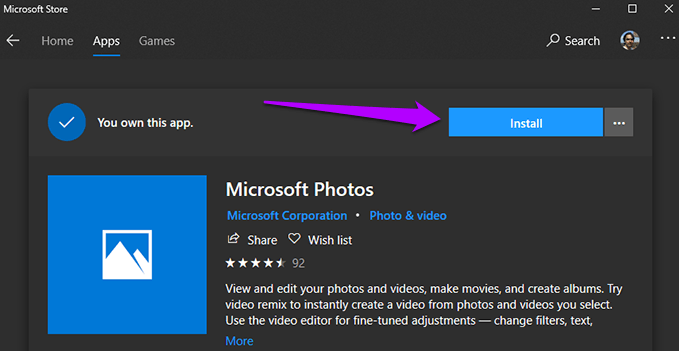
Step 3.Open Microsoft store on your computer, search for Photos. Download it from the store and wait for the installation to complete.
3 Reset or Repair Photos App
Sometimes resetting or repairing can solve this problem. Both of them are workable. So, here are the steps that you can have a try.
The steps to reset Photos app:
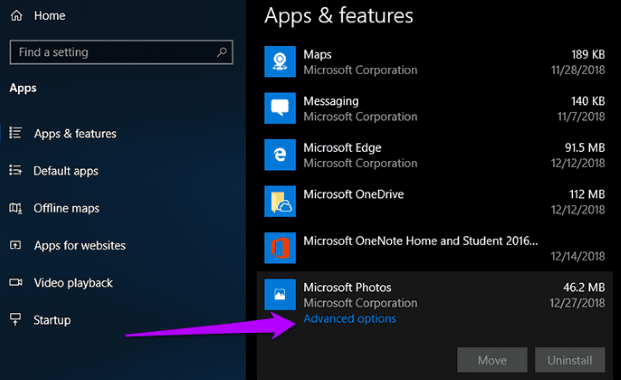
Open Settings -> Photos, then go to Advanced options and click Reset. After finishing, just restart your computer.
The steps to repair Photos app:
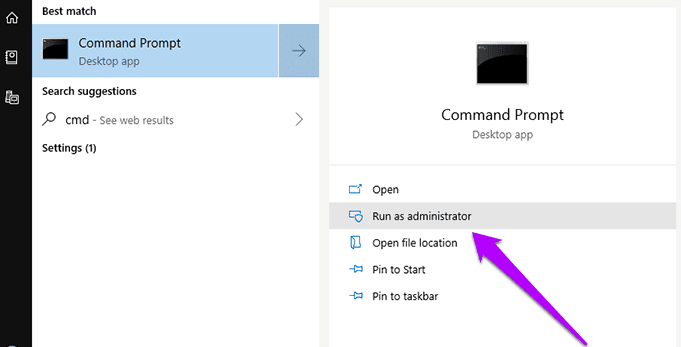
Step 1.Click Start and launch cmd (Command Prompt) as an Admin.
Step 2.Type Get-AppXPackage -AllUsers | Foreach {Add-AppxPackage -DisableDevelopmentMode -Register "$($_.InstallLocation)\AppXManifest.xml"}. Then, wait for the process to finish and restart your computer.

4 Run the Windows Troubleshooters
Windows OS makes things easier for us with its features like Troubleshooter. It is a feature that does not require us to track down the issue as running it will scan the whole PC for any issue. If you want to know how to fix the Photos app that keeps crashing on windows, then a troubleshooter might be a good option.
A troubleshooter makes the whole process very easy because of its simple interface. Not only it points out the basic issues but also it suggests the best way to resolve them. Here are the steps can use it.
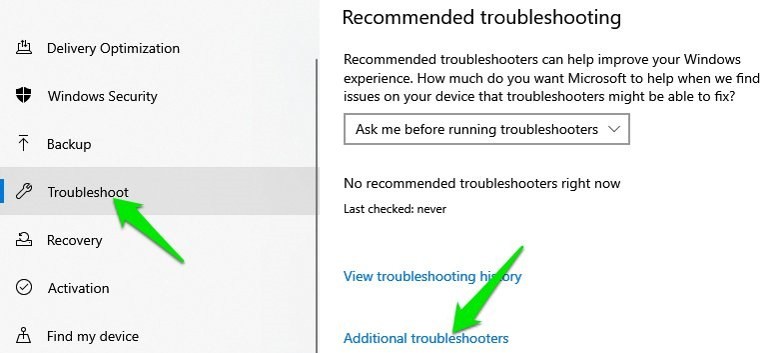
Step 1.Open the control panel on your PC and click troubleshoot.
Step 2.From the list, click Additional troubleshooters. Then, select Windows store Apps to start the process.
5 Restore Default Libraries
You can also try to restore the default libraries of the Photos app. If none of the above solutions worked for you, then this solution maybe work. However, when you use this method, you need to perform very carefully as a slight mistake will make the effort in vain.
Restoring default libraries will make sure that the whole network path and file directories are correct. So, this can solve the crashing issues. Here are the steps that you can follow.
Step 1.Start the Windows Explorer on your computer. From the left side panel, click Show libraries.
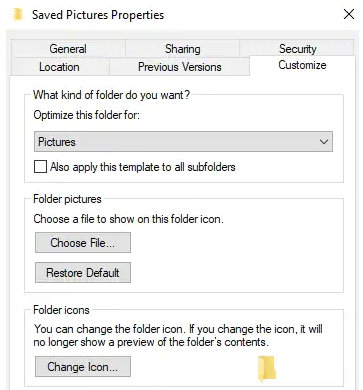
Step 2.Now you need to find out the Pictures Library. Click it and then go for Properties.
Step 3.From properties, you can select the Restore Default option. Then, click Apply and OK, the process will finish.
Conclusion
Knowing how to fix the Photos app keeps crashing on Windows 10 and 11 can save you a lot of time and effort. It may seem complex, however the process is simpler than you think. So, if you want to fix the Photos app, you can try the methods we discussed above, especially, you can use iMyFone UltraRepair, the most powerful tool on the market.


 January 4, 2023
