Kernel Video Repair is one of the more reliable file recovery methods used in the modern computer and IT industries. However, it's not straightforward because most users do not understand the methods involved or the technology behind kernel video repair.
In this post, we'll provide a concise review and overview that cuts through the tech speak and offers a simple solution for all of our readers to utilize this powerful video repair tool. Keep going on!

Everything You Need to About Kernel Video Repair
01 What is Kernel Video Repair?
Kernel video repair works by restoring damaged or corrupted video files to their original usability. Kernel Video Repair tool from Kernel Data Recovery works through a series of guided options on your machine to restore video files from local and remote servers.
02 What Features/Function it Provides?
- Easily repair corrupt, damaged, and inaccessible video files without size limitations.
- Easy to understand options using drag and drop options.
- Intuitive UI that allows you to fix multiple files at once.
- Save the repaired video file to any location on your PC from a wide range of media file formats.
03 How to Install and Use Kernel Video Repair?
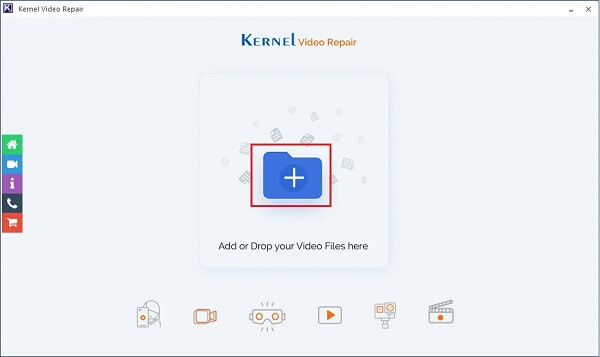
Step 1.Download and install Kernel Video Repair on your PC and open it. Then click the Add(+) button on the home screen.
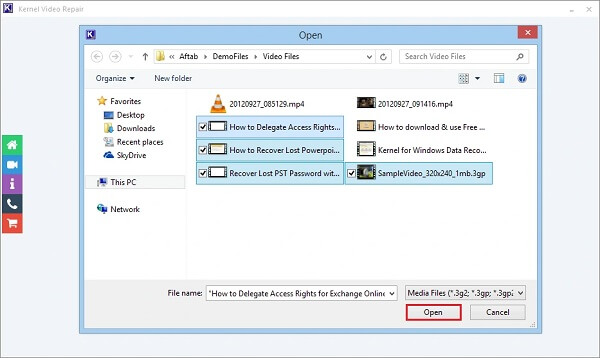
Step 2.Select the broken or corrupted video you want to repair and click the Open button.
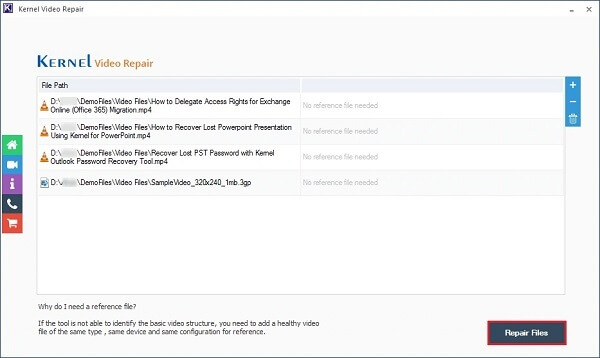
Step 3.Click the Repair button to start the fixing procession.
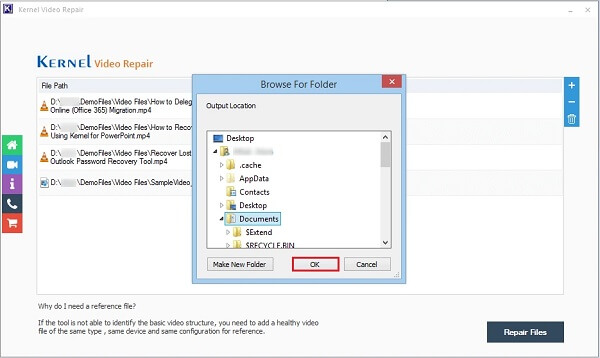
Step 4.Select a location you want to save the repaired file and click OK.
You also save the report on your file repair to review the progress later on if you would like.It's useful for anyone running a small video file repair business or reporting to an IT department in a company.
This is primarily a PC-based program that does require a bit of insider knowledge to use well. It has a free demo but requires a license to complete the full repair, and that does not include any kind of preview. That is why we suggest considering an alternative as well.
The Best Alternative for Kernel Video Repair
UltraRepair by the expert team of developers at iMyFone has a bit more of a reliable outcome than the Kernel Video Repair tool. It uses a modern UI that is easy to understand and only requires three simple steps to go from damaged or corrupted video files to repaired and restored media experience. It works with both macOS and Windows systems and has a free option with a preview before committing to purchasing the premium version.
- Works with all major video file formats.
- Repairs low-pixilated and damaged videos while enhancing their overall appearance.
- High success rate, including with batched files at a cost-effective price.

See how to use iMyFone UltraRepair to fix broken video below:
Step 1.Download and install iMyFone UltraRepair on your PC and launch it. Then upload your video by clicking on Add Video.

Step 2.Click on Start to begin the repair process and wait.
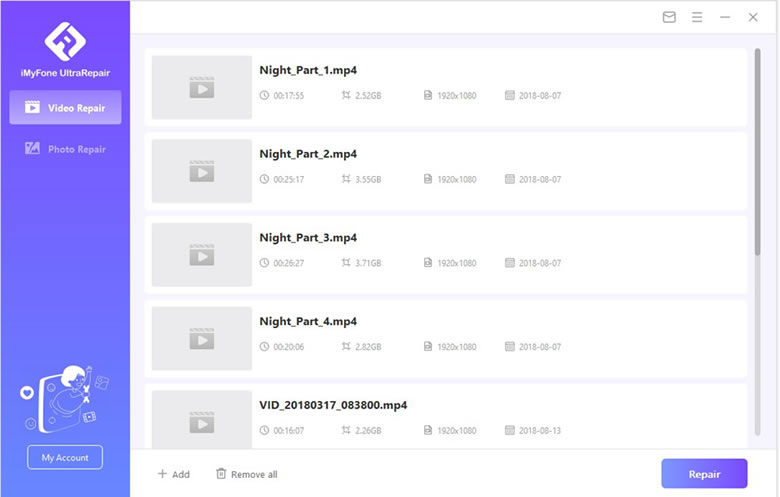
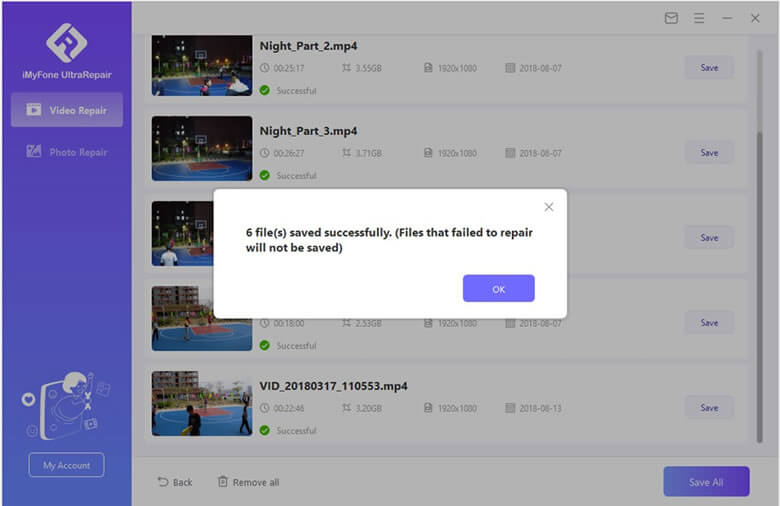
Step 3.Choose the storage space to save the repaired file by clicking the Save All option.
FAQs Relate to Kernel Video Repair
1 Is the Kernel Video Repair safe to use?
For those using this tool for the first time, it is perfectly reasonable to wonder if Kernel Video Repair safe. We think this is a safe and secure program without any malware or viruses. The success rate may be lower than UltraRepair, but it is a program worth trying.
2 Can corrupted videos be fixed with Kernel Video Repair?
Yes! You can repair videos that are damaged due to corruption with the Kernel Video Repair tool.
To Conclude
Kernel Video Repair tool is effective in repairing your old, damaged, or corrupted video files. It offers an easy-to-use UI that, while a little outdated, may require a bit of patience to understand.
If you like a more robust solution with a preview, more modern UI, and a higher success rate, we suggest you use iMyFone UltraRepair! You can try the free version to see what is repairable first by clicking the Try it Free button below.
Either way, you should be back to enjoying your favorite videos sooner than later!


 December 29, 2022