A Ultimate Guide on How to Fix Green Screen on Videos
Category: Repair Files

7 mins read
It's frustrating when all of a sudden green screen appears on your Windows during video playback. This issue can arise due to some issues in the GPU (graphical processing unit) of your device, outdated flash player, and so on.
In this article, we will discuss the exact issues that lead to the green screen and how to fix green screen on videos. We have also introduced a tool that can help you in quick repairing of video and audio files without facing any issues. Start reading this guide to know more about this problem and the ways to tackle it.
In this article: Free download UltraRepair to repair broken, unplayable, blurry videos, photos & files.

Part 1. Why Does the Video Turn Green Screen?
There are many reasons behind the video playback causing green screen problems. We are sharing the most common ones here:
With an outdated graphic driver, you can't expect the video to play smoothly. It will stop playing after a while or may fail to process a video effectively.
Your flash player might not be compatible enough to run the high definition properly. In addition, another reason behind the green screen can be due to poor performance delivered by the damaged hardware.
Not all third-party software is safe for your system. Some comes packed with virus so be careful when installing from an unreliable source.
Sometimes, the video file you are downloading may remain unfinished or incomplete. Such corrupted video files can also be blamed for the green screen on Windows.
Many other factors like download and transfer errors, corrupted damaged systems, media player errors, damaged operating systems, and so on can cause green screen problems.
Part 2. 5 Useful Ways to Fix Videos Green Screen When Playing Videos
1 Update Graphics Drivers
Old graphic drivers aren't powerful enough to run the videos seamlessly on a website. If your computer is still running on the old AMD or NVIDIA graphic cards, updating the graphic drivers can fix the problem. To do so, follow these steps:
Step 1. Go to “My Computer” and right-click on it.
Step 2. Navigate to “Manage” > “Device Manager”.
Step 3. You can also skip step 1 & 2 by typing “Device Manager” directly into the search box function of Windows.
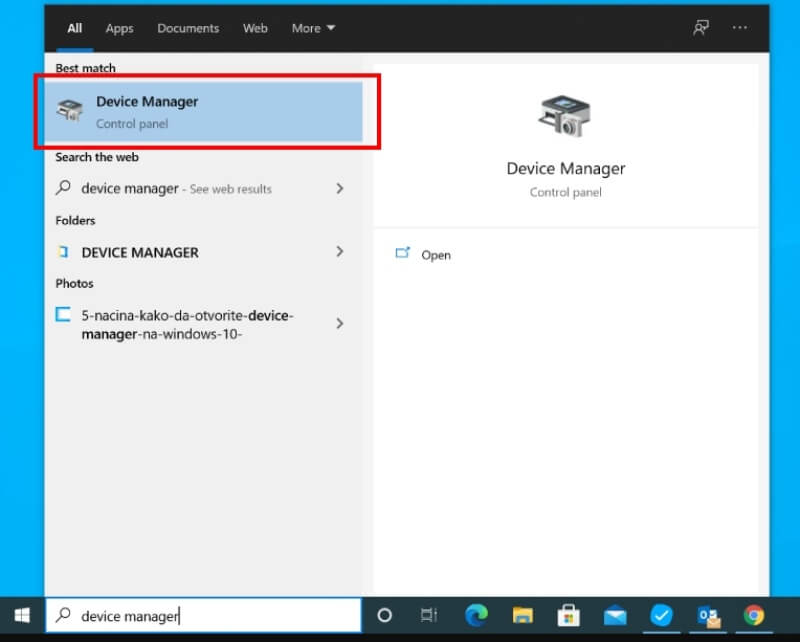
Step 4. Once you have Device Manager on your screen, click on the Display Adapters.
Step 5. Right-click on the graphics driver and then choose “Update the Driver Software”.

Step 6. Now, select the “Search automatically updated the driver software” option.
Step 7. Wait for Windows to read your graphic card and search for the latest driver.
Step 8. As soon as the installation finishes, reboot your computer and reinstall the driver.
Step 9. Reboot your computer. Windows will now reinstall a driver.
When done with all these, you can check whether the issue has been resolved or not.
2 Disable A Hardware Acceleration
Hardware acceleration means that your PC is running graphical programs using GPU instead of CPU. As a result, errors happen sometimes when a web page is processed from CPU to GPU. That's why you will have to disable the hardware acceleration to prevent the green screen problem.
Disabling Hardware Acceleration on PC
Step 1. Right-click on the video file which is showing a green screen.
Step 2. From the appearing menu, select “Settings”.
Step 3. Turn off the “Enable hardware acceleration” and uncheck it.
Step 4. Close the opened window and refresh the page.
Step 5. Open the website again to watch the video without any interruption.
Unfortunately, the “Settings” option will not show up in the web browser so it's impossible to disable hardware acceleration. For that, we are offering more solutions.
Disable Hardware Acceleration on Google Chrome
Step 1. Run the “Google Chrome” browser on your PC.
Step 2. Click on the three-dot icon to open the menu.
Step 3. Navigate to “Settings” > “Advanced” > “System” .

Step 4. Then, toggle off the “Use hardware acceleration when available” option.
Step 5. Now, reboot the Chrome browser and reopen the website to watch the same video.
Disabled Hardware Acceleration on Firefox
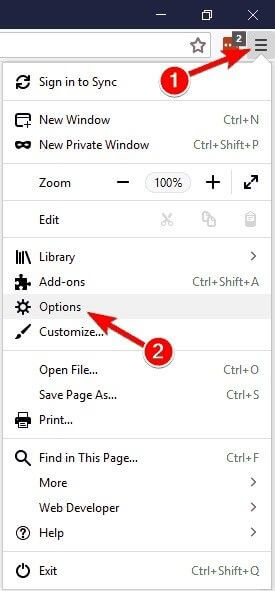
Step 1. Open the browser and click on the menu button present at the top right.
Step 2. Navigate to “Options” > “General”.
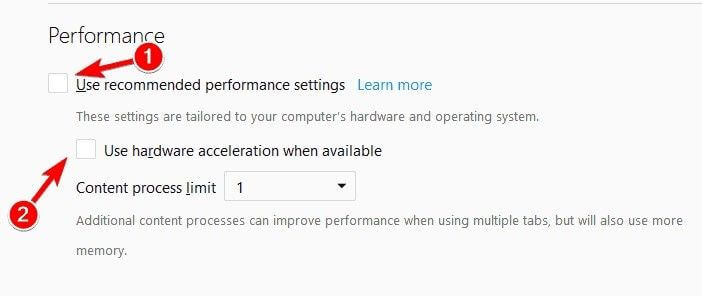
Step 3. NScroll to find the “Performance” option.
Step 4. Uncheck to turn off the “use recommended performance settings” option and “use hardware acceleration when available”.
Step 5. Restart the browser to see whether the issue has been fixed or not.
Disable Hardware Acceleration on Internet Explorer
Step 1. First, launch the “Internet Options” by directly typing it In the search box.
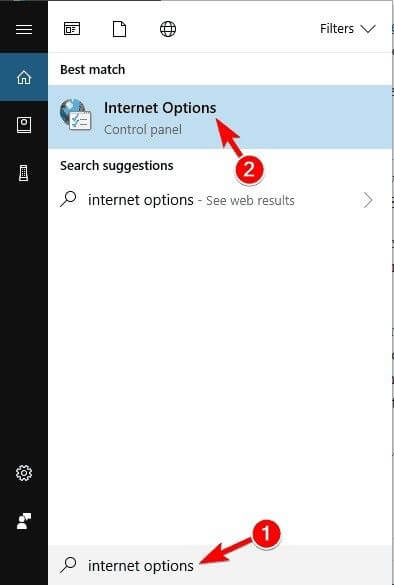
Step 2. Hit Enter to launch it. Then, move to the “Advanced” tab.
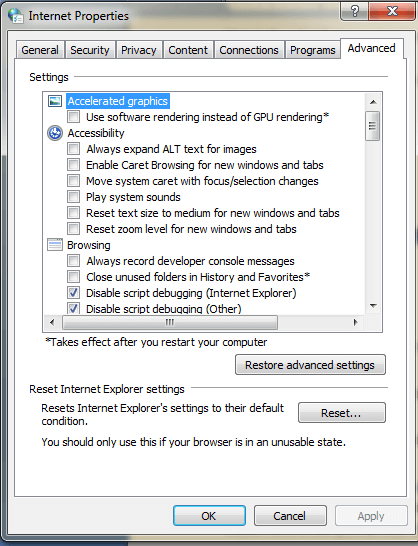
Step 3. Now, check the “Use software rendering instead of GPU rendering” .
Step 4. Click “Ok” and restart internet explorer to experience the changes.
3 Use the Trouble Shooter
Running a Windows troubleshooter is another way to tackle the green screen problem when playing a video. Here's how you can use it:
Step 1. Open the “Control Panel” on your PC using the search box.
Step 2. Head over to the “troubleshooting” option.

Step 3. Choose “view all” available on the left pane.
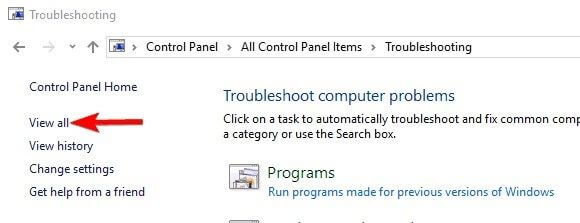
Step 4. Select “Hardware & Devices” and follow the on-screen instructions.

4 Use a Powerful Video Repair Tool
If none of the above options helps, the best you can do is use a powerful video repair tool like iMyFone UltraRepair. It's an all-in-one solution designed by our experts to repair broken and unplayable files like photos, videos, and word documents. So this software offers a great way to save your time and effort in dealing with green screen issues.
Key Features:
- Easily fix your green or blurry videos in a mere 3-step.
- Efficiently support to repair different formats of damaged videos, like MP4, FLV, etc.
- Instantly convert videos for Free, like converting MP4 to WMV.
- Also offer batch video fixing solution.
A Step-by-Step Tutorial to Repair Green Video by iMyFone UltraRepair:
Step 1: Run the software
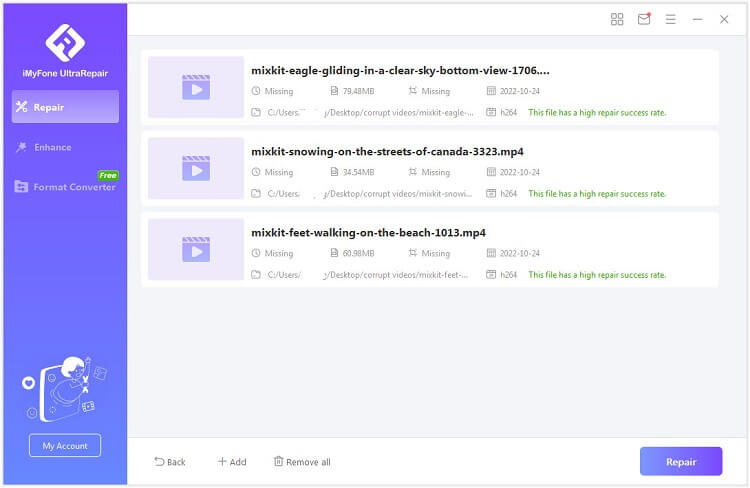
Assuming you have downloaded the software on your PC, run it and click on the “Please add video(s) and start to repair” or “Add video” button. Thereafter, choose the corrupted video files to import them. Now, the software will show you the file name, size, length, along with resolution.
Step 2: Start Repairing
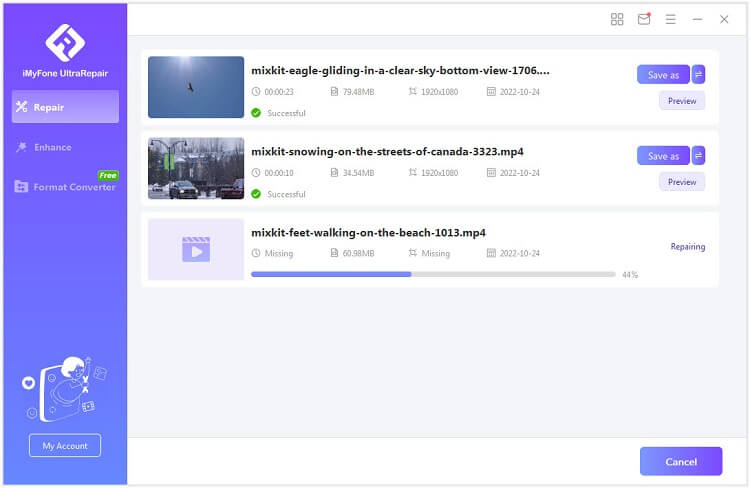
As the repair process completes, you will get a pop-up window where it shows that the repair has been completed.
Step 3: Save the Video
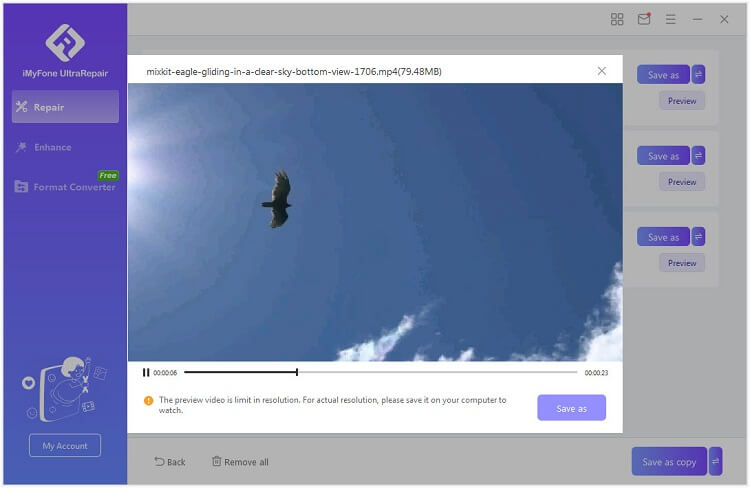
You can save the video to the desired location using the “Save” or “Save All” options. Don’t forget to select the right storage path.
5 Use Enable JavaScript in Browser from and iPhone & Android
JavaScript helps in running videos without stopping. If any changes occur in the JavaScript settings, it can restrict the video playback or cause a green screen issue. Mostly, the changes happen because of the update in the browser or firewall. Check if it is working properly on your browser.
Steps to Enable JavaScript on Chrome
Steps to Enable JavaScript on Android
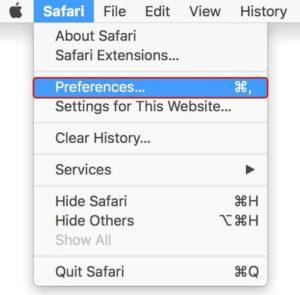
Steps to Enable JavaScript on Mac
Part 3. How to Prevent Green Screen on Videos
Rather than downloading videos offline, people love to watch them online. But the green screen problem acts as a hurdle. To handle this situation in a better way, you can follow these tips:
Conclusion
If you are looking to get rid of the green screen on videos, then look no further. These advanced tips will allow you to fix the green screen issue in a very short period. You will be amazed at how simple it is to remove green screens from your videos once you know all of the things that need to be done. And when you have a tool like iMyFone UltraRepair, dealing with the green screen problem will be easier than ever.


