How to Fix Bad Quality Videos in 3 Practical Ways?
Category: Repair Files

5 mins read
Videos in bad quality can be sue to various reasons. So, when you have low-resolution videos at hand, don't rush to be irritated as there are practical methods to fix them.
In this article, we'll introduce the reasons to these low-rec videos and guide you on how to fix bad quality videos in 3 ways.

In this article:
Download UltraRepair to enhance video quality and resolution.
Part 1: What Cause Low Quality Videos?
There are several reasons behind that cause the videos to be in bad quality, let's have a quick look at them all.
Part 2: How to Fix Bad Quality Videos?
Uneven lighting, visible noise or grain, distorted audio are common signs you will see in a video that is in bad quality. But there are methods to fix this problem. And it's time to check out these easy and reliable methods.
1 Repair Bad Quality Videos with iMyFone UltraRepair
Resolution, sharpness, contrast, saturation, color accuracy, noise and more are the components of video quality. And adjusting them requires using a professional video editor and skills. That take time.
But now you can try a 1-click video quality enhancer- iMyFone UltraRepair, which is a specialized file repair tool that uses AI technology to naturally improve video quality, no technical skills needed.
Key Features:
- Repair pixelated videos, grainy videos, blurry videos, choppy videos, videos no sound, and more.
- Enhance bad quality videos in formats like MP4, MOV, AVI, FLV...
- Batch repair multiple damaged audio files at once.
- Repair audio files without file size and number limit.
- Compatible with popular running systems including Windows and Mac.
Step 1: Launch the program and choose Enhance from the left pannel. Then choose Video clarity tab to Add Video.

Step 2: Upload your video to be enhanced, then click Start for the program to begin enhancing your video.
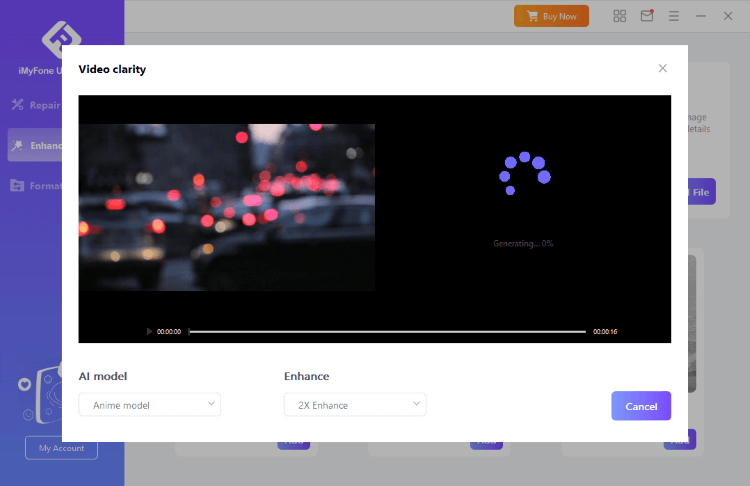
Step 3: The program will soon finish fixing your blurry videos. You can then save or share the video.
2 Re-configure Video Resolution with Adobe Premiere Pro
As we've mentioned before, low resolution is one of the main reasons for poor video quality. So you can improve the quality of grainy or pixelated videos by increasing the resolution.
For videos that have been downloaded to your device, use a video editor like Adobe Premiere Pro to increase the video resolution.
Here's how to improve the resolution of blurry videos with Adobe Premiere Pro:
Step 1: Import Footage
Open Premiere Pro, start a new project, and import your video clip.
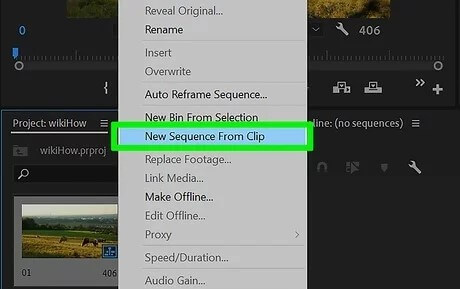
Step 2: Create Sequence
Right-click on the clip, choose New Sequence from Clip, and drag it onto the timeline.
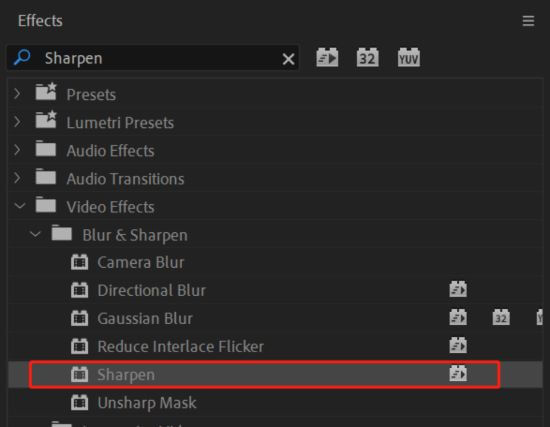
Step 3: Apply Effects
Consider using the Sharpen effect from the Effects panel to enhance clarity, but avoid excessive adjustments.
Step 4: Export Enhanced Video
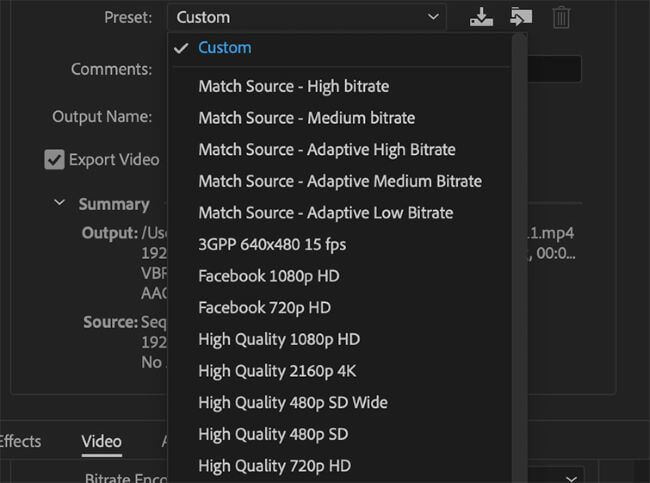
Go to File > Export > Media, set the export settings, and choose a higher resolution preset if available.
If you're enjoying the video online, then you can directly adjust the video resolution within the app. For example, you can adjust the quality of YouTube video by clicking the Settings option.
3 Enhance Video Quality with Video Plugins
Besides the dedicated video editing software, there are plugins typically work within these popular software and offer a range of tools to address specific issues related to removing low quality from a video, such as noise reduction, color correction, sharpening, and resolution enhancement.
For the well-recognized plugins, the list is here:
- Red Giant Denoiser III: Great for reducing noise in footage, especially in low-light conditions.
- Neat Video: Effectively reduces noise while preserving details in video.
- Boris Continuum Complete: Offers tools for color correction, sharpening, and upscaling.
- FilmConvert: Emulates film stocks, enhancing color grading and aesthetics.
- RE:Vision Effects' DE:Noise: Precision in reducing various video noise types like grain and flicker.
- NewBlueFX: Provides color correction, sharpening, and effects plugins.
- Magic Bullet Suite: Plugins for color correction, finishing, and film-like looks.
Part 3: How to Check the Video Quality?
After repairing videos in bad quality, you must want to know the details of them besides the quality. Though there are software to learn the details of your video, you can make it without download any software.
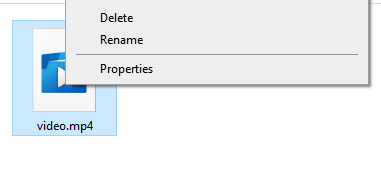
Step 1: Right-click on the video file you want to learn about the resolution, choose the Properties option.
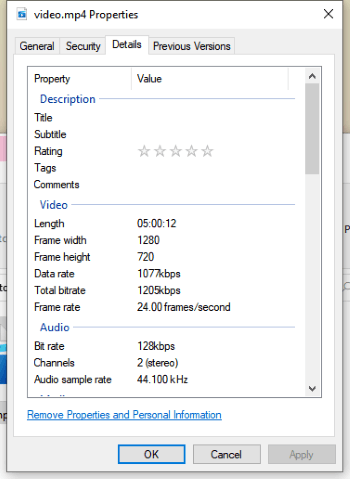
Step 2: From the tabs, select the Details.
Step 3: All video details will be presented. If you need to make any adjustment, just keep using the video enhancing or editing software.
Conclusion
And that's the part on how to fix bad quality videos, hope these tools can be helpful for you to enhance the video quality and improve them to high resolution. Regarding the easiest tool to repair videos in bad quality, this video enhancer tool iMyFone UltraRepair is recommended. Download it for free now!


