With the large number of music available on your iPod, soon there is no more storage space to put new files. Rather than delete some of these songs that are all important, you can transfer music from iPod to external hard drive without iTunes. In addition, at times, your iPod can get lost, crash or get damage unexpectedly. So, back up your music to an external hard drive for safe keeping is necessary.
How to Transfer Music from iPod to External Hard Drive or External Hard Drive to iPod with/without iTunes
1 Transfer Music from iPod to External Hard Drive or External Hard Drive to iPod without iTunes
To transfer music from iPod to external hard drive or external hard drive to iPod without going through the complicated and cumbersome processes of iTunes, you need the third-party iPod transfer software. The most professional one is iMyFone TunesMate. This program provides you with an all-in-one media transfer solution. And has received lots of positive reviews from Getintopc, Geekreply, tricksworldzz, etc.
- Transfer all or specific music from iPod to external hard drive in one-click
- Add music from external hard drive to iPod if you need in future
You can follow the steps below to transfer music from iPod to external hard drive or external hard drive to iPod without iTunes:
Step 1: On your PC or Mac, download and install iMyFone TunesMate. After installation, run TunesMate.
Step 2: Using USB cables, connect both iPod and external hard drive to the PC. TunesMate will recognize and show your iPod in the primary window at once.
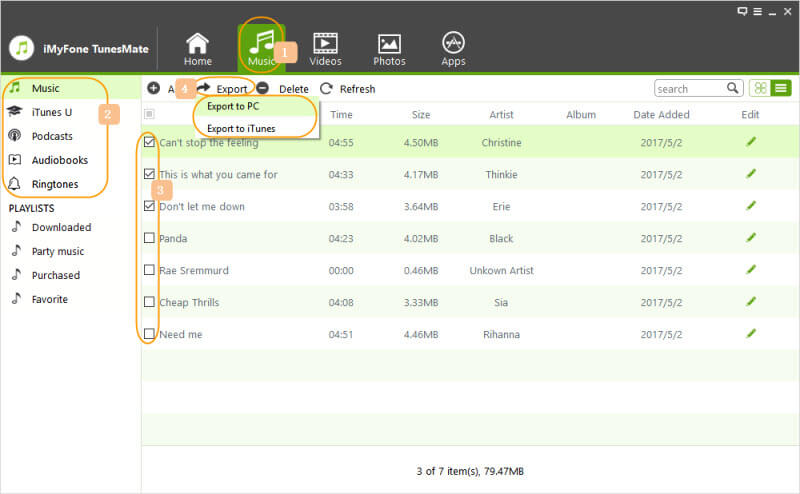
Step 3: Select “Music” tab from the top menu. Check all or those music you want to copy. Click “Export” and then click “Export to PC”.
Step 4: Browse your external hard drive from the pop-up window and choose a folder to save the iPod music.
Step 5: Click “OK” to begin the transfer process.

Note: Apart from transferring music from iPod to external hard drive, you can also transfer playlists. When you go to the “Music” tab, you can see your playlists listed at the left side. Just right-click on the one you want to transfer and choose “Export to PC” and locate your external hard drive to store.
What Else Benefit Can You Earn from TunesMate?
- Transfer both free and paid music/movies between iOS devices and iTunes/PC
- Transfer iTunes music to iPhone/iPad/iPod without overwriting the original data on your device
- Support to transfer both all files or some specific files from iTunes to iPhone/iPad/iPod
- Rebuild crashed iTunes library by exporting iDevice music to iTunes, and no limits for the number of iDevices
- Directly add music/photos/movies from PC to iPhone
2 Transfer Music from iPod to External Hard Drive with iTunes By Copying iTunes Media Folder - More Complicated
Or you can use Apple’s official tool - iTunes as well. But it is much more completed. You can follow the steps below to have a try.
Step 1: Find iTunes Media Folder
By default, your iTunes Music folder is in your iTunes folder:
- Mac
- : Finder > username > Music
- : Users > Username > Music
- : Documents and Settings > Username > My Documents > My Music
Windows Vista or later
Windows XP
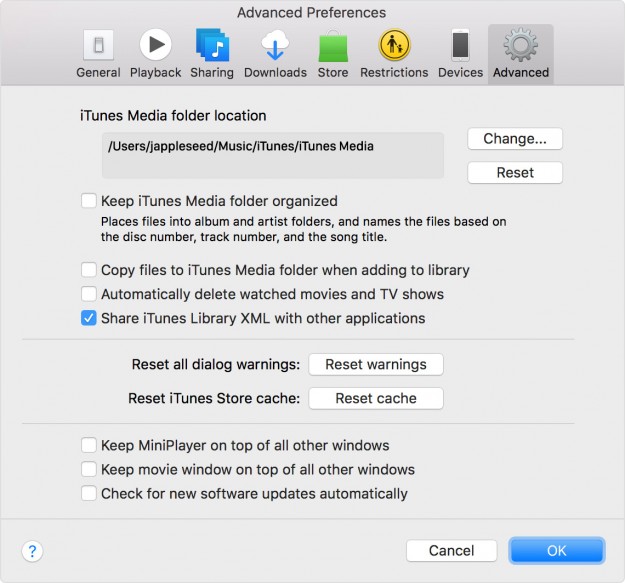
If it is not in its default location, you can find where it is located using these steps:
- Open iTunes.
- For Windows: Choose Edit > Preferences from the top menu bar on iTunes.
- Click on the Advanced tab.
- Check the box under "iTunes Media folder location" to get where your iTunes music folder is located.
For Mac: Choose iTunes > Preferences from the top menu bar of your computer screen.

Step 2: Consolidate Your iTunes Library
Before transfer iPod music to external hard drive, consolidate all of your media into the iTunes Media folder first.
- Launch iTunes.
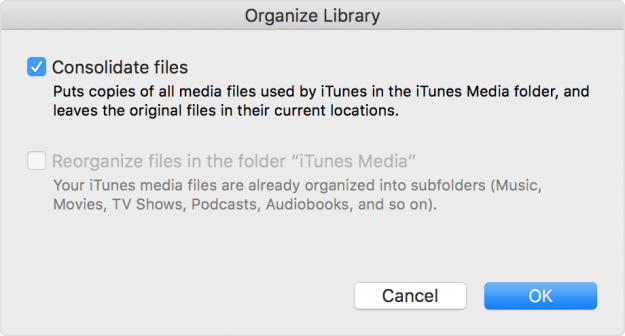
- Choose “File > Library > Organize Library” from the top menu bar of iTunes window or computer screen.
- Check “Consolidate files”.
Any files outside will be copied into iTunes Media folder.

Step 3:Copy iTunes Media Folder to External Hard Drive
- Quit iTunes.
- Find your iTunes Media folder.
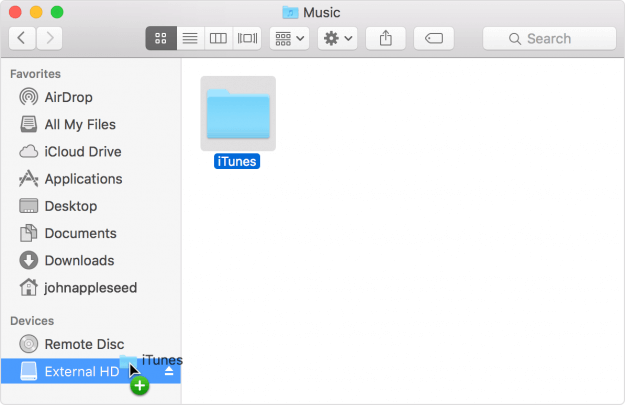
- Connect the external drive to your computer and open.
- Drag and drop the iTunes Media folder to the external hard drive. Done!

As you can see above, you can only transfer all media files to external hard drive, including music, videos, audiobooks, TV shows, etc. You cannot just choose to transfer only music.
Note: iTunes automatic sync should be disabled first. You can do that through the steps below:
- Connect your iPod to your PC. iTunes should launch automatically and if it does not, launch it.
- From the Edit menu (Window users) or iTunes menu (Mac users), scroll down and select "Preferences".
- Click on "Devices" from the tab options.
- Check the “Prevent iPods, iPhones and iPads from syncing automatically”.
- Click OK to save your setting.


 November 1, 2022