Transferring iPhone photos to Windows 7 is an easy task that can be achieved via number of ways. You can either use built-in file explorer of Windows, utilize Windows 7 AutoPlay, or you can also use a third-party file transfer tool (i.e. iMyFone TunesMate) to get the job done.
Top 3 Ways to Import Photos from iPhone to Windows 7
1 Import Photos from iPhone to Windows 7 Via iMyFone TunesMate
iMyFone TunesMate is a state-of-the-art iPhone file transfer tool that you can use to import as well as export your iPhone photos to Windows 7 and vice versa. Using iMyFone TunesMate to import iPhone photos to Windows 7 is highly recommended because it is relatively easier and much faster than other methods. Apart from this, there are many additional features this software offers that you can take advantage of.
- Supports all types of media files (including photos, movies, podcasts, music, audiobooks, playlists, etc.)
- You can also view and transfer HEIC photos via this software.
- Two-way transfer feature allows you to conveniently transfer your media files between both your iPhone and your computer.
- You can also preview pictures before transfer for enhanced selection and transfer experience.
- 1-Click backup photos to PC feature to conveniently backup all your iPhone photos.
- iTunes library management; you can use iMyFone TunesMate to rebuild corrupted iTunes library as well as merge multiple libraries conveniently.
- Transfer purchased as well as non-purchased media without hassles.
- Efficient playlist management; create, delete, rename, import, export your iPhone music playlists.
- Highly recommended by many professional software review webistes, such as Getintopc, Geekreply, tricksworldzz.com, etc.

Steps to Import iPhone Photos to Windows 7
Follow these instructions:
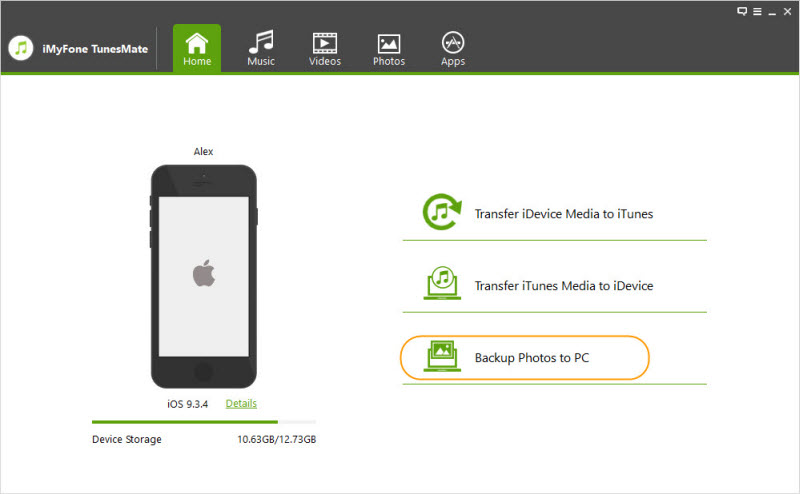
Step 1: Run iMyFone TunesMate software on your Windows 7 computer and then connect your iPhone to it.
Step 2: Now select Backup Photos to PC option available on the main page of the software.
Step 3: You will be asked to select destination folder for exported photos, choose one on your computer’s hard drive and then click on Select Folder option to proceed.
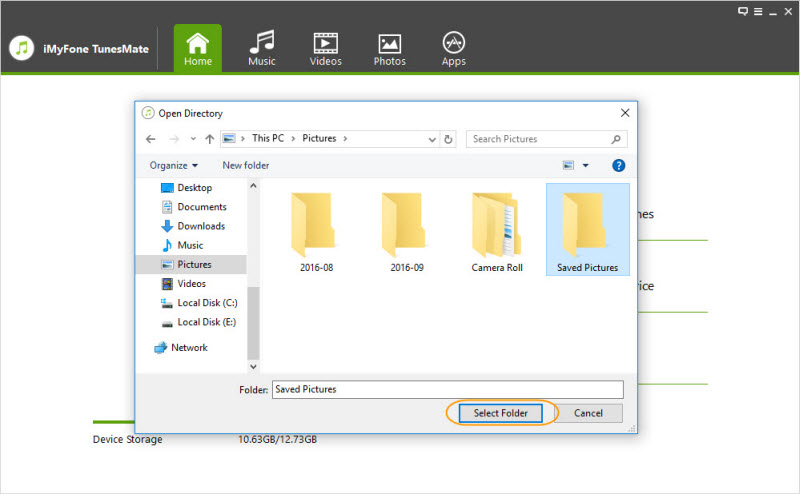
The transfer process will start and all your iPhone photos will be exported to your PC. You will also be notified once the transfer process is completed.
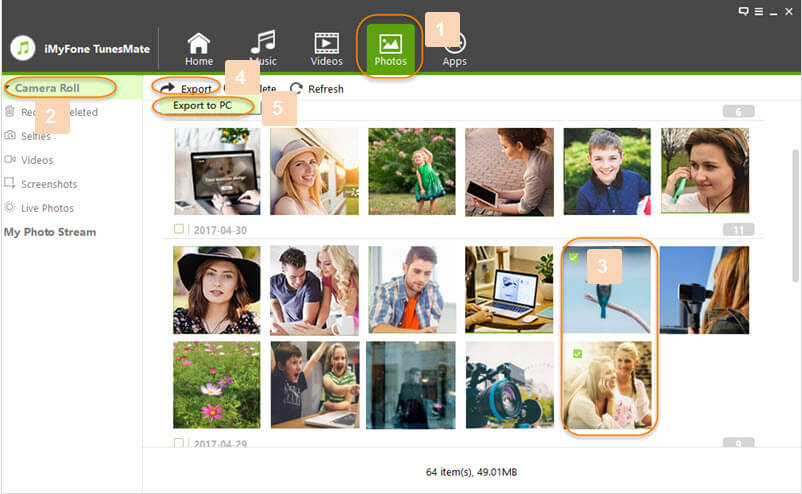
You can also selectively import photos from iPhone to Windows 7:
2 Import iPhone Photos to Windows 7 Via File Explorer
The process to import your iPhone photos via Windows 7 file explorer is also quite easy. However, keep in mind that you can only import JPG photos with this method. HEIC photos cannot be previewed via Windows 7 File Explorer.
Follow these instructions to import iPhone photos via Windows 7 Explorer:
Note
Step 1: Connect your iPhone to your PC via USB cable. And open Computer.
Step 2: Now click on the iPhone sub-menu (your device’s name may be shown here).
Step 3: Navigate to DCIM folder in the Internal Storage and then select the photos you wish to import to your PC.
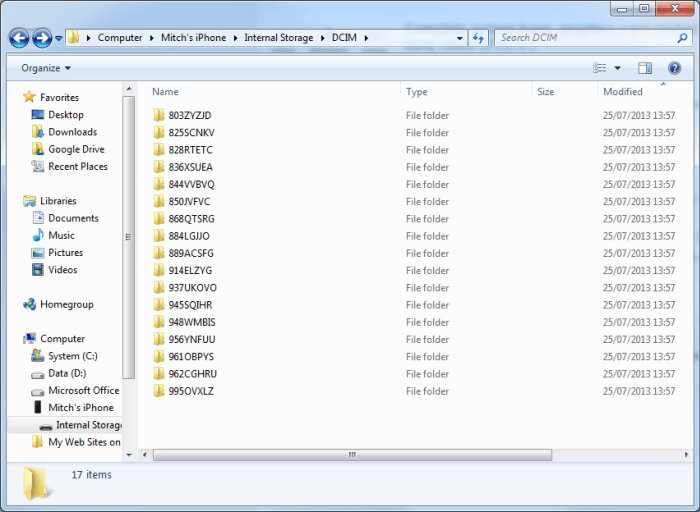
Step 4: After the selection, simply use Windows’ copy feature (right-click and choose Copy) and then Paste it (right-click and choose Paste) in your desired folder on your computer’s hard drive. Your selected photos will begin transferring.
3 Import iPhone Photos to Windows 7 Via AutoPlay
You can also import your iPhone photos to your computer via Windows 7 AutoPlay. However, just like the above mentioned method you cannot view HEIC photos with the AutoPlay as well. So this method is also only suitable for transferring JPG photos.
Follow these steps to import iPhone photos to Windows 7 via AutoPlay:
Note
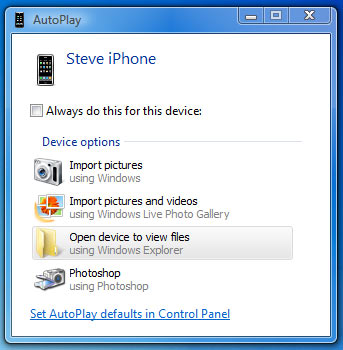
Step 1: Use a compatible USB cable to connect your iPhone to your PC. Now, AutoPlay window will pop-up automatically.
Step 2: Click on Import pictures option.
Step 3: Then select your desired folder on your computer to start the import process.


 September 10, 2021
