If you’re having the question ‘Why won’t my iPhone backup to iCloud?’ in your mind after the recent iOS update, then you’re not alone. Many other iPhone users are having a problem enabling their iCloud backup.
There are many reasons why your iCloud backup isn’t working, and here are some of them:
- It could be because there is not enough iCloud storage space available.
- It could be due to faulty Wi-Fi network.
- Maybe you’re not even signed in to iCloud.
- Or you’re still using an old version of iOS.
iCloud Backup Not Working on iPhone XR/Xs/12 (Pro)? Fixed!
We’ve proffered handy and lasting solutions to solving ‘iCloud backup not working’ and other related iCloud issues. They’re discussed in the following paragraphs:
1 Make Sure Your iPhone is Connected to Wi-Fi
iCloud won't backup without a Wi-Fi network connection, and this is to ensure speedy backup. So, if you’re using your wireless data plan to backup files on iCloud, then I advise you connect to a Wi-Fi network.
Here is how to make sure your iPhone is connected to Wi-Fi:
Step 1: Click Settings on your iPhone, and tap the Wi-Fi button on your screen.
Step 2: Select the Wi-Fi network you’d like to connect to.
Step 3: Enter the network password, and click Join.
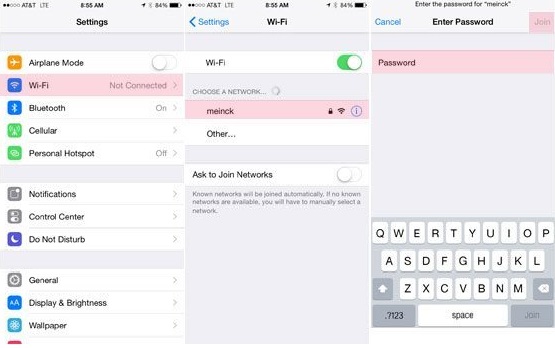
Once you are connected to a Wi-Fi network, you can try performing an iCloud back up again.
2 Check iCloud Storage
If iCloud backup is not working, you may need to check to know if you have enough iCloud storage space for the backup. You can check your available iCloud storage space through these steps on iPhone XR/Xs/12 (Pro):
Step 1: Click Setting app, and click your name at the top of the page.
Step 2: Click iCloud.
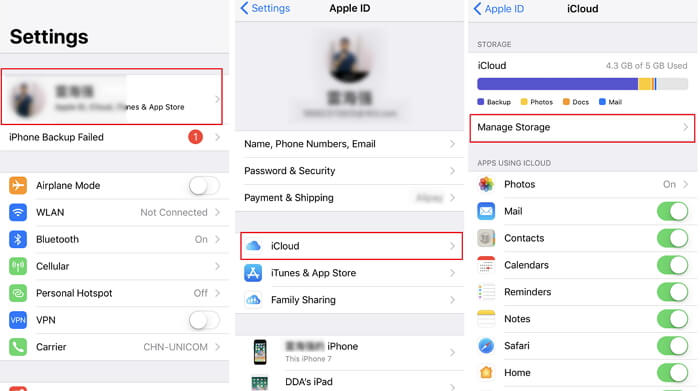
You’ll see the status of your iCloud storage. You can choose to manage your iCloud storage or upgrade to higher storage capacity by purchasing more iCloud storage space.
3 Delete Old iCloud Backup
If you feel like deleting your old iCloud backup in order to create storage space for new files, I would advise you first backup your files to your Mac or PC via iTunes.
If you’ve made a new backup of your files to your PC, then follow these steps to erase your iCloud backup:
Step 1: Clicking Settings app > iCloud > Storage > Manage Storage.
Step 2: Locate the iCloud backup you want to delete and erase it.
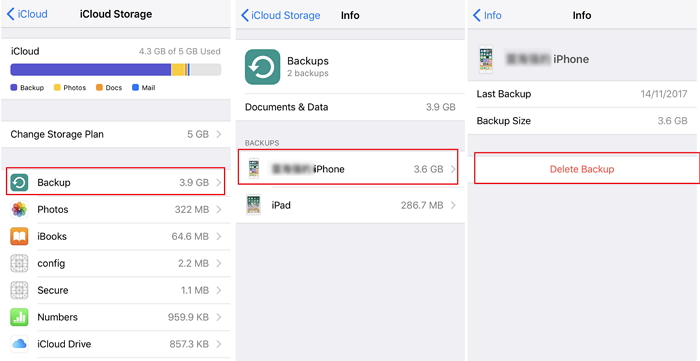
Once you’ve selected the files, and clicked on Delete, it will be erased from iCloud, and you’ll regain your storage space.
4 Reset All Settings
When iCloud won't backup right on your iPhone, resetting all iPhone settings is a good way to solve the problem and put the device in factory default. Here is how to reset all your iPhone settings:
Step 1: Launch Settings app on your iPhone.
Step 2: Click General > Reset > Reset All Settings.
Step 3: Enter your Passcode, and confirm that you would like to proceed.
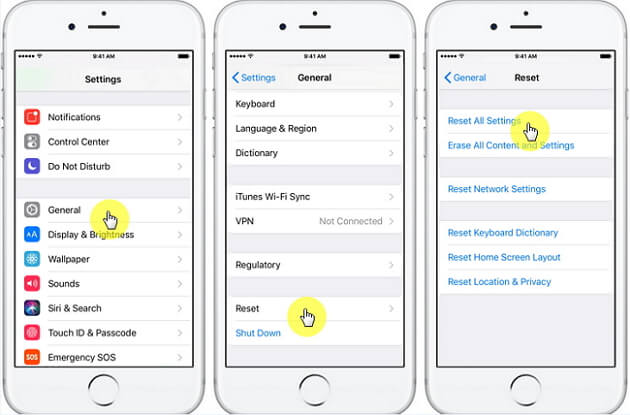
After entering your passcode, you iPhone will reset all settings and reboot at the end of the process. Then, check if your iCloud backup is working, if it’s not working, read on.
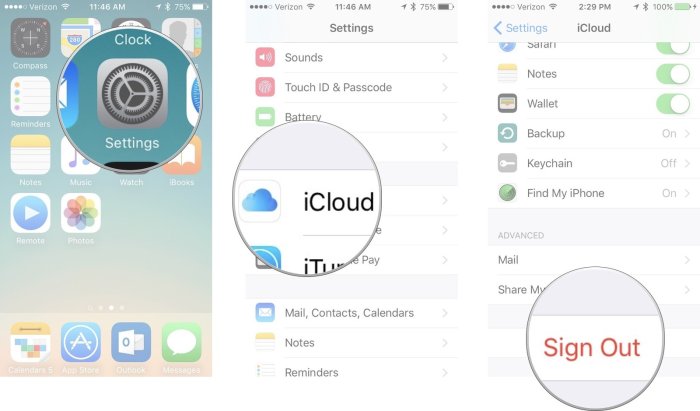
5 Sign Out and Back into Your iCloud Account
One of the solutions to solving ‘iCloud backup not working’ is to exit from iCloud and re-enter again. If the problem is from ID verification, this will fix it.
Step 1: Launch Settings app on your iPhone.
Step 2: Click Accounts & Passwords > Sign Out. Indicate that you would like to ease all previous settings, and you’ll be redirected to a new iCloud Sign-in page.
Step 3: Enter your Username and Password to continue, and follow the prompts to complete the process.
6 Restart your iDevice
Rebooting your iPhone XR/Xs/12 (Pro) is the easiest way to perform a troubleshooting when iCloud backup is not working. After rebooting the iDevice, you can try to back up to iCloud again.
Here are the steps:
Step 1: Press down the Home and Power buttons simultaneously until the Apple logo appears on your screen.
Step 2: Once your iPhone comes back on, you can try to see if your iCloud is now working.
7 Update to the Latest iOS 14
Updating your iOS to its latest version can be a good way to solve iCloud backup not working and other iOS related issues. Here is an easy way to install iOS 14 using Software Update on your iPhone or iPad:
Step 1: Backup your files on iCloud.
Step 2: Click Settings > General > Software Update.
Step 3: Enter your Apple ID Passcode if prompted.
Step 4: Click Agree on Terms & Conditions, then click Agree again to confirm.
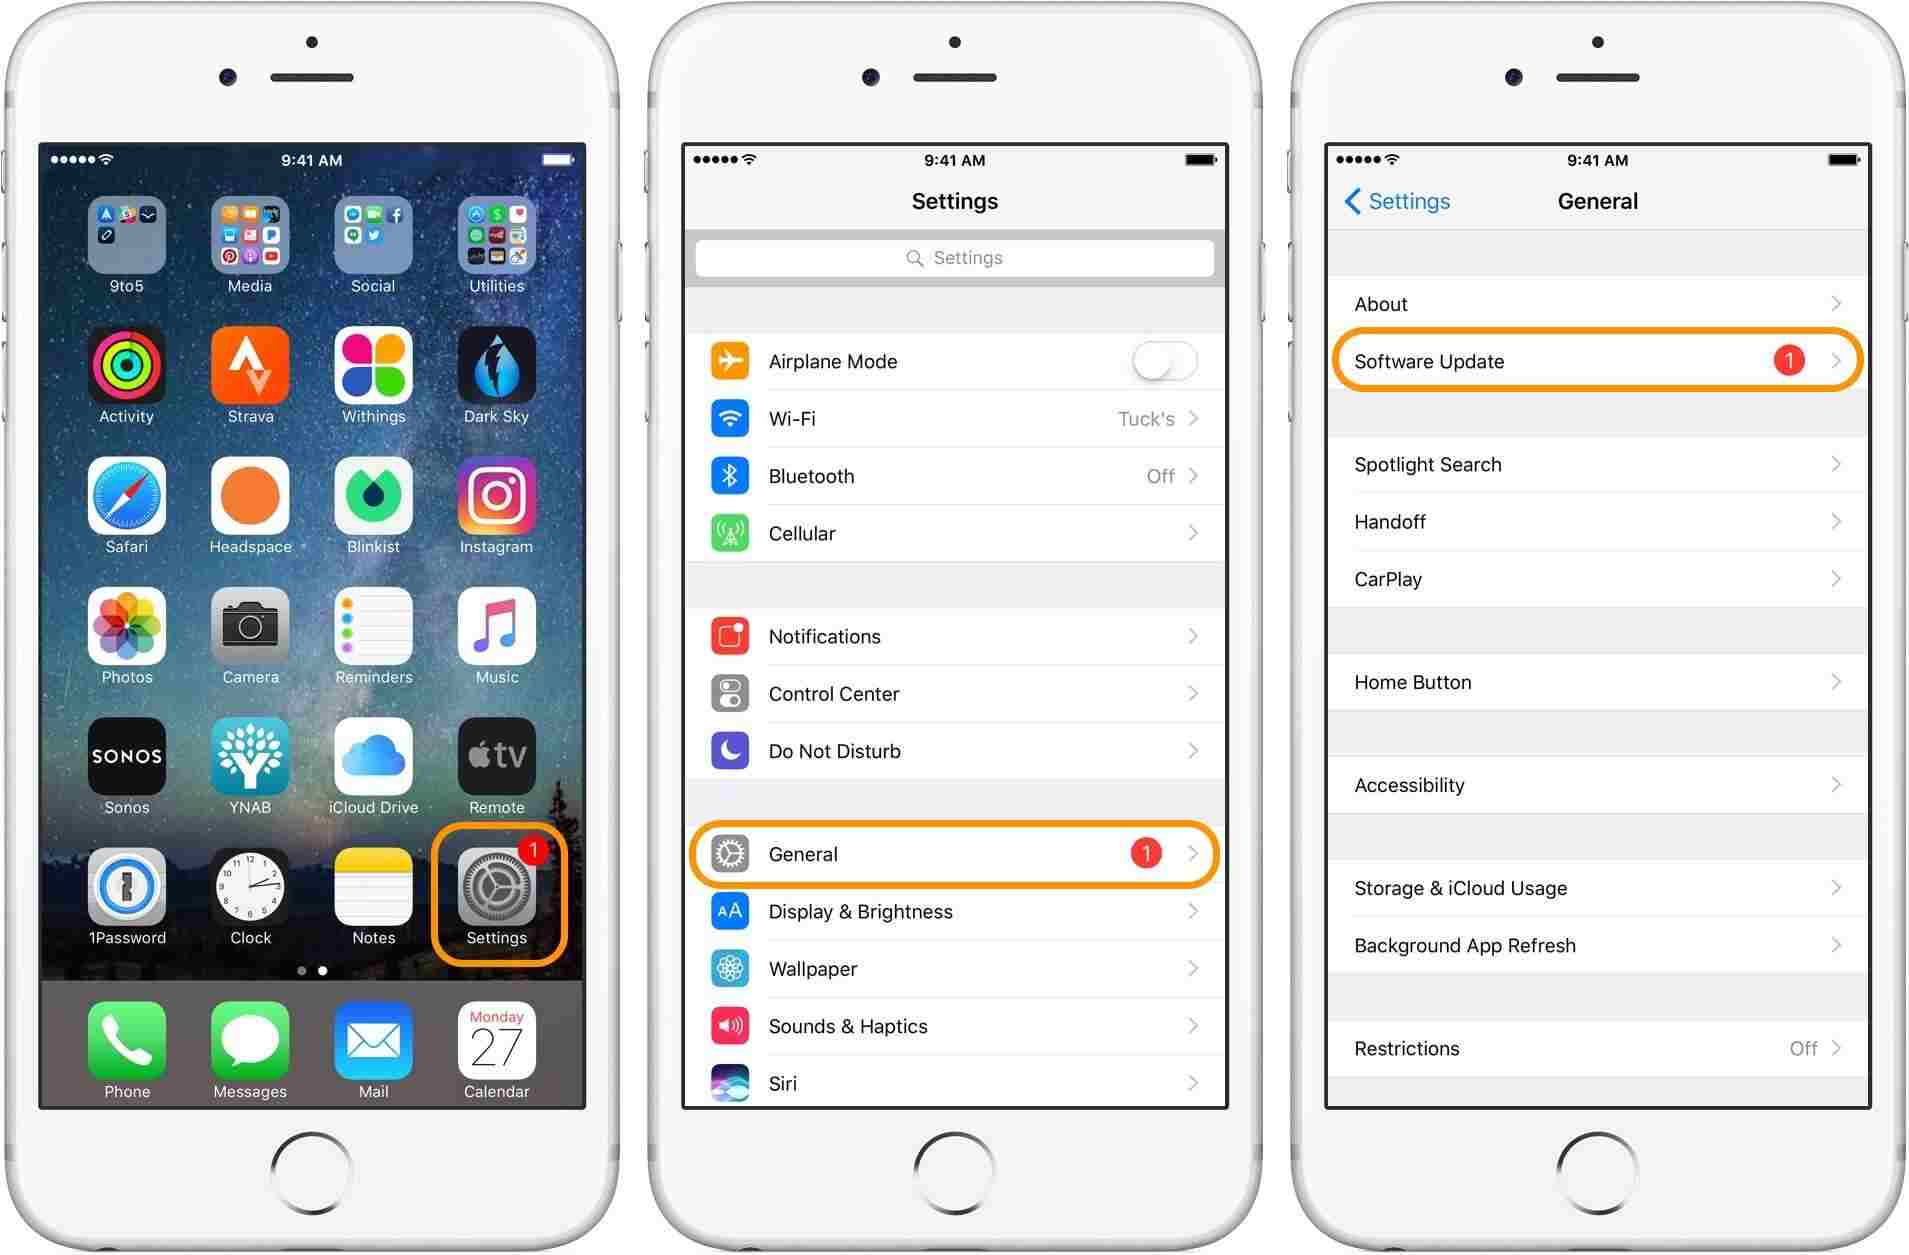
The download will begin automatically, thereafter installations will commence.
How to Backup iPhone to PC without iCloud
iMyFone TunesMate is an iPhone transfer tool that you can freely use to Transfer your media files between iPhone, iPad or iPod touch and Computer/iTunes.
With TunesMate, you don’t need to stress yourself over iCloud backup not working, because you transfer and retain a perfect copy of your files on your PC/Mac via TunesMate. It fully supports iOS 14 and previous versions.
Key Features:
- Backup: Back up songs, playlists, and other media from your iOS or Android device to your local music library.
- Direct File Transfer: TunesMate can aid you to directly add files from computer to iPhone, without ever opening iTunes.
- Backup without Password: Backup iTunes files to iPhone without iTunes password.
- File Sharing: Share iTunes music with family or friends, even in different Apple IDs.
- Back up iPhone to computer without losing any files, rebuilds damages iTunes library, and can transfer all iOS media files to any location.
Steps to Transfer iPhone Music to Computer via TunesMate
Step 1: Download and install TunesMate on your PC. Connect your iPhone to your PC using USB cable.
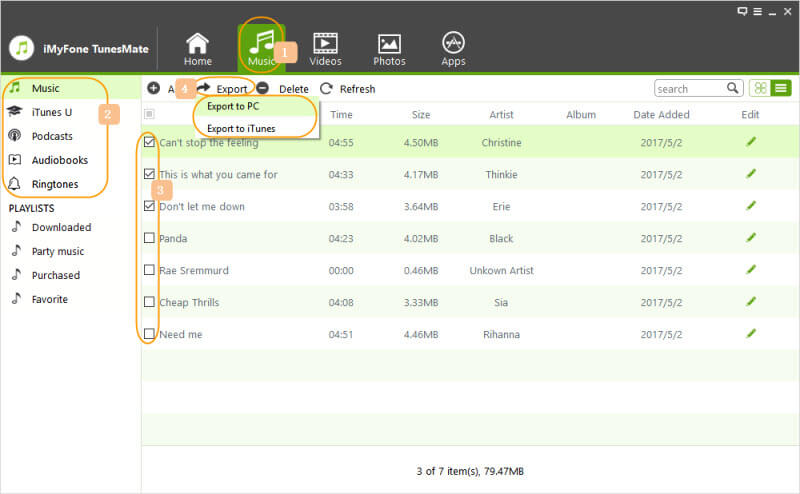
Step 2: Launch TunesMate and click Music. Tick the music you want to transfer and click Export > Export to PC.
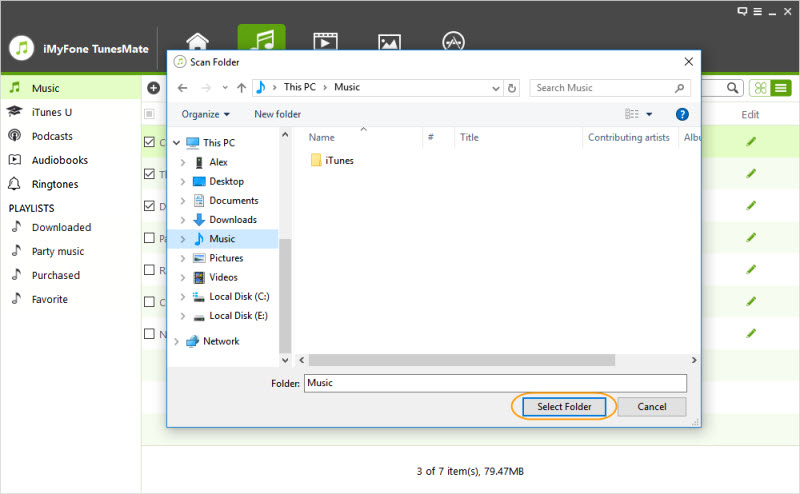
Step 3: Browse and select the target folder, then click OK to start exporting your music files.


 June 28, 2021
