In the past, seamlessly transferring videos from your iPhone to your computer or vice-versa used to be a herculean and difficult task. However, now things have changed and have actually gotten easier. You now have a variety of options for your video transfer and we are going to dedicate the most part of this article to showing you a few ways in which you can send videos and other media files to and from your computer/laptop with your iPhone. Read on below to learn how it actually works.
Top 5 Methods to Transfer Videos from iPhone to PC (iOS 12 Supported)
Below is a list of methods that you can use to transfer videos from your iPhone to your computer:
- Method 1: With Third Party Media Transfer
- Method 2: With a Usb Cable
- Method 3: With iCloud
- Method 4: Via Email
- Method 5: Via Dropbox
1Transfer via Third Party Media Transfer without iTunes (iOS 12 Supported)
iMyFone TunesMate is on of the best third party media transfer which can offer the best transferring options from iDevice to PC because the application can transfer any type of video files without iTunes. iMyFone TunesMate can also transfer data among unlimited devices, and preview the files before you transfer them.
- Effectively manage videos by importing, exporting, or deleting.
- Transfer movies or any other videos to iPhone in clicks
- The video format including Music Videos, TV Shows , Movies, Home Videos, iTunes U and Podcasts.
- Transfer media files without any data losing
- Freely transfer files between iTunes and iPhone/iPad/iPod Touch
STEP 1: Start the iMyFone TunesMate program on your computer and then Connect your iPhone to your computer via your USB cable.
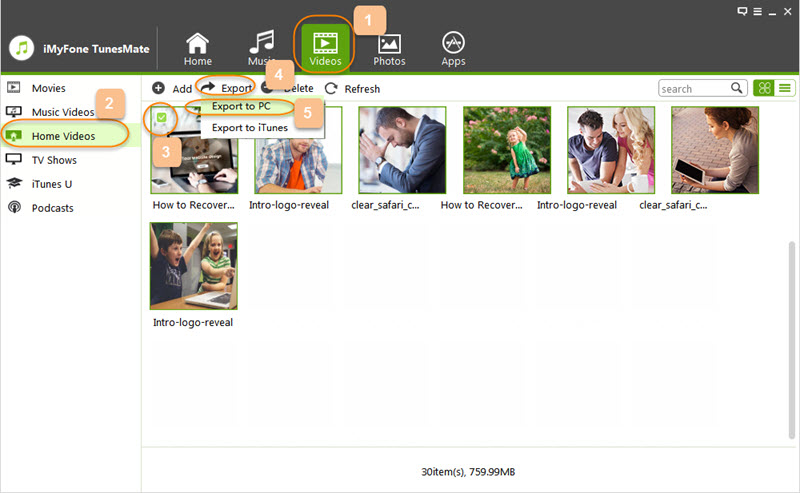
STEP 2: To transfer videos, click on the “Video” icon on the dashboard and select “Home Videos” from the sidebar menu to initiate a transfer.
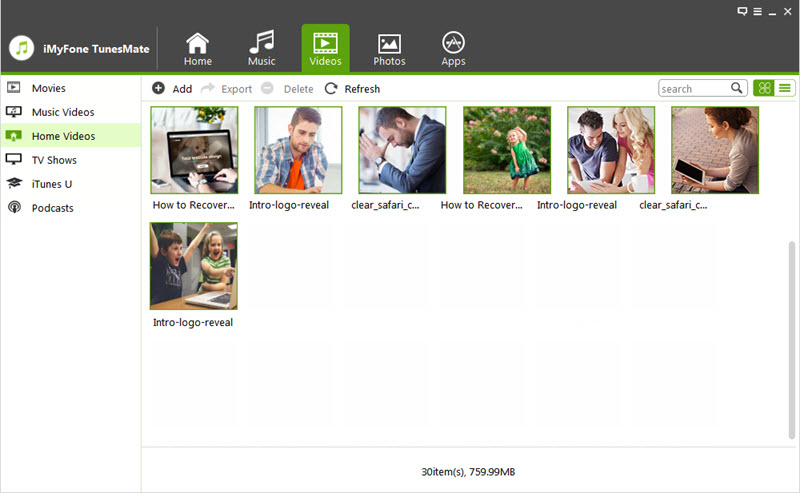
a. Navigate and find the video you wish to transfer and click on “Export > Export to PC” from the menu at the top to initialize a video transfer from your iPhone to your computer.
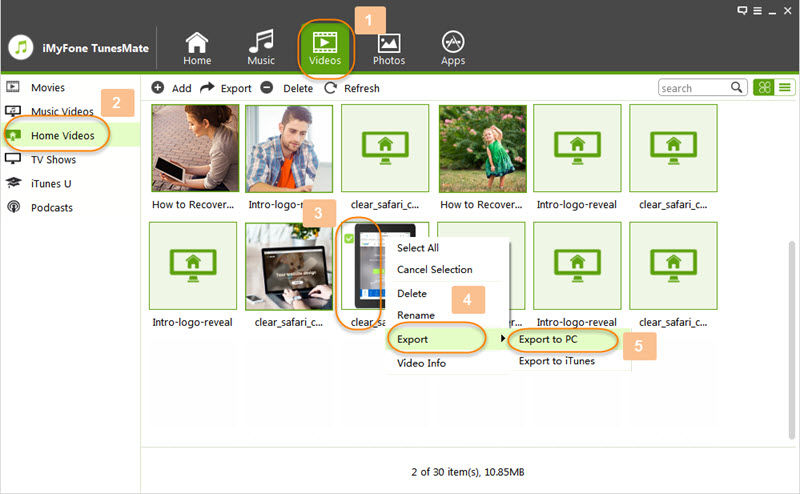
b. You can also directly right-click on a video and choose the “Export option.”
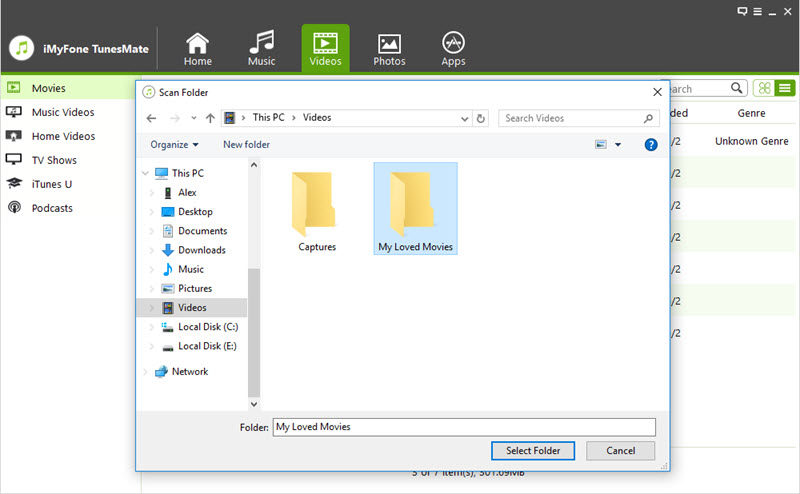
c. A popup window will prompt you to select a destination folder. Once you “Select Folder” the export process will begin.
2Transfer Videos from iPhone to PC with an USB Cable
STEP 1: Connect your iPhone to your computer using your USB cable
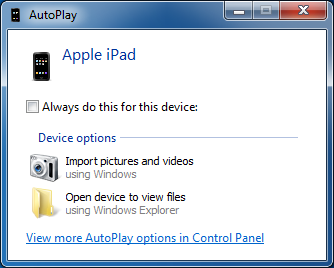
STEP 2: Auto play will pop up
STEP 3: Choose "Import pictures and videos".
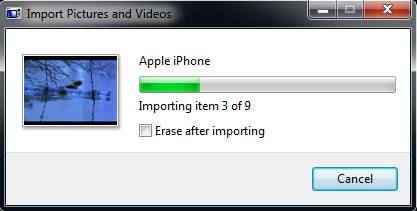
STEP 4: Select a preferred folder in your computer and click on"Import".
Note
This method is slow and you are only allowed to transfer videos that were taken with the iPhone Camera. Videos synced by iTunes cannot be transferred using the USB cable.
3Transfer Videos from iPhone to Computer with iCloud
STEP 1: Activate the iCloud Photo Library on your iPhone (Settings>>iCloud)
STEP 2: go to Backup storage and activate Backup to iCloud to upload a video on your device to iCloud. Click on Back Up Now to begin the backup.
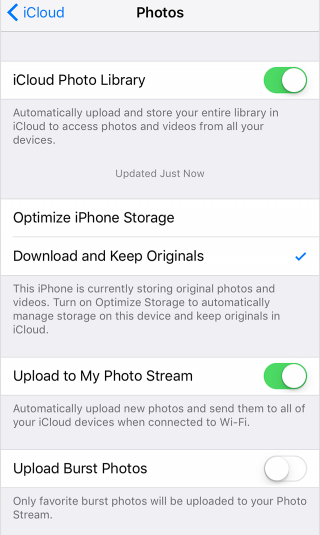
STEP 3: On your Mac computer, locate the Apple Menu and then select iCloud in Preferences.
STEP 4: Login with the same Apple ID you used on your iPhone. Navigate to Photos>>>Photo Stream to export the videos to your computer.
- Transfer speed will be relatively slow as compared to offline method (transfer via iMyFone TunesMate)
- iCloud offers limited storage space, so if you have multiple videos then you might not be able upload and then download all your videos simultaneously.
- This transfer method requires constant internet connection. In case of an internet problem, the transfer will fail.
4Transfer Videos from iPhone to PC via Email
STEP 1: Log into your email and select “Compose” to write a new email.
STEP 2: Put a subject if you like and navigate to “attach” to attach a media or video to your email.
STEP 3: Navigate to a video you want to attach in the email and click OK.
STEP 4: Log into your email with your computer and download the attachment from the email to your computer.
Note
Emails do not generally permit transfer of files larger than 20MB. So you cannot transfer very large files with this method.
5Transfer Videos from iPhone to Computer Via Dropbox
STEP 1: Download and install Dropbox both on your Computer and iPhone.
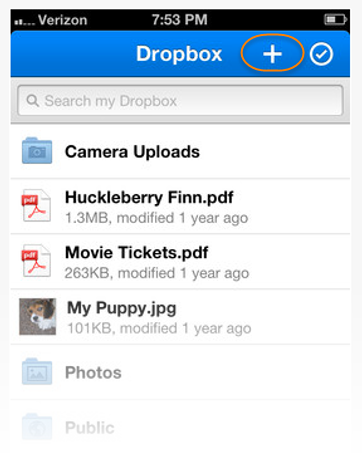
STEP 2: On your iPhone, use the +icon to add videos that you wish to transfer, define a destination folder for the videos and then click upload.
STEP 3: on your Dropbox window of your computer, you will see the items you uploaded to your Dropbox from your iPhone, click on the folder and Download them to your Computer.
- Slow transfer speed (depends on your internet) as compared to offline transfer method (iMyFone TunesMate).
- Dropbox offers limited storage space, so you might have to upload limited number of videos to Dropbox then download them on your laptop, then delete the ones on Dropbox and then upload new videos to Dropbox and so on. Doing this again and again will be a hassle.
Conclusion
From all the above-listed methods of video transfer from iPhone to computer, the most favorable and ideal method turned out to be the iMyFone TunesMate method. This file transfer method requires no internet connection unlike the others (Dropbox, iCloud and Email), there is also a precise category of videos that you wish to transfer. You can use it to equally send videos from your computer to iPhone. Apart from videos, you can also send other media like photos and music using the iMyFoneTunesMate software.


 June 28, 2021