iTunes is the standard method used to transfer files and other data from and to iPad. It can be an effective approach, but when it comes to getting pictures from your iDevice to PC, there are some limitations. Due to some features, iTunes cannot transfer photos to PC but it can be used to export other images and other files from PC to iPad; however, it is limited to limited to transferring only 1000 pictures. If you want to move those lovely images and other saved photos on your iDevice to your computer, then this article will provide you with possible ways to transfer photos from your iPad to PC without iTunes.
The Best Way to Transfer Photos from iPad to PC without iTunes
iPad Data Transfer - iMyFone Tunesmate
iMyFone iPad Data Transfer is useful software which enables you to manage and control your iDevice data conveniently and quickly freely; thus, it prevents you from getting frustrated over muddled up files. It also serves as a bridge between your iDevice and iTunes/PC without any block while syncing and it allows you to play your favorite songs and movies whenever you want.
Features of Tunesmate:
- Two-way transfer: It enables you to transfer files from iPad to PC/iTunes or sync files from PC/iTunes to iPad.
- Transfer photos without iTunes: It allows you to add pictures from iPad to PC directly without accessing iTunes.
- Bypass iTunes restrictions: With Tunesmate, you can easily bypass iTunes restrictions and unknown iTunes errors.
- No data loss: It allows you to add files to iDevice without replacing old files.
- All media files supported: It exports files including movies, music, podcasts, TV shows, audiobooks, playlists, iTunes U, photos, and so on .
How to Transfer Photos from iPad to PC without iTunes
Below are steps on how to use iMyFone Tunesmate to transfer pictures from your iPad to PC.
Step 1: Download and install Tunesmate on your PC. Open iMyFone Tunesmate.
Step 2: Use a USB cable to connect your iPad to your PC and press the PHOTOS tab in iMyFone Tunesmate.
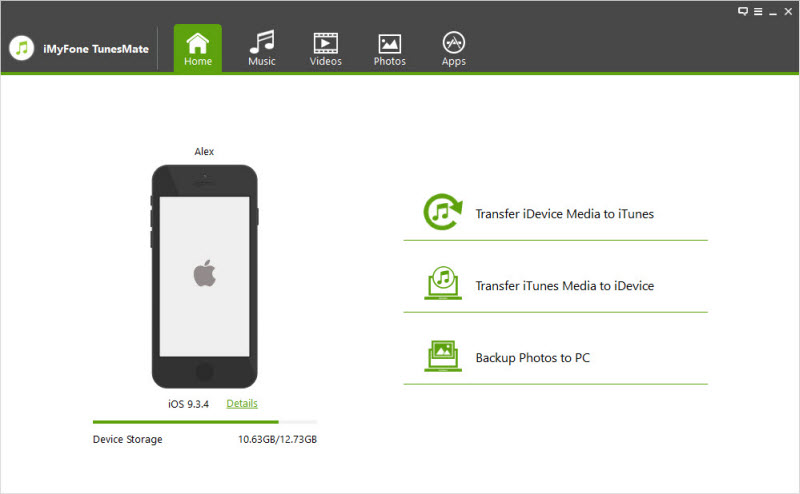
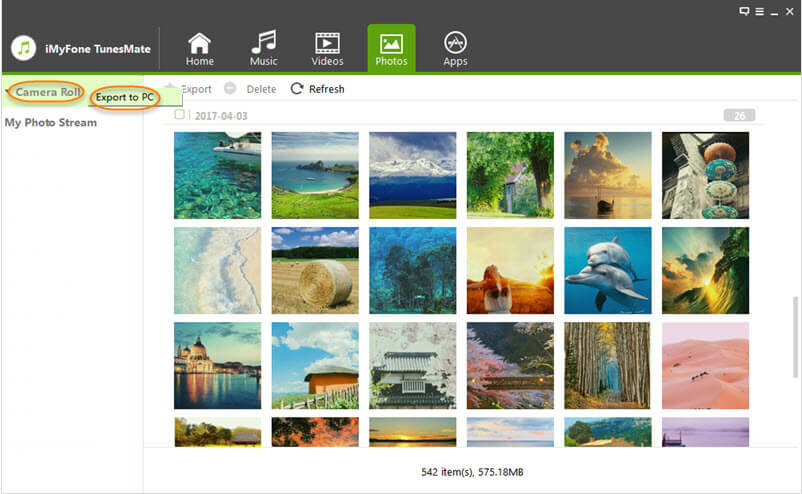
Step 3: A list of available albums will be seen on the left. Right click on the one that you want, after that select EXPORT TO PC from the little menu which appears.
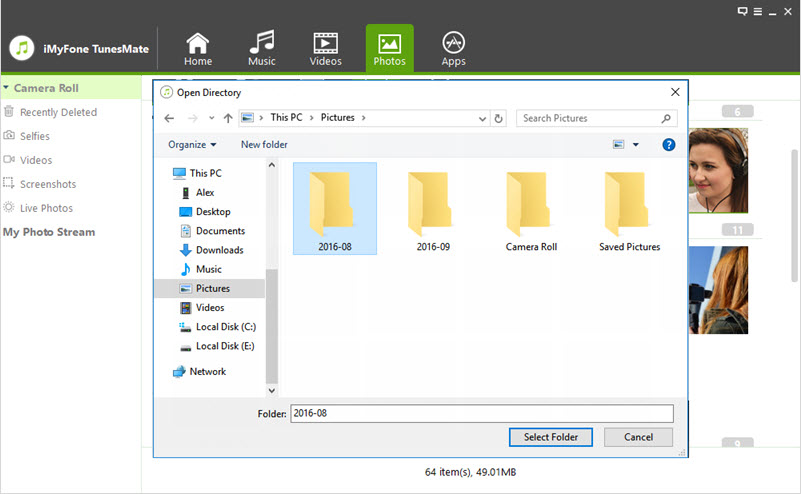
Step 4: Now, you can browse to a folder on your PC. Select the photos you want and click SELECT FOLDER.
Wait for a while as the photos are exporting. You will see a message window which will tell you that the files are being exported. Afterwards, tap OPEN FOLDER to view the photos in their new folder or just simply tap OK to end the process.
Other Ways to Transfer Photos from iPad to PC without iTunes
1 Using Windows Explorer to Transfer Photos from iPad to PC without iTunes
Windows treats the iPad either as a file system or a digital camera based on how they pictures are accessed. Using the windows explorer is the easiest way to get images from your iPad to a Windows PC.
Step 1: Start MY COMPUTER.
Step 2: Locate your iPad; you will see it under Portable Devices section.
Step 3: Run iPad to look for your Photos.
Step 4: Choose the images you want to copy and paste them to a location you can easily access on your PC.
Note
If the pictures are not displayed in Windows, ensure the iPad is unlocked first. Else, the iPad will be found in MY COMPUTER; however, all the content in it will be inaccessible and invisible.
2 Using iCloud to Transfer Photos from iPad to PC without iTunes
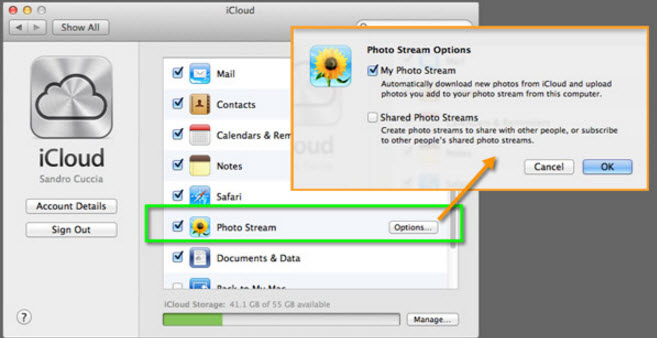
Apple iCloud service can be used to sync photos from iPad to your PC or laptop. All you have to do is enable iCloud on your iPad in Settings and switch on Photo Stream.
Step 2: On your iPad, launch the Dropbox app and switch to the Upload tab.
Step 3: Press the + icon and choose the images you want to export. Select and the location you want to save the files and start uploading.
Step 4: When you get to your PC, the selected photos will be waiting to be downloaded to the folder of Dropbox.
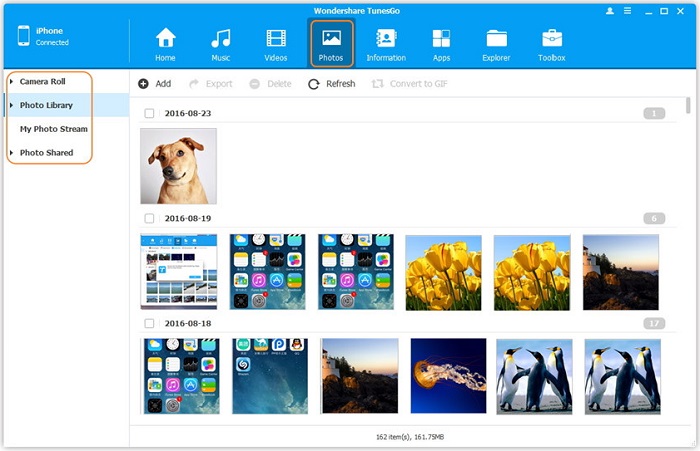
3 Using Tunesgo to Transfer Photos from iPad to PC without iTunes
This may be regarded as one of the best iPad transfer tools for amateur iPad users who get quickly tired of complicated operations to export files between iDevice and PC or between iOS devices.
Step 2: Use a USB cable to connect your iPad to your PC.
Step 3: Tap the PHOTOS button located in the left directory tree to display the photo window.
Step 4: Find the iPad photos and tap EXPORT TO to transfer the images to any preferred destination on your PC.
Step 5: Tap OK when the transfer is completed.


 June 28, 2021