You have your favorite music on a flash drive from your old Mac, PC or any other computer and now you want to transfer it on your iPad? Here is some simple tips to transfer music from flash drive to iPad.
So if you are wondering how to transfer music from flash drive to iPad, there are several ways to do it. The methods we will suggest now are highly effective.
2 Ways to Transfer Music from Flash Drive to iPad
There are several ways to do this transfer, but today we will present you the best and most effective ones. Generally we can divide the methods in two: with or without iTunes.
1 Transfer Music from Flash Drive to iPad with iTunes
Step 1: Move Music from Flash Drive to iTunes
- Connect your flash drive to computer.
- Open iTunes on your computer.
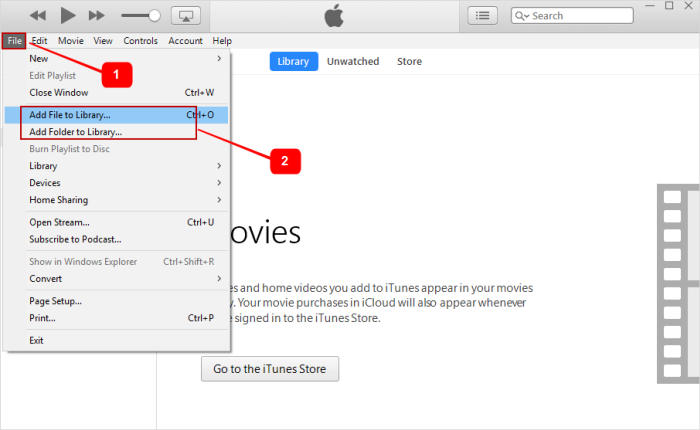
- Go to “File > Add File to Library” and browse for your flash drive.
- Select the songs you want to transfer in your flash drive. Hit “Open”. Then you can find the music on your iTunes library.
Step 2: Sync iTunes Music to iPad
- Connect your iPad to computer.
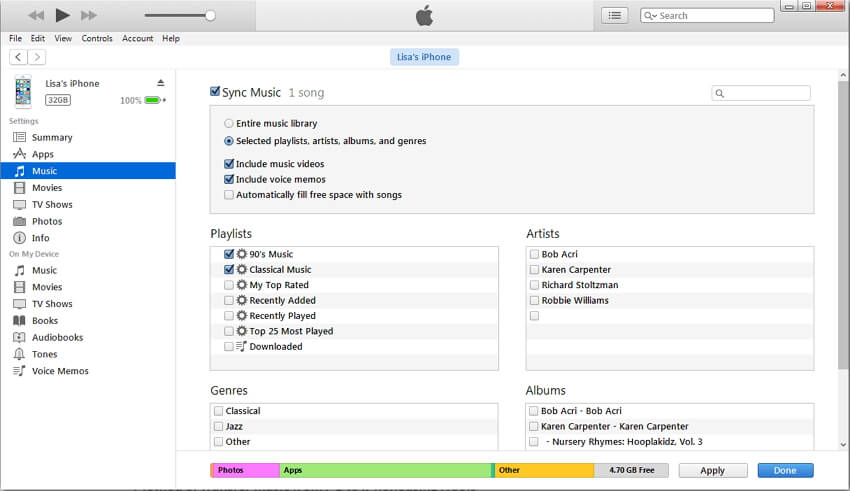
- On iTunes, click on the device icon.
- Choose “Music” from the left sidebar.
- Check “Sync Music” and choose “Entire music library” or “Selected playlists, artists, albums, and genres”.
- Once done, just hit “Sync” button at the bottom. That’s it.
Note
- The existing music on iPad will be replaced with the new songs. That also says, you will lose music.
- You can only choose the music according to playlists, artists, albums and genres instead of the specific songs.
- iTunes music library only supports some specific formats. If your music in flash drive is not supported by iTunes, you need to convert music first.
2 Transfer Music from Flash Drive to iPad without iTunes
As iTunes is not user-friendly and limited to manage our iPad media, you will feel pleasure to find the perfect iTunes alternative, iMyFone iPad Transfer. This is an all-in-one solution to freely transfer music between iPad and computer/iTunes/flash drive.
With it,
- you don’t need iTunes library as a bridge to transfer music from flash drive to iPad.
- you won’t lose any existing music on iPad.
- you can transfer music with any music formats.
iMyFone iPad Transfer offers you a good way to share purchased or free music/movies within different Apple IDs.
So how to transfer music from flash drive to iPad? Why not download its free trial and follow the steps below to figure it out?
Step 1: Launch iMyFone iPad Transfer on computer. Connect your iPad and your flash drive to computer.
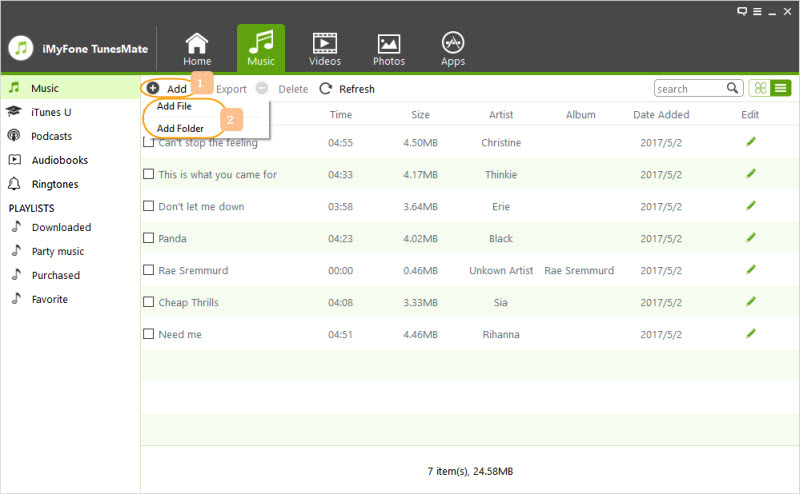
Step 2: Head to “Music” tab at the top on the transfer tool. Hit “Add > Add File” and browse for your flash drive.
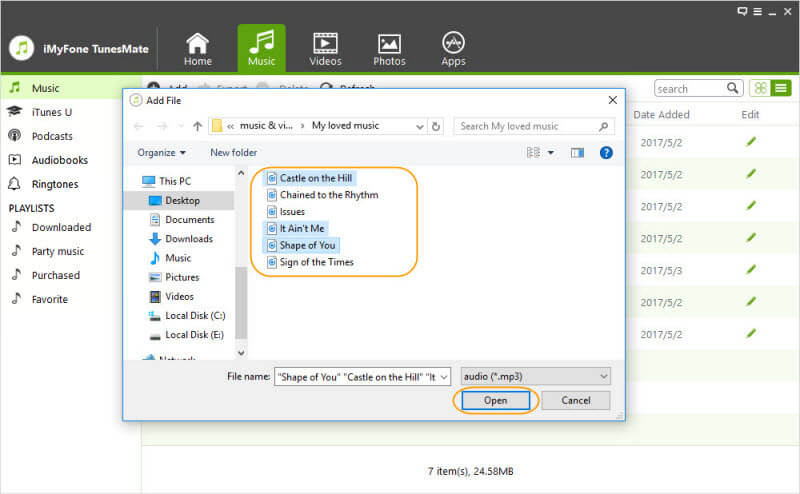
Step 3: Select the music you want to transfer and hit “Open” to begin.
That’s it! Just open the Music app on your iPad and enjoy the songs on the go.
Note
As we all know, only music with some specific formats can be played on iPad. Don’t worry. If the songs cannot be played on iPad, they will be automatically converted to iPad-supported formats when transferring.
So iMyFone iPad Transfer is not only a transfer tool, but also an automatic converter which makes it easy for you to transfer music from flash drive to iPad.
Of course, iMyFone iPad Transfer has a bundle of perfect features that give you more control of your iPad data.
- Two-way sync - 1-click to transfer music from iPad to iTunes/iTunes to iPad without losing any data.
- Sync compatibility - An iPad can be synced to 5 iTunes/computers at the same time without erasing. An iTunes library/computer can be synced to 5 iOS devices.
- Music backup - Transfer music from iPad to computer/iTunes/external hard drive to have a large music collection in one place.
- Edit music info - Manually edit music ID3 tags, like albums, genres, names, artwork, etc.
- Delete music in bulk - Delete music from your iPad music library or just remove from a playlists.
- Manage music playlists - Create/rename playlists, and add/delete music into playlists.
3 How to Convert Songs in Flash Drive with iTunes?
Step 2: If yo are using Mac, go to iTunes > Preferences. If you are using Windows, go to Edit > Preferences.
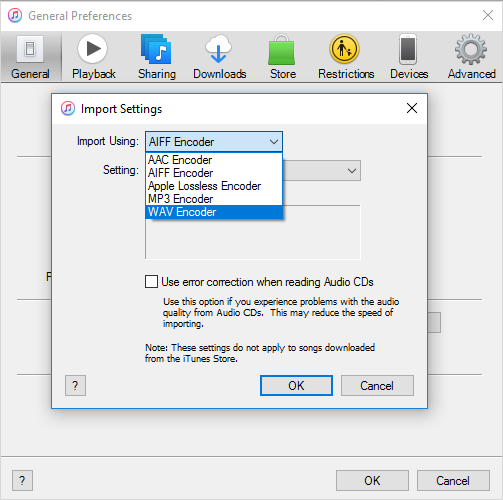
Step 3: Go to General tab, and click on Import Settings.
Step 4: Click Import Using and choose the encoding format of conversion, like MP3. Hit OK to save the settings.
Step 5: Keep holding down Option key (Mac) or Shift key (Windows) and go to “File > Convert > Convert to MP3”.
Step 6: Browse your flash drive from the pop-up window. iTunes will convert all the songs in the flash drive to MP3.
You will then find the original songs and converted songs from on your iTunes library.


 June 28, 2021