I think you have known the Apple upgrade photo feature called High Efficiency Image File Format (HEIC) since iOS 11 which also remains in iOS 13. The essence of this new photo-centric feature is to make images smaller without compromising the image quality on iDevices.
What are The Advantages of HEIC?
The most relevant advantage of HEIC is that it doesn’t compromise image quality on smartphones and Mac computer. Other advantages include:
- Ability to store single images or sequences.
- Ability to store audio/text alongside images.
- Ability to save editing operations on images.
- Ability to carry out lossless photo compressions.
- Ability to handle wide spread integration speedily and efficiently.
How to Backup/Export HEIC photos from iPhone/iPad to PC/Mac
There are many ways to backup/export HEIC photos from iPhone/iPad to Mac/PC. Many of these ways are rigorous, while some just takes a few steps to complete. Hence, we will serve the best wine first – so, starting from the best way.
Way 1 iMyFone TunesMate –Selectively Export HEIC Photos from iPhone with Pre-view
iMyFone TunesMate iPhone Transfer can be best described as an iTunes alternative. It’s a Mac/PC based tool that can backup or export HEIC photos from any iDevice to PC/Mac. During the process of transferring HEIC photos, you can preview them on your computer and selectively export the photos.
Key Features:
- iPhone Files Transfer: TunesMate can efficiently and effectively transfer any iPhone or iPad media file to iTunes, computer or Mac.
- iPhone Music Manager: With it, you can add music files from PC/iTunes to iPhones, export music from iPhone to PC/iTunes, delete music files from your iDevice after backing up your files.
- Transfer iTunes Library to iPhones without Password: It also has the capacity to transfer iTunes library between iPhone/iPad and PC/Mac, even without an iTunes password.
- Both Free and Paid Files are Supported: You can transfer both free and paid files from your iPhone to PC or from iTunes/PC to iDevice any time, making iTunes restriction powerless.
- Received lots of positive media reviews and is full compatible with iOS 13.
Steps to Backup/Export HEIC Photos from iPhone
Step 1: Download and install iMyFone TunesMate on your PC. Launch iMyFone TunesMate, and connect your iPhone/iPad to your PC using a USB cable.
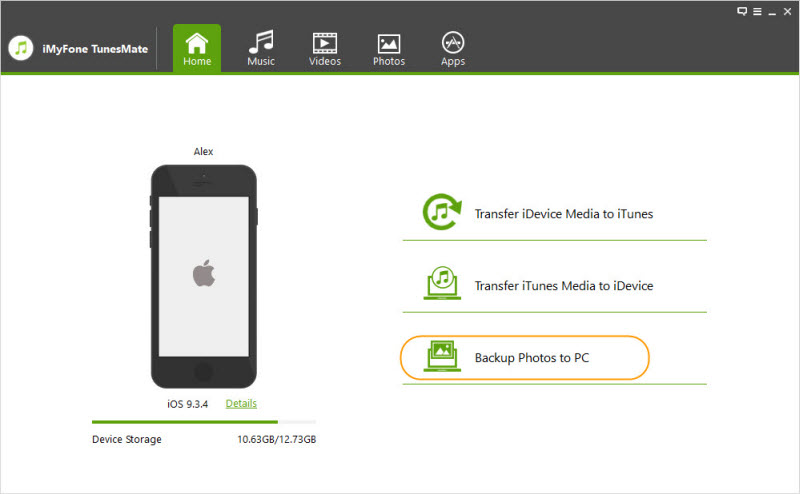
Step 2: Click “Backup Photos to PC” from the Home interface of TunesMate.

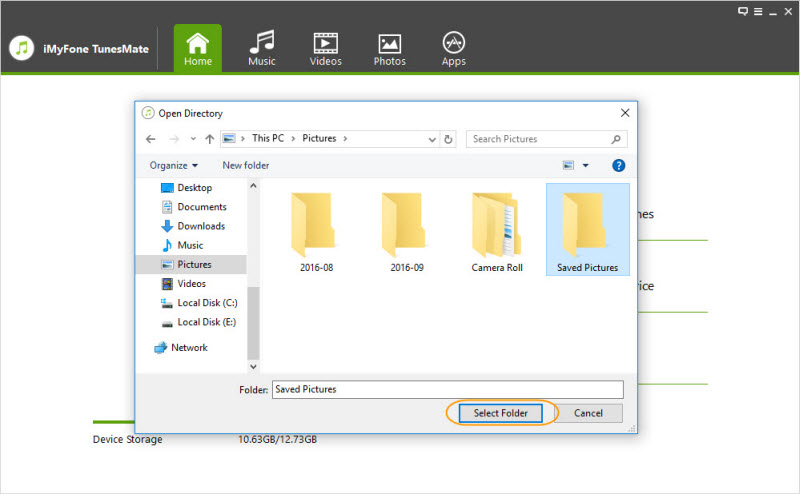
Step 3: Select the folder where you would like to store the photos HEIC on your computer. Click on “Select Folder” to start the backup process.

Step 4: Once you see “Backup Successful” you should know that the process of exporting your HEIC photos from iPhone is complete.
Way 2 Import Photos from iPhone to PC with AutoPlay
Let’s look at how to import photos and videos from iPhone to PC using AutoPlay. But, it’s necessary to mention that AutoPlay can only move Camera Roll photos but cannot move any other type of iPhone photos such as photo library and photo streams. If you want to move photo libraries and streams, you need to use TunesMate.
Nevertheless, here is how to import iPhone photos to PC using AutoPlay.
Step 1: Make sure you have the latest version of iTunes on your PC, then connect your iPhone to your PC with a cable.
Step 2: Launch Photo App on your PC. Then click on “Import” at the top right corner.
Step 3: Select the photos you would like to import and click on “Continue” to complete the process.
Way 3 Export HEIC/HEIF Photos from iPhone to Computer using iTunes
iTunes is handy for syncing photos from iPhone, iPad or iPad to computer. Here is how to sync your photos to a computer using iTunes.
Step 1: Download and install the latest version of iTunes on your PC. Launch iTunes, then connect your iPhone to your PC using a USB cable.
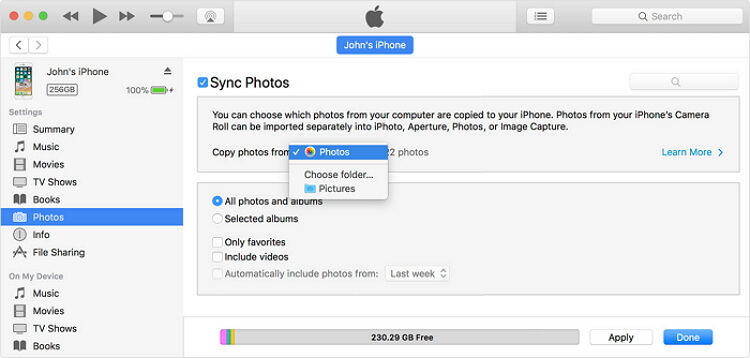
Step 2: Click on your device icon in iTunes, then click on Photos.
Step 3: Check the box next to “Sync Photos”, then choose the folder you want to sync to.
Step 4: Select “Include Videos” if you want to sync videos too, then click on “Apply”.

Way 4 Transfer iPhone HEIC Photos to Computer using iCloud
A good way to transfer photos from iPhone to PC/Mac is by using iCloud photo sharing feature. This feature is part of the iCloud service, and easy to sync photos to PC using it. Here are the necessary steps:
Step 1: Click here to download iCloud for Windows, then set up iCloud photo library using the next steps.
Step 2: Open iCloud for Windows, click on Options and select iCloud Photo Library. Click done, then Apply.
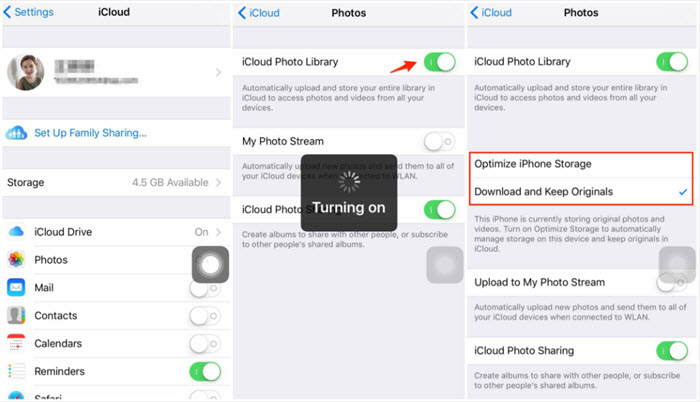
Step 3: Turn on iCloud Photo library on your iDevices.
Step 4: To download your iCloud photos and videos on PC, open File Explorer on your Windows PC.
Step 5: Click on Favorites > iCloud Photos > Download Photos and Videos. Then choose the photos you want to downloa


 June 28, 2021
