Are you facing 'iPhone Songs greyed out in iTunes'? Are you facing a similar issue of Larry? Do you want to know why you songs greyed out on iPhone? Would you like to know how to fix this issue by yourself? Then, learn 'how-to' in the following paragraphs!
Main Reasons Why Your iPhone Songs Greyed Out
You are experiencing 'iPhone songs greyed out' due to one or some of the following reasons:
- iTunes sync error
- The greyed out songs are corrupt media files
- The greyed out songs have been modified in the past
- The format of the file is unsupported or unreadable
- The songs are DRM protected
How to Fix Greyed Out Songs on iPhone
There are many simple ways to correct 'iPhone songs greyed out issue' and we've shared these solutions in the following paragraphs:

Best Solution: Sync Your Music with An iTunes Alternative
From the above, we've pointed out that 'iPhone songs greyed out' are always caused by iTunes syncing error. This simply means that if you can employ another media transfer tool in syncing your iPhone songs from iTunes, you'll be able to avoid this error.
The best answer and transfer tool for backing up or restoring iOS files from computer/iTunes to iOS is iMyFone TunesMate which has been highly spoken by lots of media, like Getintopc, Geekreply, etc.
Key Features:
- Acts a bridge between your iPhone/iPad/iPhone touch and iTunes/PC without causing any syncing issues
- You can back up your music, and freely restore it with other music libraries anytime
- Aid you to easily bypass iTunes restrictions and unknown iTunes errors.
- Transfer iOS files from iTunes/PC to iPhone/iPhone/iPad without ever opening iTunes.
- All iOS media files such as music, music video, audiobooks, podcasts, iTunes U, playlists, etc. are supported.
- Non-purchased files can also be two-way transferred from/to any device.
Steps to Fix iPhone Songs Greyed Out with iMyFone TunesMate
Step 1: Download, install and open iMyFone TunesMate, then connect your iPhone/iPhone to your computer using a USB cable.
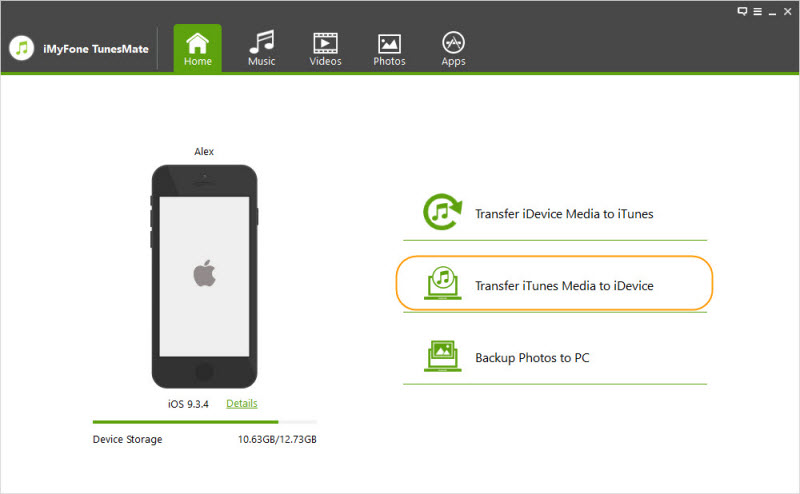
Step 2: From the home interface of iMyFone TunesMate, click the "Transfer iTunes Media to iDevice". It will scan all the media files in your iTunes library and show them in list.
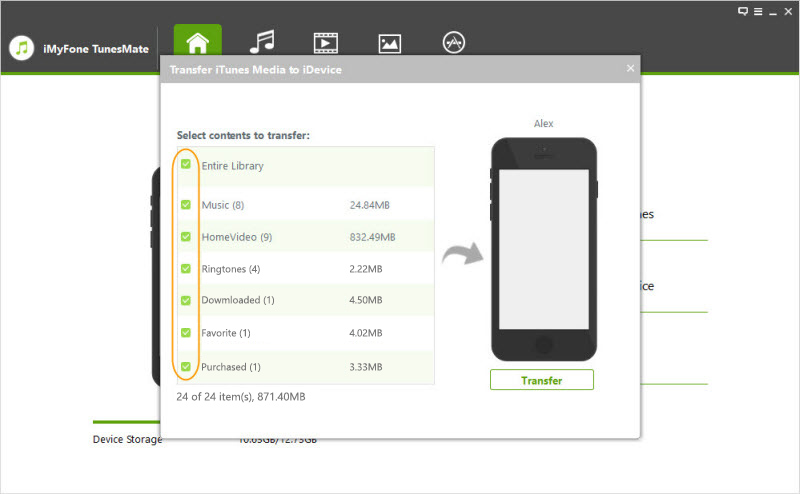
Step 3: All the media files will be checked by default. You can uncheck the specific types you do not want to transfer. And click "Transfer" button to begin the transfer process.
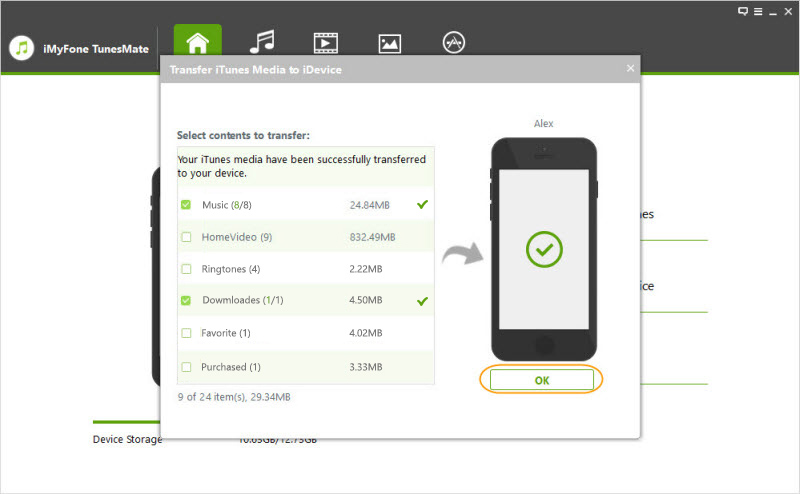
Step 4: When the transfer process finished, click on OK button. Then open your iPhone and tap the transfered music, you can play them on your device freely now!
Manually Drag and Drop iTunes Songs
Instead of automatic file syncing (which may be the cause of the greyed out songs), you can manually manage content on your iPod touch, iPhone, or iPad using iTunes. This option allows you to add specific contents from your computer to your iPhone.
Use the steps below to manually add songs from iTunes to your iPhone:
Step 1: Connect your iPhone to your computer and launch iTunes.
Step 2: Select the songs you would like to add to your iPhone from iTunes library.
Step 3: Look at the left sidebar of your iTunes, you'll see your device name. Drag the songs and drop them on the device.
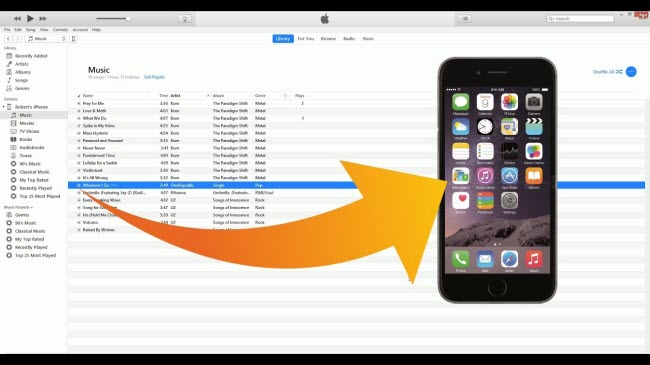
This solution can only work when you've turned “Manually manage music and videos” on. If you've not turned this option on, follow these steps:
Step 1: Connect your device to PC and launch iTunes.
Step 2: Locate your device icon, and click on it.
Step 3: Click “Summary”, then scroll down to Options and tick the box next to “Manually manage music and videos.”
Step 4: Click Apply.
Check the Audio Format
If the greyed out songs on iPhone are DRM protected, then they won't be able to play on iPhone. To check if the format of the greyed out songs follow these steps:
Step 1: Go to iTunes and click on the track that is greyed out.
Step 2: Right-click on the song and select Get Info, then click File.
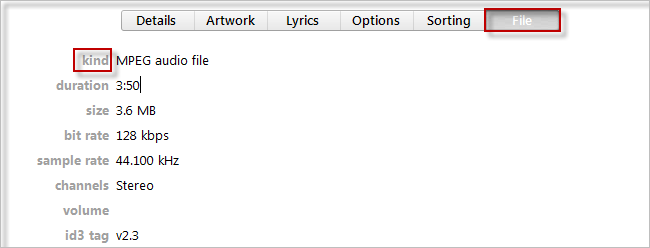
The song format will be listed on the info page. If you see “Protected” next to Kind, it signifies that the song is DRM (Digital Rights Management) protected, and is unsupported by iPhone. The way out of this situation is to subscribe to Apple Music or use a transfer tool to remove the restriction on the song.
Delete and Re-Download the Songs Again
If the greyed out songs on iPhone were actually purchased from iTunes, then you can delete them from iPhone and iTunes, and re-download them without any charges. Here is how to delete and re-download songs on iTunes:
Step 1: To delete songs on iTunes, launch iTunes and click iTunes Stores > Account > Purchased. Select the greyed out songs and delete them.
Step 2: To delete songs on your iPhone, launch your Settings app, and click General > iPhone Storage > Music > Downloaded Music > Edit > Red Button on top of artist > Delete > Done.
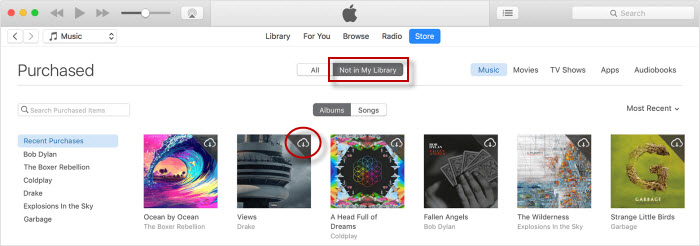
You can now re-download these songs on iTunes and re-sync them to iPhone.


 June 28, 2021
