While it’s good to have all your favorite music stored in your iPhone’s storage, it can lead to storage issues if your music collection is huge. This storage issue could be frequent in older iPhones that have low storage space. Fortunately, there are 5 ways about how to erase the music from iPhone so that you can free up needed space.
How to Erase Music from iPhone via iPhone Settings
Following are some methods to learn how to erase music from iPhone:
1 How to Erase a Single Song from iPhone
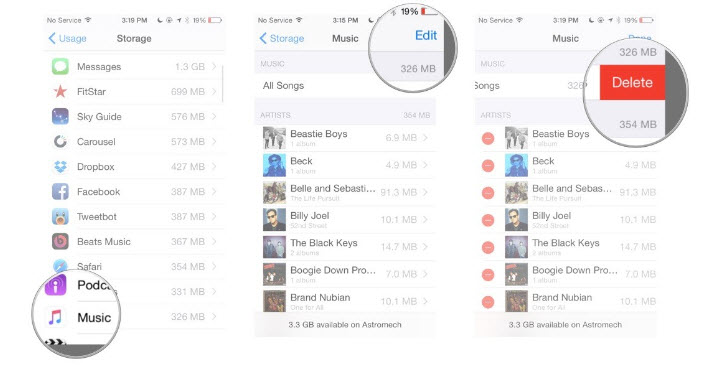
You can erase any song stored in your iPhone’s storage by using the Settings app of your device. Follow these instructions:
Step 1: Launch Settings app on your iPhone.
Step 2: Navigate to General > Storage & iCloud Usage.
Step 3: Locate Manage Storage option. It will be under Storage section.
Step 4: Now tap on Music and then select what you wish to delete. To delete a single song, you will have to tap on Artist’s name and then their Albums page. There you will find the list of songs.
Step 5: Once you find the song you wish to delete, tap Edit and select Delete. The selected song will be erased from your Music app and your iPhone immediately.
2 How to Erase an Album from iPhone
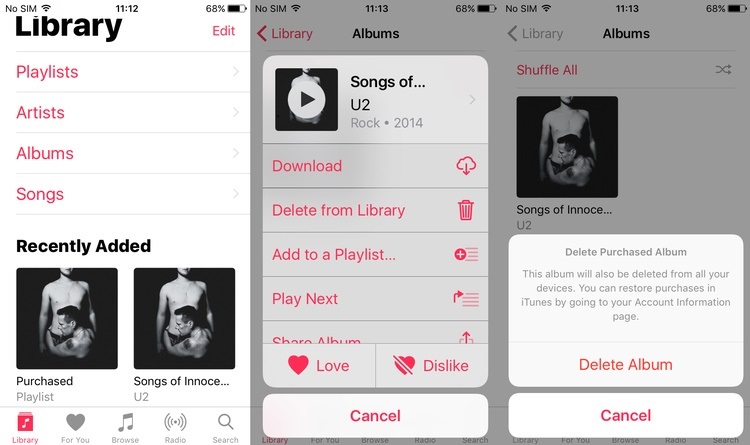
The process to delete an album is pretty much the same as deleting a single song from your iPhone via Settings app. Follow these instructions:
Step 1: Launch Settings app on your iPhone and navigate to General > Storage & iCloud Usage.
Step 2: Find and select Manage Storage. A list of apps will show up after you select it.
Step 3: Now tap Music and then instead of selecting All Songs, select the Album you wish to erase.
Step 4: After selecting the specific Album, tap Edit and choose Delete.
3 How to Erase All the Music from iPhone
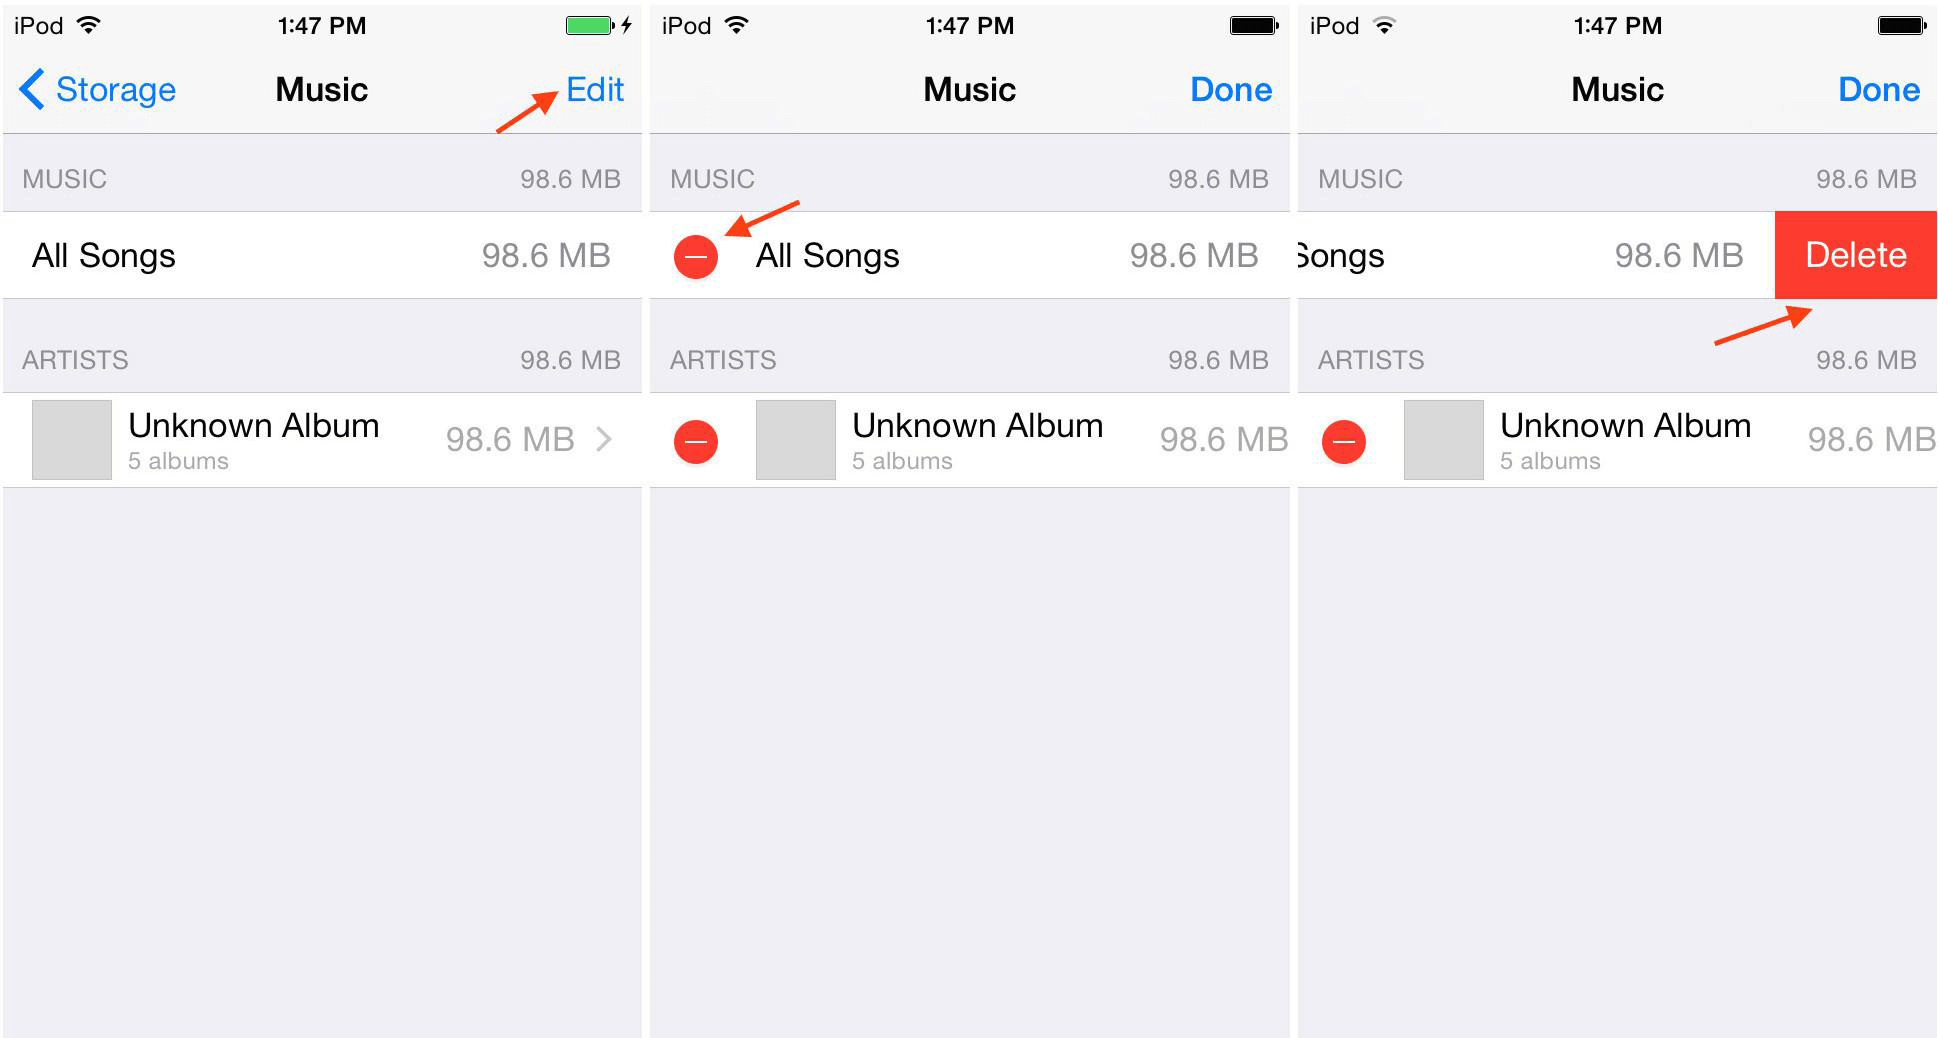
You don’t have to go through album by album if you simply want to delete all your music. You can erase it all at once from the Settings app. Follow these instructions:
Step 1: Launch your iPhone’s Settings app and navigate to General > Storage & iCloud Usage.
Step 2: Find and select Manage Storage option and then select Music app from the provided list.
Step 3: Now tap Edit option available at the top right corner, select All Songs and then tap the Delete button.
How to Erase Music from iPhone Via iTunes
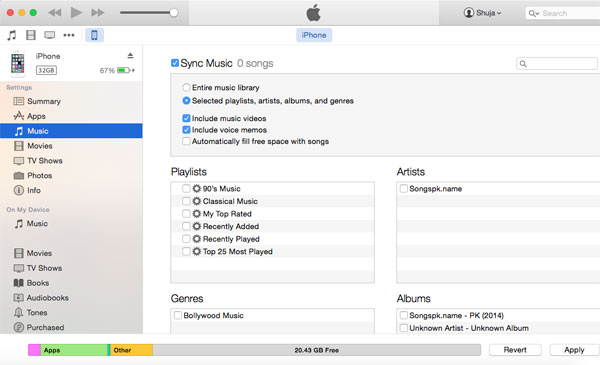
If you don’t mind plugging your iPhone into your computer to delete your iPhone music, then using iTunes to do this is a tried and tested method. Follow these instructions:
Step 1: Launch iTunes and connect your iDevice to your computer.
Step 2: From iTunes, select the iPhone icon located at the top left and then click Music option available under Settings.
Step 3: As default, the Sync Music option as well as other options including selected playlists, albums, artists, genres, etc. will be ticked.
Step 4: You just have to make sure that no songs or other items are ticked. It should say ‘0 songs’ next to Sync Music option.
Step 5: Now click the Apply button. That’s it! All your iPhone music will now be deleted.
How to Erase Music from iPhone Via iPhone Music Manager
Another way to delete your iPhone music easily is by using a good third-party iPhone music manager. iMyFone TunesMate is one of the best iPhone music managers that lets you effectively manage all your music on your computer. You can either erase the music selectively or all at once via TunesMate.
Key Features:
- Erase all your iPhone music quickly with just one click.
- Preview your iPhone music before selecting and erasing it.
- Using TunesMate to erase your iPhone music is a lot faster than using iTunes to do it.
- You can transfer purchased and non-purchased music between your iPhone and computer/iTunes freely.
- Edit music meta data such as album art, title, song number, year, etc.
- Apart from managing music, TunesMate also allows you to manage other media files such as photos, videos, apps, podcasts, etc.
Steps to Use TunesMate to Erase iPhone Music
Step 1: Launch iMyFone TunesMate on your Mac or Windows PC.
Step 2: Plug in your iPhone to your computer. TunesMate will recognize it upon launch.
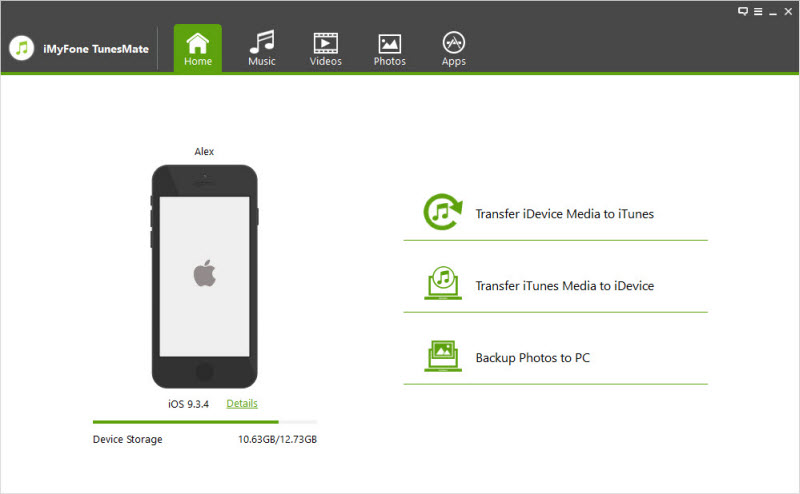
Step 3: Click Music from the list of tabs on the top of TunesMate interface. A new window will open, listing all the available music on your iPhone.
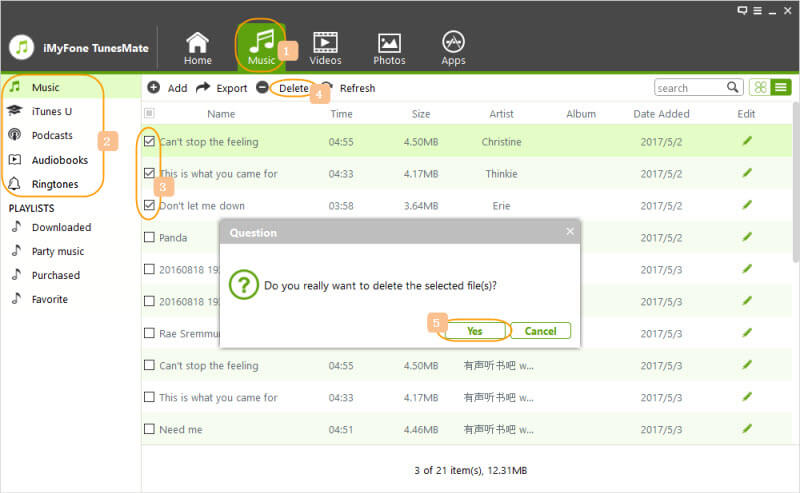
Step 4: Use the checkboxes alongside the songs to select the ones you wish to delete. After selection, click Delete option located at the top.
Step 5: Click Yes when prompted. Your selected songs will now be erased.


 June 21, 2021
