Have you transferred HEIF format images from iOS 11 to your computer, but you can’t seem to view them? HEIF is a fairly new format, so not all software supports it. Because of this, you may have to get a dedicated viewer for these images. Let’s take a look at which platforms can read HEIF natively and which can’t.
Platforms That Can Read HEIF Images:
- iOS 11 on iPhone 7 or later.
- macOS High Sierra (10.13) and higher.
Platforms That Can’t Read HEIF Images:
- iOS 10 or lower.
- Anything earlier than iPhone 7.
- Windows PC (currently).
- macOS High Sierra 10.12 and earlier.
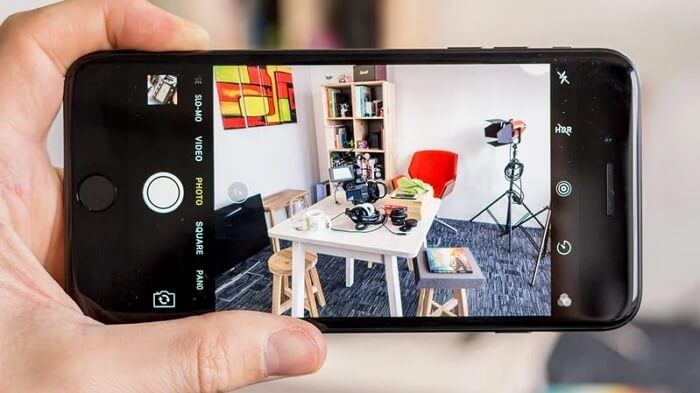
Top 3 Free HEIF/HEIC Image Viewers PC/Mac
So what do you do if you have an OS or device that doesn’t support HEIF images, but you want to view images in HEIF format. One way to get around these limits is to use a HEIF image viewer on your computer. Here are some of the best choices.
#1: iMyFone TunesMate Free Viewer
iMyFone TunesMate is software that gives you total control over your iPhone/iPad/iPod and it’s fully compatible with iOS 11. While one of its major functions is to transfer files, especially files that iTunes doesn’t normally let you transfer, if can also be used as a convenient photo viewer and organizer.
Key Features:
- Manage HEIF Images: View HEIC images on PC/Mac for free; backup or delete iOS 11 HEIC images.
- Backup your iPhone photos, from both your camera roll and your photos stream to computer/external HD.
- Transfer albums (not just photos) from iPhone to computer/external hard drive.
- Manage & Transfer Files: music, movies, playlists, photos, albums, podcasts, audiobooks, iTunes library, etc.
How to View HEIF/HEIC Photos with TunesMate Image Viewer
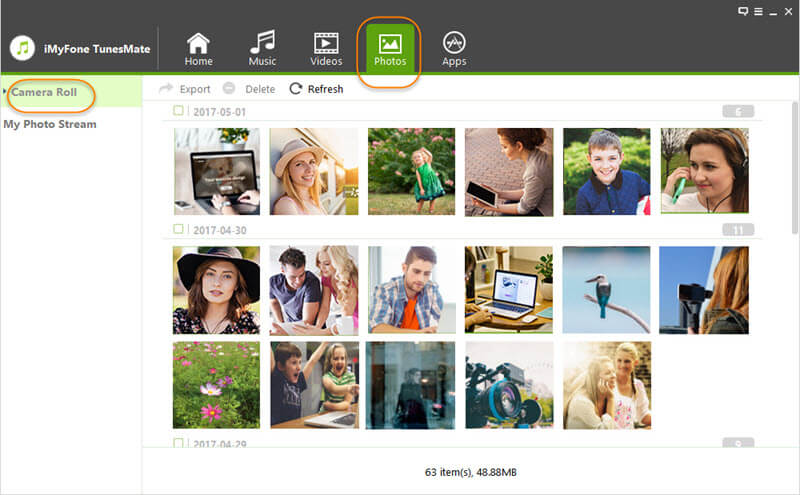
Step 1: Download and install iMyFone TunesMate on your computer. Plug your iOS device into your PC or Mac, then launch TunesMate.
Step 2: Click where it says Photos at the top. A grid of thumbnails of the photos on your device should appear on the screen, even if they are in HEIF format. (From the left sidebar, you can choose to view albums or photo stream.)
#2: iCloud
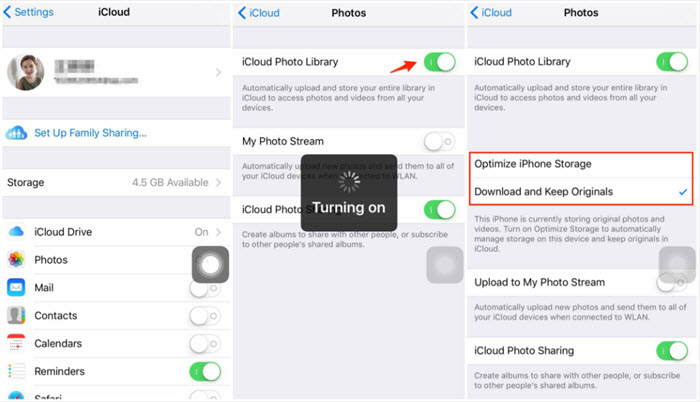
When you transfer your photos to iCloud, they will automatically be able to be previewed on your iCloud account using your other devices. You can see them as thumbnails or enlarge them. You just need to transfer your photos to iCloud first, so make sure that you have enough room on iCloud. (Remember that after 5 GB, Apple charges for space.)
Directory to store photos in iCloud: Go to Settings > Photos & Camera > iCloud Photo Library on your iPhone.
#3: Dropbox
Dropbox is a similar tool as iCloud, since it is also a cloud storage service. If you upload your photos to Dropbox, you should be able to access them from other devices, and you should be able to view them before you download them. Again, though, remember that there are limits to cloud storage services. On Dropbox, you can only store 2 GB of data before you have to get a paid account.
Of course, you need to install the Dropbox app on your iPhone/iPad.

Bonus Tips to Convert HEIF Images to JPGs
1. Convert HEIF Images to JPGs Using Secure Converter
It's much easier to convert HEIF images to JPGs or JPEGs using local converters. It's not suggested to use online converters, as the converted photos are stored in the converter's cloud server, which may cause privacy leak. That's why lots of users use iMyFone HEIC Converter for help.
Key Features:
- Convert HEIF images to JPGs without loss of quality (you can change image quality for converted images as well).
- Convert HEIF images which are in iOS 11 device or on computer.
- Convert HEIF images one at a time, or in bulk.
- View HEIF images for free if you use "Convert Single Photo".
- Converting is done locally and converted images are stored local, which won't cause any privacy leak.
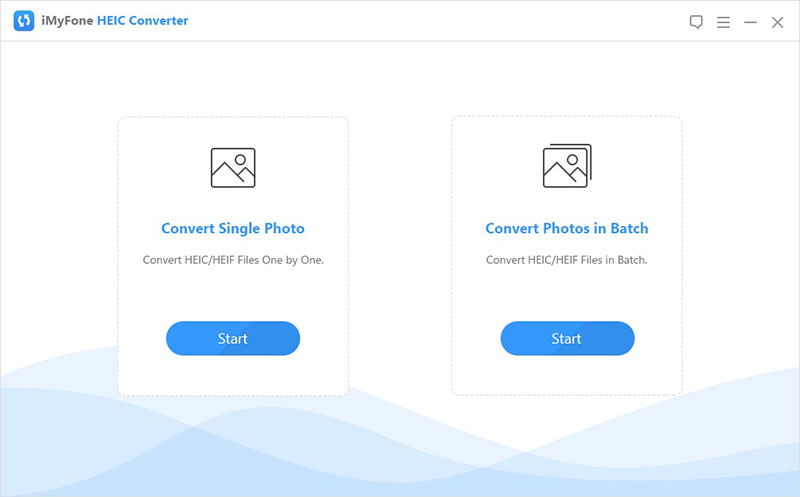
Simple Steps to Convert HEIF Images to JPGs
Step 1: Download, install and run the converter on your computer. (If you want to convert HEIF images in iPhone, connect it to computer)
Step 2: On the converter, choose "Convert Single Photo" or "Convert Photos in Batch" according to your needs.
Step 3: Click "+" button to select the HEIF photos.
Step 4: You can view the HEIF images. Before clicking Convert, you can change photo quality for converted JPGs and select a target folder to store.
2. Convert HEIF While Transferring to Computer
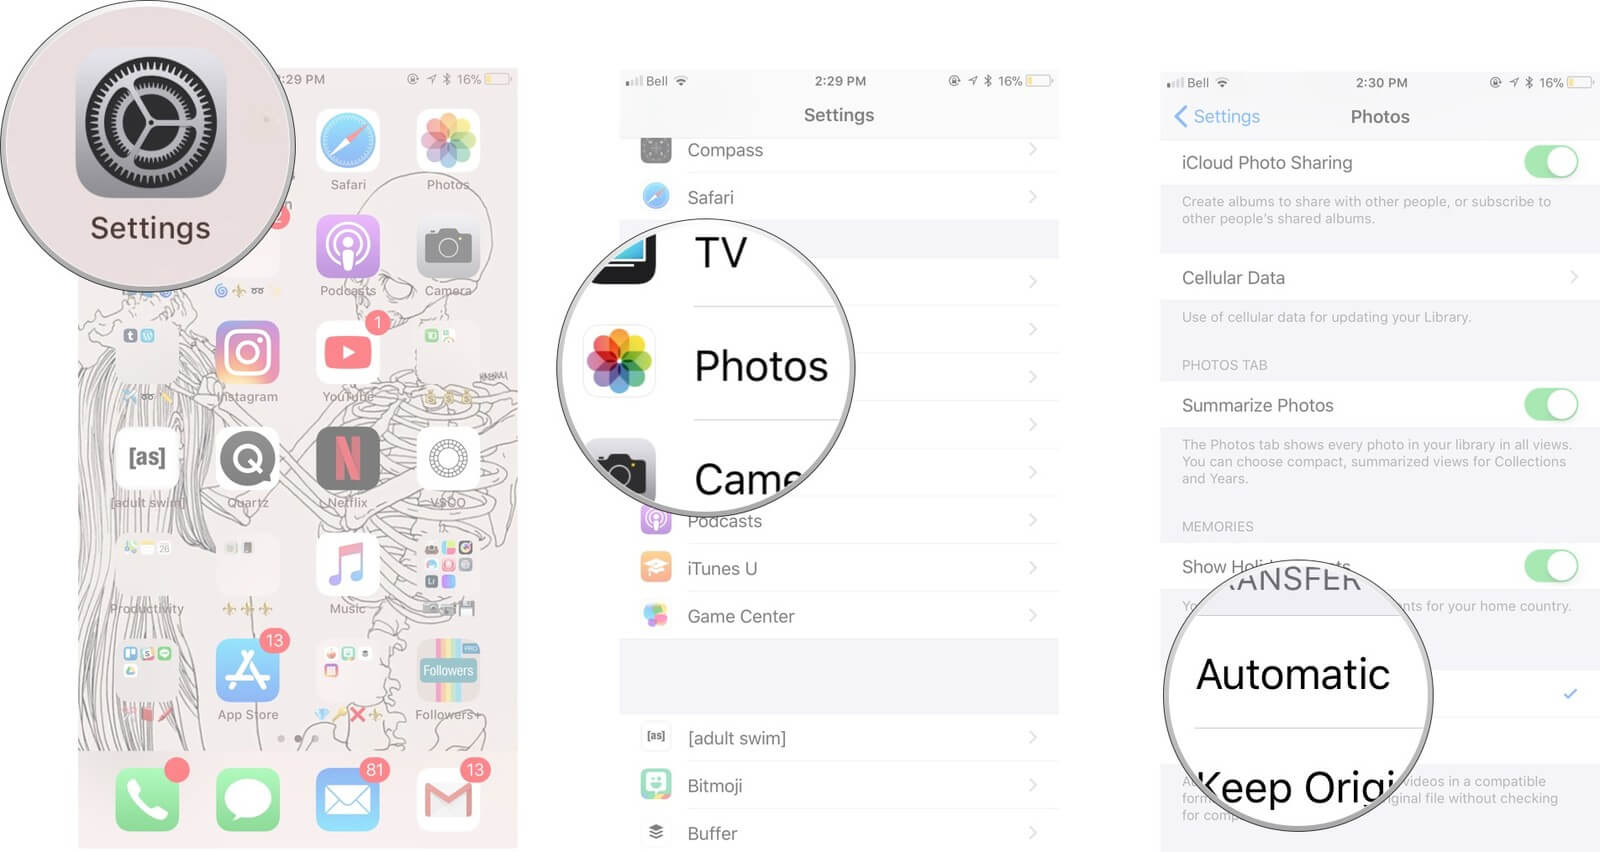
iOS also has a built-in feature to convert HEIC to JPG images, in case you weren’t aware. This occurs automatically when you’re transferring photos from your iOS device to your PC or Mac. You can make sure that it’s turned on by going on your iOS device, tapping on the Settings, then tapping Photos, and making sure that there’s a green check mark next to where it says “Automatic” under “Transfer to Mac or PC.”
Note: This will work for those photos that will be taken later, but not for existing HEIC photos.
3. Save JPG Instead of HEIF/HEIC
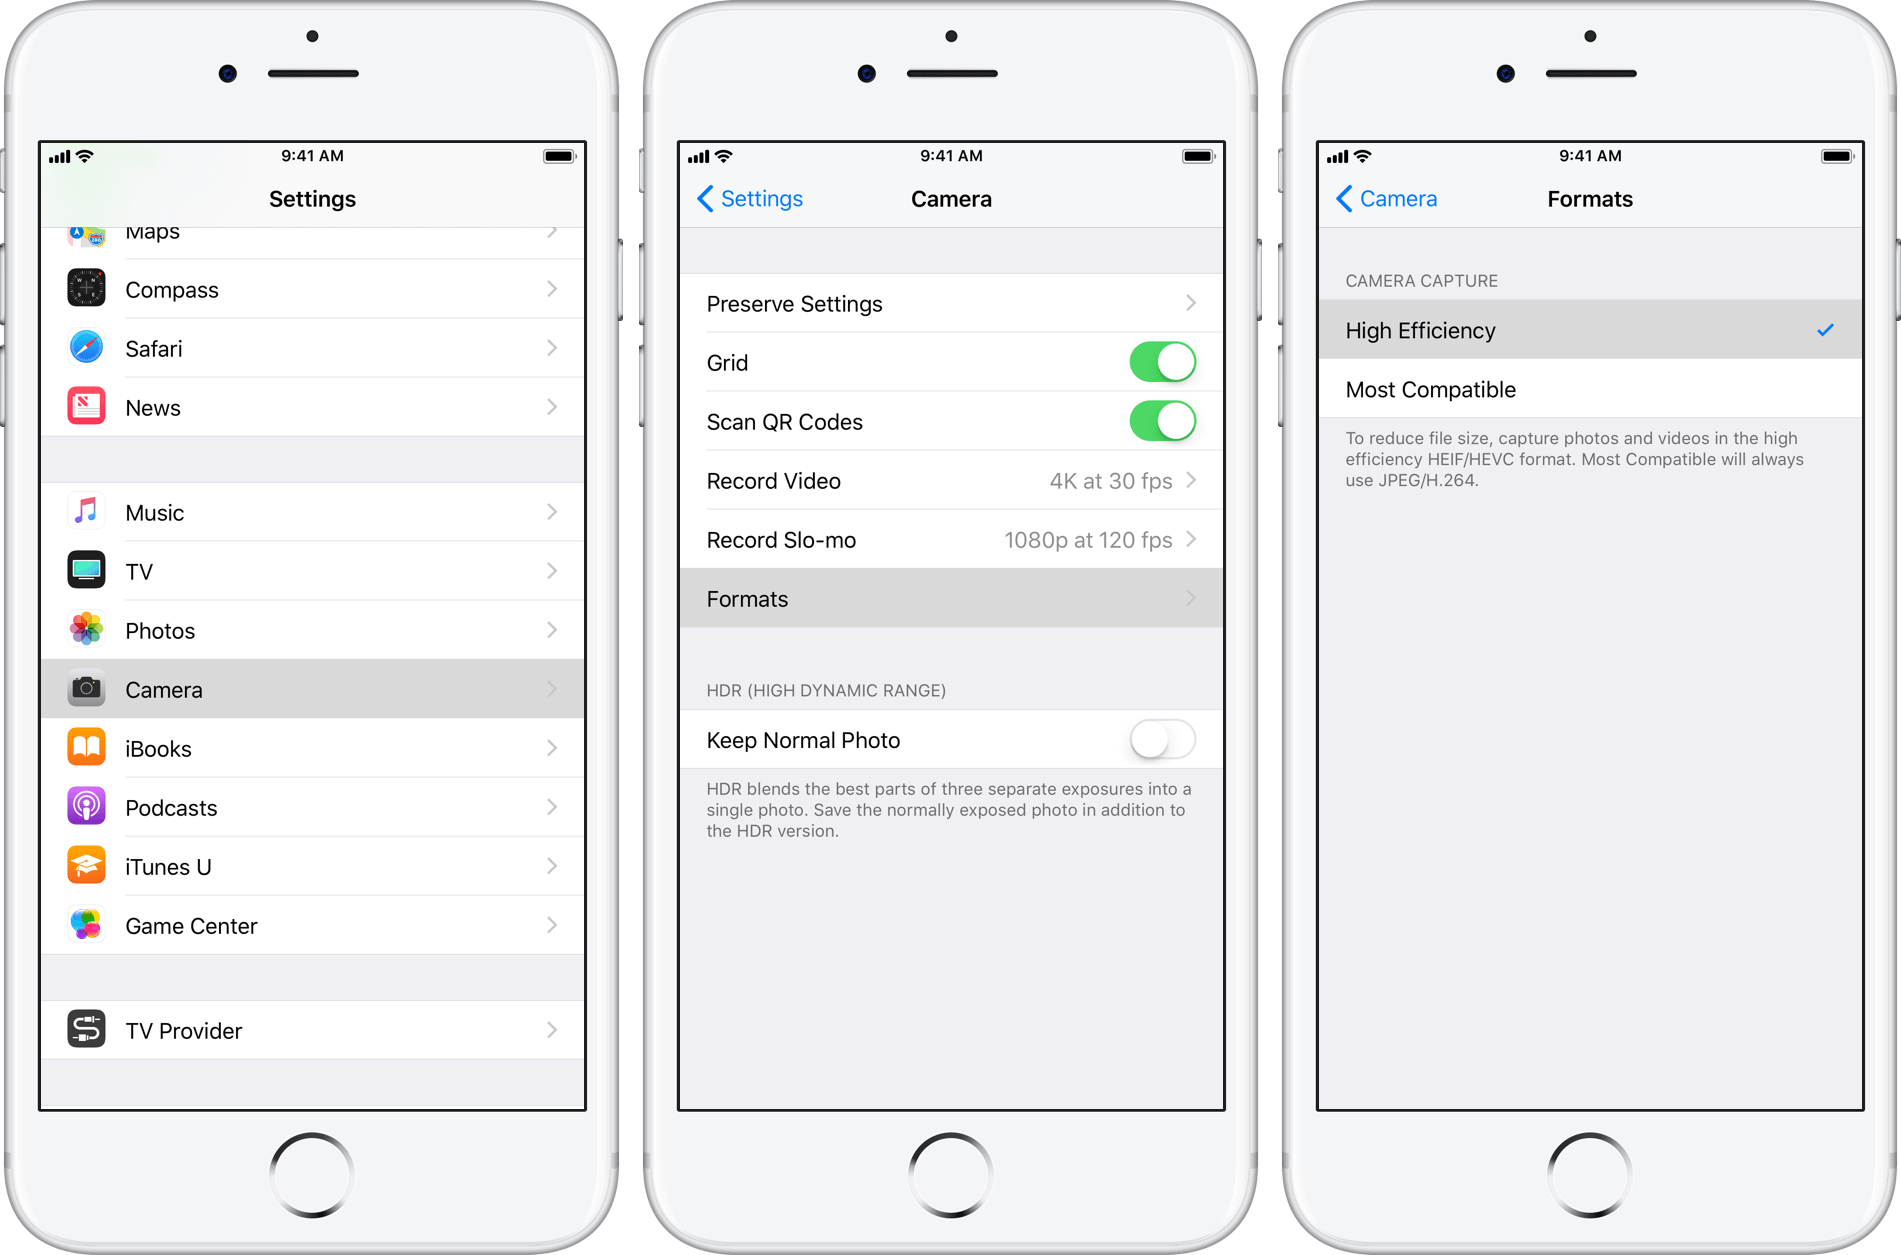
Besides, you can also choose to store photos in JPG on your iPhone instead of HEIC. This is not available for the existing photos, but you can set it up for the later photos.To do that, go to Settings > Camera > Formats and tap Most Compatible. Later, all the new photos will be JPG format instead of HEIF.
Note: This settings is not for the existings HEIC photos.


 December 17, 2021
