While getting a new iPhone sounds exciting, copying your important data can seem like a challenge. The process is time-consuming and frustrating when you have to move a variety of data files, including photos, videos, contact, texts, music, and others. If you have never attempted that before, follow the instructions on transferring data from Pixel to iPhone in the guide to simplify your device switching experience.
- Part 1: What to Do Before Transferring from Pixel to iPhone
- Part 2: Directly Switch from Pixel to iPhone on Computer [All iOS & Android Supported]

- Part 3: Transfer Data from Pixel to iPhone with Move to iOS
- Part 4: Restore Pixel Music & Photos Data on iPhone via iTunes
- Part 5: Sync Mail/Contact/Calendar from Pixel to iPhone
- FAQs: More About Transferring Pixel
Part 1: What to Do Before Transferring from Pixel to iPhone
To ensure that the transfer is smooth without unexpected glitches and errors, follow these steps.
- Restart both devices before you start the transfer.
- Disconnect the cellular connection on your Pixel phone.
- Disable all running background apps on Google Pixel. Make sure that all settings meant to optimize your connection, such as Smart Network Switch, is disabled.
- Don't use both devices during the transfer. Don't make phone calls or launch other apps during this time.
Part 2: Directly Switch from Pixel to iPhone on Computer [All iOS & Android Supported]
iTransor Pro helps users switch from Pixel to iPhone easily. It's a one-stop solution for transferring up to 18 types of data without having to download different applications. With a highly successful transmission rate, you can migrate multiple data types simultaneously.
Features of iTransor Pro
- Transfer the data you need by selectively choosing one or more types.
- It enables users to transfer data across various platforms directly.
- Data can be transferred without Wi-Fi or cellular data. All you need are a pair of cables and a computer with iTransor Pro.
- The phone data process is transparent, allowing users to check how much data they have on the phone. The transfer can be stopped or restarted whenever needed.
Steps to Transfer Data from Pixel to iPhone using iTransor Pro
Step 1. Connect Both Devices to A Computer
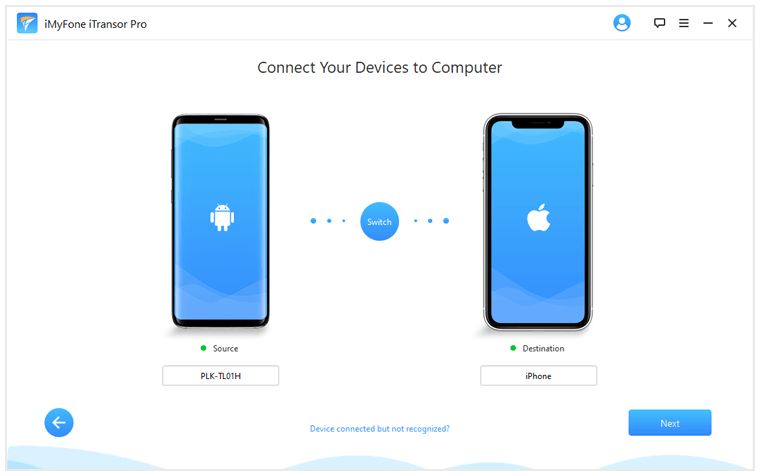
Open the program and click Transfer other data. Connect both your Pixel and iPhone to a computer using their original USBs. Unlock the screen of your iPhone and make sure that your Pixel device is the source and the iPhone is the destination. Click Next to start transfer process.
Step 2. Prepare Both Devices for Transfer
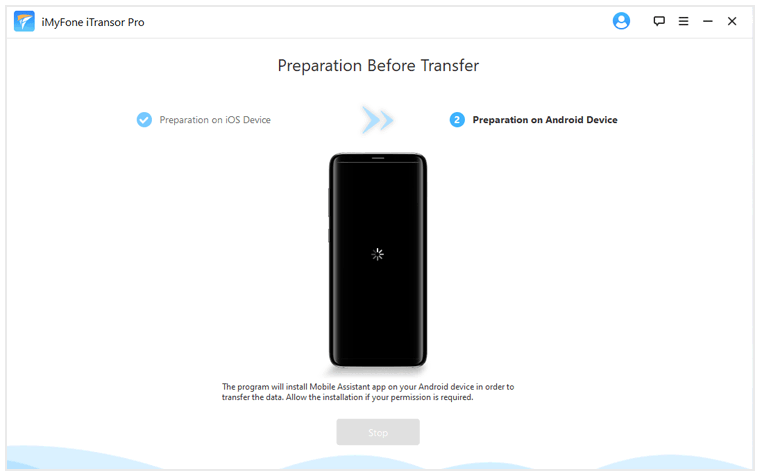
Make sure you follow all the instructions on the screen while the program prepares your devices for transfer. At this point, the program will install Mobile Assistant on your Pixel device to read and write your data.
Step 3. Select the data for transfer
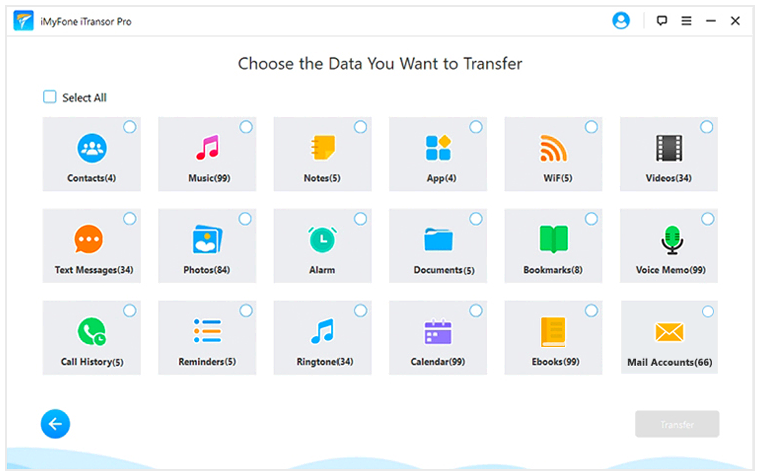
After the devices have been prepared, select the data you want and click Transfer. The transfer methods will vary according to the types of data that you select.
Step 4. Complete data transfer from Pixel to iPhone
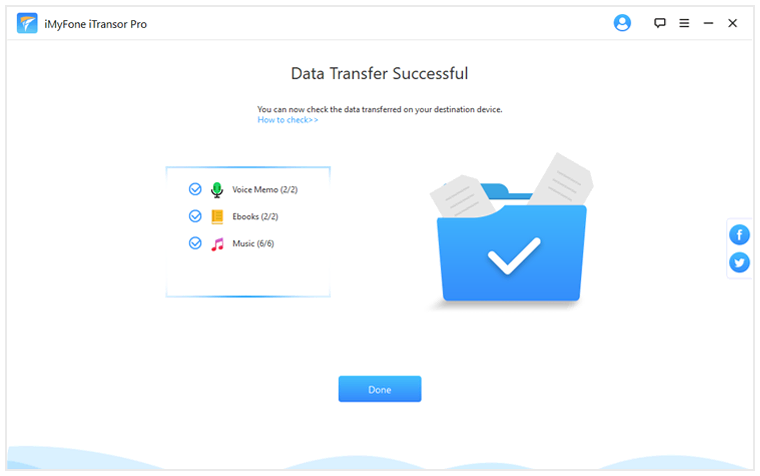
While the transfer time varies with the size of data, it usually takes half an hour to complete. You can then check the target device for all the data you have transferred.
Part 3: Transfer Data from Pixel to iPhone with Move to iOS
If you have experience of using an iPhone in the past, you might be familiar with the Move to iOS app. It is an application that helps transfer data from an existing Android device to an iPhone. Keep in mind that this option is available only when setting up a new iOS device.
Currently, the Move to iOS app allows users to transfer contacts, messages, photos, videos, calendars, mail accounts, and bookmarks. Since the application transfers data wirelessly, you have to place both devices nearby with their Wi-Fi feature turned on.
1. Choose to Set Up an iPhone from a Pixel Device
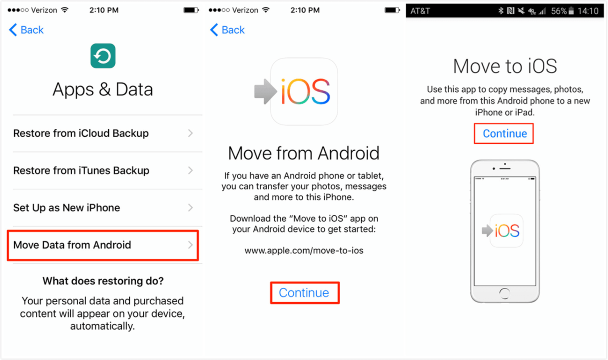
When setting up your iOS device, choose to Move Data from Android. Install the application on your Pixel phone, launch the application and click Continue to switch from Pixel to iPhone.
2. Start the Transfer of Data
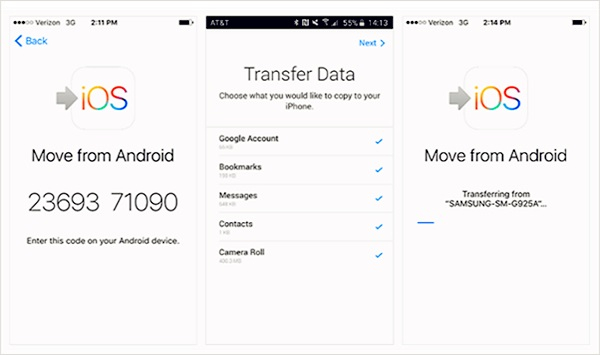
Your iPhone will display a one-time generated code that you need to enter on your Pixel phone to connect both devices. You can then select what you want to transfer. As the transfer is performed wirelessly, it may take some time to complete the process.
3. Data Transfer Is Complete
After the Pixel phone to iPhone transfer is complete, you will be prompted to disconnect the devices and access the data you transferred on your new iPhone.
Part 4: Restore Pixel Music & Photos Data on iPhone via iTunes
You can quickly restore your music and photos data on your iPhone via iTunes using a computer. If you have a stream through a music app, sign in with your name and password. However, if you use Apple Music, you can simply sign-in on your iPhone.

- Connect your Google Pixel to the computer and find your music.
- Choose the songs you want to move and put them in a folder on your computer.
- Disconnect your Pixel device and connect your iPhone to your computer.
- Open iTunes and click Music.
- Drag the music folder you created earlier to the Music section in the iTunes library.
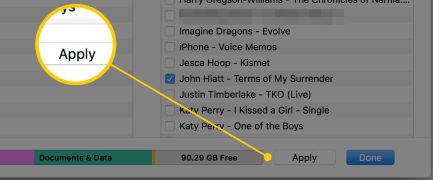
- Select your iPhone and click Music. You can opt to sync your complete library or select the songs you just added.
- Click Apply, and you can now find your music on your iPhone.
Part 5: Sync Mail/Contact/Calendar from Pixel to iPhone
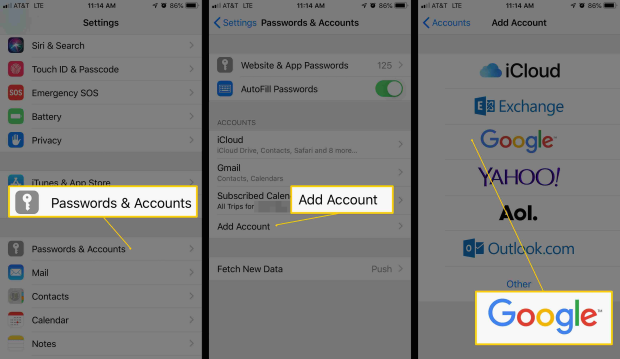
The iPhone supports Yahoo, Exchange, Google, along with many other email providers, allowing you to log in to your email account on iPhone and use the same calendar, contacts on your Android phone.
- Go into Settings, then Passwords & Accounts.
- Select Add Account.
- Select the email account.
- Enter the information regarding your account and tap Next.
- Turn on the sync option for Mail, Contacts, and Calendars.
If you use social media apps such as Twitter and Facebook to store contacts or calendars, then you can sync the related data to the iPhone or iPad via them.
FAQs: More About Transferring Pixel
1. How do I transfer photos from pixels to Macbook manually?
- Connect your Pixels and Macbook with USB cable, and then File transfers.
- On your Mac, open Android File Transfer > DCIM > Camera folder.
- Select the photos and videos you wish to transfer and drag them into the desired folder on your Mac.
- Detach the USB cable from your phone.
2. What can Google Pixel Transfer be used for?
It can be used to transfer data from an iOS/ Android device to a Pixel phone. The data transfer comes pre-installed on Pixel phones and works only if the target device is a Pixel smartphone.
Conclusion
While Pixel to iPhone data transfer may seem intimidating, you do not need to worry about losing data any more. This guide will help simplify the process and make your transition smooth. iTransor Pro will definitely back you up to transfer most data you need compared with other methods.


 April 15, 2022

