Did you know that you are able to send and receive text messages on your Mac? Imagine how convenient it can be to be able to send and reply to text messages and iMessages from your Mac. This feature has been around for a while and with a few tweaks, you can also join the league of those enjoying this great functionality. In this article, we show you how to get messages on your Mac.
How to Get Text Messages on Your Mac
To receive text messages on your Mac (from non-Apple devices or when iMessage is unavailable), follow these simple steps follow these simple steps to turn on text message forwarding on your iPhone, so the messages can be available on your Mac.
Step 1: Tap on Settings on your iPhone and then tap “Messages”
Step 2: Tap on “Text Message forwarding.”
Step 3: Tap on the toggle next to your Mac to enable the feature.
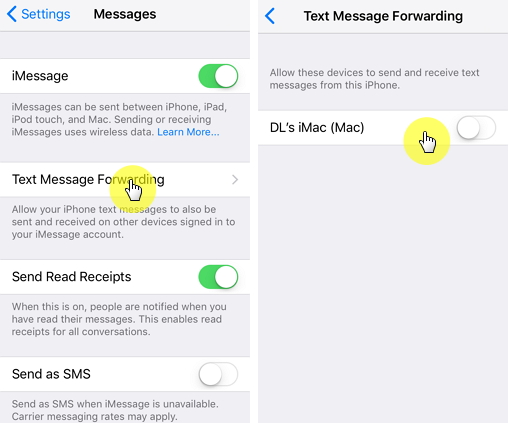
If you are signed in to Messages on your Mac and Text forwarding is enabled on your iPhone, you will be able to get text messages on your Mac.
How to Get iMessages on Your Mac
Before you can begin to send and receive text messages or iMessages on your Mac, you need to ensure that you are signed in with your Apple ID to the Mac messages app. Follow these simple to get iMessages on your Mac.
Step 1: Launch the Messages app on your Mac. If it’s your first time, you'll be prompted to sign in with your Apple ID. If you have launched the app previously, simply click on the “Messages” tab in the menu bar to continue.
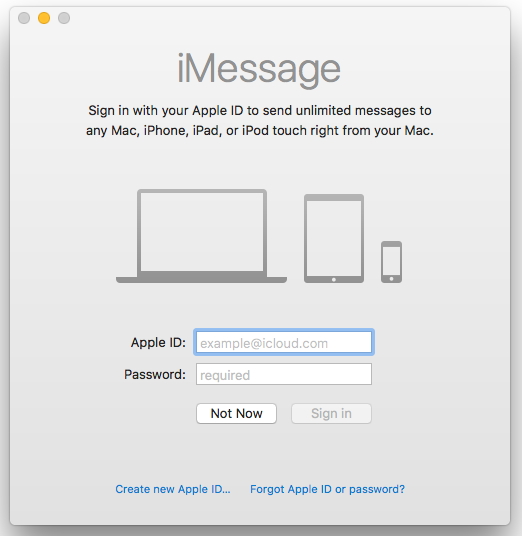
Step 2: Click “Preferences > Accounts > iMessage”. Enter your Apple ID and password.
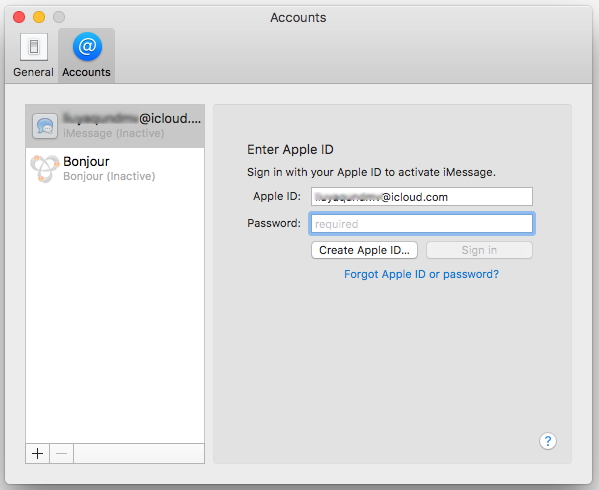
Step 3: Once you’re signed in successfully, You should see all your details including the phone numbers and emails you can be reached at as well as the number or email new conversations will start at.
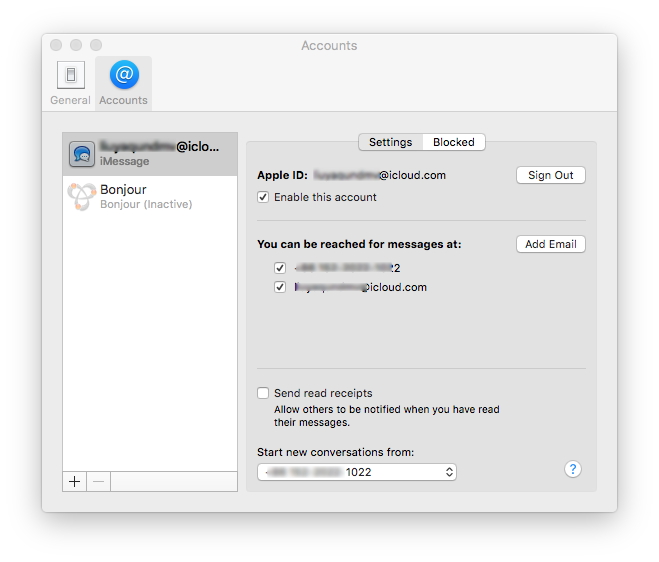
Your phone number is the default number where new conversations will start. You can change that by clicking on the number and entering a new one.
Transfer iMessages and Texts from iPhone to Mac
While the above method will work for all the new text and iMessages you get on your iPhone, there may be some old ones that you would like to transfer to your Mac. In this case you need a program whose specific purpose is to let you to export data from your iPhone to your Mac. The best one is D-Port Pro.
The following are just some of the features that make it the ideal choice.
- It is a backup and restore tool that you can use to create a backup or all the data on your device in a single click.
- Restoring data from an iTunes, iCloud or iMyfone backup is also quick and easy.
- You can also use D-Port Pro to export data from an iOS device to the Mac or from a backup file to the device or the Mac.
- It can also be used to backup only a section of your data, specifically your messages, WeChat or WhatsApp Data.
How to Transfer Messages from iPhone to Mac via D-Port Pro
To begin, download and install the program to your Mac. Once the installation process is complete, connect your iPhone to the computer and then follow these simple steps.
Step 1: Launch the program on your computer and on the main window, select “Back Up & Export from Device” from the let panel. Then, click “Export Data.”
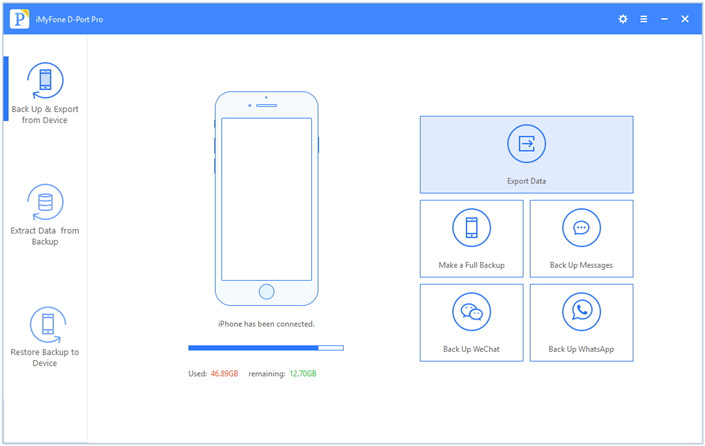
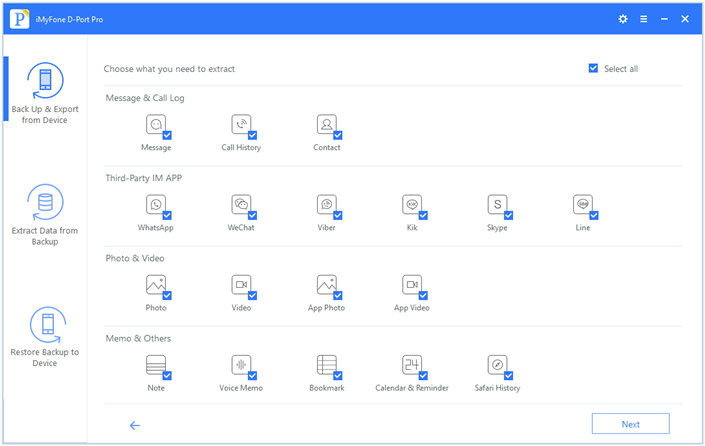
Step 2: Select “Message” as the type of data you would like to export and then click “Next.” The program will begin scanning the device.
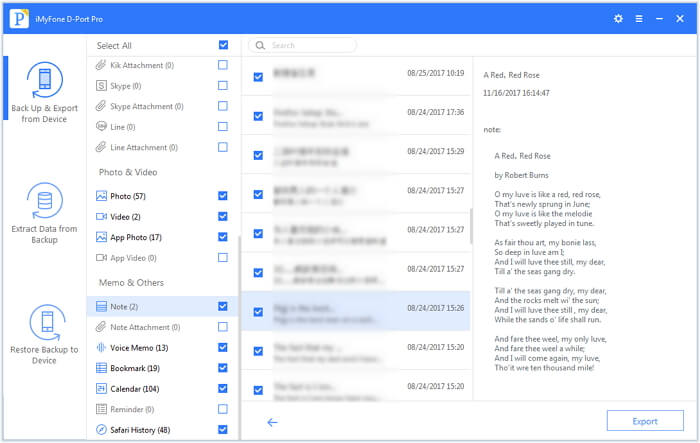
Step 3: When the scan is complete, you should see a list of all the contacts on the device on the next page. Select the ones you want to transfer to the computer, select an output format and then click “Export” to complete the process. This will export both your text messages and iMessages.
How to Stop Getting Messages on your Mac
As useful as it is to get text messages on your Mac, sometimes they can just be too much especially when you don’t remember enabling the feature. Whatever the reason, you can easily disable this feature at any time and stop getting iMessages on your Mac. Follow these simple steps to do it.
Step 1: On your mac, open the “Messages” app.
Step 2: Click on “Messages” at the top bar and select “preferences” from the list of options that pops up.
Step 3: This will open the Accounts window. Tap on your Apple ID on the left column and then uncheck the box marked “Enable this Account” or click “Sign out.”

This will easily disable the feature and you won’t be able to receive the messages on your Mac. If you want to re-enable the feature at any time in the future, follow the tutorial above to do it.


 September 9, 2021

