Welcome to AnyTo Android App! This application allows you to easily change your GPS location without rooting your device. It supports most LBS(Location based service) apps, including popular AR games and social apps.
Preparation: Installation
Download and install the AnyTo Android App:
After downloading, you can use AnyTo to change location on Android directly.
Mode Selection
1 General Mode (Default Mode)
General mode suitable for most location-based applications such as Google Maps, Facebook, WhatsApp, etc.
Steps to enable General Mode:
Step 1. Enable Developer Mode
Go to "Settings" > "About phone" > "Software information" and tap "Build number" 7 times.
Step 2. Select Mock Location App
Go to "Developer options" > "Select mock location app" and choose "AnyTo". After completing these steps, you can start changing your location.
2 Game Mode
Designed specifically for changing the location in AR games such as Pokémon Go, Monster Hunter Now, Dragon Quest Walk, etc.
Steps to enable Game Mode:
Step 1. Switch Mode
Switch the button on the main interface's right sidebar to open the Game mode or select Game mode from the side drawer.
Step 2. Select Game
Enter the game selection page, choose the game you want to play, and click "OK".
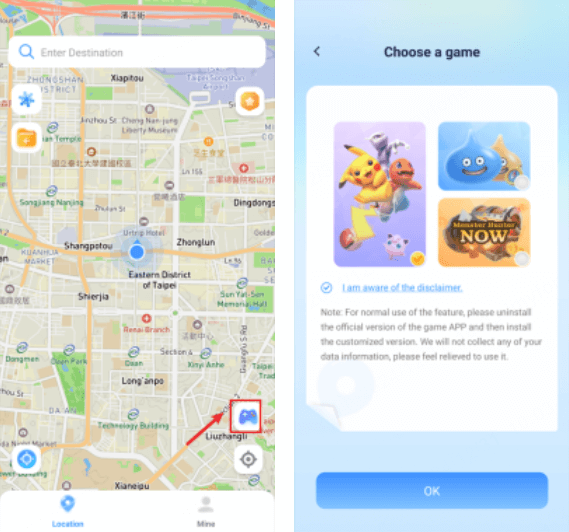
Step 3. Install Customized App
Follow the instructions to install the customized app. Change the location to the desired destination before opening the game to avoid detection.
Note
In Game Mode, location change only affects a specific game and does not impact other applications.
Change Location with AnyTo Android Version
1 Teleport Mode
Click on the map or enter the location information in the top search bar.
Select the Teleport mode and click Move.
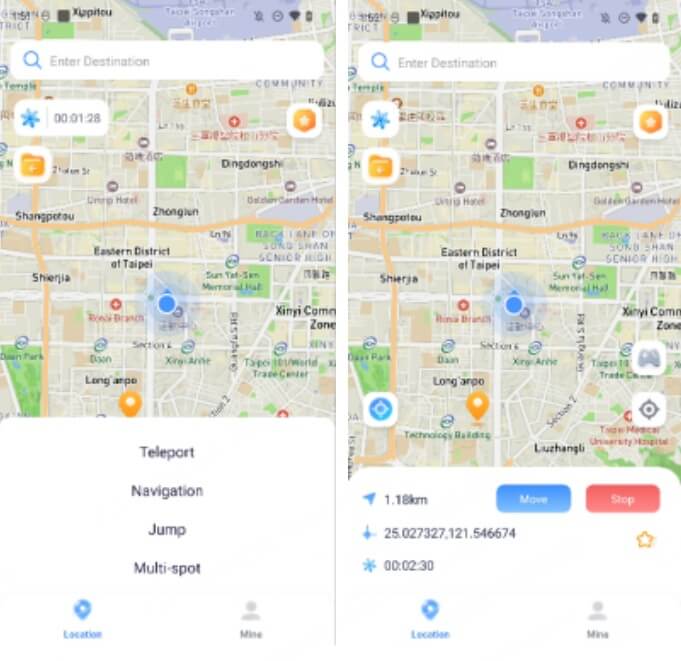
2 Jump Teleport Route (Plan Teleport Routes)
Click on the map or enter the location information in the top search bar and select the Jump Teleport mode.
Click on the map and select the location information you want to teleport to.
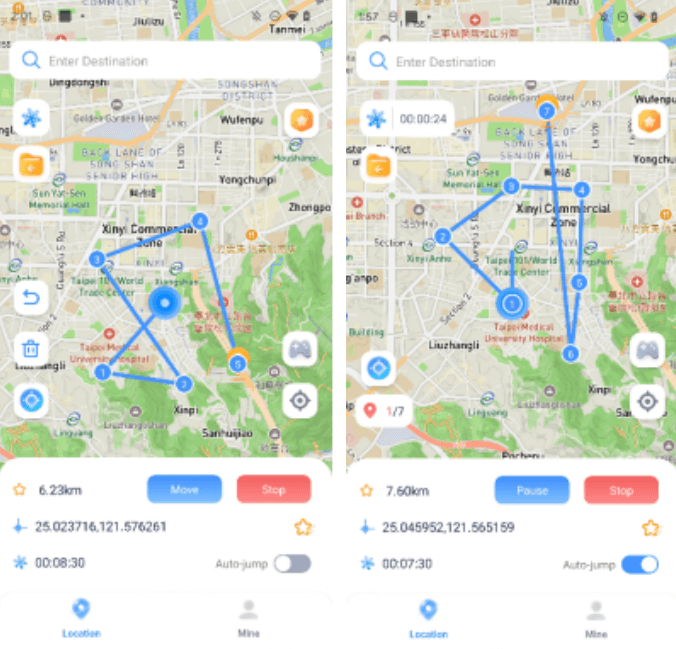
You can undo or clear the selected location information using the buttons on the left.
A. Manual Jump
After clicking Move, you need to manually click Next to jump.
B. Automatic Jump
After turning it on, it will automatically jump to the next location according to the cooldown countdown. (you need to turn on the cooldown mode first)
3 Navigation Route
Click on the map or enter the location information in the search bar at the top and select the Navigation mode.
Change the travel speed by dragging the slider below.
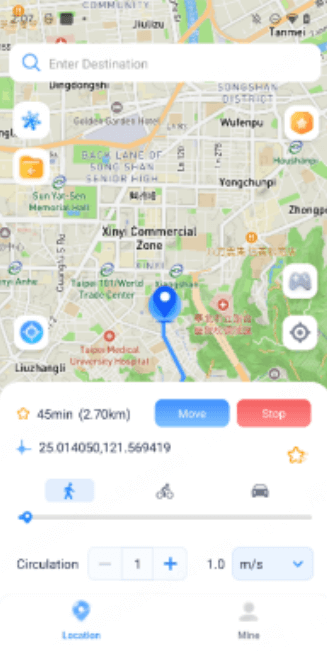
Note
You can modify the travel route and set the number of route loops by switching between different travel modes.
4 Multi-spot Mode
Click on the map or input the location information in the top search bar and select Multi-point mode.
Click on the map and select the location information you want to navigate to.
Change the travel speed by dragging the slider below.
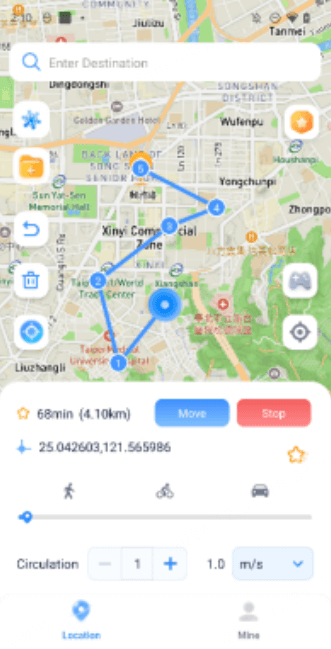
Note
You can cancel or clear the selected location information using the button on the left.
5 GPS Joystick Mode (Best for Games)
Click the Joystick button on the left to enter the Joystick mode.
Drag the center of the disc to the edge to lock the direction and move. You can drag the center of the disc to any position on the edge to change the direction of your movement.
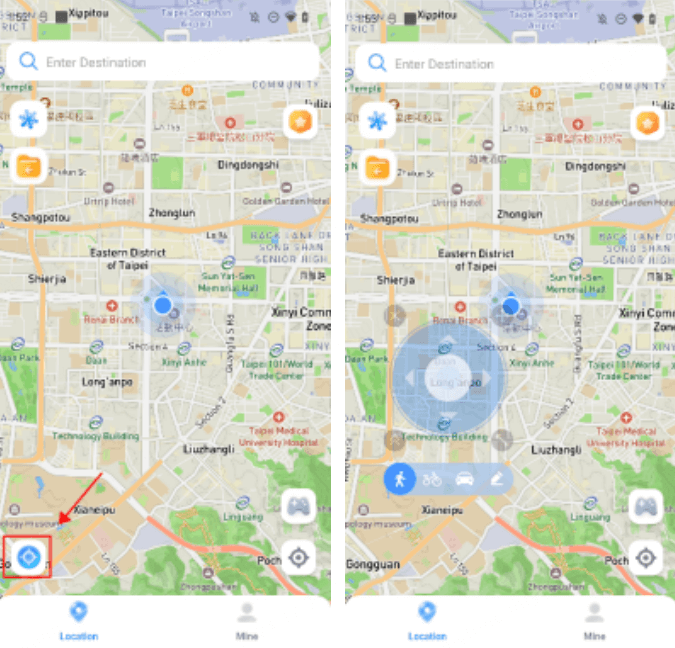
You can click the travel method below or support customization to change the movement speed.
Special Features for Game
1 Cooldown Timer (Game Assist)
Turn on the Cooldown Timer button on the left sidebar.
When you teleport to another location, the timer calculates the cooldown time based on the
distance and starts the countdown. Avoid other operations before the countdown ends to
prevent detection.
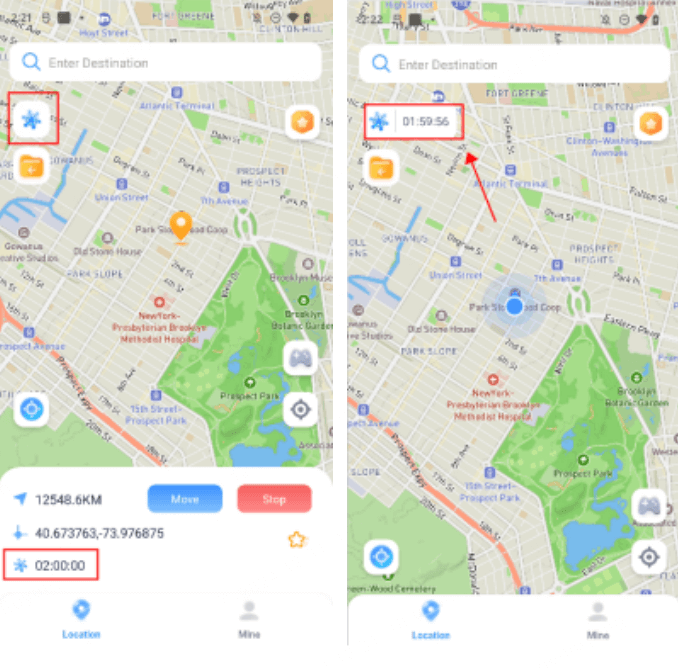
If you do not want to use the cooldown timer, click the cooldown button again to turn it off.
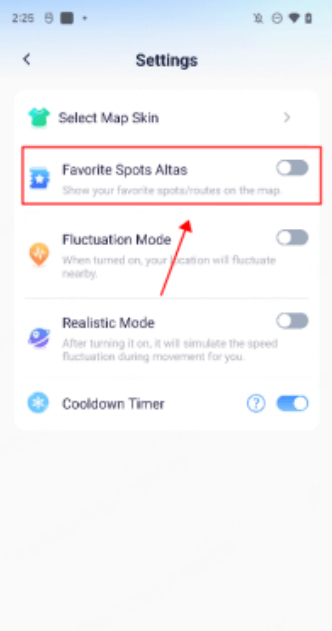
2 Favorite Spots Altas
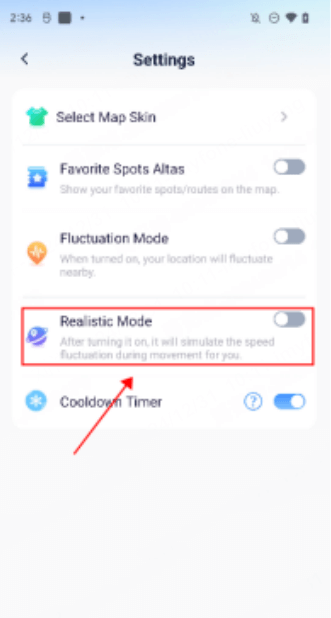
Swipe left to open the side drawer, and in the settings, you can see the Favorites Spots Atlas. Enable the switch to display your favorite spots on the map.
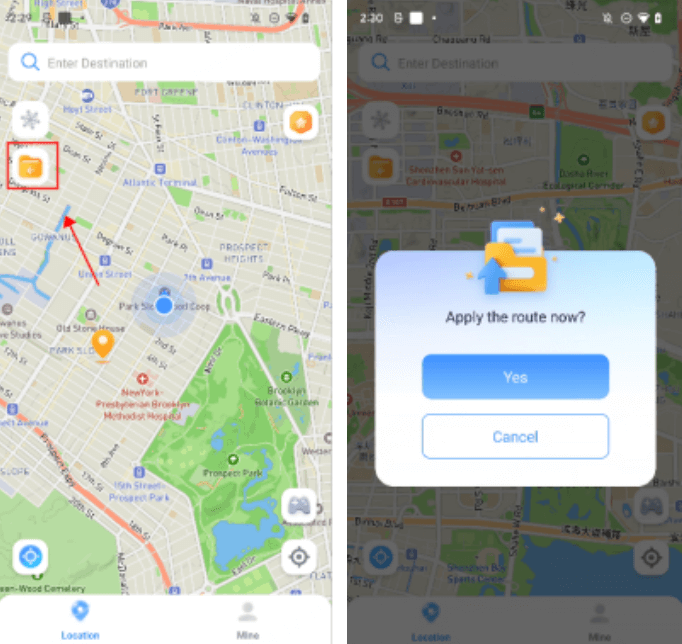
3 Import Route
Click the Import button on the left sidebar to import a GPX file from your device. Once imported, the route will be applied on the map.
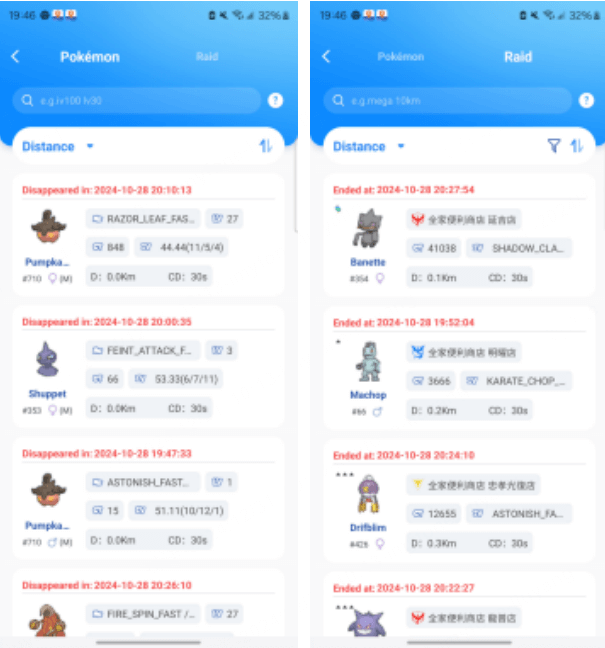
4 Pokédex
You can view Pokémon and raid battles information and search for specific Pokémon/raid battles.
Note
This function entry is only visible in game mode.
Instructions
1. The list displays the latest Pokémon/raid Battles (hatched) data by default and sorts by distance.
2. The search supports multiple conditions but needs to be separated by space, for example: iv100 2000mi 096.
3. When searching without entering the distance condition, the Pokémon/raid Battles data near the current location will be displayed by default.
4. The supported search conditions are as follows:
Pokemon
- Name: e.g. [pikachu] - Search for Pokémon named pikachu. (English only)
- PokemonID: e.g. [025] - Search for Pokémon with PokémonID 025.
- LatLon: e.g. [40.719989, -73.996789] - Search for data within 10km of the specified coordinates. If you need to search for more data, please add distance conditions.
- IV: e.g. [iv100] - Search for Pokémon with IV value 100 and above.
- CP: e.g. [cp2000] - Search for Pokémon with CP value 2000 and above.
- Level: e.g. [lv30] - Search for Pokémon above level 30.
- Gender: e.g. [female] - Search for female Pokémon. (supports searching for male, female, genderless)
- Boosted: e.g. [boosted] - Search for Pokémon with weather bonus.
Raid
- PokemonID: e.g. [146] - Search for raid battles with Moltres as the leader.
- Name: e.g. [pelipper] - Search for raid battles with pelipper as the leader. (only English is supported)
- Tier: e.g. [t5] - Search for 5 star raid battles.
- LatLon: e.g. [40.719989, -73.996789] - Search for data within 10km of the specified coordinates. If you need to search for more data, please add distance conditions.
- Mega: e.g. [Mega] - Search for mega raid battles.
- EX: e.g. [ex] - Search for exclusive raid battles.
- Hatched: e.g. [hatched] - Search for hatched raid battles. If not hatched, please search [egg].
- Boosted: e.g. [boosted] - Search for raid battles with weather bonuses.
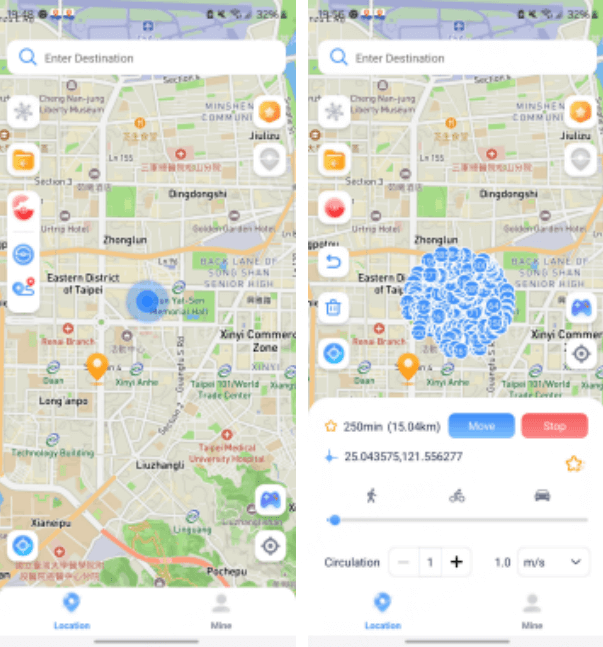
5 Automatically Generate a Route
Click to automatically generate a route for you to visit all the supply PokeStop near you.
Note
This function entry is only visible in Game mode.
Other Special Features
1 Favorites and History
Data Management
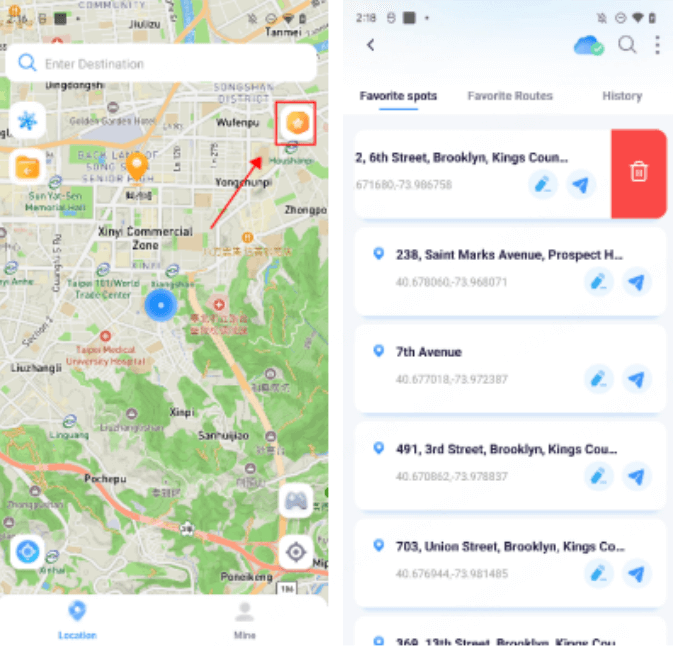
Click the favorites entry on the right sidebar to view favorite spots, routes and history. Support edit names, directly go to a spot, apply route, and delete data. Use the top search button to find desired data.
2 Import and Export GPX Files
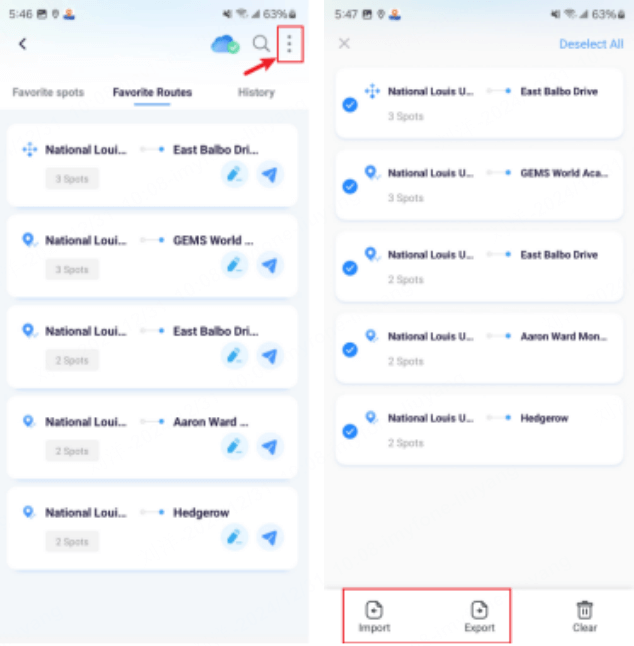
In the Favorite Routes list and click the manage button to export selected data as GPX files or import GPX files.
3 Cloud Storage Data
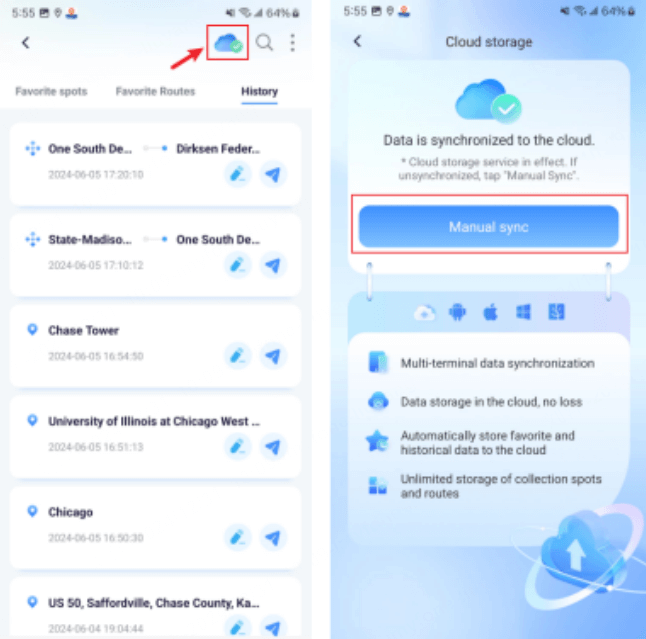
Click the cloud storage service button to check if data is synced to the cloud. If data is not synced, click “Manual Sync” to complete the synchronization.
4 Fluctuation Mode
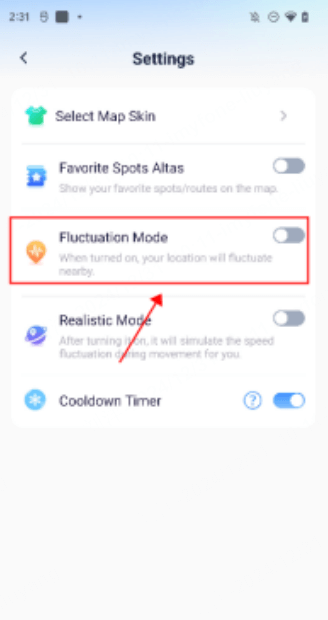
Swipe left to open the side drawer, and in the settings, turn on the Fluctuation Mode button to enable Fluctuation Mode to make the virtual location fluctuate within a few meters in teleport mode to reduce detection risk.
5 Realistic Mode
Swipe left to open the side drawer, and in the settings, turn on the Realistic Mode button to enable Realistic Mode.
6 Reset Real Location
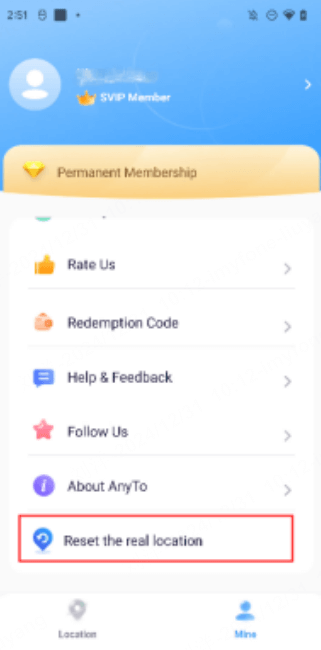
Swipe left to open the side drawer, click the Reset the Real Location entry to reset your device's actual location.
7 Map Skin
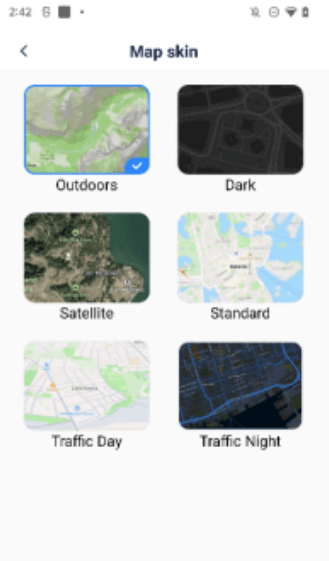
Swipe left to open the side drawer, and in the settings, click Map Skin to choose your desired map skin.
