Question: I have lots of non-purchased music on my iPhone and want to transfer them to iTunes. But the iTunes only transfer purchases, how can I do this? -- Edgar
Not everyone is able to purchase every song that they want to listen to from the iTunes store, which is why they have to download them elsewhere. However, if you want to sync non-purchased music from iPhone to iTunes then you’re going to run into some problems as iTunes doesn’t allow you to do that. Fortunately, we are going to show you the best method for transferring non-purchased music from iPhone to your iTunes – so, let’s jump right in.
Limits of Using iTunes to Transfer:
- iTunes simply doesn’t allow you to transfer non-purchased music from iPhone to iTunes or from iPhone to computer.
- If you want to transfer purchases from iPhone, all the purchases will be transferred together. You can select to transfer.
- Syncing iTunes library to iDevice will delete the original library on device as well.
- An iPhone can be synced to one iTunes library, or your device will be erased.
- Secondly, iTunes is full of bugs and problems which are hard to fix.
Transfer Non-Purchased Music from iPod to iTunes (For Win)
If you are using an iPod, you can consider this way here to transfer non-purchased music from iPod to iTunes for free. But it’s more complicated, and it’s not available for iPhone and iPad. If you are using a Mac, this way is not suitable for you.
Step 1. Connect your iPod to computer with a USB cable.
Step 2. Open up the “My Computer” window andyour iPod will be shown up there.
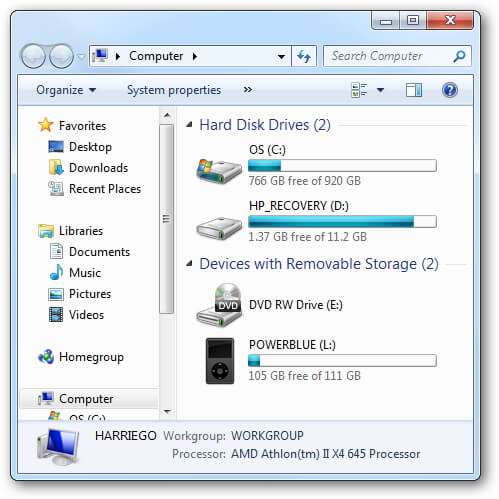
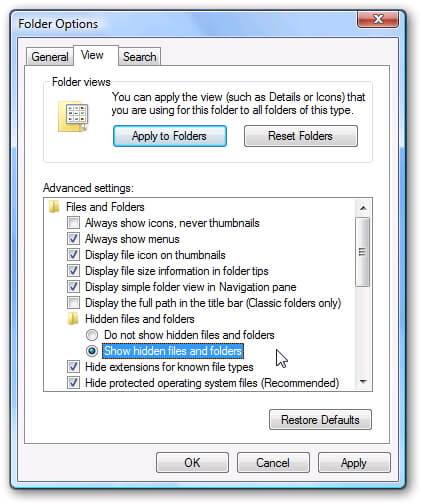
Step 4. Head back to the “My Computer” menu and double-click on your iPod to open up its files.
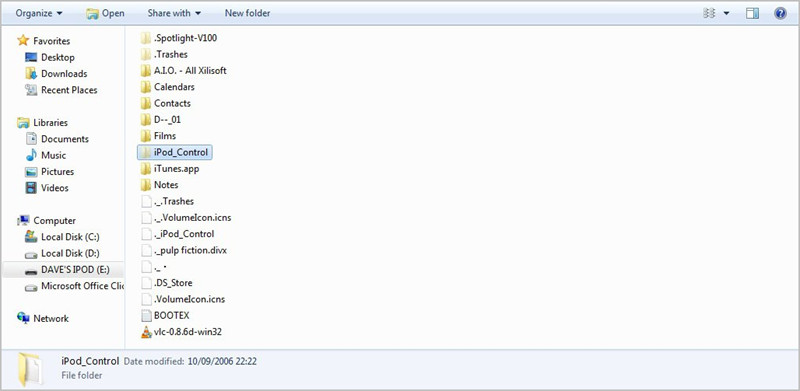
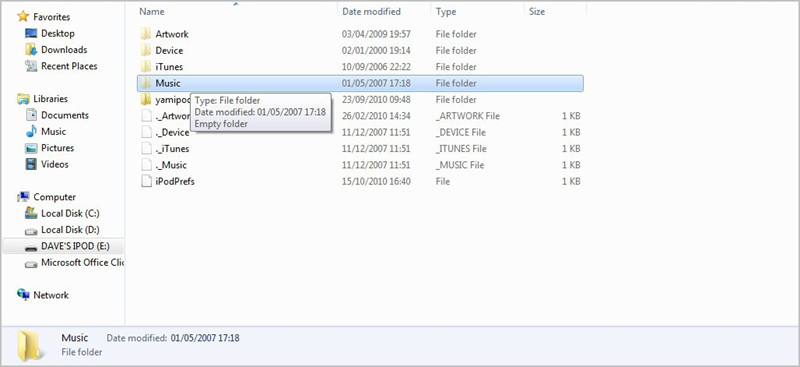
Step 5. Locate and enter the “iPod_Control” folder, folder by the “Music” folder. Copy this folder to your desktop.
Step 6. Open iTunes, click on “File > Add Folder to Library”.
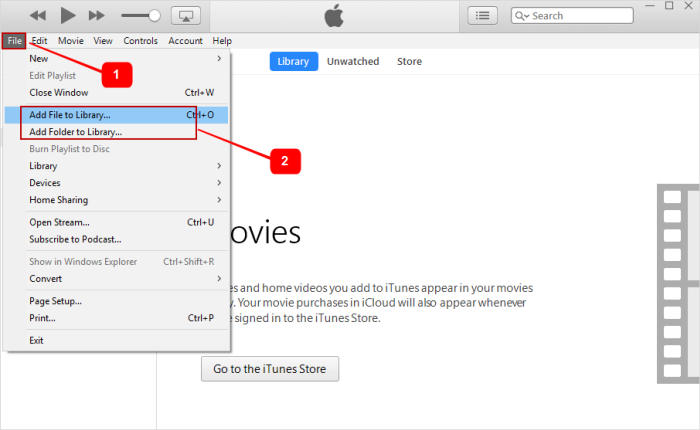
Step 7. Head to your desktop and select the music folder which you just copied. Click “Open”. After a few minutes, you will be able to find your iPod’s music in your iTunes library.
Step 8. Lastly, head to the “Edit > Preferences” menu and click on the “Advanced” tab. Check the box next to “Keep iTunes Media folder organized”.


 September 27, 2021