Hi there! Wondering why you're confronted with "This iPhone requires backup files to be encrypted"?
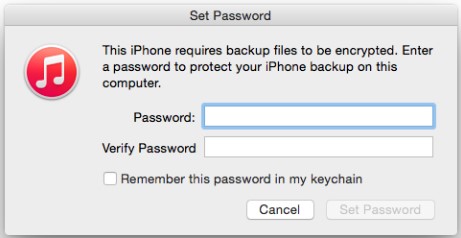
Basically, encrypting your files is like allowing your device to "mess your files up" in such a way that only your device understands. In other words, encryption is the process of encoding files / other forms of data. The purpose of encrypting your files is now clear to you, yeah? It prevents unauthorized access to your files thereby protecting your privacy in a secure manner.
Should I Encrypt iPhone Backup?
Whether you should or not encrypt your iPhone backup is a choice entirely left to you; however, I will show you why and how to. Encryption is a go-to option for securing your privacy especially with the increased usage of public WiFi. If unauthorized persons have access to your encrypted files, the files will simply be a bunch of indecipherable characters on their devices.
In this article, you'll learn how to encrypt your iPhone's backup or simply bypass/get rid of the message-"This iPhone requires backup files to be encrypted". Also, this tutorial will cover how to unlock encrypted iPhone backup. Now, onward to the necessary steps to follow to encrypt iPhone backup.
How to Encrypt iPhone Backup
The encrypt backup feature in iTunes will lock and encodes in data. But iTunes does not automatically encrypt your backup. You need to turn on the Encrypt iPhone Backup option when you want to make a backup for the first time. If you wish to encrypt your iPhone backup, the under-listed are steps you should follow.
Step 1: First of all, open iTunes on your computer.
Step 2: Connect your iPhone to iTunes.
Step 3: Your device should be listed after connecting it properly. Select your device from the list in the upper-left corner of the iTunes app window.
Step 4: Select "Encrypt iPhone backup" which is found in the "General" or "Summary" pane.
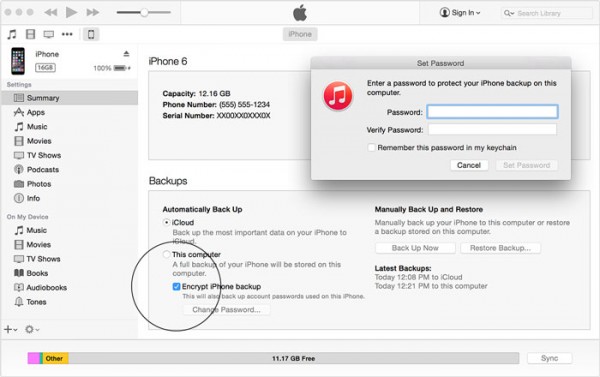
Step 5: A password will be required before proceeding. As usual, set a password you can always remember.
Step 6: Confirm your password.
How to Disable "This iPhone requires backup files to be encrypted"
If you skipped the previous section, you obviously do not want to encrypt your iPhone backup. We've got you covered! Generally, "This iPhone requires backup files to be encrypted" is caused by Service/VPN providers. To get rid of this message, simply follow the steps provided below.
On your device:
-
Open Settings.
-
Navigate to General.
-
Next, click on Profile and look for the app's configuration profile.
-
Click "Delete Profile". You might be asked to enter your device password. If so, simply enter your device password in the box provided.
-
Click "Delete".
After carrying out the steps listed above, do the following:
-
Open iTunes.
-
Navigate to the "General" / "Summary" pane.
-
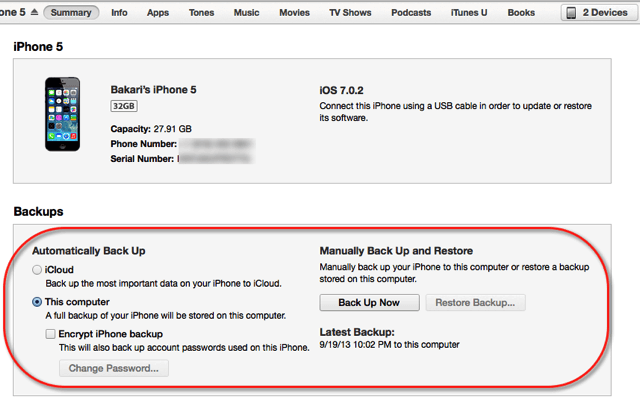
Make sure "Automatically Back Up" is set to the value of "This computer".
-
If "Encrypt iPhone backup" is checked, please uncheck this.
-
Press "Back Ups Now".
When complete, the backup files will be stored in certain folders on your computer.
-
On the Mac OS, iTunes stores backed up files in /Users/[YOUR_USERNAME]/Library/Application Support/MobileSync/Backup.
-
On Windows Vista, Windows 7, 8 and 10, iTunes stores backed up files in Users[YOUR_USERNAME]AppDataRoamingApple ComputerMobileSyncBackup.
If You Can't Remember the Password for Your Encrypted Backup
Sometimes, you might forgot the password for your encrypted backup. Issues like this can be really frustrating. Good thing is that there are lots of professional teams working tirelessly to solve such issues with simple and easy-to-use software/apps. One of such awesome program is iMyFone KeyGenius! It decodes passwords for iTunes backup in all situations! You can think of it as a "Superman" of sorts when it comes to issues like this.
Top Features of iMyFone KeyGenius
- Unlock iTunes backup encryption with expert advanced algorithms.
- Featured with three powerful attack methods: Dictionary Attack, Brute - Force with Mask Attack and Brute - Force Attack.
- Ensure high success rate based on the state-of-the-art techniques.
- Only 3 steps to unlock iTunes backup password.
- Support all versions of iTunes and iOS devices.
How to Unlock iTune Backup Password with iMyFone KeyGenius
Begin by downloading and installing iMyFone KeyGenius on your computer. Then launch it. To recover the lost password, you need to choose Unlock iTunes Backup on the main interface. Then follow the simple steps below to unlock your backup password using iMyFone KeyGenius.
Step 1: After you choose Unlock iTunes Backup on the main interface, all your backup files will be listed on the screen. Choose one and click Next.
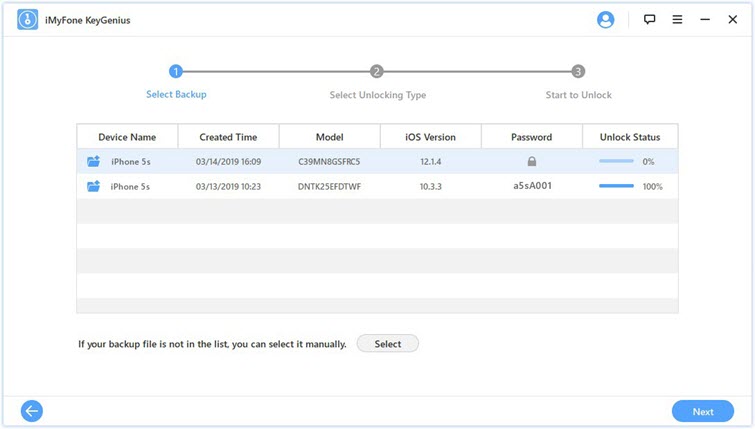
If you are unable to find the backup file in the list, you can tap on the Select button to manually choose the file on your computer.
Step 2: Choose one attack methods from the three according to your situation.
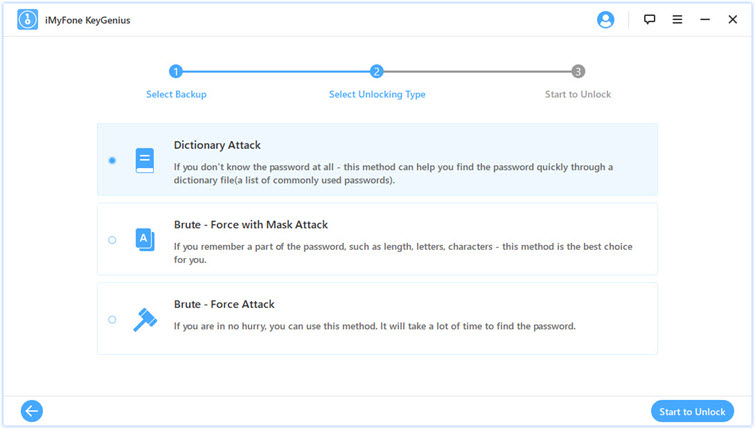
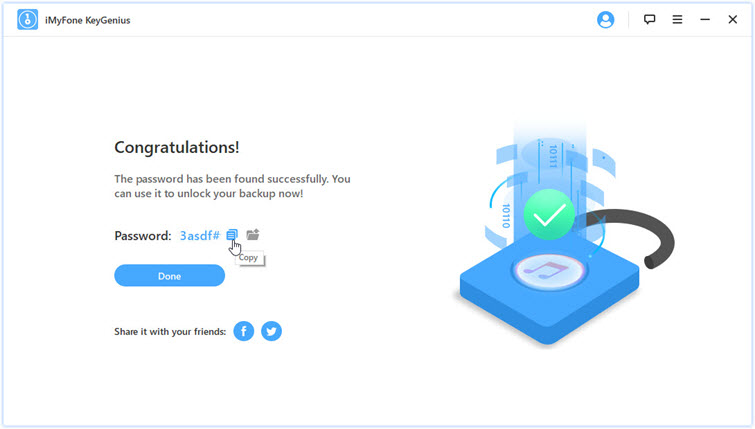
Step 3: Click on the "Start to Unlock" button to begin the unlock process. The password will be shown on the screen once completed. Now, you can copy the password to access your iTunes backup.
That's it for now. You can try to disable the message "This iPhone requires backup files to be encrypted" on your iTunes now. Refer to this post anytime you’re facing issues with iPhone backup. The solutions are simple and easy to understand; their even easier to execute, so you should have no trouble with any of them.


 September 9, 2021
