Many individuals have a massive number of photos taken and stored in their iPhone. Over the time, the number can become a greater one as you take more photos from your iPhone. In certain cases, though, you will have to browse for iPhone photos by the dates they were taken. For instance, assume that you need to view a specific photo taken on your last birthday.
With this article, let’s see how to sort iPhone photos by date taken and organize them in an appropriate manner. In fact, the process is pretty simple.
1: Sort iPhone Photos by Date Taken with Windows Computer
Here’s how to sort iPhone photos on your Windows computer.
Step 1. Select any of the image you have already imported to your PC.
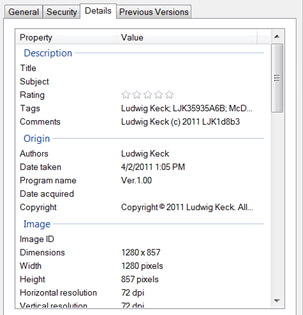
Step 2. Right click on the image and go to “Properties”.
Step 3. Click on “Details” option and go to "Date created" or "Date taken" to observe the date on which the picture is taken. If necessary, you can even find GPS coordinates of the location of the photo.
2: Sort iPhone Photos by Date Taken with All-in-One Software
You can also use a professional software to sort iPhone photos by date taken. We use a very useful software called iMyFone D-Back in this case. This software is developed to be a very user-friendly and handy. You can arrange all the photos in your iOS device and backups (iTunes and iCloud) using this useful software. It doesn’t need you to install anything on your iOS device. The beauty of this software is that it lets you recover even the deleted photos and organize them.
- It has been recommended by CNET, techradar, PCWorld, 9TO5Mac and other professional websites.
- It is compatible with both Windows and Mac computer, as well as all iOS versions and iOS devices.
- It can sort iPhone photos by date directly or from iTunes.iCloud backup.
- You can sort existing and even deleted photos from iPhone.
2.1 How to sort photos by date taken from iPhone
Here’s how to soft photos by date using iMyFone D-Back.
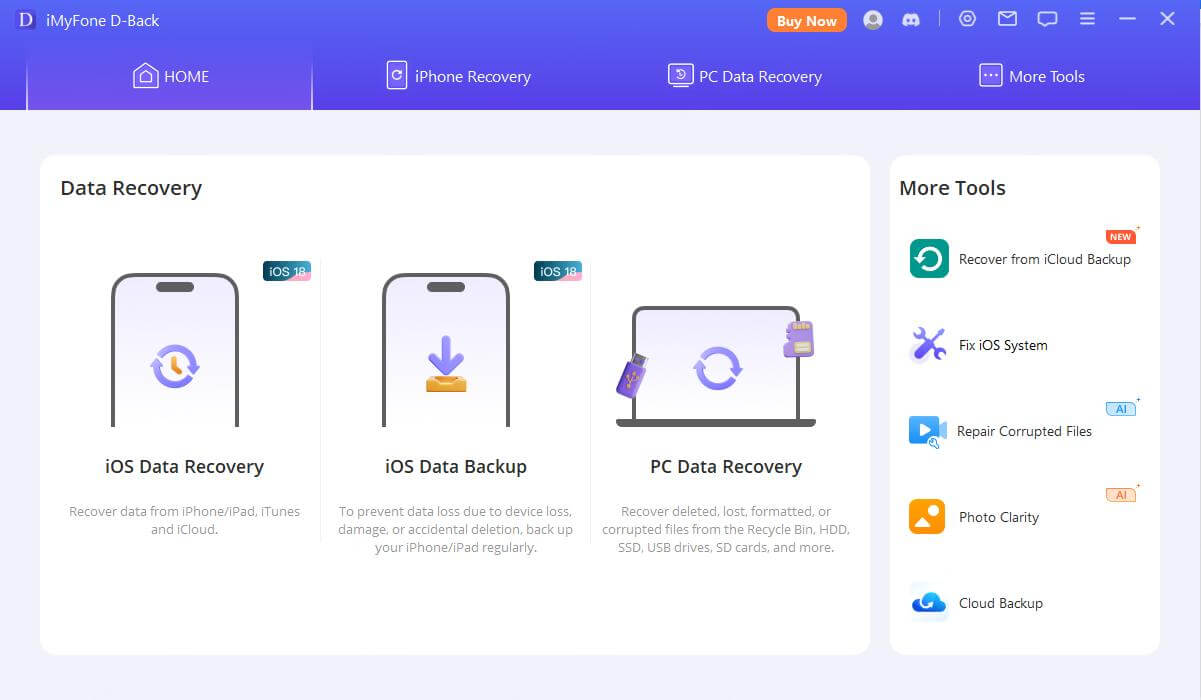
Step 1.Open iMyFone D-Back and press on “Start” button. It is located under “Recover from iOS Device”.
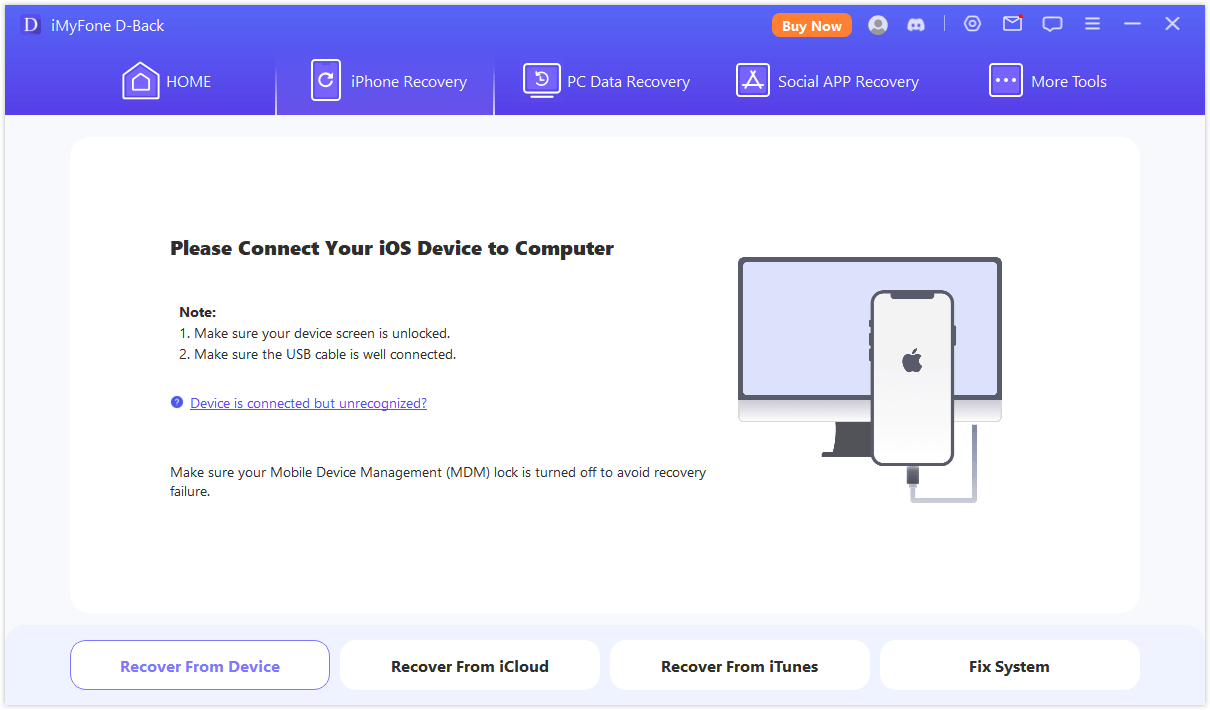
Step 2.Connect the device to the same computer and the iOS device will be detected by computer. Click on “Next” to move on.
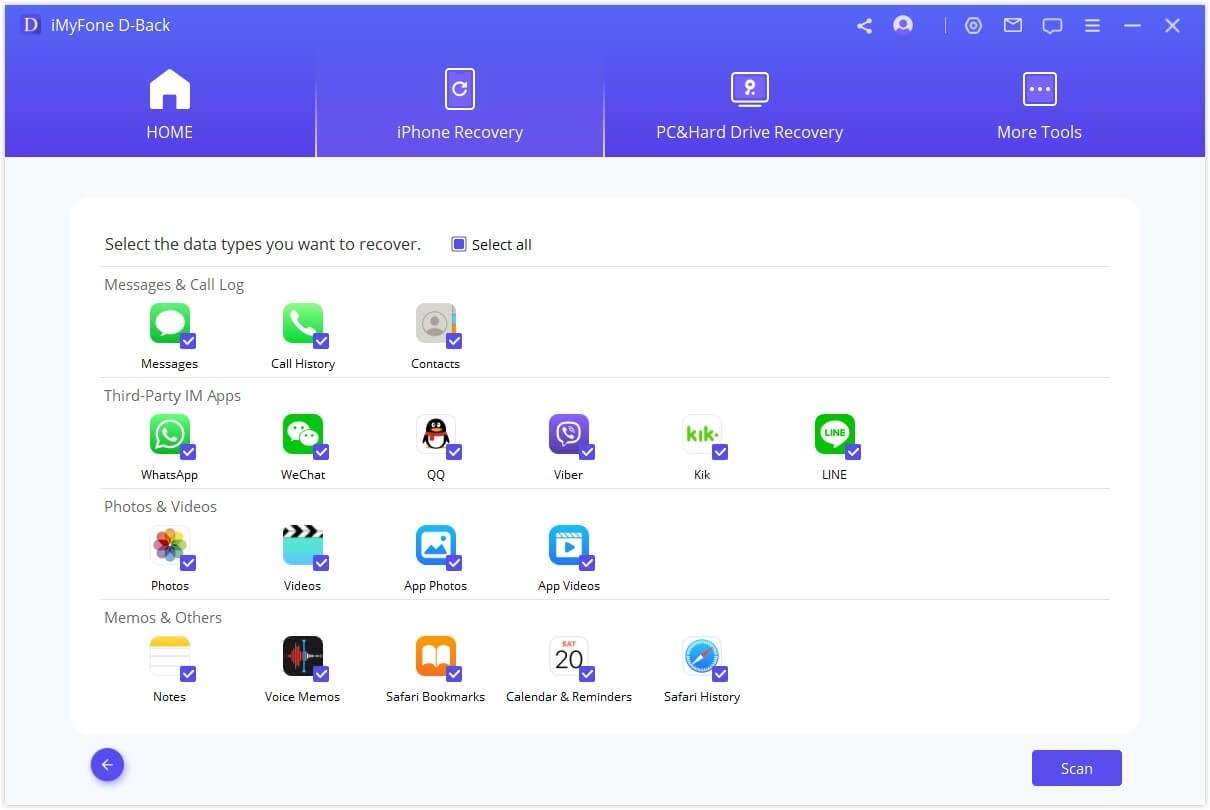
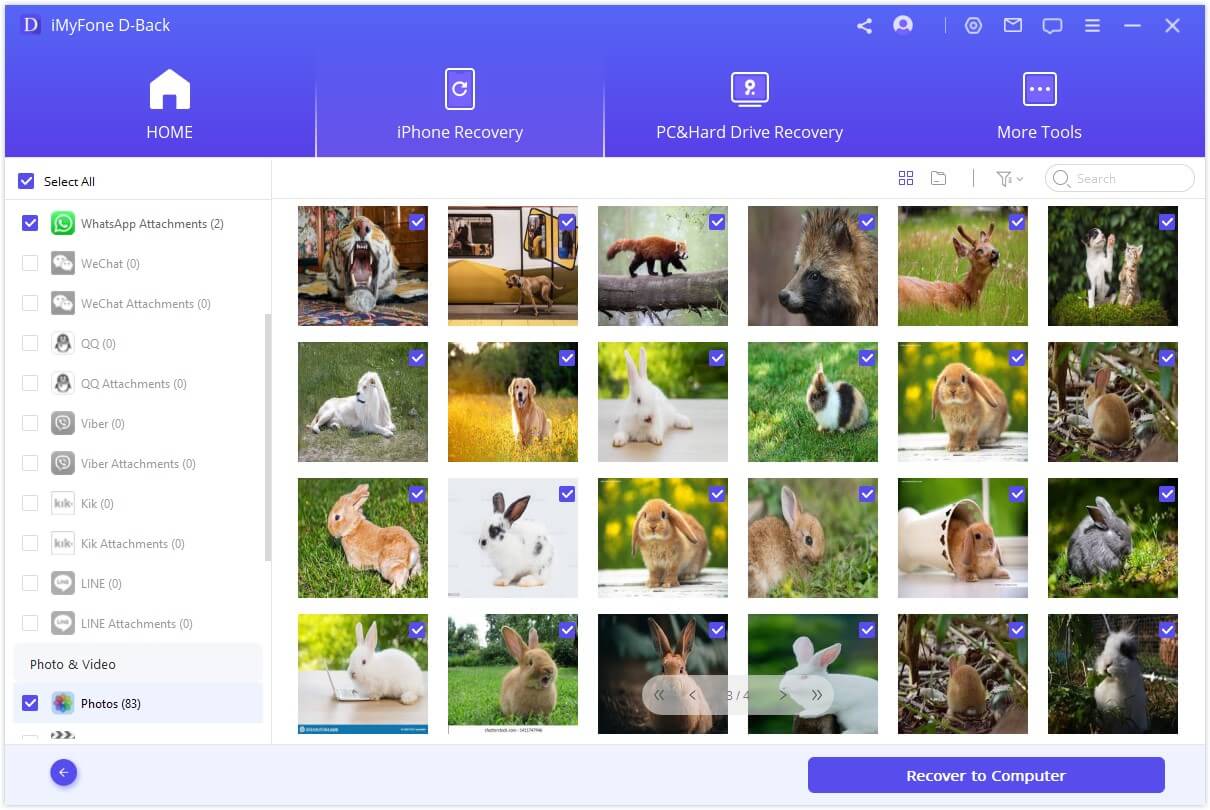
Step 3.Click on the photo type you intend to manage here. Then, click on “Scan”.
Step 4.Once the scanning is done, you can preview the photos. Then click on “Recover” option. Now, select a lotion to save the files you are recovering. You should wait for a couple of minutes to for the files to be recovered in HTML or CSV format.
2.2 How to sort photos by date taken from iTunes backup
If the photos are saved on your iTunes backup, you can use D-Back to get them on your phone.
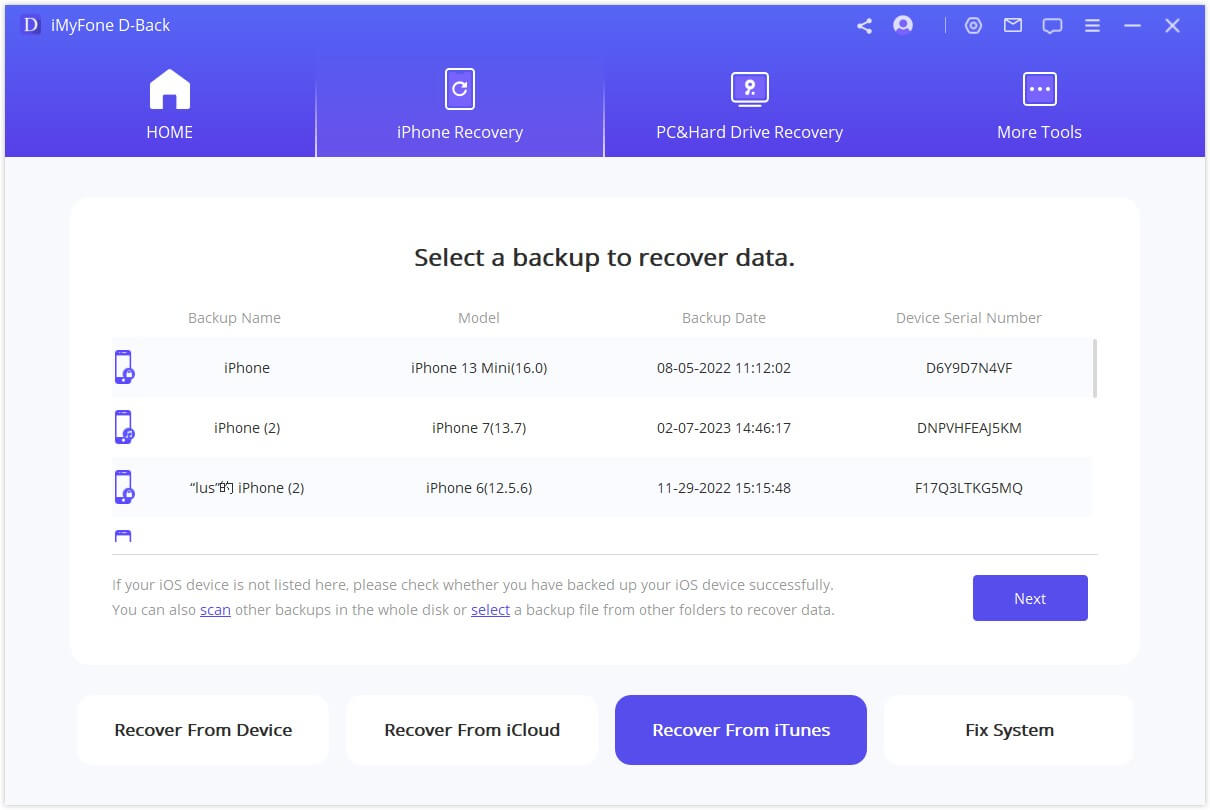
Step 1.Launch the program with “Start” under “Recover from iTunes Backup”. Select the exact iTunes backup on which your photos are stored. Click on the “Next” option.
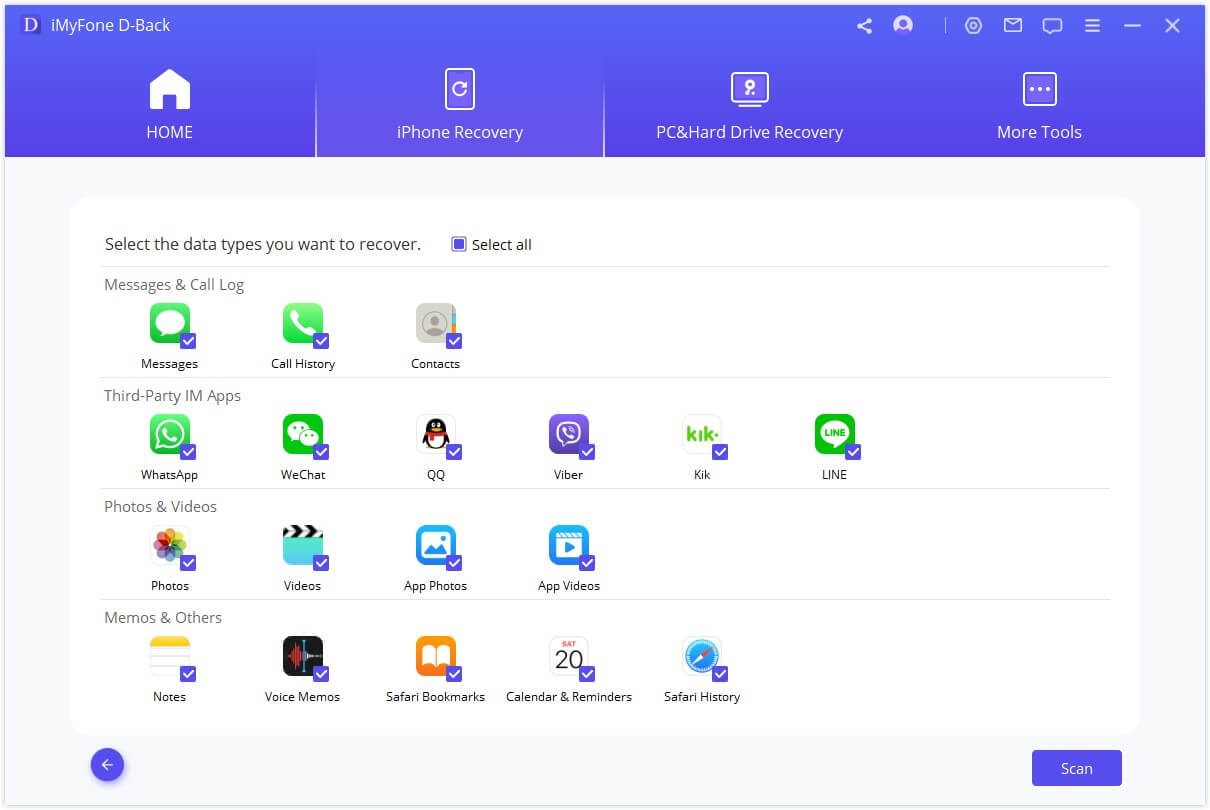
Step 2.Click on the file types (photos) you need to recover and hit “Scan”.
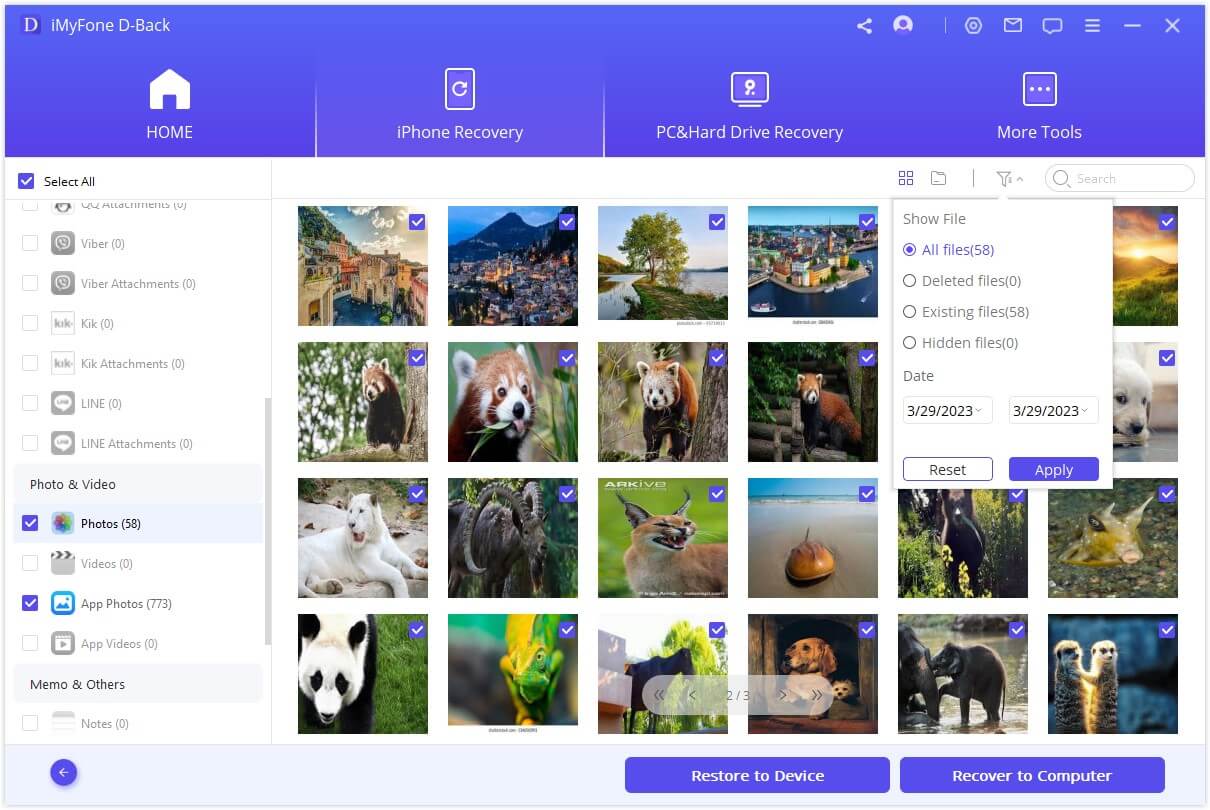
Step 3.Once the scanning is done, you can preview the photos you should save to the computer. After defining the files, you can click on “Recover” option. Define on which location you intend to save the recovered files.
2.3 How to sort photos by date taken from iCloud backup
If the photos are saved on your iCloud backup, you can use D-Back to get them on your phone.
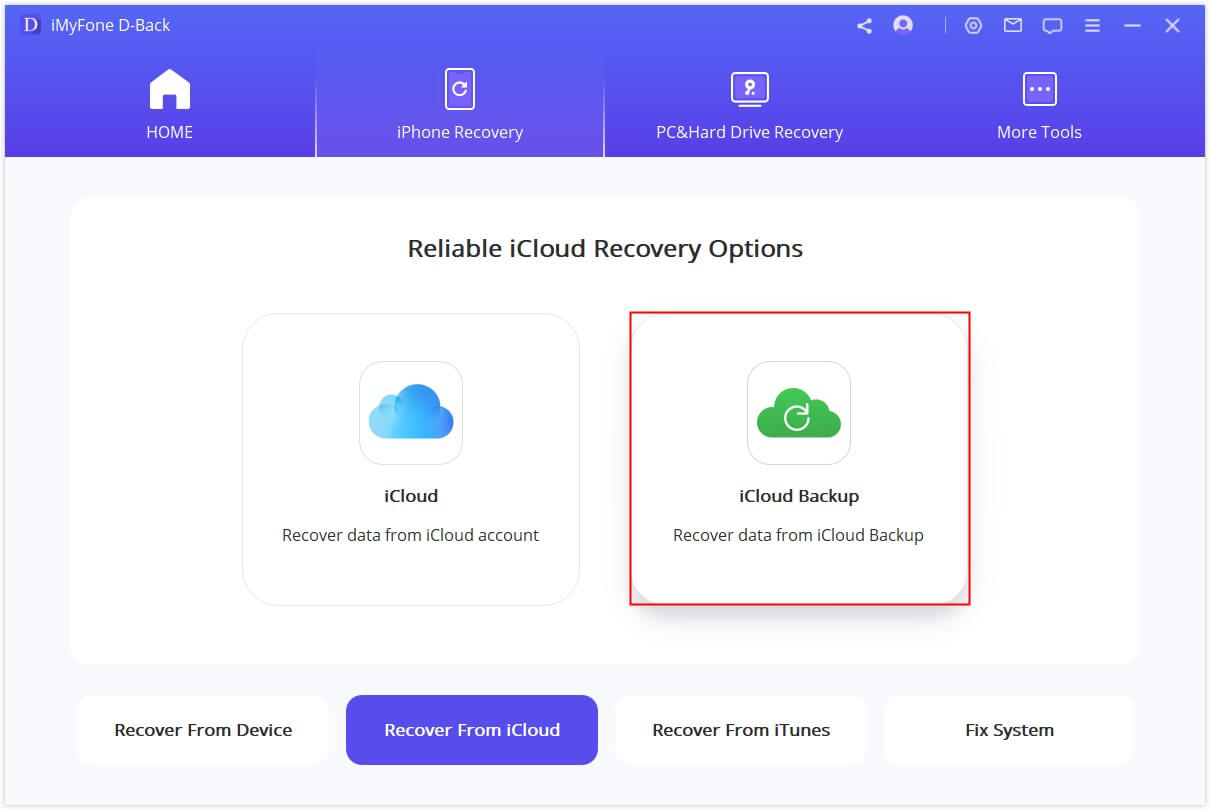
Step 1.Select “Recover from iCloud Backup” and then click “Start”. Next, sign in to your iCloud account.
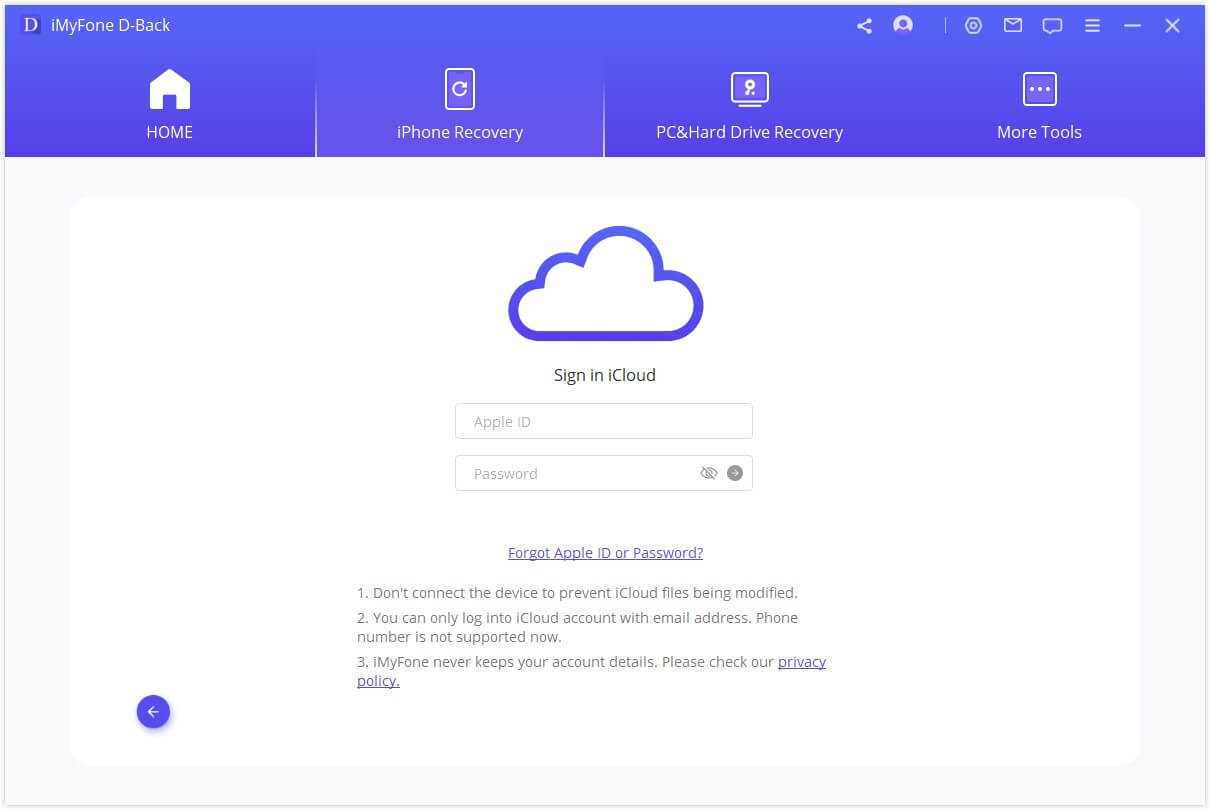
Step 2.Enter your log in information to access your account and then select the backup file with the photos you want. Click “Next”.
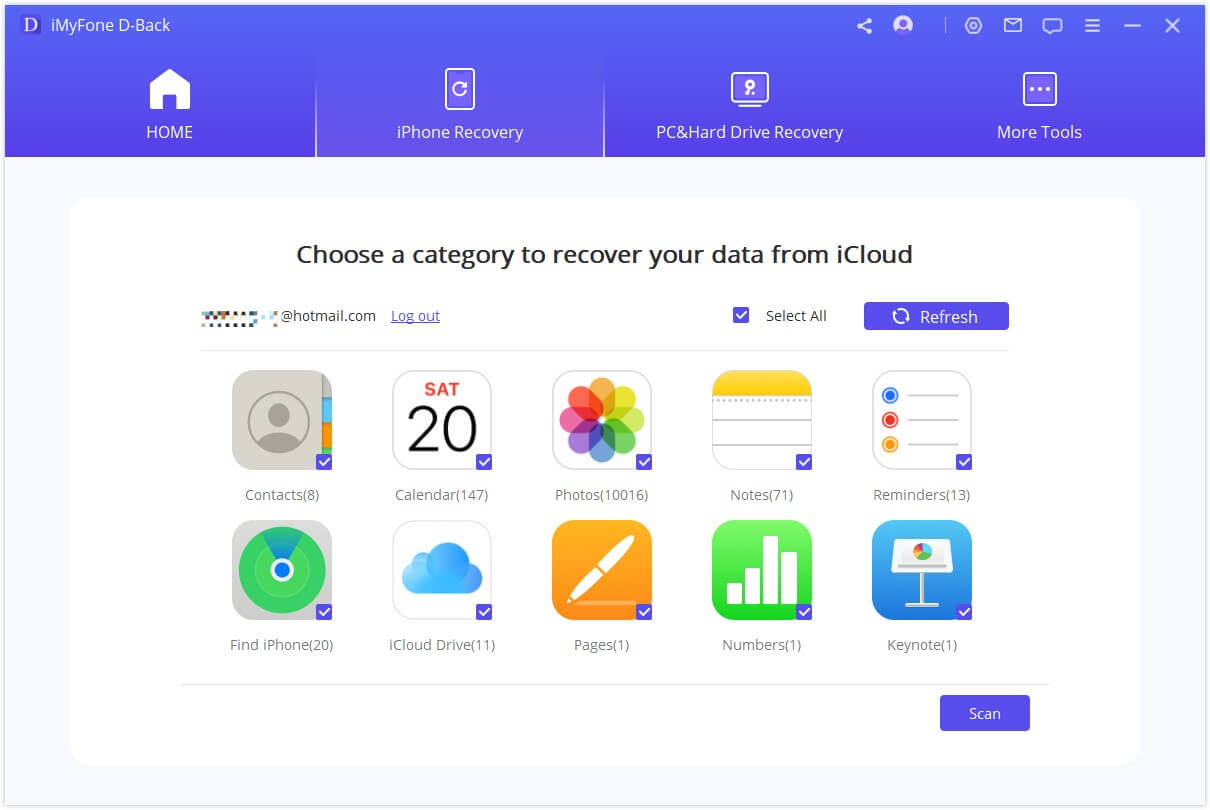
Step 3.Select “Photos” as the type of data to recover and then click “Scan”.
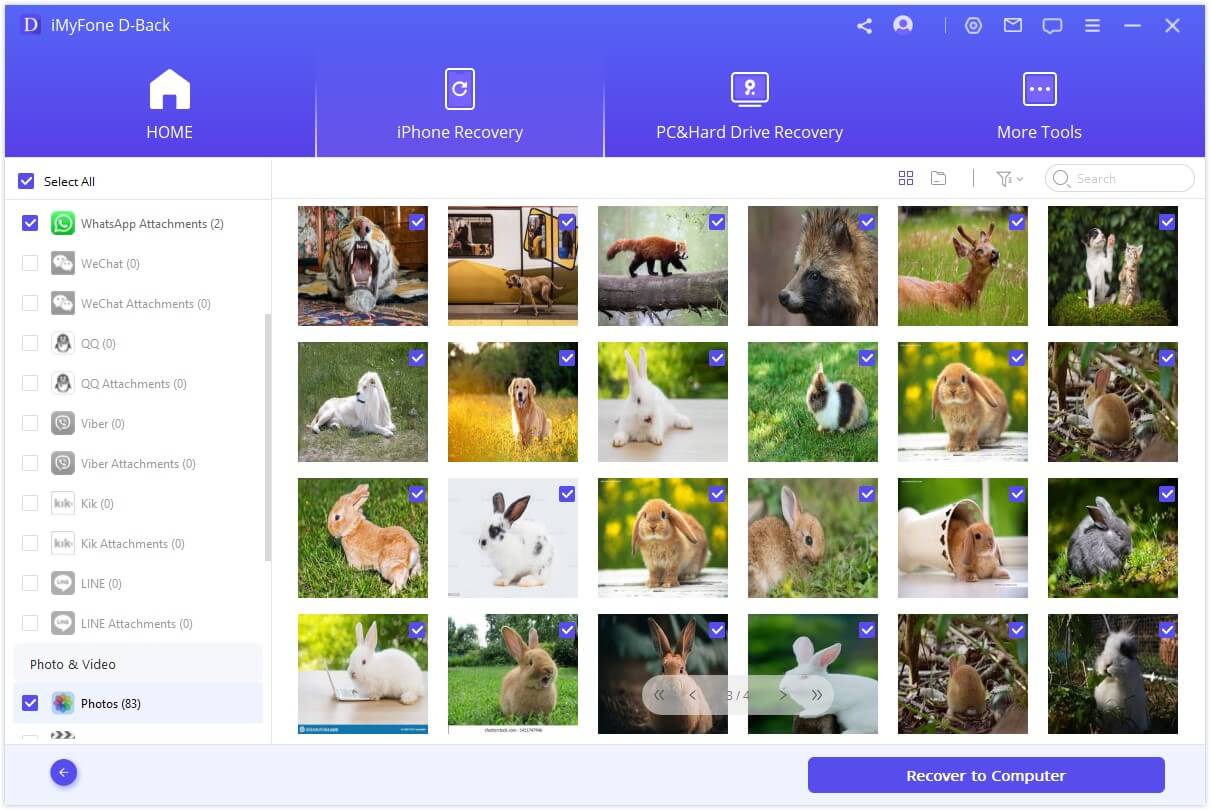
Step 4.The program will analyze the selected backup file and display all photos on it in the next page. In this results page, click on an item to preview the data and then select the ones you need and then click “Recover” to save them to your computer.
Reviews of the Two Methods
In this section, let’s take a look at the most notable pros and cons associated with the methods we have mentioned above.
| via Windows Computer | via D-Back | |
|---|---|---|
| Difficulty | A little complex | Easy |
| Computer Compatibility | Windows | Windows/Mac |
| Sort iPhone photos by date directly | No | Yes |
| Sort iPhone photos by date from iTunes | No | Yes |
| Sort iPhone photos by date from iCloud | No | Yes |
| Sort existing iPhone photos | Yes | Yes |
| Sort deleted iPhone photos | No | Yes |
| Supported data scope | Only photos | 18 + data types (including photos) |
When both the methods are compared, you can notice that iMyFone D-Back works as an all-inclusive tool. It can help you recover and backup variety of data. It also supports multiple types of files. This program also works on all the iOS devices and OS versions.
Conclusion
You can go through the options mentioned above and select the most appropriate option for you. If you are concerned more about the budget, you can opt to the option “Windows Computer” method. However, if you expect more of convenience and the experience of a professional and versatile tool, you can go for iMyFone D-Back. Regardless of the method you select, we appreciate if you can leave us a comment about your overall experience. Your feedback is valuable for our readers and for ourselves.


 September 28, 2023