You are trying to make a phone call but your iPhone keeps saying call failed? Well, you are not alone. Plenty of iPhone users keep seeing such messages and wonder how to fix them. With that said, we have composed this article with 11 practical solutions to address that issue. So, keep reading.
What Does Call Failed Error Mean?
It means when you try to makes a phone call, iPhone keeps saying the call failed. The message displays “call failed”. Interestingly, some users say they have noticed the same issue even in a phone call or using the Facetime.
Reasons Why Call Failing on iPhone?
- One of the main reasons behind make call failed is signal error. If you try to make a phone call from an area where signals are weak, there’s a huge possibility to see this error.
- In addition to weak signals, call can fail due to loosened or damaged SIM card.
- Also, it can be due to some sort of a software issue.
Top 11 Methods to Fix iPhone Keeps Saying Call Failed
Now, let’s take a look at the top methods you can consider to this issue.
Method 1. Turn Airplane Mode on & off
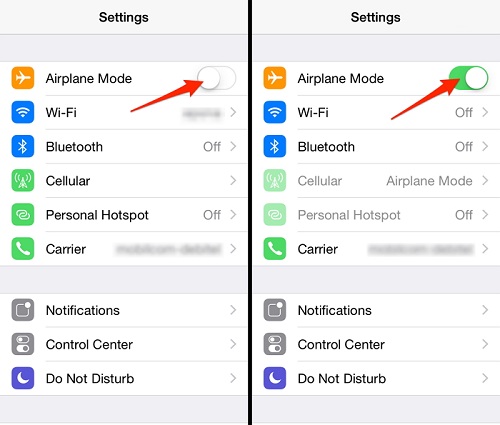
Toggling the Airplane Mode on and turning it off once again would solve this issue for most of the users. This can be the easiest of all. And this is also a method that works to fix when call forwarding not working on iPhone.
Step 1: Swipe up from any of the screens of the iPhone and access Control Center.
Step 2: Then, tap on the Airplane icon located on the upper-left corner. Just wait for a couple of seconds and turn the same option off.
Method 2. Disable Call Blocking
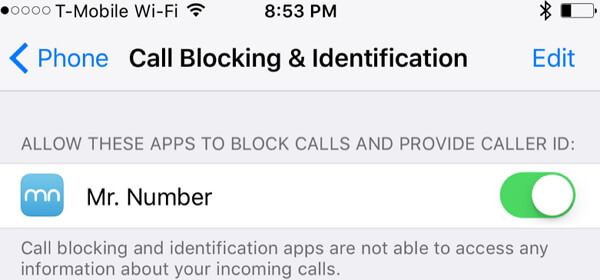
If you have enabled call blocking feature on your device, you cannot make phone calls (obviously).
Step 1: Go to Settings app and select Phone.
Step 2: Then, tap on Call blocking & Identification. If the app is switched on under “Allow These Apps to Block Calls and Provide Caller ID”, turn it off.
Method 3. Toggle Caller ID on & off
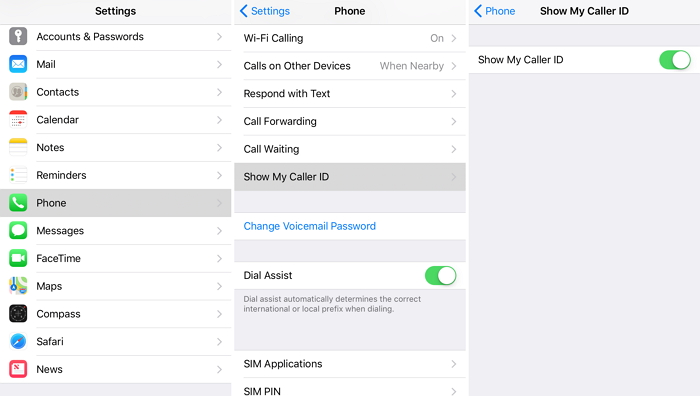
If called ID is on, you can turn it on to see if the problem resolves.
Step 1: You can go to Settings and select Phone.
Step 2: Then, go to Show My Called ID.
Step 3: Then, make sure that the button is green.
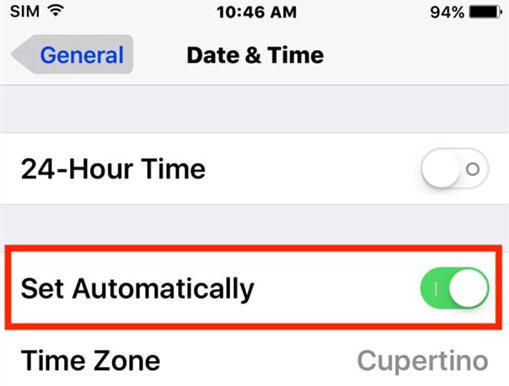
Method 4. Change the Date & Time
If the date & time of the device is incorrect, you will have to correct it. Here’s how to do it.
Step 1: Go to Settings and select General option.
Step 2: Then, go to Date and Time.
Step 3: Turn on “Set Automatically”.
Method 5. Restart iPhone
If the problem is still there, you should try a restart on device. In fact, this can be one of the simplest solutions for you to fix various minor issues.
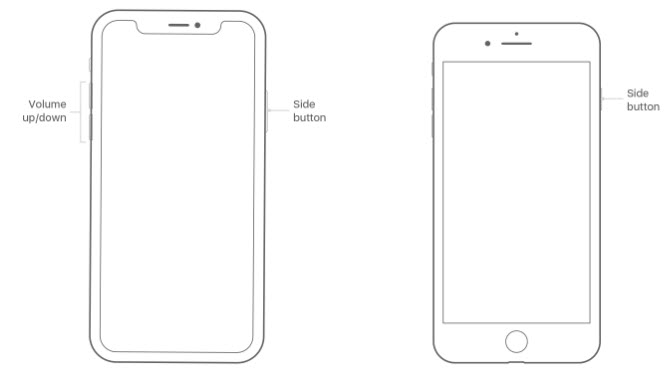
Step 1: Press and hold the Sleep/Wake button of the device and wait for a couple of seconds.
Step 2: The slider will appear now. Just move it from left to right and let it be completely off. Wait for 30 seconds or so.
Step 3: Turn the device back simply by pressing the Sleep/Wake button.
Trying to restart your device through an easier way? You can learn how to restart iPhone from computer, which requires no effort to successfully turn on your iPhone while removing bugs.
Method 6. Disable LTE
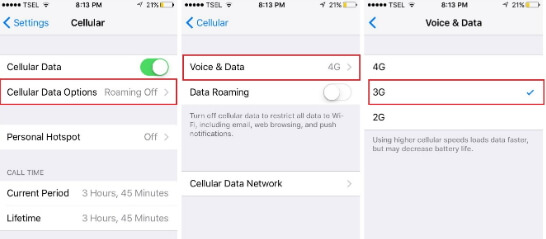
In order to get faster cellular data on your device, you can turn on LTE. Nevertheless, it may affect the call-making ability of the device for some users. To fix it just disable LTE.
Step 1: Go to Settings app and select Cellular.
Step 2: Then, select Cellular Data.
Step 3: Tap on Voice & Data and choose 3G here.
Method 7. Update Carrier Settings
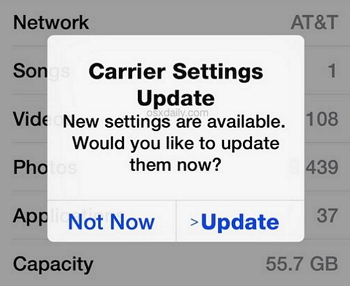
For some users, Updating the Carrier Settings of the iPhone might do the trick. Here’s how to do it.
Step 1: First, make sure that the iPhone is connected to a good internet connection.
Step 2: Open Settings app and select General. Then, go to About option.
Step 3: If there’s an update, you can simply see a notification so you should opt to that.
You can also learn how to fix iPhone call volume low suddenly, which can also be an annoying problem.
Method 8. Factory Reset iPhone via iTunes
Factory reset would be the another resort you can have a try, but you will lose all the existing data as a result of this process.
Step 1: Open iTunes on the computer and connect the device to the same computer.
Step 2: Provide the passcode if prompted and select the iPhone from the appearing menu.
Step 3: Click on Restore which is located in the Summery panel.
Step 4: Click on Restore to confirm. iTunes will now erase all the data on your device and install with the latest software. Once the device is restarted, just configure the device as a new one.
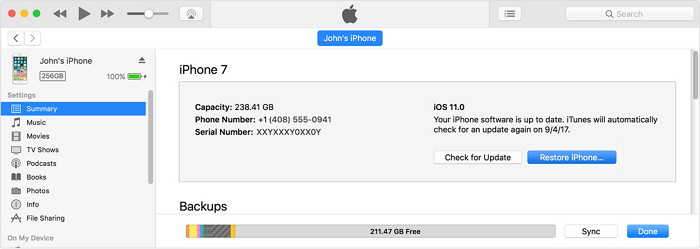
If your iPhone not showing up in iTunes, try to follow the guides here for your iPhone to be detected by the iTunes.
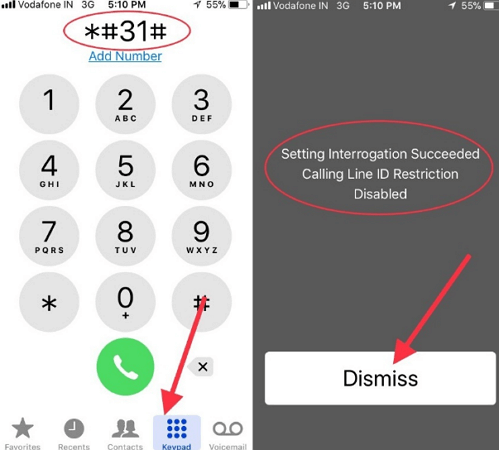
Method 9. Dial *#31#
Dialing the code *#31# would be one of the easiest ways to disable the hidden anonymity status.
Method 10. Fix iPhone Keeps Saying Call Failed Without Data Loss
As you might realize, some of the methods used to fix the above issue can cause data loss. For instance, factory reset or restoring through iTunes can cause data loss. If you want a method that doesn’t cause data loss, try iMyFone Fixppo.
It is a superb tool that can resolve various issues associated with iOS devices. This special software can address issues such as iPhone screen black, white screen of death, iPhone couldn't be restored, restart loop, and many other issues. It's also compatible with all iPhone models and all iOS versions, including iOS 17/18. Here’s how to fix this issue.
Step 1.First, launch the software and use a cable to connect your iPhone to PC.
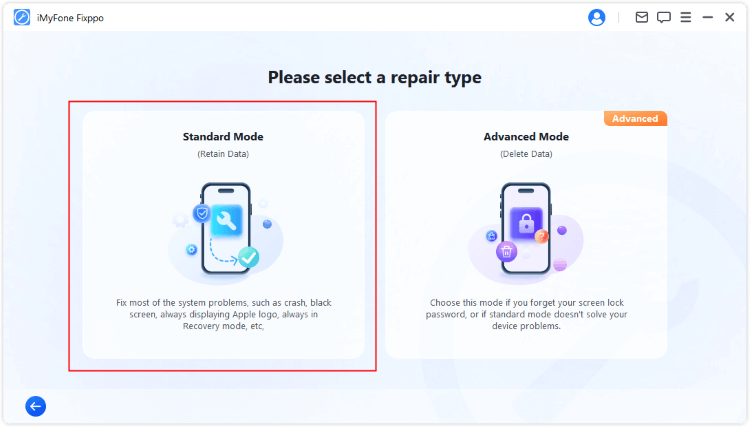
Step 2.Now, Click on the Standard Mode tab, which promises to fix when your iPhone keeps saying call failed without losing data.
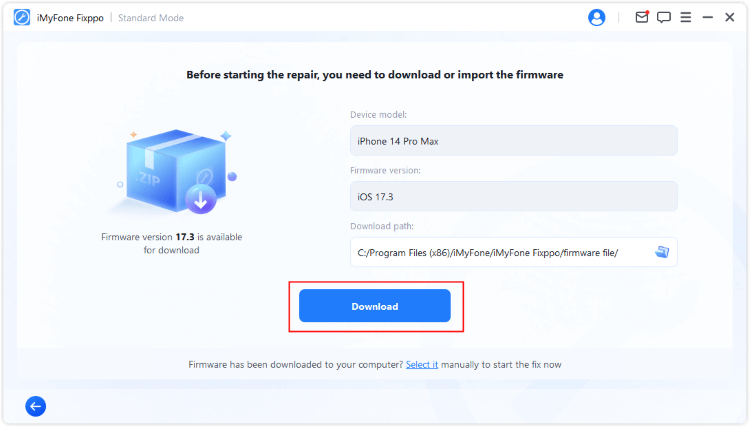
Step 3. The program will search for the available firmware for your device, click Download to get it.
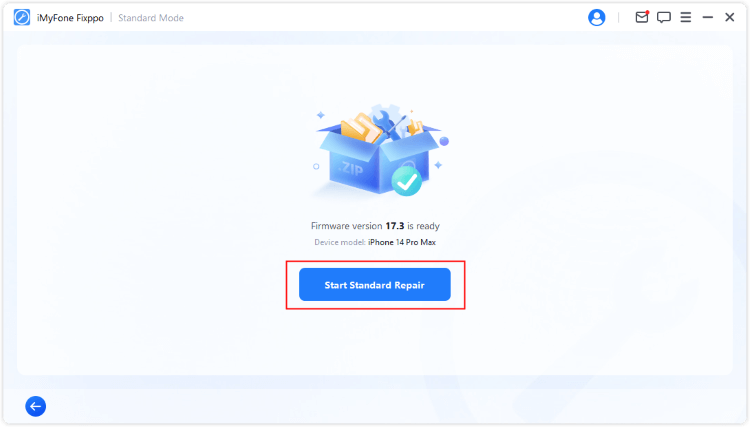
Step 4. When it is downloaded, click Start Standard Repair, and the software will instantly begin its job to repair your buggy iOS system.
Do not know whether trust it or not? Don't worry. It has been recommended by many professional websites.

Method 11. Contact Apple Support to Check the Hardware
If none of the above options work for you, you need go for the last resort - contact Apple support and check the hardware.
Tips for Fixing iPhone Keeps Saying Call Failed
Now that you know how to address this issue, let’s learn some of the important tips.
Tip 1. Try to Keep Your Data Safe before Fixing
One of the most important things before fixing is to create a backup. Such approach will mitigate the potential of losing your data.
To create a backup, you can use iTunes or iCloud (both of which are official tools offered by Apple).
Tip 2. Recover Data after Fixing
If you have lost data after fixing this issue, you shouldn’t give up. There are ways to get your data back easily.
If you don’t mind losing current data, you can try restoring the device with iTunes or iCloud.
However, if you want to recover data without backups or without restoring, iMyFone D-Back is also a choice.
Conclusion
You can carefully go through the methods we have mentioned in this article and choose the best option that suits you. After trying all the methods that have to be performed manually but the problem still exists, try this iOS System Repair Tool out, it won't let you down!


 September 11, 2024