Calendars play a significant part in our lives as they keep us on track with our day to day tasks. There is so much going on in our work, personal, and social experiences and sometimes it gets hard for us to keep up.
However, technology has made it very convent for us to log our tasks and events by providing us with virtual calendars. We may need a calendar which is almost always in front of our eyes.
For this purpose, the best idea is to print your calendar and hang it up at a place where you can see it each time to pass by. In this post, you will learn how to print calendar from iPad.
1: Print Calendar from iPad without Enabling Calendar Sync
This is the procedure that you need to follow when your calendar is not synced to iCloud.
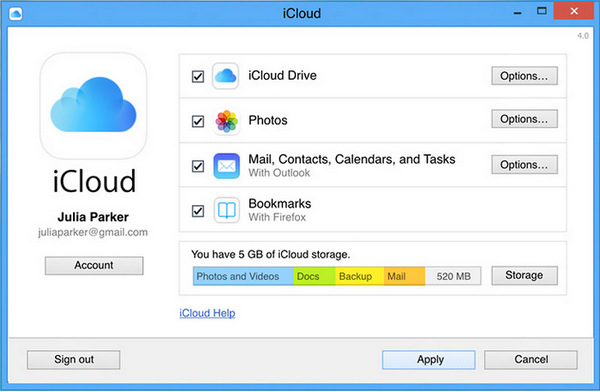
Step 1. Open the settings of your iPad. Then tap at your name which is located on the top of your iPad screen.
Step 2. Then click on iCloud and switch on “Calendars” by sliding the button until it turns green. This can be done by tapping on the switch as well.
Step 3. Then, on your Windows laptop go to https://www.icloud.com and log in with your Apple ID. Make sure to use the Apple ID which is already logged in your iPad.
Step 4. After you are logged in, click on the calendar app, and select the month that you want to print. Next, you have to take a screenshot of that month. For that purpose, press the window key along with the PrtScr key together and save it.
Step 5. Open that screenshot from the location or folder and tap on the “print” option located in the “File” drop-down menu.
2: Print Calendar from iPad with Enabling Calendar Sync
The second method of printing the calendar from your iPad involves being synced and logged in to your iCloud. To learn how to print calendar from iPad on Mac, just follow the steps given below:
Step 1: First, you must sign in with the same Apple ID as your iPad on the iCloud of your Mac computer.
Step 2: After logging in both of your devices with the same Apple ID, sync your iPad calendar on your Mac. To sync on your iPad, go to setting, and click on your name and turn on the “Calendar” option by tapping into iCloud. For syncing on your Mac, go to your system preferences, go into your iCloud settings and then check the “Calendar” option.
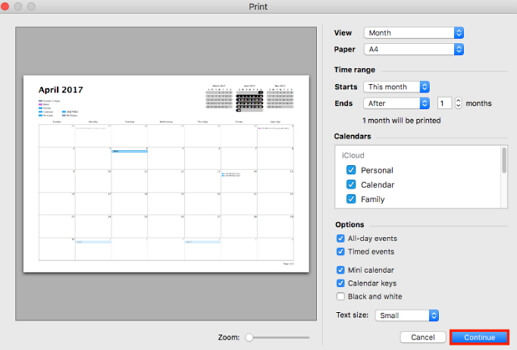
Step 3: Once you have enabled the sync on both of your devices, you will automatically be able to access your iPad calendar on your Mac. You can print it by tapping on the ‘print' option available in the ‘File' drop-down menu.
3: All-in-One Way to Print iPad Calendar on Windows/Mac
Other than the methods given above, you can also print calendar from your iPad on your Windows or Mac even if you have lost them.
iMyFone D-Back is a data recovery software which helps people in exporting existing and lost calendar from iPhone. After exporting them in the printable format, you can easily print them as you want.
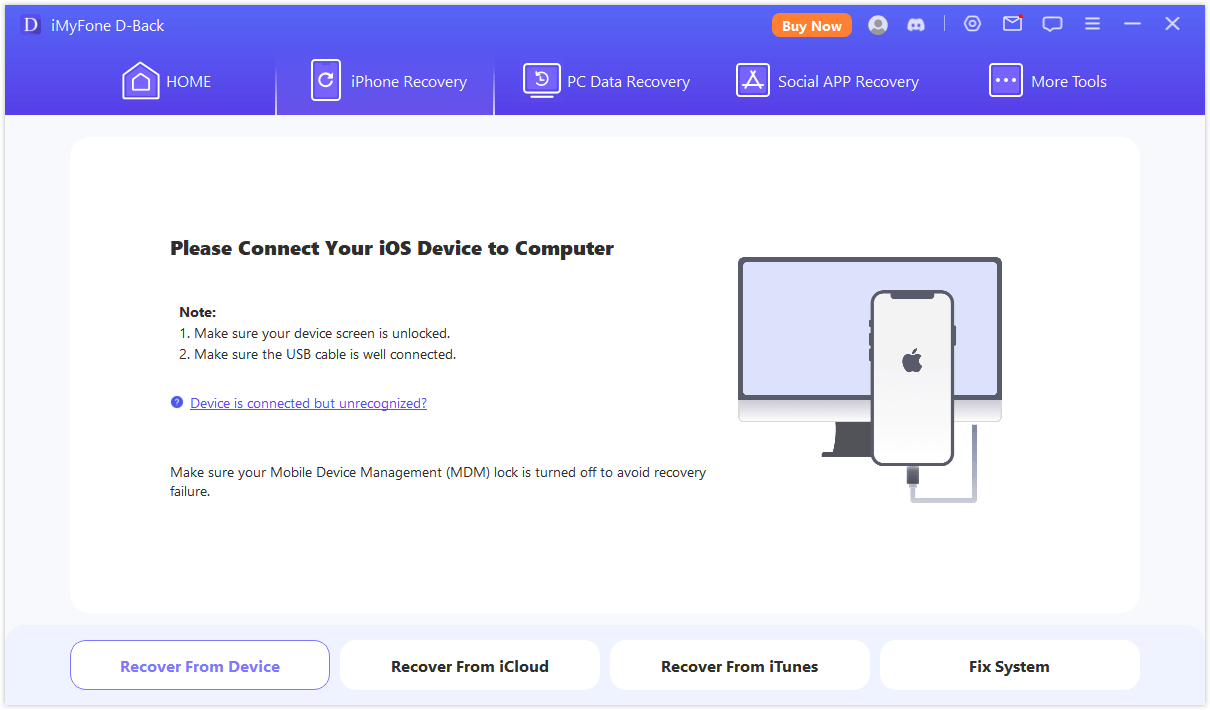
Step 1.Launch it on computer and start at the "Recover from iOS Device" tab. Connect your device to computer. After the program successfully detects your iDevice, click "Next".
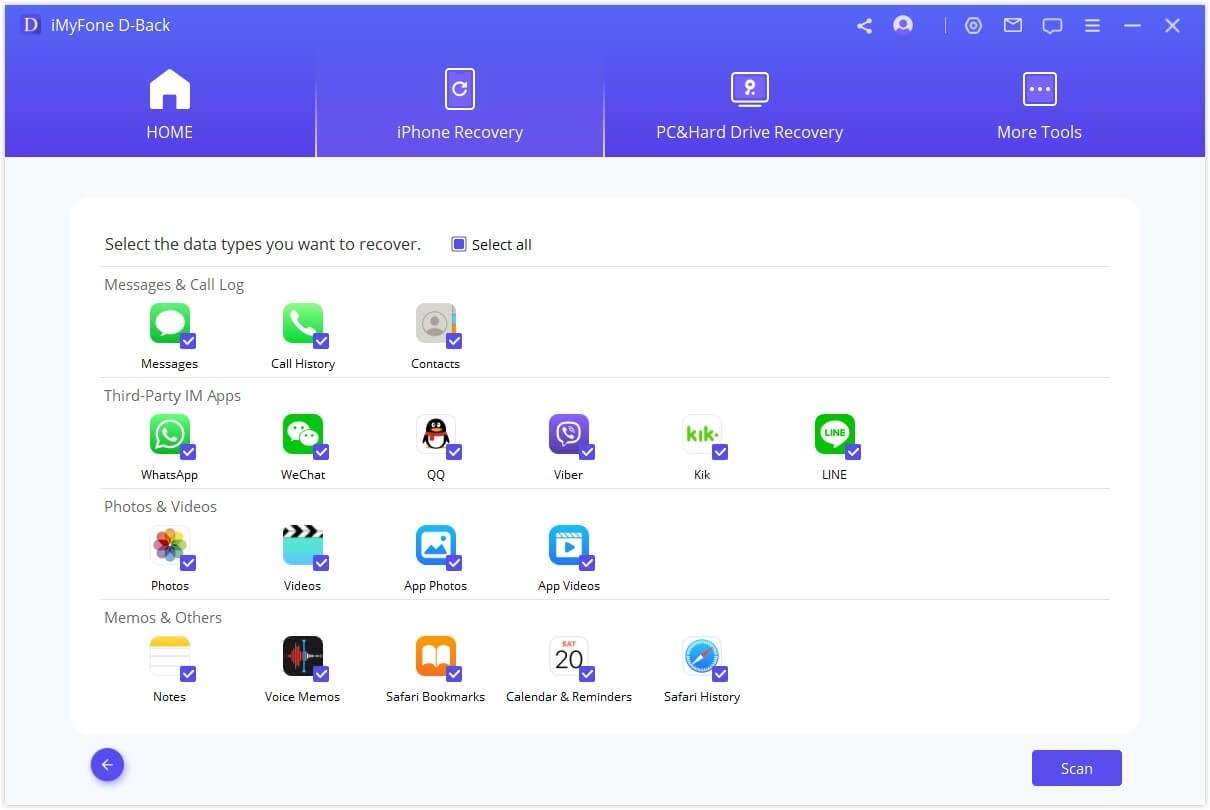
Step 2.Select the types of calendar files that you would like recover. After that, click "Scan".
Step 3.After scanning, all the exportable calendar files will be presented on the screen. Choose what you need and tap on “recover”.
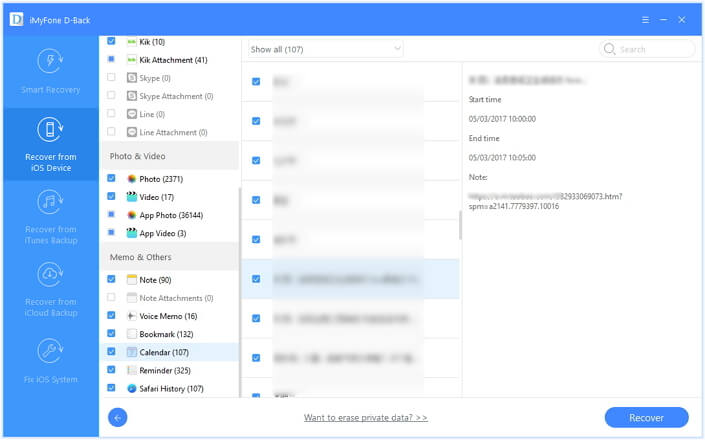
Step 4.Once, your calendar is exported in HTML or CSV format, you can easily print the calendar.
This tool has been recommended by many professional websites.

4: Official Way to Print Calendar from iPad with AirPrint
AirPrint is a feature provided by the iOS software which allows you to print data without connecting your device to the printer via wires. You can also use it to print your calendar from your iPad.
For this purpose, you have to make sure that your printer supports AirPrint, and that your printer and iPad are connected to the same Wi-Fi.
Step 1: Open your calendar, and click on the month which you want to print.
Step 2: Then click ‘print’ which you will most likely find in the “share” option.
Step 3: After this, you will be presented with a list of printer choices, and you have to tap on the options which says “AirPrint enabled printer” and click “print”.

Which method is the best for you?
There is no better method as each one of them assists you when you have some crucial feature missing:
- The first method is complicated for most users.
- The second method is easy but it can take a long time for both devices to sync.
- The third method will always work for both Windows and Mac users.
- The fourth method is for tech savvy people.
Conclusion:
To conclude, all we can say is to use the method which suits your situation best and for you. That can be easily chosen by reading the comparison above or by reading the instructions carefully. You have all the possible methods listed above and now you have chance to choose the best one for you. Don’t forget to comment your queries and feedback below.


 September 28, 2023