Have sent iMessages to friends but receives no response? They are too negligent to notice the iMessages or they have blocked you on iMessage? Well, we cannot deny that Apple does offer us many advanced service but it is really hard to tell whether friends have blacked you on iMessages.
In this article, we offer several ways about how to confirm if someone has blocked you on iMessages. Read on and find what is useful for you, and what may surprise you is that all the methods are free and apply to iOS 12.
1. Check the Color of iMessages You Sent
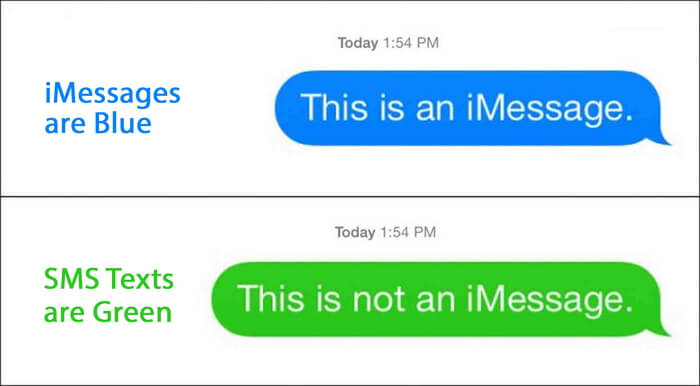
If you send an iMessage in color blue to your friend, but it never says Delivered and after a few minutes the iMessage turns green.....Well, we cannot say that you definitely have been blocked by the friend via the simple color sign. However, in the digital era, it is pretty unlikely that the iMessage network doesn’t work and the iMessage you sent have to revert back as a text message. We have a simple remedy to this. Just keep sending iMessages intermittently and if they all turn green from blue, then unhappily, you have been blocked definitely.
2. Check the Status of iMessages You Sent
Follow these simple steps to transfer the photos from your iPod touch to Mac.
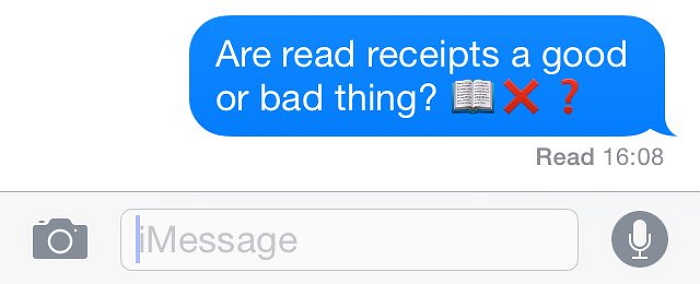
Well, to know if you're blocked on iMessage is hard and the second tip may be not perfect but it is still worth a try. Generally, iPhone users turn on the Send Read Receipts for messages in Settings, and actually the default setting of the option is ON. If you send an iMessage to friend’s iPhone, and it stays blue saying Delivered but never turns to Read, then probably you've been blocked. And similar with the first tip, there's a small percentage that the receiver turns off his or her Send Read Receipts function.
3. Check the Status of iMessages on Both iPhone and MacBook
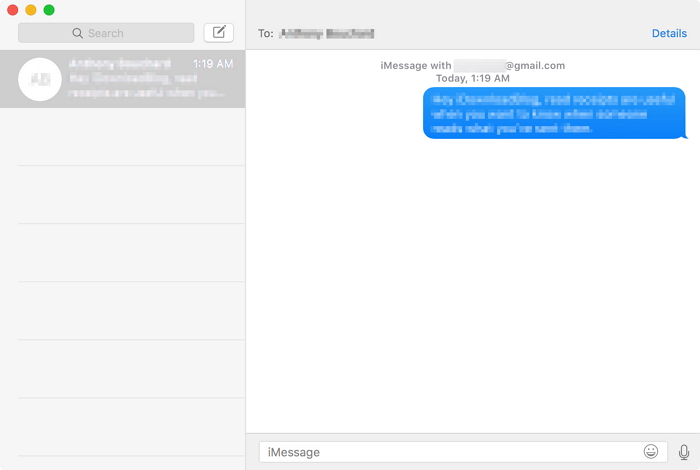
The third tip is suitable for iPhone users who have a MacBook. And it's very easy. Just send an iMessage through either your iPhone or MacBook. Your iPhone will always show a Delivered icon under the iMessage. However, if you have been blocked by your friend, the MacBook shows NOTHING under the iMessage. The MacBook doesn’t show any Delivered or Read sign.
4. Back Up iMessages on iPhone Selectively (iOS 12 Supported)
So you probably need to back up your iMessages on iPhone. Think about that someone has blocked you and you accidently delete some iMessages in that conversation! Here we will introduce the best backup tool on the market – iMyFone D-Port iPhone Data Exporter to you. With the following excellent functions, the iMyFone tool shines among its competitors.
iMyFone D-Port iPhone Data Exporter
Key Features:
- Backs up 20+ types of data on iOS device. You can copy text messages from iPhone, transfer WhatsApp messages from iPhone and much more.
- Viewing iTunes backup and getting backup from iCloud will be easy with iMyFone D-Port.
- You can use it without any worry for it gives you the entries of free trial version and 30-day money back guarantee.
- Good software must be easy to use and iMyFone D-Port is a good example.
- All iOS devices and iOS versions including iPhone 8, iPhone X and iOS 12.
How to Easily Back Up iMessages from iPhone to PC/Mac
With the following easy operations, you can transfer iMessages from iPhone to computer as a backup in case you have been blocked by friends and lose their iMessages. Before the start, you can go to iMyFone D-Port's official page to download the Free Trial.
Step 1. Select Data Types and Connect iPhone
Click Back Up & Export from Device tab and then click Export Data. Connect your iPhone to computer.
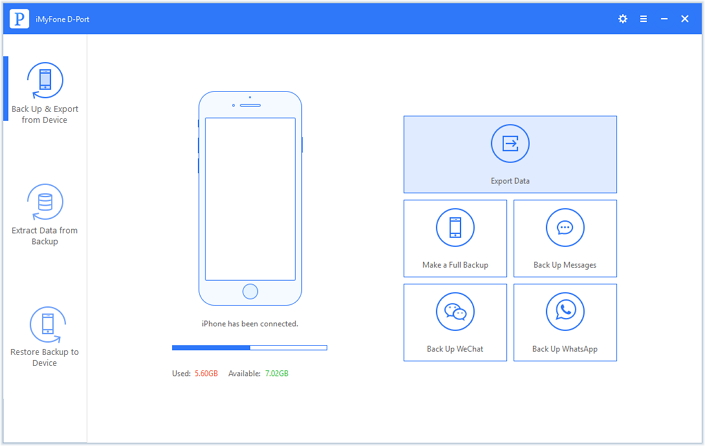
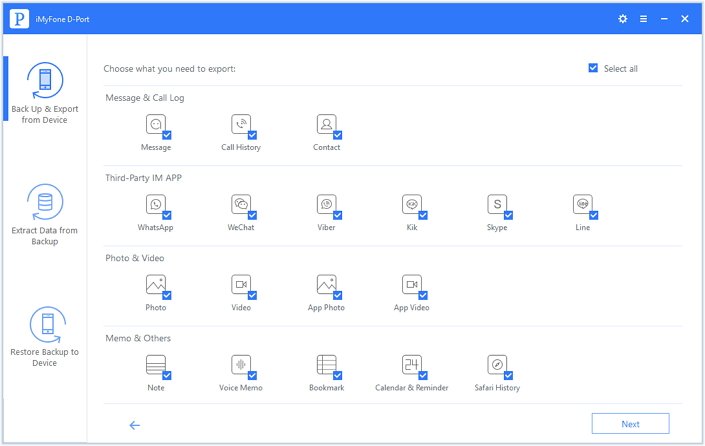
D-Port will show all the data types it supports to back up and automatically select them all. You can also uncheck Select all and then choose the ones you need. Then click Next to connect your iPhone to the iMyFone program.
Step 2. Scan iPhone and Preview Messages to Choose
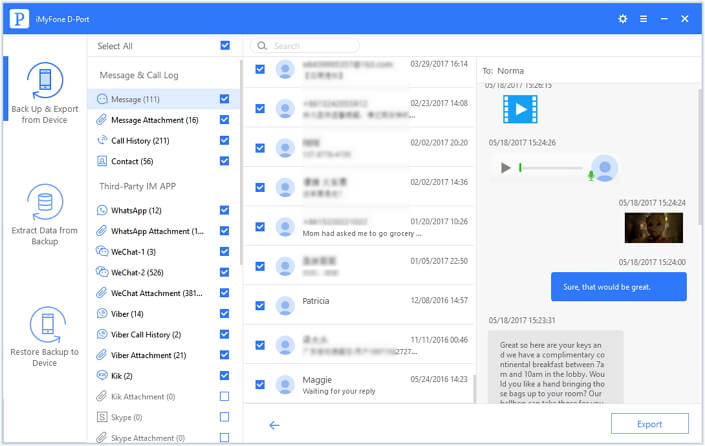
D-Port will start to scan the data, including iMessages on your iPhone. After scanning, you will see all the iMessages. Preview them to find the ones you need to back up and then choose them.
Step 3. Export iMessages onto Your PC/Mac
Click Export button and D-Port will prompt you to choose or create a folder on your computer to store the iMessages. After exporting, you can check your iMessages on computer when you need. Don't forget D-Port also supports iOS 12.


 December 20, 2021
