Safari is the most popular contributor to the iPad's total cache capacity. To be fair, cache files are not completely useless; in fact, they are very useful, unless they take up too much space. The Safari cache ensures that pages you visit frequently load faster. But browser caches has a number of drawbacks. In addition to taking up available space, the corrupted files can cause serious problems, such as the browser failing to load or the label failing to close. And it will eventually cause the phone to have performance issues.
For the topic issue on how to clear Safari cache, we are going to tell you some ways to do that. Keep reading!
1. The Free Method to Clear Cache on Safari
How to clear Safari cache on iPhone/iPad? This is not a difficult task. You can do it simply on Settings. Next we will go through the steps that you can follow in order to clear Safari caches on iPad/iPhone.
Step 1: Launch the "Settings" app on your iPad through the home screen.
Step 2: Scroll down the menu and select "Safari".
Step 3: Scroll down to the bottom of right hand panel and tap on "Clear History and Website Data".
Step 4: Confirm by tapping "Clear" from the pop-up window.
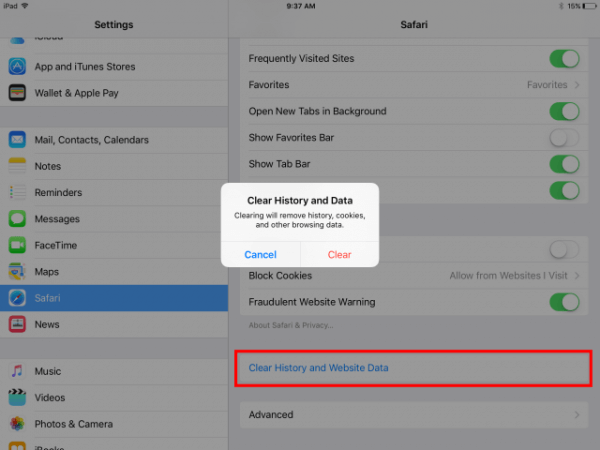
This common method to clear Safari caches on iPad in Settings may be easy. However, manually doing it step by step, day by day may cause a lot of frustration for most users. And this cannot delete the deleted Safari caches and cookies actually. Besides, all apps store cache files on iPad, not only Safari. And most of these apps do not have an option to clear iPad caches, so how could we clear these useless cache files stored in other Apps?
2. How to Clear Safari Caches and Cookies on iPad Permanently (iPadOS 14 Supported)
Manually deleted Safari cache and data can be easily recovered with the right tool. iMyFone Umate Pro - iPad Eraser gives you the opportunity to permanently clear Safari cache on iPad, even the previously deleted data. Deleted Safari cache is 100% unrecoverable then.
- It can permanently erase existing Safari cache, cookies and history on iPad, 100% unrecoverable.
- It can find out previously deleted Safari history and completely erase them.
- All current and previously deleted private iOS data can be erased just 1 click.
- The operation is super easy and the clean results is perfect.

Option 1: The Steps to Clear Safari Cache & Cookies and All Other App Caches from iPad
Step 1: Run the iMyFone Umate Pro - iPhone/iPad Data Eraser on your computer, and connect iPad device to PC so that the program can detect it.
Step 2: Go to 1 - Click Free Up Space option, Click on "Scan" button and the program will do a full space-saving analysis for your iPad.
Step 3: Click "Clean" button and all App caches including Safari caches will be cleanned.
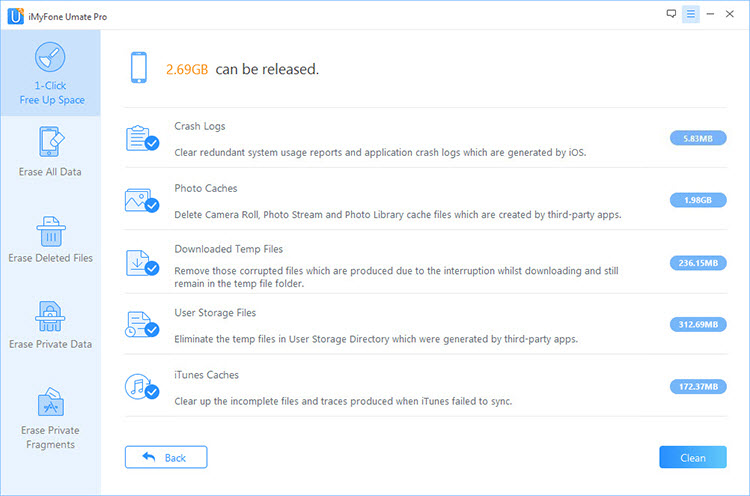
Option 2: The Steps to Permanently Clear Safari Cache on iPad
What's more, you can go to the "Erase Private Data" mode Ffor the permanent clearing of Safari cookies and caches on iPhone/iPad.
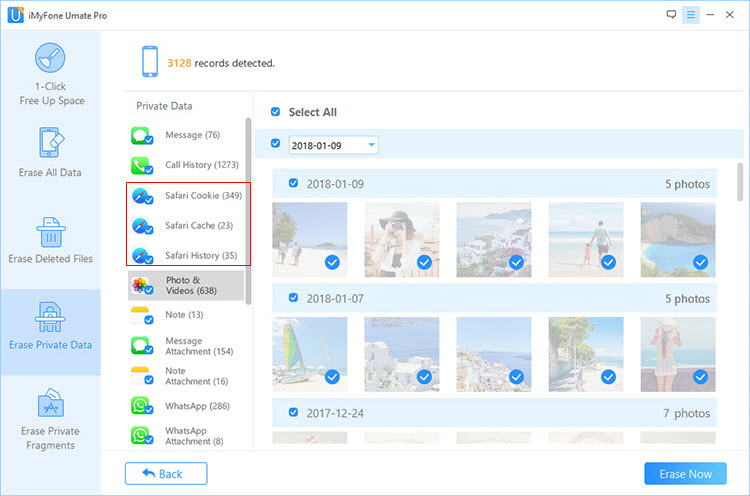
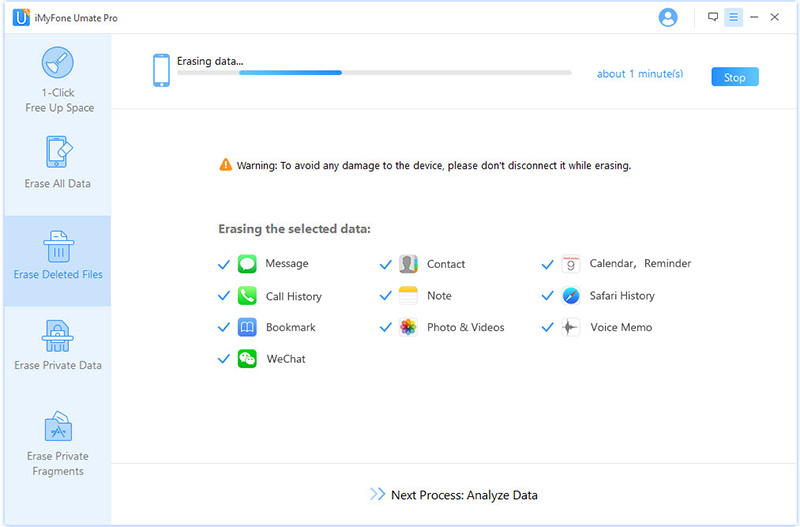
Option 3: How to Clear Deleted Safari Cache on iPad
Besides the existed Safari cache and cookies, iMyFone Umate Pro can also delete the previously deleted Safari data. Just follow the steps below.
Step 1: Choose an erase mode. Here we take "Erase Deleted Files" to erase deleted Safari history for example. Then hit "Scan" button.
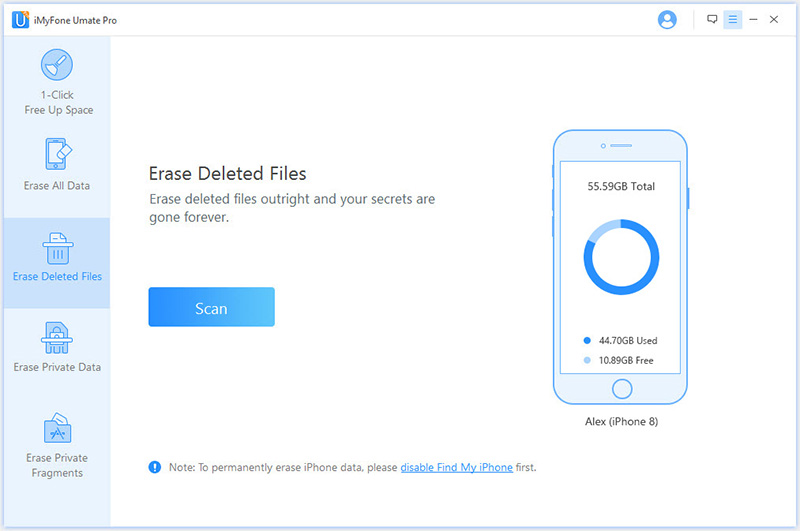
Step 2: Your previously deleted data will be displayed. Check "Safari History" and then hit "Erase Now" button. Cofirm it by typing "delete" into the box.
The famous media macworld.co.uk also reviewed iMyFone iPad Eraser as an effective cache cleaner for iPhone.


 March 12, 2024
