Most people, particularly IT professionals, know how frustrating it can be to set up a zoom meeting but only to discover that the camera is not working. Even though you can still join the meeting with your microphone, you may need to fix the camera issue to have a more productive virtual meeting. This content contains the solution you need. Simply follow the fixes to have what you want in no time at all.
Part 1: Check If Your Video Is Turned on
Sometimes, the issue you think is big may not at all. If you see that your camera is not working on zoom, try to check to be certain if your video is turned on.
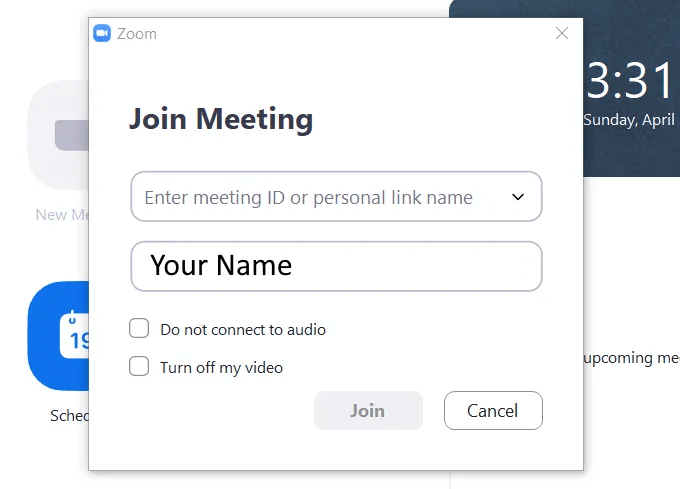
Every user of zoom is prompted by the app when they join a meeting to check a box saying " Turn off my video ". If you check the box, the video will be turned off and your camera will not be working. So, if you need the camera, ensure the box isn’t checked. Besides, if your camera is not working on zoom, you may want to check if all other programs are using the camera. If there is any, try to close it
Part 2: Restart Zoom Camera Access
Another effective method you may want to try if you notice that your camera not working on zoom is to stop the video and restart it.
The moment the app is reopened, you will see on the bottom bar the up arrow next to the "Start Video/ Stop Video" setting, click on it.

Ensure that your zoom camera is connected. Try to uncheck the camera and then recheck. Now see if the problem is solved.
Restarting the zoom is a simple fix that will work. However, if it fails, you may want to try to restart your PC.
Part 3: Check Privacy Settings
One of the reasons your camera not working on zoom can be that there are specific privacy settings on your Windows 10 that are preventing both the hardware and software from accessing the zoom camera. If this occurs, what are the steps to take?
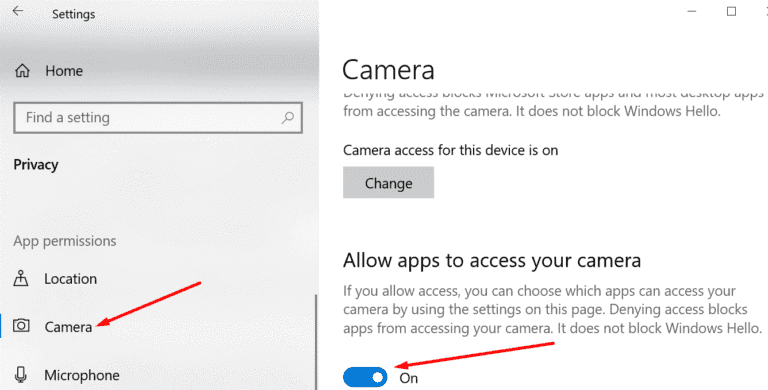
- Step 1: Open the "Settings" app and click on Privacy.
- Step 2: Click on "Camera" under "App Permissions".
- Step 3: Toggle on the "Allow apps to access your camera" option.
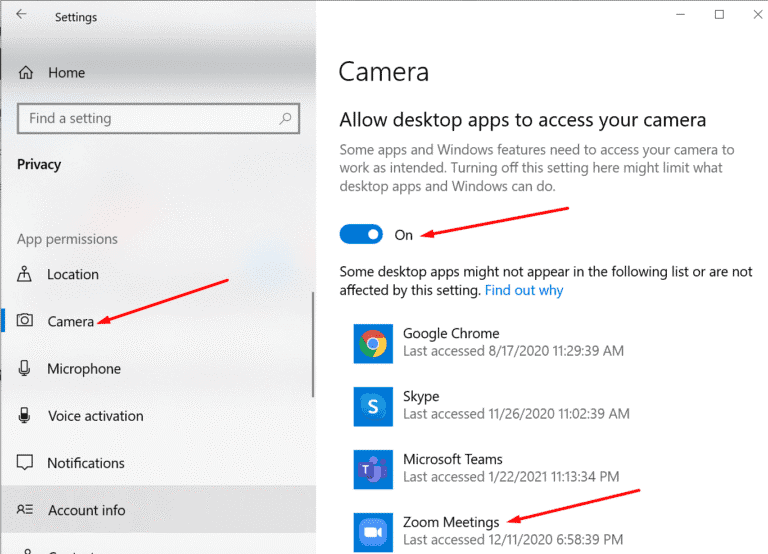
- Step 4: Turn on the "Allow desktop apps to access your camera" option to allow Zoom to use the camera.
Part 4: Use Zoom's "Troubleshooting"
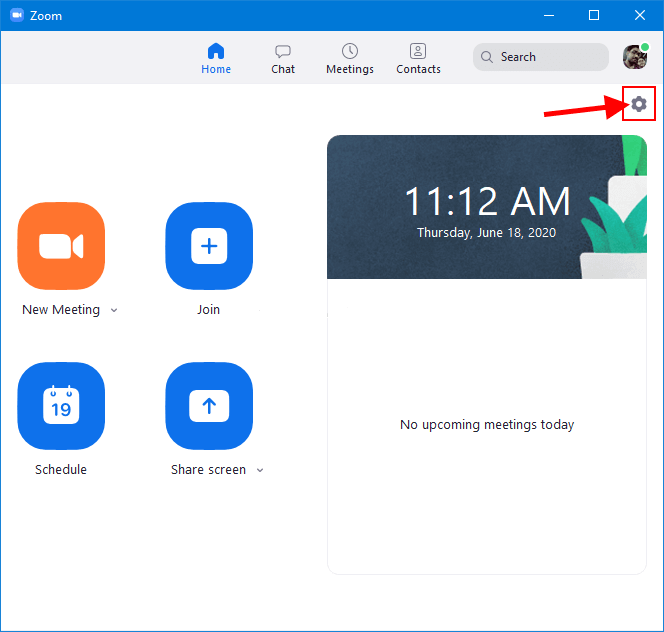
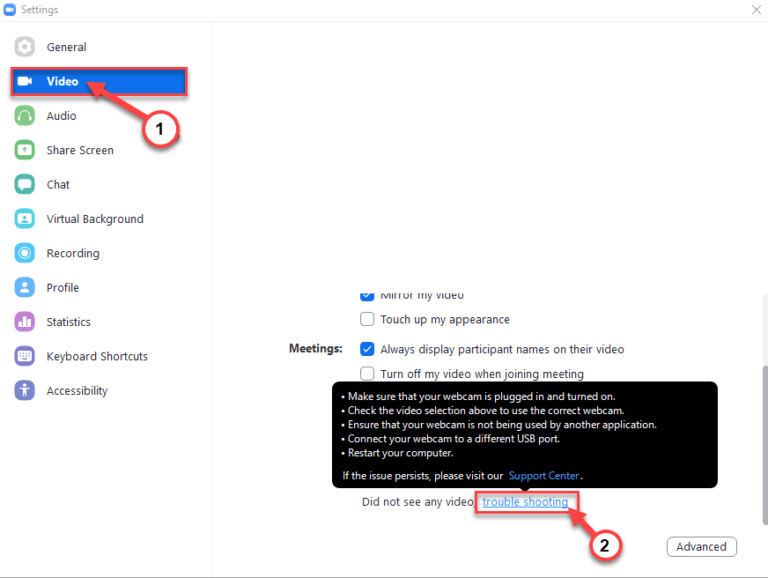
You can use zoom troubleshooting to deal with the issue with your zoom camera if it's not working. Below are the steps to get it done:- Step 1: Run the Zoon app on your PC.
- Step 2: Open Zoom settings by pressing the gear-shaped icon.
- Step 3: Press "Video" on the left-hand side.
- Step 4: Then scroll down and click on "troubleshooting" at the right-hand side of the same window.
Ensure you follow the pop-up list of instructions minutely. This list includes ensuring the webcam is plugged in and turned on, ensuring the webcam is not used by another application, and restarting your PC if nothing is working.
Part 5: Disable and Enable Webcam
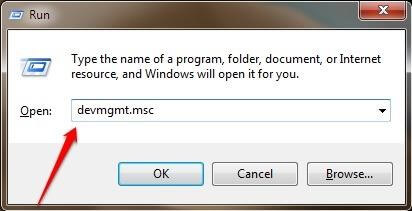
One of the effective ways that have worked for a lot of users facing problems with the camera of their zoom is Disabling and enabling the webcam. What are the steps to take? Steps to Uninstall Webcam Driver- Step 1: Click on Windows key+R to open the "Run" window.
- Step 2: Type "devmgmt.msc" in the 'Run" window and press "Ok". Then the "Device Manager" will open.
- Step 3: Expand the "Cameras" section.
- Step 4: Right-click on "Integrated Webcam" and press "Uninstall device".
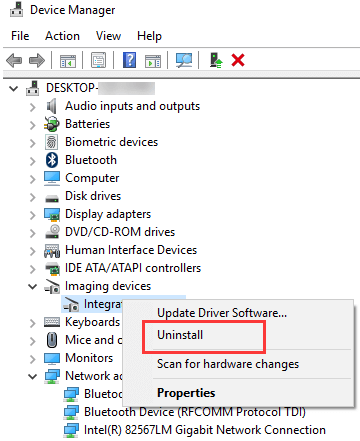
- Step 5: To confirm the uninstallation, click on the "Uninstall" option to uninstall the Webcam driver from your computer.
Steps to reinstall the Webcam Driver
There are two methods to get this done:
- Method One
To install the uninstalled camera driver, you can reboot your computer.
- Method Two
In case the first method fails to reinstall the camera driver, then try to do it manually yourself by following the steps below:
- Step 1: Open the Device Manager.
- Step 2: Press "Action" and try to click on the “Scan for hardware changes” option.
Check If the problem is solved after reinstalling the webcam driver from the Zoom app.
Note: Another way is to manually update the webcam driver. Do this with the following steps:- Step 1: Open the Laptop manufacturer’s website.
- Step 2: Download the latest webcam driver.
- Step 3: Install the driver by running the installer package.
- Step 4: Reboot your laptop.
- Step 5: Open your Zoom app to test the camera and see if the issue is fixed.
Bonus: Fix Zoom Camera Not Working with Fixppo
iMyFone Fixppo refers to an iOS system recovery program capable of fixing iOS systems and devices. If you have any iOS issues, you may turn to Fixppo, which solves those problems like a piece of cake.
8,000,000+ Downloads
Great Features of Fixppo
Fix your iPhone/iPad/iPod touch/Apple TV without losing data.
Support all iOS versions and devices including iOS 16 and iPhone 14 models.
Downgrade iOS to the previous version without jailbreak.
Enter/Exit Recovery Mode in 1 click.
Steps to Fix iPhone Camera not working with Fixppo
- Step 1: Download Fixppo on your PC and install it.
- Step 2: Use a USB cable to connect your iPhone to your PC and run the program.
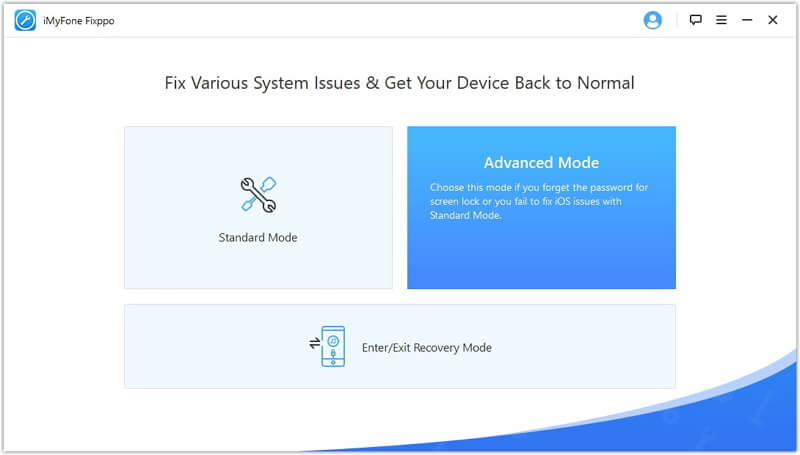
- Step 3: Choose "Standard Mode" from the main menu. You can as well try "Advanced Mode" if "Standard Mode" does not work.
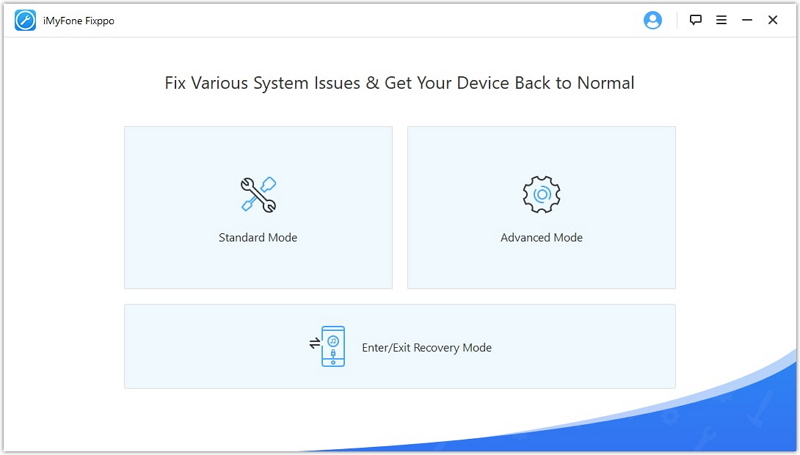
- Step 4: Put the device into DFU Mode. Ensure that the specific iPhone is selected to have the correct instructions.
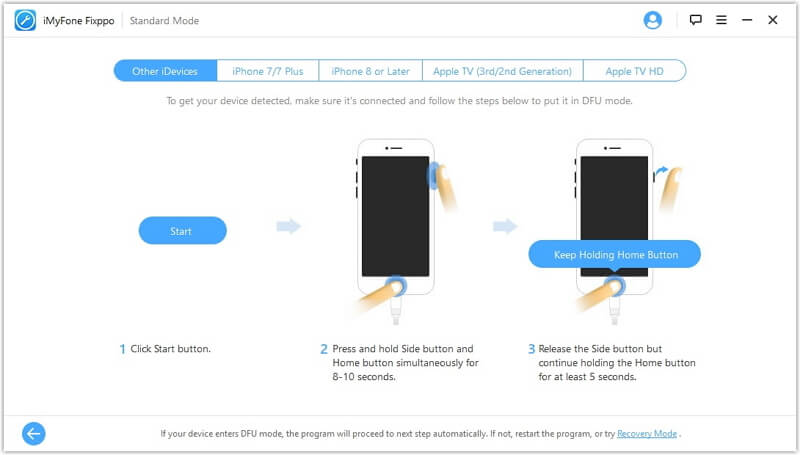
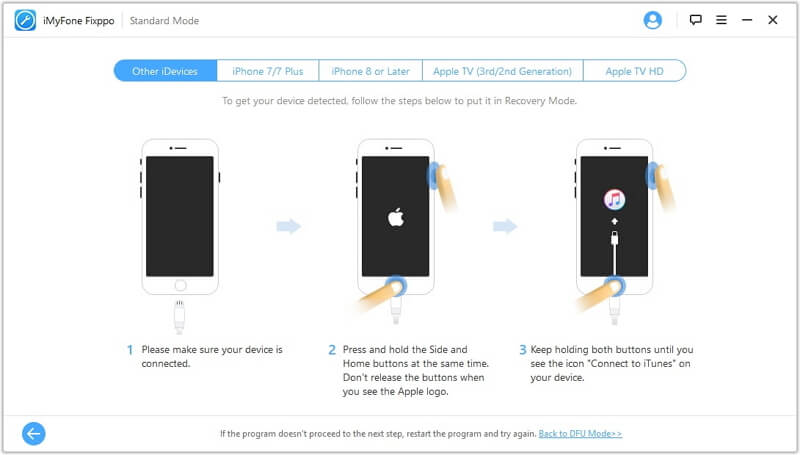
- Step 5: You will see some information about your device once your device is in Recovery Mode (or DFU Mode). Click on the "Download" option to proceed after verifying your information is correct.
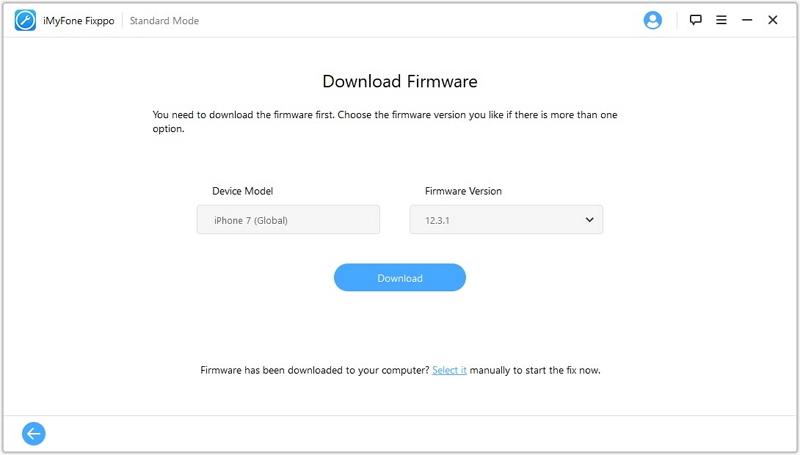
Change any incorrect information.
- Step 6: Click on "Start" after the software has downloaded the needed firmware.
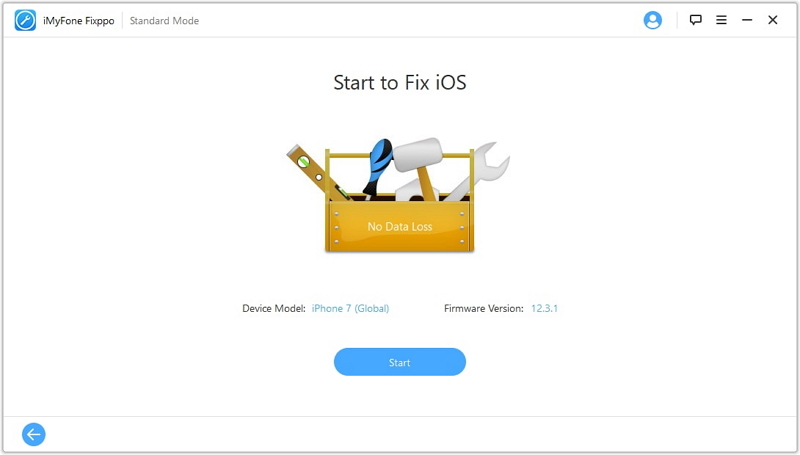
- Step 7: The problem should now be fixed by the new iOS firmware.
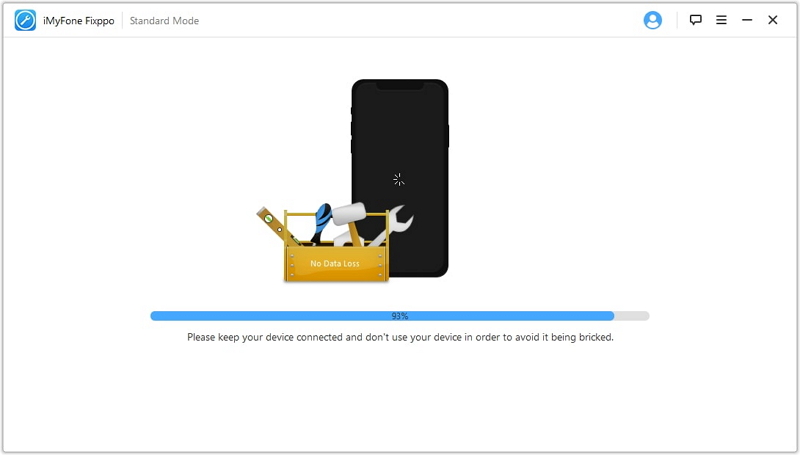
You can use the same step under "Advanced Mode" if "Standard Mode" fails to fix the problem. However, unlike "Standard Mode", " Advanced Mode" will lead to deal loss.


 February 8, 2023
