Why WiFi Disconnects When iPhone is Locked/Sleeping? How to Fix It
Category: iPhone Issues

3 mins read
In this article:
In certain situations like when updating your device to iOS 16/17/18, backing up data to iCloud or restoring data from iCloud is necessary, then you will need Wi-Fi to remain active and connected even when the iPhone is locked. Yet, there are some users who have reported that Wi-Fi will disconnect when the device is locked or asleep. This means that these functions can be severely impaired.
If you are experiencing the problem of Wi-Fi disconnecting after locking or sleeping, the following article offers a wide range of solutions you can try.
Fix your iPhone/iPad/iPod touch/Apple TV without losing data.
1 Forget the Network and Rejoin
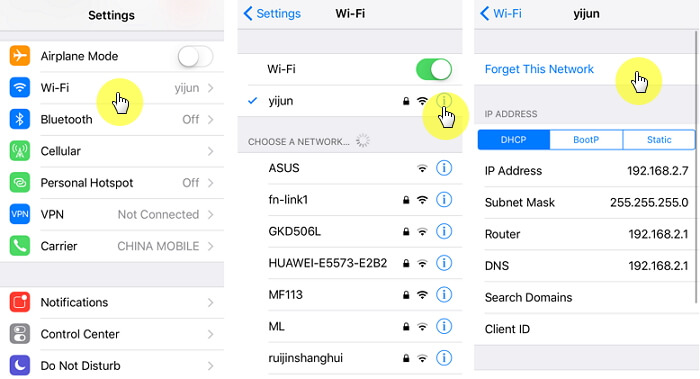
This solution has been proven to work for other network related problems. Follow these simple steps to forget and rejoin a network and see if this fixes when your iPhone won't stay connected to Wifi:
Step 1: Open the settings app on your iPhone and then go to “Wi-Fi”.
Step 2: Tap on “Forget this Network” and when a popup appears.
Step 3: Now go back to “Settings > WiFi and rejoin the network by entering its password.
2 Disable VPN from Settings
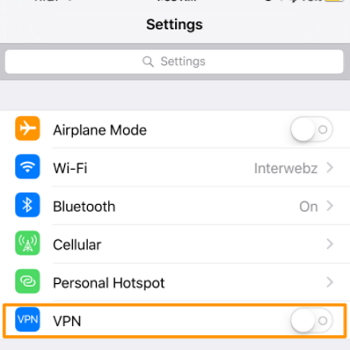
Sometimes VPN can affect the functionality of your Wi-Fi connections. So, if you have enabled VPN you may want to disable it and see if this solves the problem. To do this, follow these simple steps;
Step 1: Go to Settings on your device.
Step 2: : Find VPN in the settings and if the status is marked “Connected”, toggle it to “Not Connected”.
3 Update Router Firmware
It is also very likely that the problem could be your Wi-Fi router. If in particular, the Wi-Fi router’s firmware is outdated, you need to update the firmware to fix the problem. The process of updating a router’s firmware will depend on the manufacturer. You can find more information on the manual or the manufacturer’s website.
4 Turn off Wi-Fi Networking Services
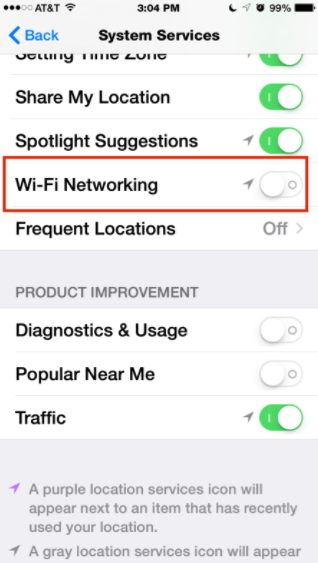
Some users have also reported that the iPhone dropping Wifi problem was fixed when they disabled Wi-Fi networking services. Follow these simple steps to try it;
Step 1: Open the Settings on your device.
Step 2: Tap on Privacy and then tap “Location Services”.
Step 3: Tap on “System Services” and then turn off “Wi-Fi Networking”.
This doesn’t turn off Wi-Fi, it just prevents Wi-Fi networking to be used by Location services.
5 Turn off Wi-Fi Assist
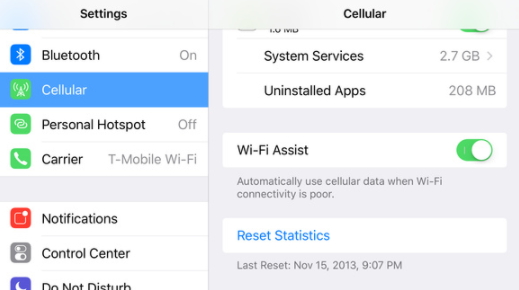
Wi-Fi assist is a new iOS feature that can be used to find more reliable Wi-Fi connections when the one you’re using becomes problematic. However, there are some users who have reported that turning off Wi-Fi Assist can solve a lot of Wi-Fi related problems. Follow these simple steps to turn off Wi-Fi Assist and see if it works for you;
Step 1: Open the Settings and then tap on “Cellular”.
Step 2: Scroll down to find “Wi-Fi Assist” and if it’s turned on, toggle the switch to turn it off.
6 Restore and Reset iPhone System Without Data Loss - Fixppo
If none of the above solutions work, you may need to restore the device and reset it as new. Doing this will eliminate some of the settings that may be causing the issue. The go-to solution for restoring a device and setting it up as new is iCloud or iTunes. The problem is that these two solutions can result in the loss of existing data on your device.
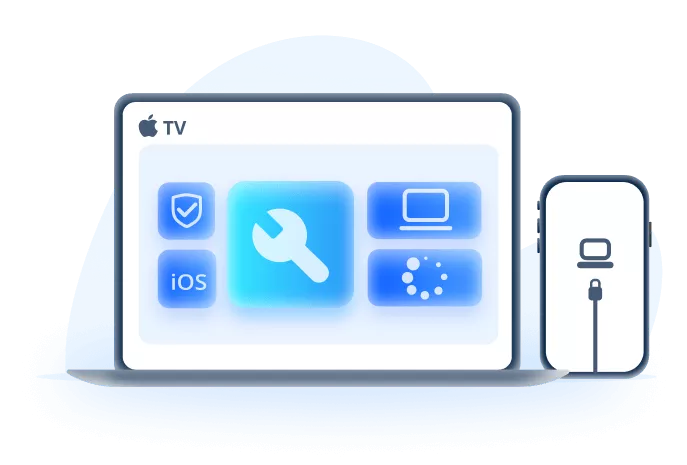
If you don’t want to lose any of the data on your device, you may want to consider troubleshooting and repairing your iOS system with a professional helper - iMyFone Fixppo. If there are bugs with your system, then common solutions might not be able to resolve the problem smoothly but seeking help from a third-party tool should work.
One-stop iPhone Troubleshooter:
- Restore and reset iPhone system without data loss.
- Compatible with all iOS versions and devices.
- It's 100% secure to use without losing data.
Within 4 simple steps, this annoying problem won’t boggle your mind anymore and iOS-related glitches that cause you the trouble will be removed instantly.
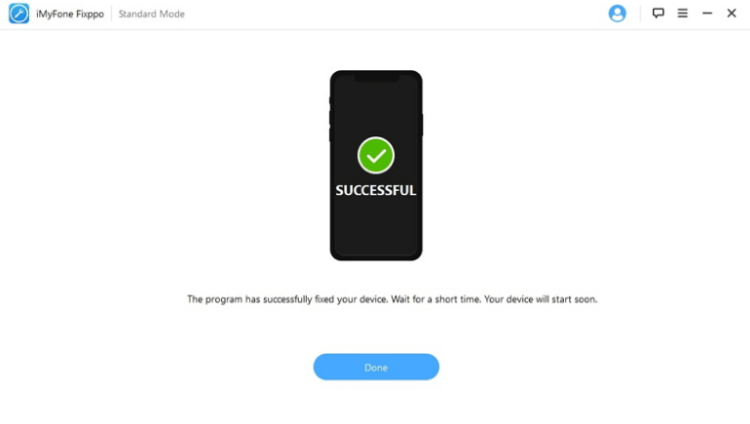
Step 1: Download and install Fixppo to your computer, then choose Standard Mode.
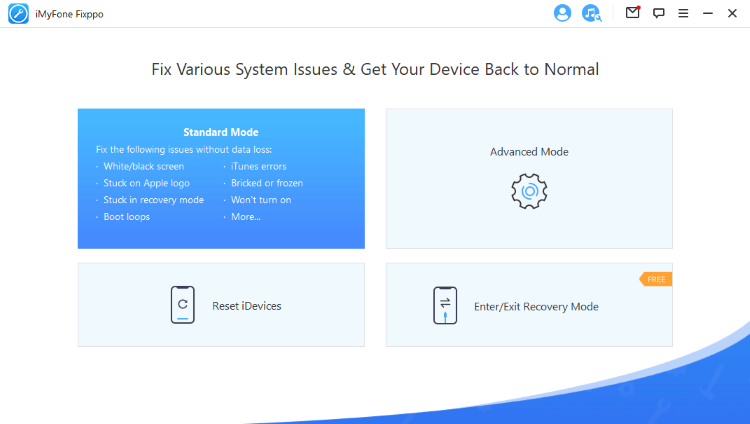
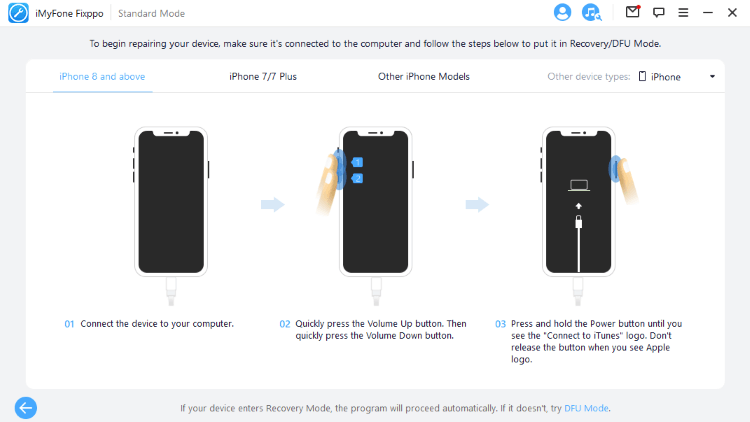
Step 2: Connect your device to computer. You're able to head to the next step once your device gets detected. If not, please put your iPhone into Recovery Mode first.
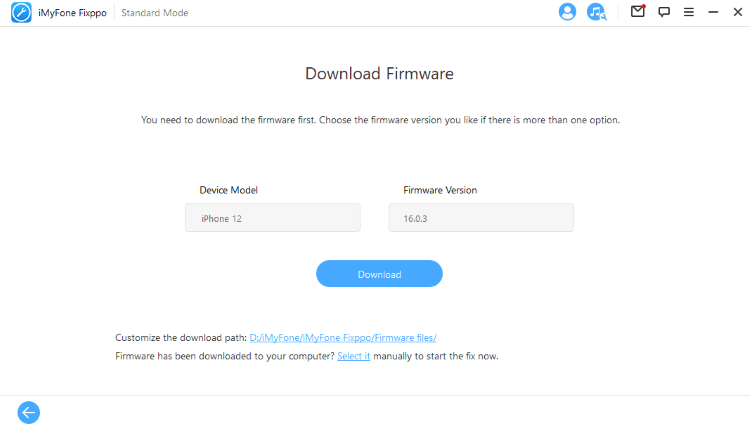
Step 3: Now, your device information will show up on the screen, click on Download to download the firmware package.
Step 4: When the firmware is downloaded, click Start to begin the fixing process, please wait patiently. After that, your iPhone will be restarted successfully. You may now go to see if problems of your YouTube Music are fixed smoothly.
