An iOS update is important for a variety of reasons; it can help eliminate some iOS bugs, removing some common feature issues. An update also comes with great new features that can enhance your iOS experience. But updates have also been known to cause a lot of problems. One of these problems is less common than many others but it does occur. There are users who have reported that the iPhone ringer is not working as soon as they updated the device to iOS 16.
If this happens, the following solutions can help you get to the bottom of the issue and hopefully get your ringer working normally again.
1. Try Some Basic Troubleshooting
Before you attempt any more advanced procedures to fix the ringer, try the following troubleshooting steps. They are easy to operate and they probably work to fix iPhone ringer not working on iOS 16;
- Make Sure Do Not Disturb Is Turned Off
When it is turned on, Do Not Disturb can disable the ringer. This is great for when you are in a meeting but can also make you think the ringer is broken. If it is on, you should see a moon icon on the top right of the screen. To turn it off, go to Settings > Do Not Disturb.
- Make Sure Bluetooth Is Turned Off
If the Bluetooth on your device is turned on and connected to other devices, your ringer may not work. Go to settings > Bluetooth to turn it off.
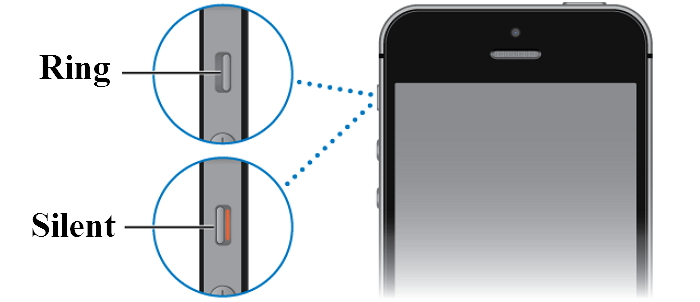
- Check the Mute Button
You also need to make sure you did not turn on "Mute" which may cause the ringer to fail to go off. The mute button is located on the left side of the iPhone and you need to push it toward the screen to turn on the ringer. You will see a small red stripe if mute is enabled.
2. Adjust the Ringer Volume
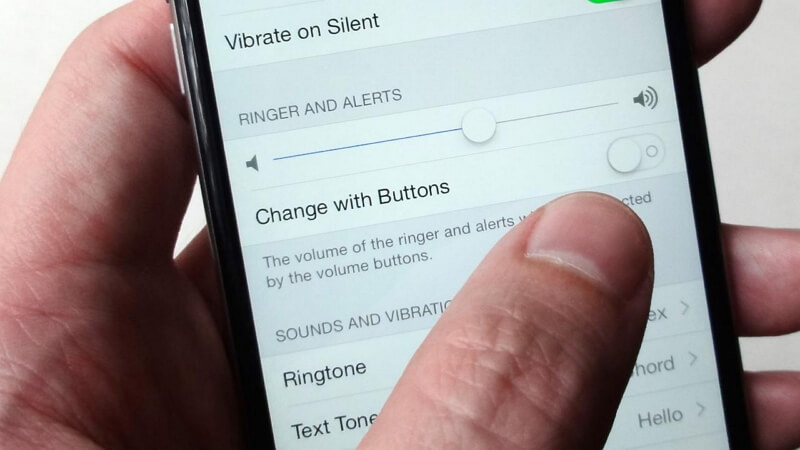
The ringer on your iPhone can refuse to work even if all other sounds on the iPhone are working because the ringer volume setting is independent from the volume of other sounds on the iPhone.
To adjust the ringer volume go to Settings > Sounds > RINGER AND ALERTS and then move the slider all the way to the right to increase the ringer volume. Then the issue that iPhone ringer not working but sound works will probably be fixed.
3. Reset All Settings on iPhone
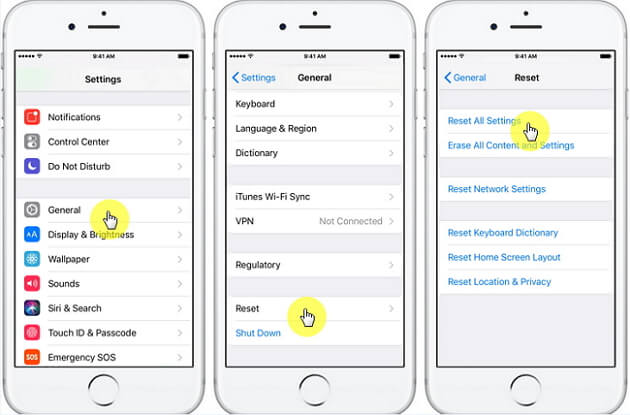
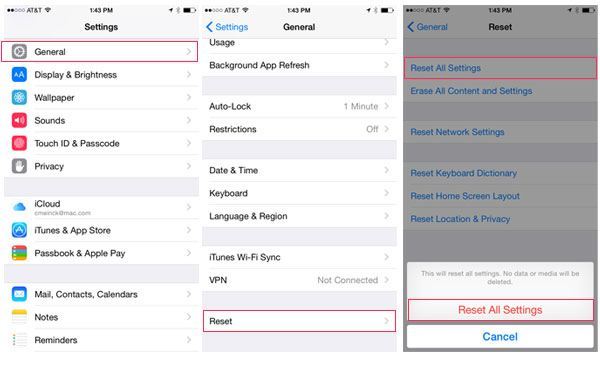
You can also fix this problem by resetting all settings on your iPhone. Resetting the settings on your device will only affect the settings and doesn’t cause data loss. To reset the settings on your iPhone, go to Settings > General > Reset > Reset All Settings. Enter your passcode when prompted and this will reset all settings on the device including the ringer settings which could fix the issue.
4. Check If the iPhone Is Stuck in Headphone Mode
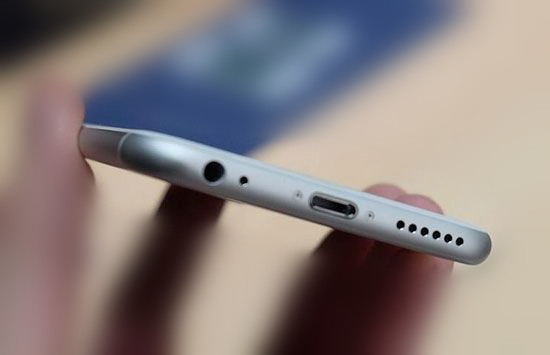
The ringer on your iPhone can also suddenly stop working when the device is stuck in headphone mode. If the iPhone is stuck in headphone mode, you should see the headphone icon on the screen at the top even when the headphones are not connected. Click here to learn how to fix an iPhone that is stuck in headphone mode.
5. Fix iPhone Ringer Not Working by iMyFone iOS Recovery
If you have tried all the solutions above and none of them have worked, you may need to update the iOS system on your iPhone. To do this, you need to use a third-party system recovery program like iMyFone Fixppo, This program is designed to fix many iOS related issues by detecting the issue and then updating the iOS system accordingly. Some of the features that make it the ideal tool to help you fix this problem include the following;
- It can be used to easily fix many iOS related issues including a device that is stuck in DFU mode, recovery mode or the Apple Logo as well as a device that is unresponsive in one way or another.
- Its three different recovery modes ensure that it is effective regardless of how serious the problem is. It can also fix the problem without data loss.
- The process is quick and easy, requiring only a few simple steps.
- It is compatible with all iPhone models including iPhone X and all versions of the iOS system including iOS 16.
How to Fix iPhone Ringer Issues by iMyFone Fixppo
After installing iMyFone Fixppo to your computer and launching it, you can use it to fix an iPhone whose ringer is not working. Follow these very simple steps;
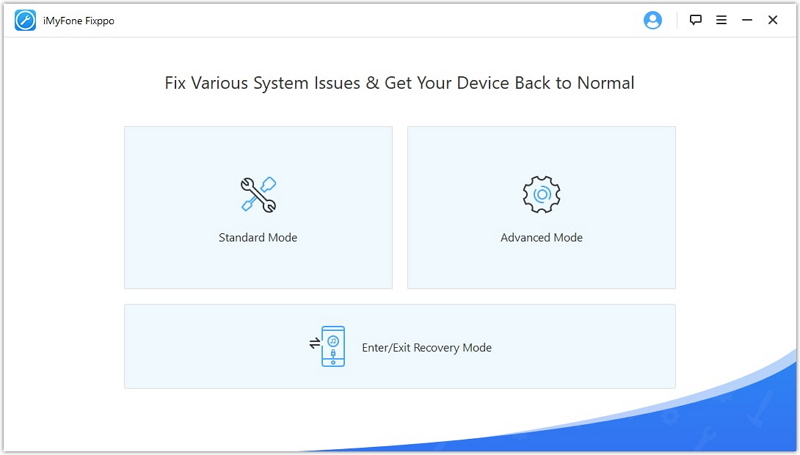
- Step 1: Choose Standard Mode from the main window and connect the iPhone to the computer. You can see that 3 modes are offered and Standard Mode won't cause any data loss on your device during the fix.
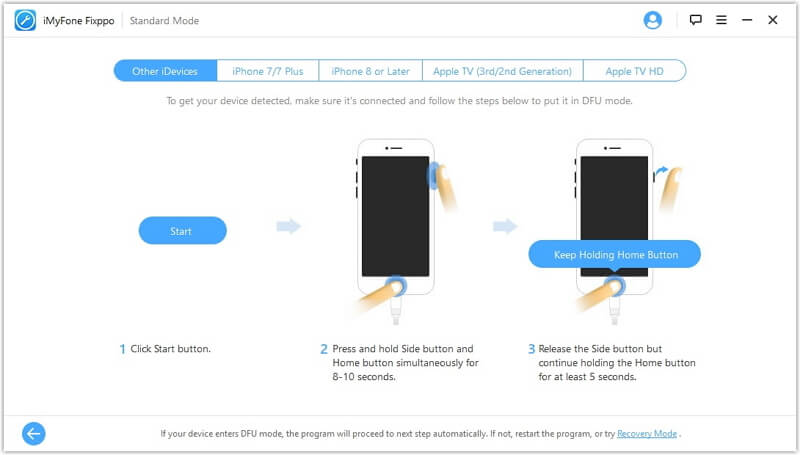
- Step 2: Then click "Start." Follow the instructions on the program to put your device in DFU mode or recovery mode.
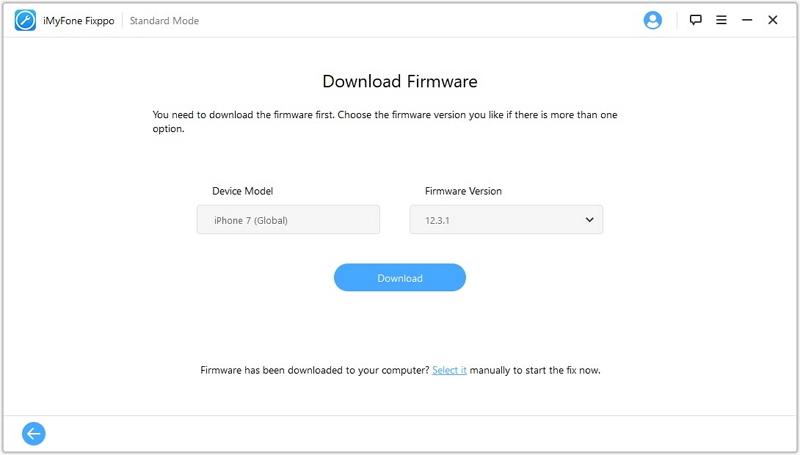
- Step 3: With the device in recovery mode or DFU mode, the program will prompt you to download the latest firmware. Click "Download: and then wait while the firmware is installed on your device.
- Step 4: Click on "Start to Fix" as soon as download is completed and the program will begin fixing the device immediately.
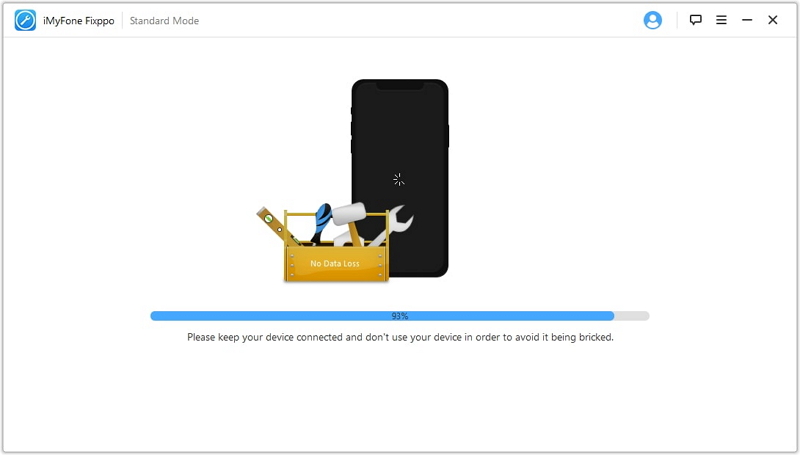
The iPhone will restart in a few minutes and the device will be working normally again.
6. Factory Reset Your iPhone
Another way to fix an iPhone that is unresponsive is to reset the iPhone to factory settings. This is usually a last resort and should only be attempted when all other solutions fail to produce the desired result. That's because a factory reset will remove all the data and settings on your device. To factory reset the device, begin by creating a backup of all the data on the device and then follow these simple steps.
- Step 1: Open the settings on your iPhone and then tap on "General."
- Step 2: Tap on "Reset" and then choose "Erase All Contents and Settings."
- Step 3: When prompted, enter the passcode and when a warning box appears, tap on "Erase iPhone" to confirm the action.
- Step 4: You may also need to enter your Apple ID password before the iPhone begins to wipe all the data and settings on the device.
Once this is done, the iPhone will go back to the set-up screen. You can then follow the instructions to restore a backup to the device.


 February 8, 2023