So far Apple officials haven't said anything about it. We have tried to resolve this message sending failure in our base with certain different methods which are mentioned below. Go ahead, try them out, possibly your issue can also get resolved.
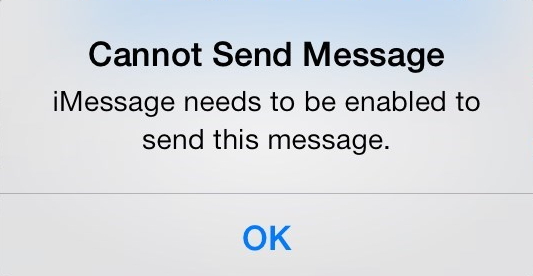
7 Tips to Fix "iMessage Needs to Be Enabled to Send This Message" Issue
1. Delete the Thread & Start a New One
When you are unable to send a message on iMessages because of the pop-up saying, "iMessage needs to be enabled to send this message", try to delete that particular thread and start again. Some people who got the same problem find this way works, so you may be able to send message again once you start a new thread.
2. Disable & Re-enable iMessage
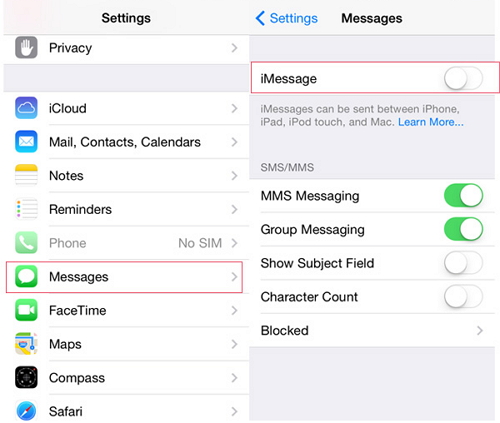
Since the error itself says that iMessage needs to be enabled, therefore this troubleshooting step can make you out of the trouble. You can disable your iMessage in 'Settings' and then enable it again. To perform this method, the steps are given below.
- Open 'Settings' in your iPhone and scroll for the 'Messages' option.
- Tap on it and toggle off the slider just next to 'iMessage' option.
- Wait for a while and then re-enable 'iMessage' by toggling it on.
3. Sign Out & Sign In iMessage Account
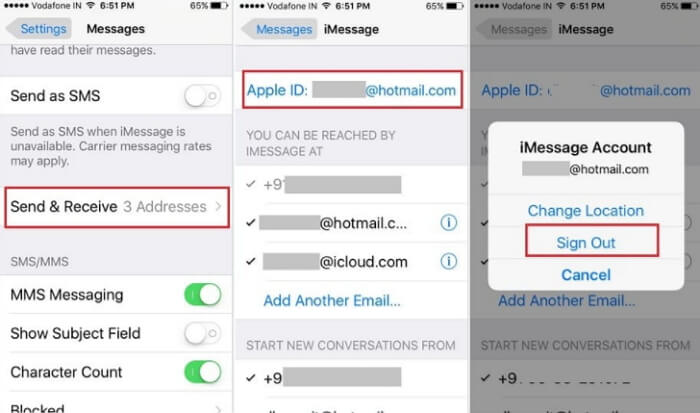
Reportedly, signing out and signing in your iMessage account can miraculously solve your aforementioned problem. Follow the below mentioned steps carefully in order to fix the issue.
- Launch "Settings" of your iPhone XS, iPhone XR or iPhone XS Max, and get into the "Messages" section. Now, you are required to get into the "Send & Receive" tab.
- Next, hit on the preferred "Apple" ID of yours which you wish to sign out.
- A pop up will appear and hit on the "Sign Out" option.
- Reboot your device now and then follow the first step again. Now, tap the "Add Another Email..." option and sign in to the same Apple ID account again.
4. Reset Network Settings
Resetting the network settings can be a useful step when "iMessage needs to be enabled" error pops up. However, this method will, as the name suggests, reset your network settings like Wi-Fi settings or VPN settings etc. Here are the steps that need to be followed for the process.
- Open 'Settings' and tap on 'General'.
- Go to the 'Reset' option and tap 'Reset Network Settings'.
- Enter passcode when asked and confirm the decision by hitting on 'Reset Network Settings'.

5. Reset All Settings
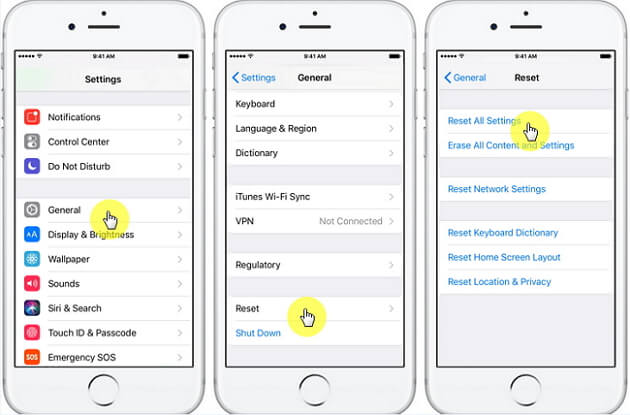
After resetting the above settings, if unfortunately you are still unable to start conversation again in iMessage, you can go for this method. This will reset your settings to default. The steps are given below.
- Go to 'Settings' and tap on 'General'.
- Go to 'Reset' followed by 'Reset All Settings'.
- On prompt, enter your passcode and then tap again on 'Reset All Settings'.
6. Fix iOS Bug without Data Loss
If the above methods doesn't help, there could be a software problem with your iPhone. You can also fix the iOS issue using a third-party tool and the most recommended tool will be iMyFone Fixppo. It has the compatibility with all iOS devices and iOS versions. It is basically a data recovery tool which contains a special feature namely "Fix iOS System". This feature is designed to fix the iOS issues and hence it will be the best choice to try when your device is not letting you send message due to the pop-up – "iMessage needs to be enabled to send this message".
iMyFone Fixppo iOS Repair Tool (iOS 17 Supported)
Key Features:
- The software's "Fix iOS System" feature can deal with numerous iOS problems, such as black screen, white screen, iPhone stuck in recovery mode, restart loops and so on. It can fix the problems with no loss of data.
- The software holds expertise in recovering lost data under various lost data scenarios, like accidental deletion, or data disappearing suddently.
- iMyFone Fixppo is compatible with almost all iOS devices including iPhone 15, and supports to recover 22 types of data including, photos,contacts,WhatsApp messages, Kik messages, WeChat messages and so on.
- It can find the deleted data fast with its four recovery modes.
Limited Time 10% OFF Coupon Code: FARTT91
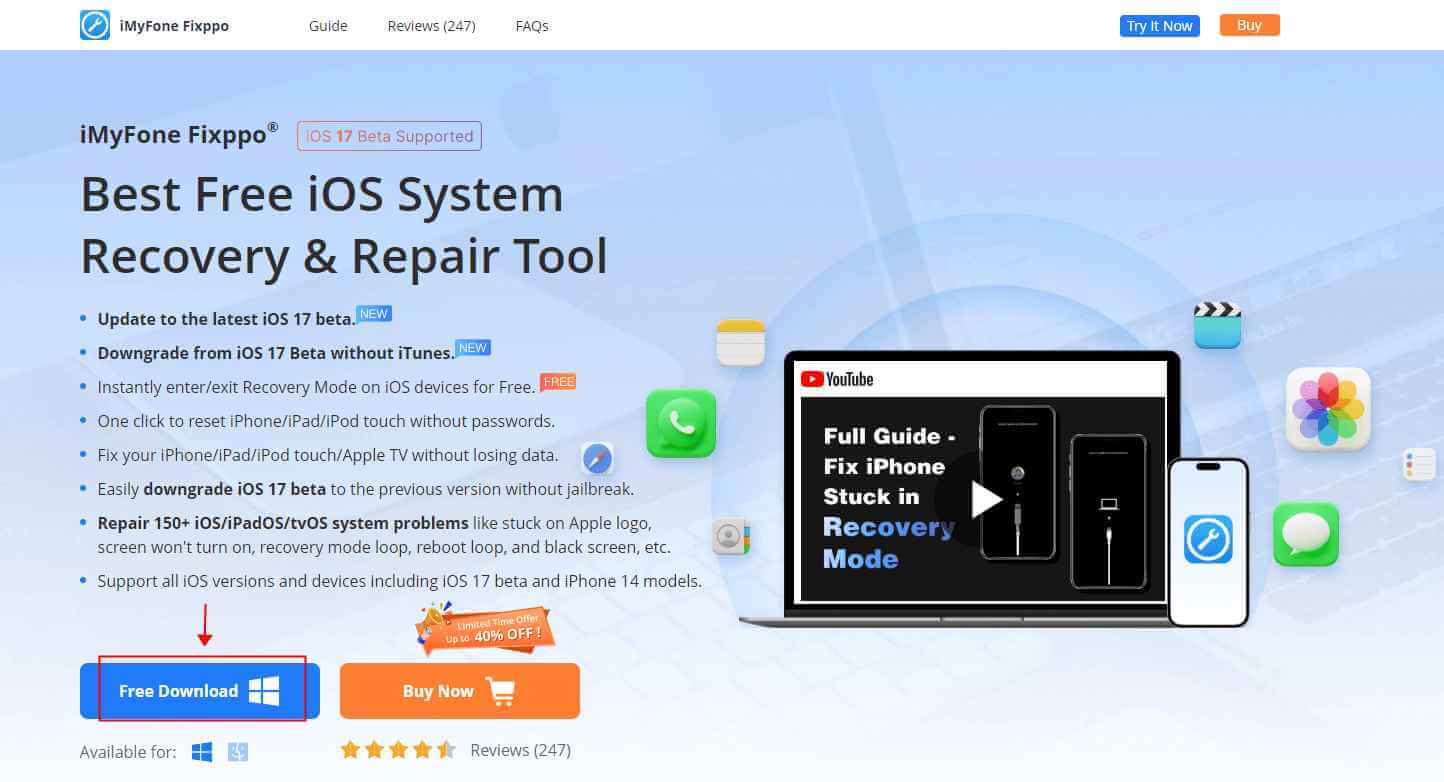
Step 1 – Download and install iMyFone Fixppo on your computer, launch the program and connect your iPhone to the computer using a USB cable.
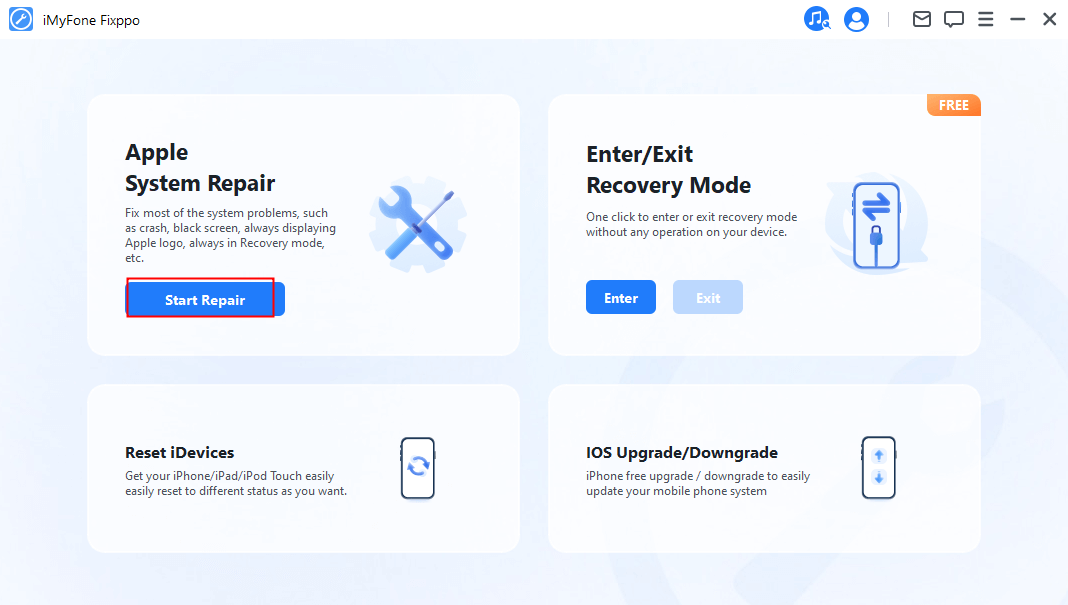
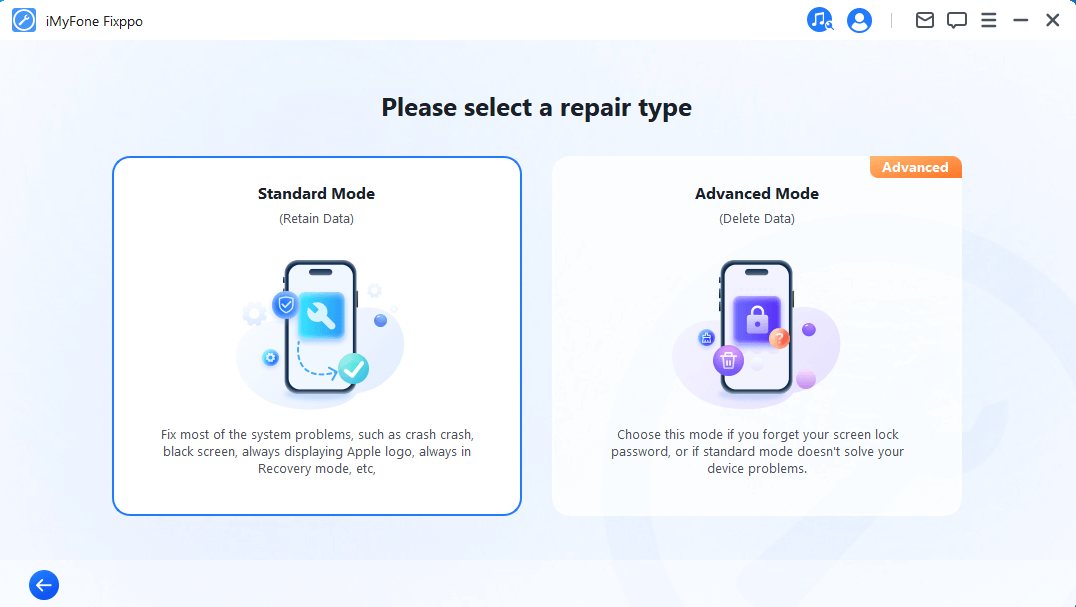
Step 2 – Click the "Start Repair" button and choose "Standard Mode".
Step 3 – Enter Recovery Mode or DFU Mode.
Connect your iPhone to the computer using a USB cable. Follow the on-screen instructions to put your iPhone into DFU or Recovery mode.
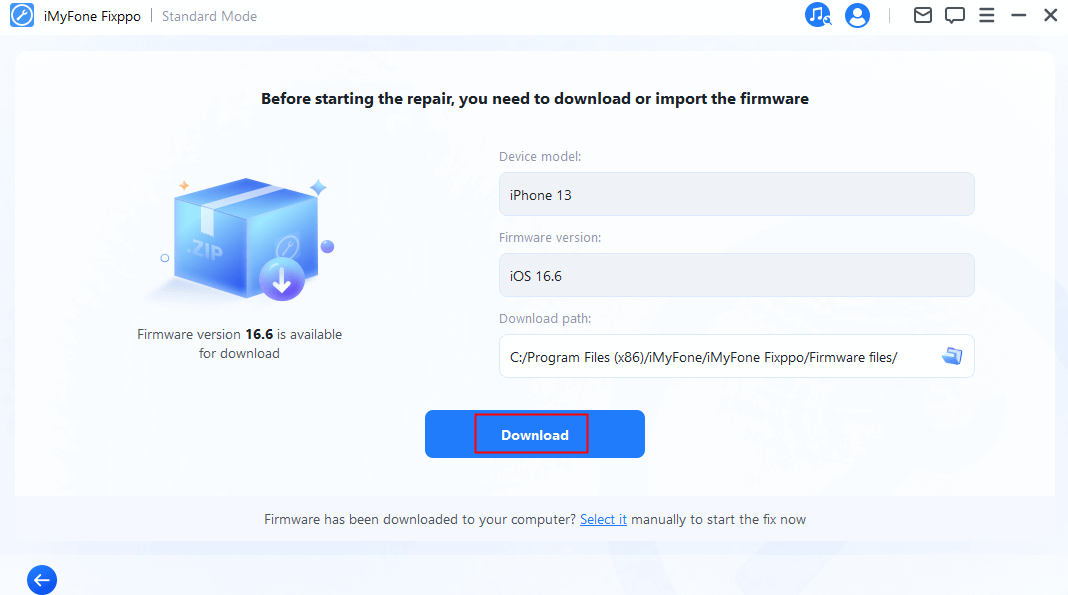
Step 4 – Confirm your device details and download the appropriate firmware packa/bge suggested by Fixppo.
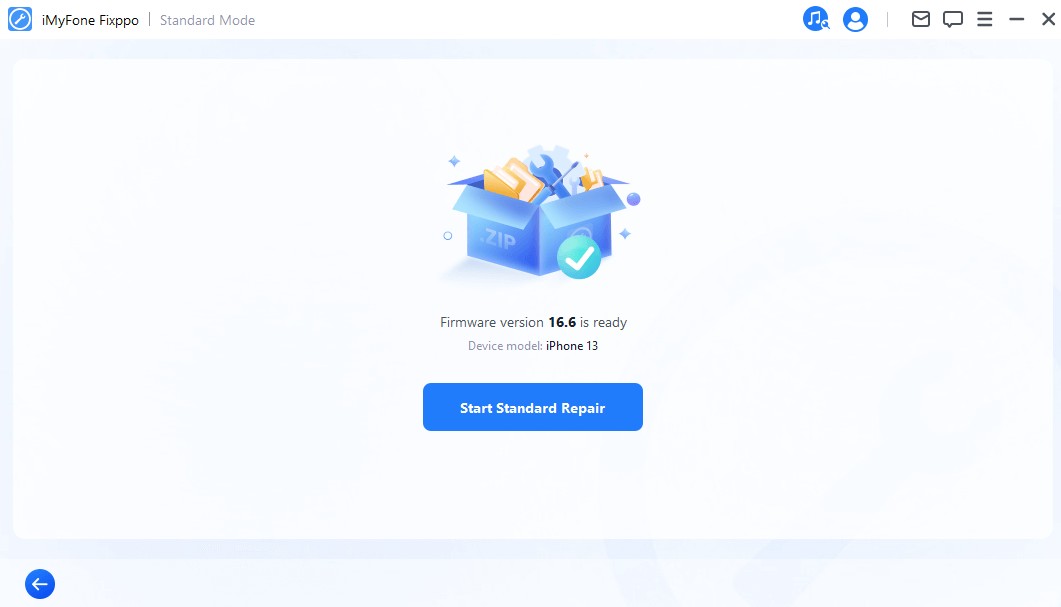
Step 5 – Once the firmware is downloaded, click on "Start Standard Rapair" to initiate the system repair process.
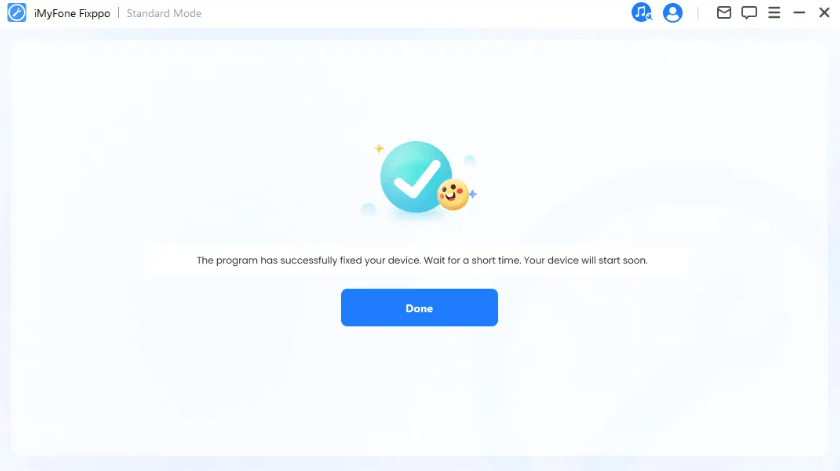
Step 6 – After the repair is complete, your iPhone will restart. Check if the "iMessage Needs to Be Enabled to Send This Message" is resolved. You may want to know: [2023] Top 12 Ways to Fix iPhone Not Ringing Issue in iOS 17
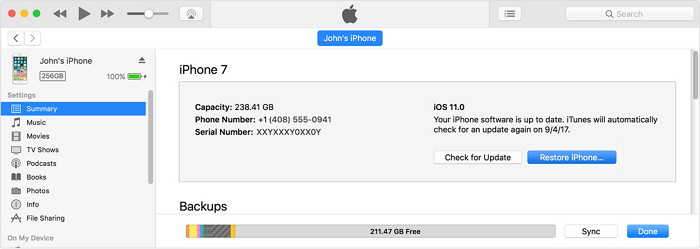
Although restoring using iTunes wipes away all the data, it often comes out as the helpful solution in many problems and therefore we suggest you try this method for the iMessage issue too. For more effective result, you need to restore your device with iTunes using the recovery mode. Don't worry if you don't know the steps, we are providing them. Keep reading to know them. We now hope that you've gotten "iMessage needs to be enabled to send this message" error resolved now.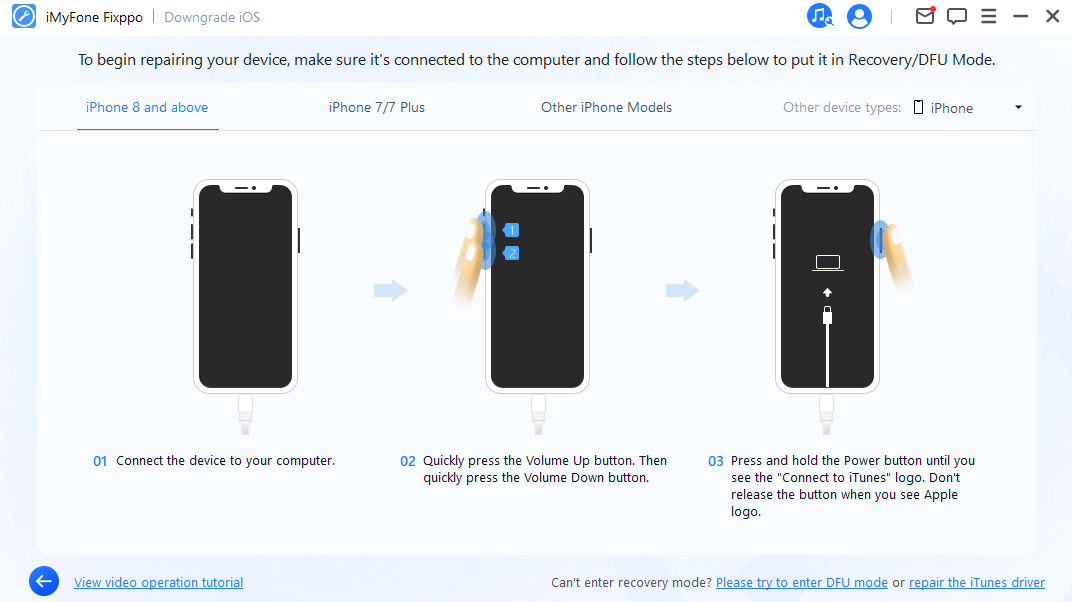
7. Restore iPhone using Recovery Mode with iTunes


 September 25, 2023
