Google Maps Voice on iPhone is an exceptionally handy tool that can assist you when you need to find a particular route which is totally new to you. With that said, some users have complained that their Google Maps voice not working due to some unknown reason.
It is needless to mention how annoying and frustrating when it is not working. However, we have composed this article to help you out.
Q. Why My Google Maps voice not working on iPhone?
In fact, there is no single particular reason behind “Google Maps voice navigation not working” issue. In other words, navigation issues on Google maps can occur due to various reasons. For instance, it can be a simple setting issue or an issue related to failed iOS update. Well, this article will show you how to address the most common causes.
Phase 1: Back Up Your iPhone before Fixing
Before trying any fix on your iOS device, we strongly suggest you to back up it due to various obvious reasons which will minimize the potential to data loss.
In order to create a backup of your valuable data, you can consider using official tools like iTunes or iCloud. Both of these tools are offered for free (iCloud is free only up to 5GB though). But both of these tools let you create full backups of the available data.
Phase 2. Top 9 Ways to Fix Google Maps Voice Not Working on iPhone
After creating a backup of your data (either through iTunes/iCloud), you can try the solutions explained hereafter.
Way 1. Enable Voice Navigation in Google Maps
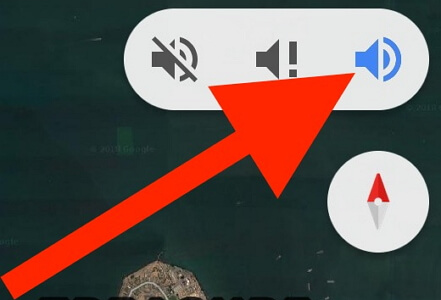
The simplest fix to address this issue is enabling voice navigation in Google Maps.
Step 1: Open Google Map on your iOS device.
Step 2: After starting the navigation, you will see sound option (top right corner of the screen). Tap to enable voice.
Way 2. Check Bluetooth Connection
If your iPhone is paired with the car speaker and you are away from the car, you cannot hear voice assistance. So, follow the steps below.
Step 1: Go to Setting and select Bluetooth option so you can see currently paired devices.
Step 2: Just disconnect the Bluetooth connection so Google Maps will start to use iPhone voice.

Way 3. Redownload Voice Direction
If your device doesn’t have downloaded voice directions on it, you cannot necessary hear the voice. Under such instances, the solution is to download voice directions. Steps below show how to download voice direction.
Step 1: Connect the device to internet.
Step 2: Then, click on the option called get directions. Once the process is completed, you can start the software and change voice on the Map you would do usually.
Way 4. Check Your iPhone Volume Level
Sometimes, you may not be able to hear Google Maps voice because the volume is down to the minimum. To fix it, you can easily press Volume Up button and then increase the audio level.

Way 5. Pause Spoken Audio
Pausing spoken audio is another simple fix you can use. If you were listening to podcasts instead of listening to music, you may not be able hear the voice of Maps Navigation.
Step 1: Go to Settings and select Maps option.
Step 2: Tap on the option Driving and Navigation.
Step 3: Check Pause Spoken Audio option which is can be found under Navigation Voice Volume.

Way 6. Force Close and Restart Google Map
You can try restarting the Google Map app to get it worked once again. This method applies to fix when Google Maps timeline freezing.
Step 1: Perform a double press on the iOS device’s home button. If it is an iPhone X, go to recently used apps through swiping the screen (as it doesn’t have a home button).
Step 2: Find Google Map and swipe left to close it. If necessary, you can close the other running apps.
Step 3: Now that Google Maps is closed, you should open it once again to see if it works properly.
Way 7. Clear Your Device's RAM
Clearing the RAM might solve some minor issues related to Google Map’s functionality. This cannot be fixed just by restarting the app.
Step 1: First of all, unlock your iOS device.
Step 2: Press and hold the power button until you see “Slide to power off” option.
Step 3: Now release the power button and then press and hold home button for about five seconds.
Way 8. Restart Your iPhone
If your device is still giving troubles, you should try restarting the device and see if the issue is solved.
For iPhone 8 or older:
Step 1: Press and hold the Top button so you can see the slider.
Step 2: Drag the slider and turn the device off.
Step 3: Now, press and hold the Top button once again to see the Apple logo and get the device restarted.
For iPhone X or later:
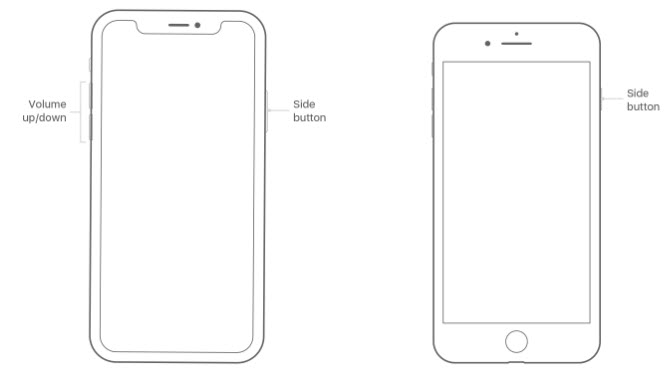
Step 1: Press the Side button with any volume button together and hold them to see the slider.
Step 2: Drag the slider and turn the device off.
Step 3: Once the device is turned off, press and hold the Side button once more so you can see the Apple logo.
Way 9. Fix Google Maps Voice Not Working on iPhone without Data Loss
If you wonder how to fix Google Maps navigation not working issue without causing any data loss, you can use iMyFone Fixppo - a professional iOS system repair tool.
- Support fixing a wide range of issues associated with all iOS devices.
- It also supports most iOS versions including iOS 16/17/18.
- It has been trusted by many professional websites like Macworld, Cult of Mac, Payetteforward, Makeuseof and so on.
Here’s how to fix the issue by using iMyFone Fixppo.
Key Features:
- The software's "Fix iOS System" feature can deal with numerous iOS problems, such as black screen, white screen, iPhone stuck in recovery mode, restart loops and so on. It can fix the problems with no loss of data.
- The software holds expertise in recovering lost data under various lost data scenarios, like accidental deletion, or data disappearing suddently.
- iMyFone Fixppo is compatible with almost all iOS devices including iPhone 15/16, and supports to recover 22 types of data including, photos,contacts,WhatsApp messages, Kik messages, WeChat messages and so on.
- It can find the deleted data fast with its four recovery modes.
Limited Time 10% OFF Coupon Code: FARTT91
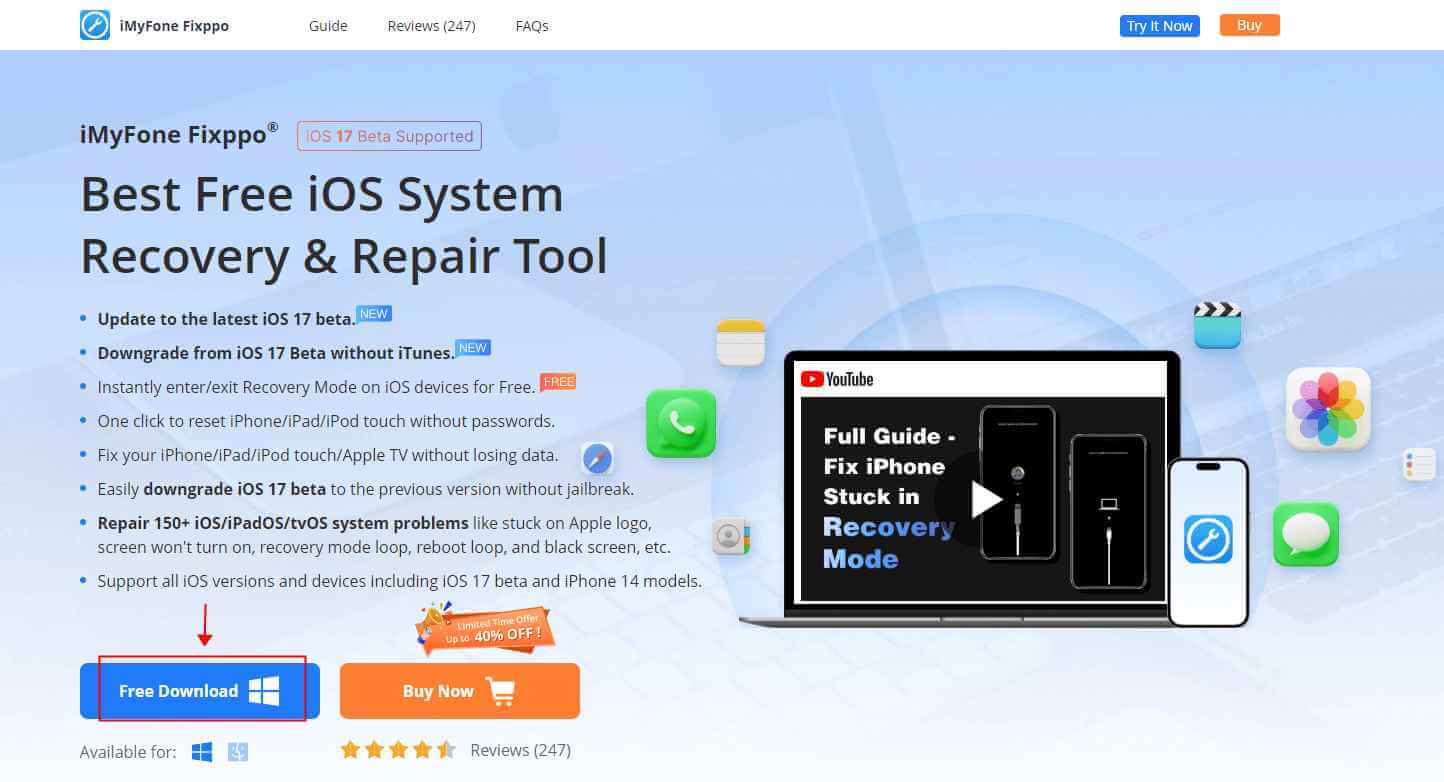
Step 1 – Download and install iMyFone Fixppo on your computer, launch the program and connect your iPhone to the computer using a USB cable.
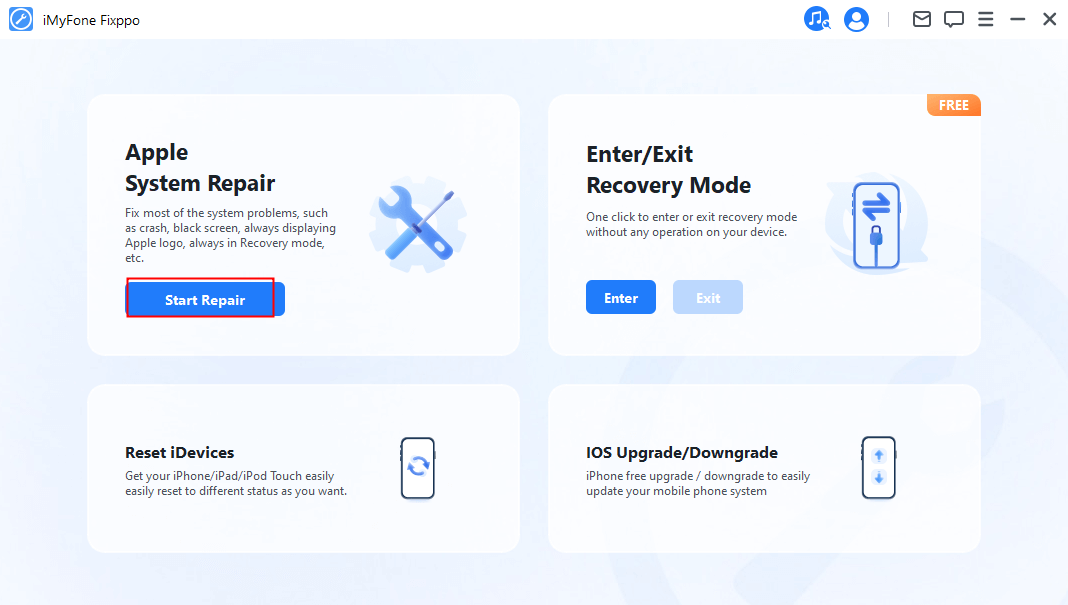
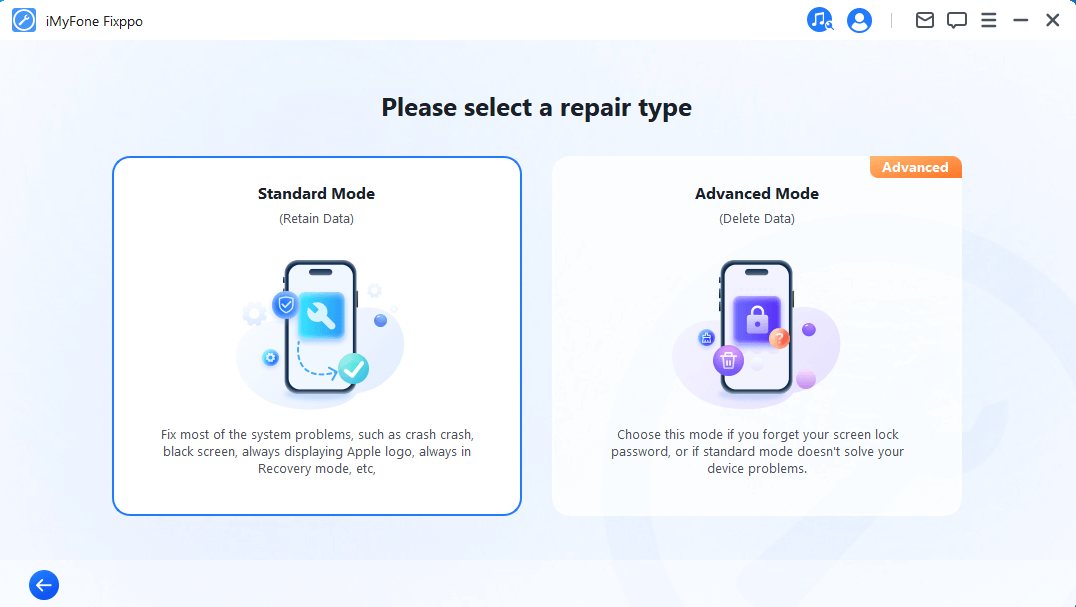
Step 2 – Click the "Start Repair" button and choose "Standard Mode".
Step 3 – Enter Recovery Mode or DFU Mode.
Connect your iPhone to the computer using a USB cable. Follow the on-screen instructions to put your iPhone into DFU or Recovery mode.
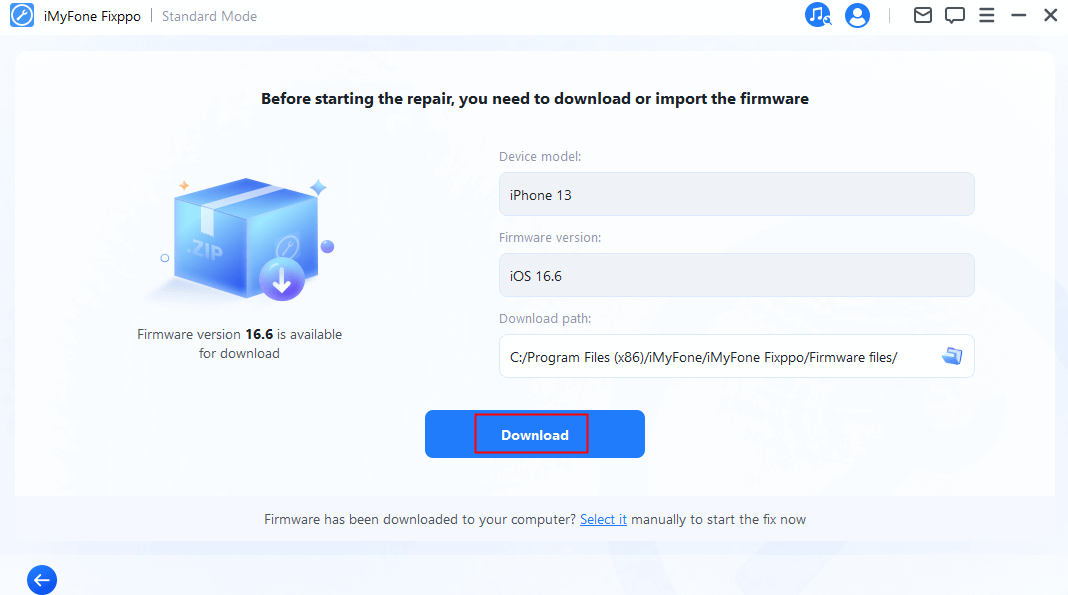
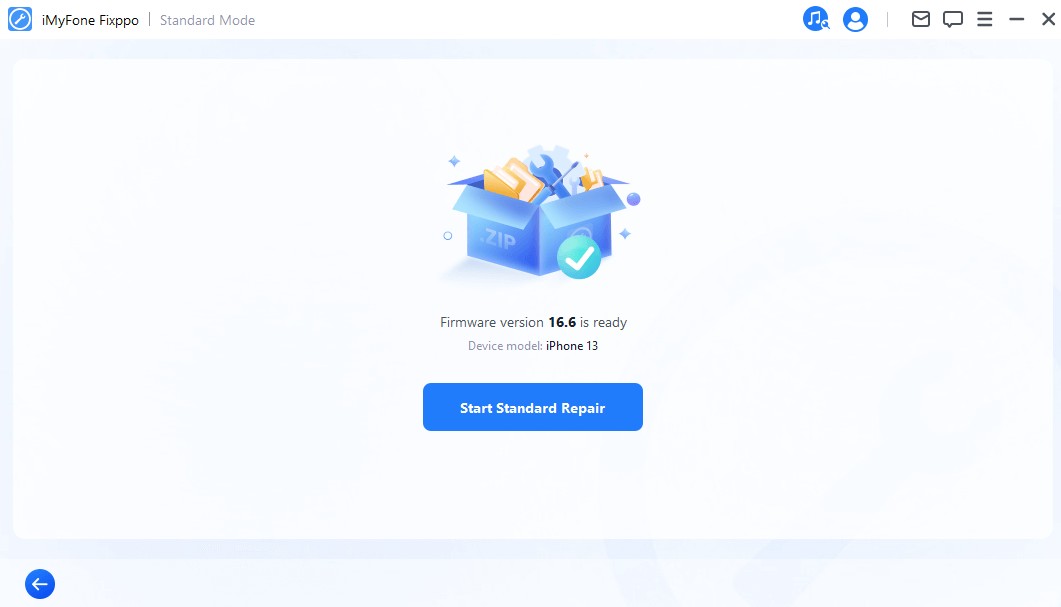
Step 4 – Confirm your device details and download the appropriate firmware packa/bge suggested by Fixppo.
Step 5 – Once the firmware is downloaded, click on "Start Standard Rapair" to initiate the system repair process.
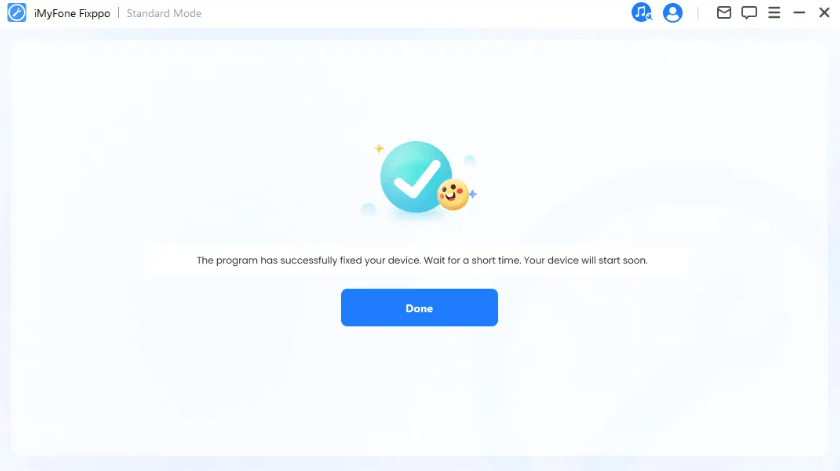
Step 6 – After the repair is complete, your iPhone will restart. Check if the Google Maps Voice Not Working on iPhone is resolved. Conclusion Well, those are the methods you can use to fix “Google Maps voice navigation not working” issue. You can go through the list of fixes we have mentioned above and pick the best that matches your preference. Also, please note that you keep backups of data before trying any fix. Last but not least, we appreciate if you can share your honest thoughts about this article. 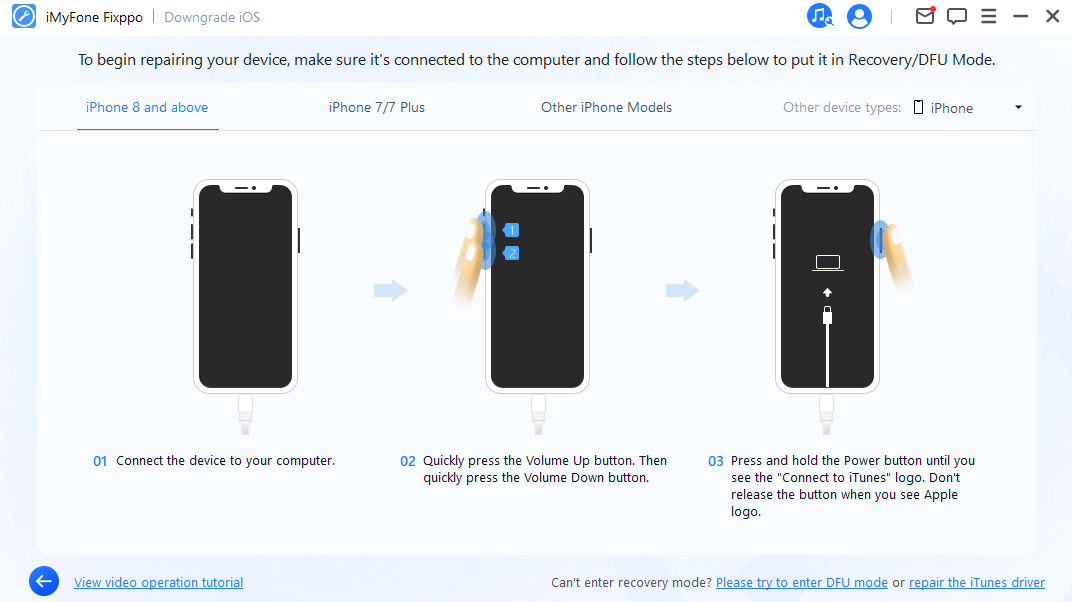


 March 27, 2025
