Too much important data on your iPod touch and you want to transfer them to your computer for backup or viewing them on computer anytime? Well, this thought deserves to be encouraged. But how to transfer data from iPod touch to computer? Generally, we use three ways to do that - creating a backup of iPod touch using iTunes, transferring iPod touch data using iCloud service, and using one 3rd-party data transfer tool to transfer important iPod touch data and access them on your computer. Here we explain the specific instructions and pros and cons of the three ways in the article.
1 Transfer iPod touch Data to Computer Using iTunes
Pros
1. iTunes is for free.
2. You can restore the backup that iTunes makes to your iPod touch when you need.
Cons
1. iTunes cannot transfer partial data on your iPod touch.
2. You cannot view the specific content in iTunes backup.
How to Transfer iPod touch Data to Computer Using iTunes
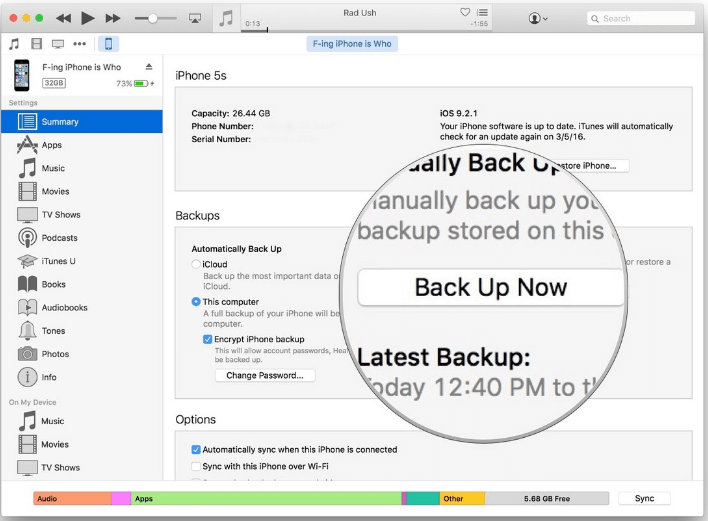
Step 1: Run iTunes on your computer. And then connect your iPod touch with the computer.
Step 2: You can select your iPod touch by clicking the device icon at the top left corner of the iTunes window.
Step 3: Click the Summary panel and you will see the information of your device and the Backups option.
Step 4: Click Back Up Now under Manually Back Up and Restore. And then wait for the transfer finishes.
2 Transfer Data from iPod touch to Computer by iCloud
Pros
1. Free way .
2. Provided that your iPod touch has been backed up to iCloud, you can transfer your data even your iPod touch is not at hand.
Cons
1. iCloud can only transfer less than 10 types of files to your computer.
2. If the data hasn’t been backed up to iCloud on your iPod touch, this way will be useless.
3. The operation is a little inconvenient.
How to Transfer Data from iPod touch to Computer by iCloud
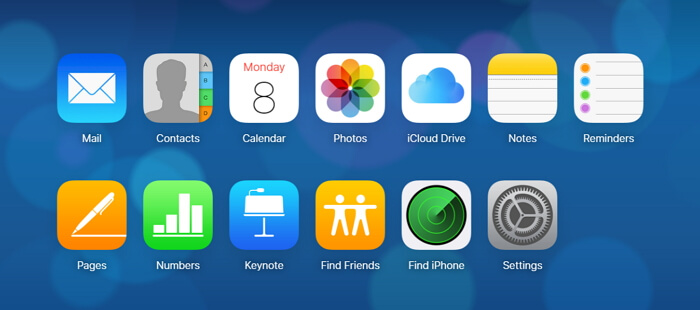
Step 1: Log in your iCloud account on your computer.
Step 2: Click the data type you want to transfer. Here we take contacts as example. And then choose the contacts you need to transfer. Of course you can choose all the contacts
Step 3: Then click the gear icon to choose Export vCard… to transfer the contacts to your computer.
Step 4. Other files types, such as photos, notes and more can be transferred with similar steps.
3 Selectively Transfer Data from iPod touch to Computer
If you want to pick up the important data on your iPod touch selectively and move it to the computer, iMyFone D-Port iPod touch Data Extractor is a good choice.
Pros
1. Selectively transfer up to 18 types of iPod touch data to computer.
2. All the operation is easy and can be finished in several minutes.
3.You can not only transfer the data on iPod touch to computer but also the data in your iTunes/iCloud backup.
4. You can also use it to backup your device, and you can backup certain type of data such as WeChat, WhatsApp, Messages instead of all the data on your device. These backups can be easily restored to your devices using iMyFone D-Port Pro.
Cons
1. It cannot transfer all the file types on iPod Touch.
2. You need to pay for the software, even it offers the free trial version.
Steps to Transfer Data from iPod touch to Computer Using iMyFone D-Port
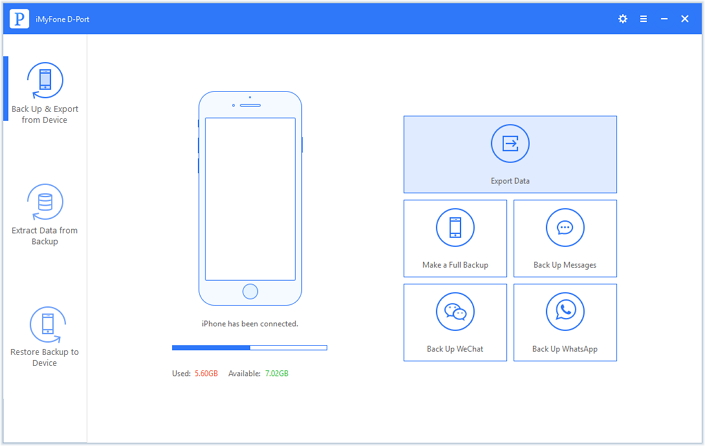
Step 1: Choose Extraction Mode
Download and launch the program. Connect your device to the computer. From the left panel, choose "Back Up & Export from Device" option. Click "Export Data" to continue.
Step 2: Choose Data Type and Scan iPod touch
Pick the file format(s) that you want to transfer from iPod touch. And click the “Next” key at the bottom of the screen.
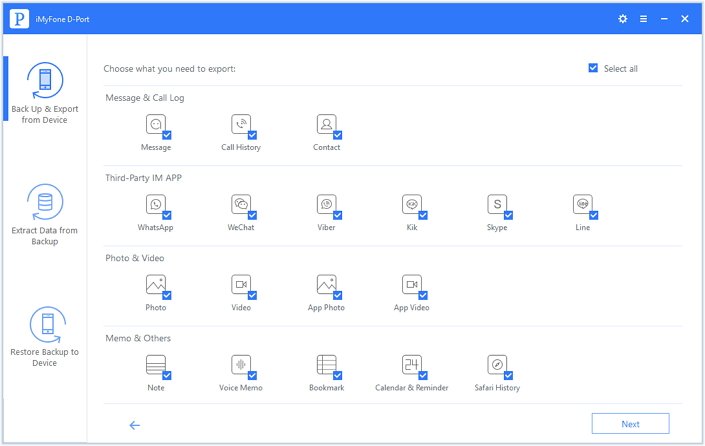
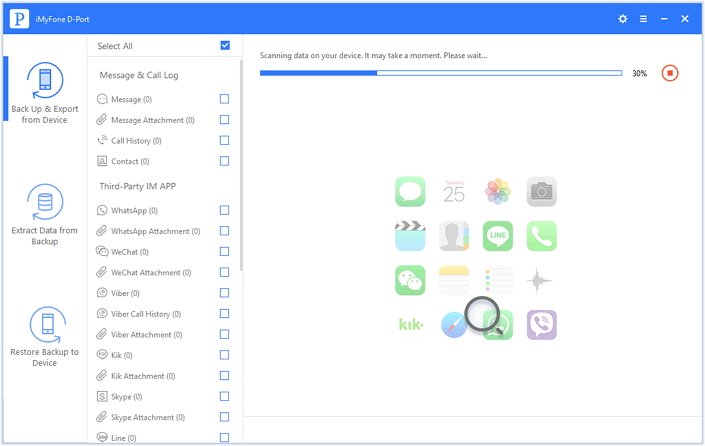
Then it will start the scanning procedure and identify the selected file formats.
Step 3: Preview and Selectively Transfer iPod touch Data
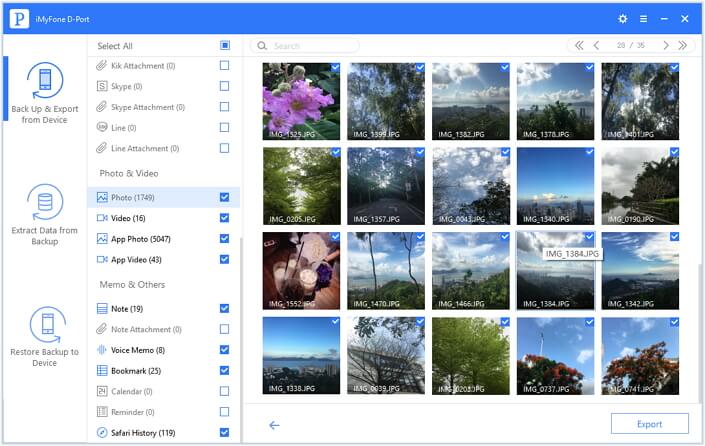
Then you will see the list of the files in the preview interface. You can mark all the files that you want to transfer and press the “Export” button to save the files on your computer.
That’s how iMyFone D-Port iPod touch Data Extractor finish the easy transfer from your iPod touch to computer.
And which way do you like most? Or any doubt about the article? Please feel free to leave a comment.


 September 13, 2021
