Two Ways to Save Photos from Viber on iPhone
Category: iOS Data Recovery

3 mins read
Your Viber account no doubt contains a lot of memorable photos that you may want to save to your Camera Roll so you can share on other applications. If a friend on Viber has sent you a particularly memorable or important photo and you are wondering how you can save it to your iPhone's camera roll, you've come to the right place. This article will share with you two different ways to save photos from Viber on iPhone, even you are using iOS 12/13/14/15/16 on your iPhone. Read on to find out how to do it.
In this article:
Part1. How to Save Photo from Viber
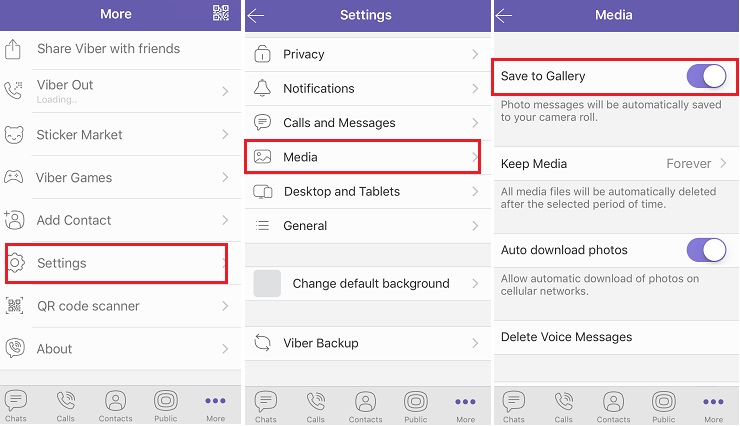
To save Viber Photos to your Camera Roll, you have to turn on the option in Viber. Follow these simple steps to do it.
Step 1: Open the Viber app and then tap on "More" from the menu at the bottom.
Step 2: Tap on "Settings" and then "Media" and switch on "Save to Gallery".
Step 3: Now head on over to the Settings app on your iPhone at tap on Privacy > Photos and the make sure that Viber is turned ON.
All your photos should now appear on your camera roll automatically.
Part2. Save Viber Photos, Call History and Messages from iPhone to Computer
A better way to keep your photos safe is to save them to your computer. As a matter of fact, we have a solution that allows you to not only save your Viber photos to your computer but all your messages and call history as well. This is a good way to have a backup of your Viber activity just in case you lose some of the messages.
This solution comes in form of an iPhone data transfer tool known as iMyFone D-Back that also comes in handy when you want to backup all your Viber messages and their attachments to your computer. Some of its features include the following.
iMyFone D-Back iPhone Data Transfer (iOS 16 Supported)

Key Features:
- Supports to transfer or recover deleted/lost videos, photos, contacts, messages and more.
- It is also ideal when you want to extract data from an iTunes or iCloud backup without resetting your phone.
- It is very easy to use and quite effective in both data recovery and data extraction.
- It has a preview function that you can selectively transfer or save data from iPhone.
Here's how to use iMyFone D-Back to save your Viber messages and their attachments to your computer. The steps work for iOS 16, also.
1. Install and Launch the Program on Your Comouter
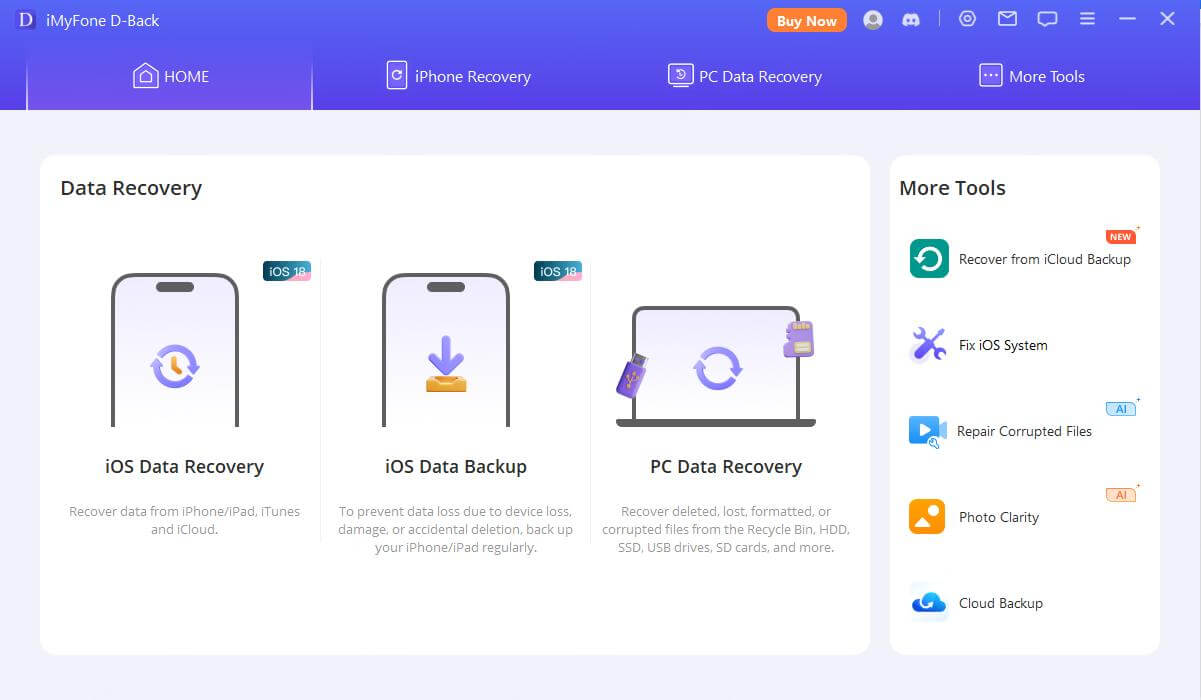
Step 1: Download and install the program to your computer and then launch it. On the main window, click on "Recover from iOS device" and then click "Start" to begin.
2. Connect the iPhone to the Computer
Connect the iPhone to the computer using USB cables and then click "Next" once the program recognizes the device.
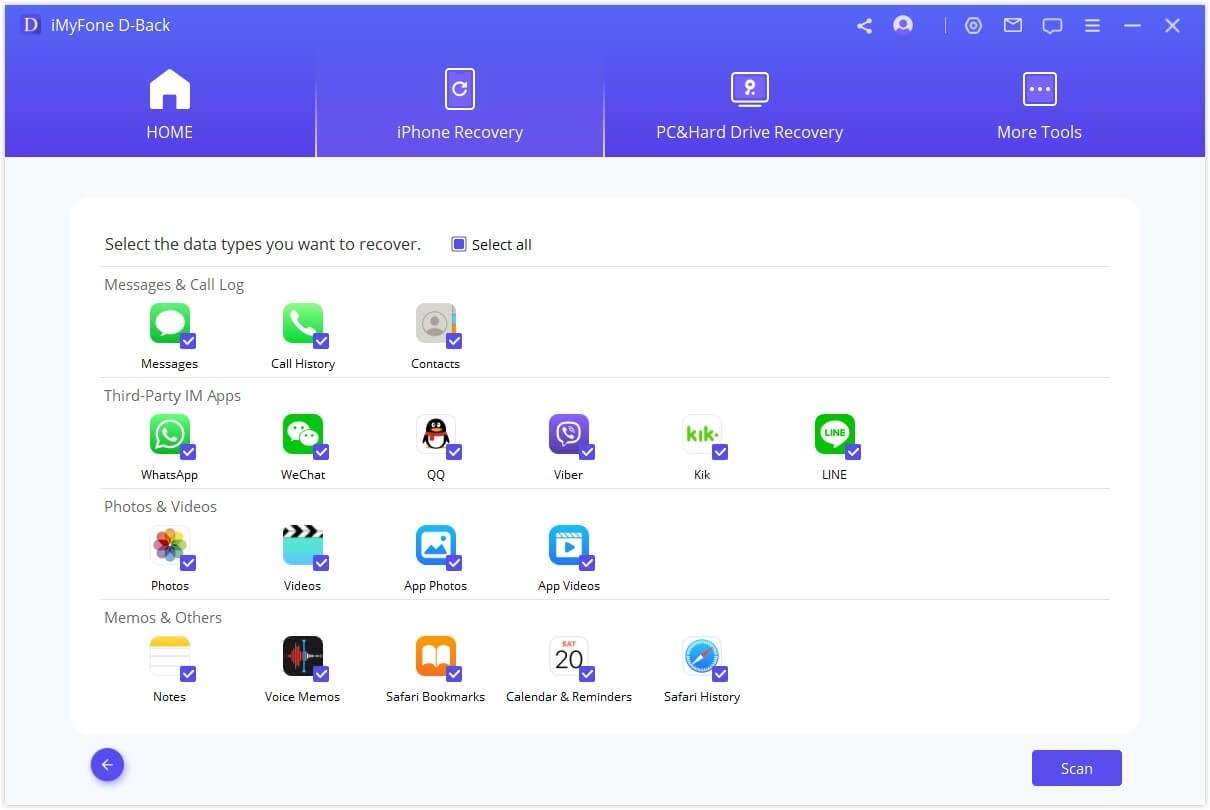
In the next window, select "Viber" and then click "Next." to start the scan process.
3. Select and Save the Viber Messages
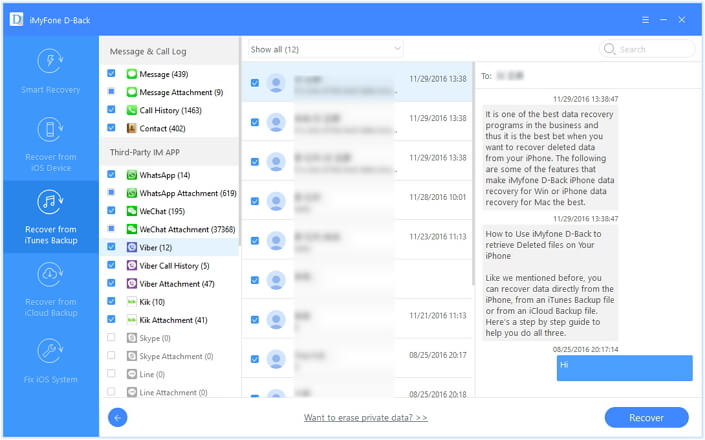
When the scanning process is complete, select the Viber messages and their attachments that you want to save to your computer and then click "Recover" to choose a location.
Conclusion
iMyFone D-back is a highly recommended data recovery software that helps you easily recover all the deleted viber data from iPhone. It can help you recover or save photos from viber in one-click. Just download iMyFone D-Back to save all your Viber data including photos, messages, call history to your computer! The latest iOS 16 can be supported, also!


