Something happens all of a sudden, your iPhone is disabled when you forget the password or upgrade to iOS 14/13/12/11. You can't use it or even access any of the data on it. while this is a nightmare situation for anyone, you should know that it can be fixed. The only problem is that there is only one way to re-enable it. The only way to get into a device that has been disabled is to erase it first.
This means that all of the data you had on the device that was not available on an iTunes or iCloud backup file will be deleted. In this article, we are going to share with you three different ways you can erase and recover data from a disabled iPhone.
Part 1: Common Situations Which Can Disable Your iPhone
You do not always have control over your iPhone may become disabled. It can be due to:
- Entering the passcode wrong several times (usually 10) can lead to the data being erased, and while that is a reasonable safety measure it can be problematic.
- Your attempts to add a different iOS to the phone or modify it without authorization can also disable it and lead to data loss.

Part 2: Can I Recover Data from a Disabled iPhone?
That depends on different situations. If you are wondering how to recover data directly from a disabled iPhone, it is quite impossible. Luckily, if you have your phone synced with iTunes or iCloud or you have an alternative option of accessing these two databases, you may be able to recover it.
Part 3: Erase and Recover Saved Data to Disabled iPhone
1Disabled iPhone has synced with iTunes before
Erase and Recover Data from Disabled iPhone using iTunes
If you have synced this iPhone or iPad with the computer before, you still can make a backup of your iPhone with iTunes. Without this premise, you will be unable to make your iPhone trust the computer or unlock your device without a password, and your device will not be connected to iTunes successfully then.
Step 1: Open iTunes and connect your iPhone or iPad to this computer through USB cable.
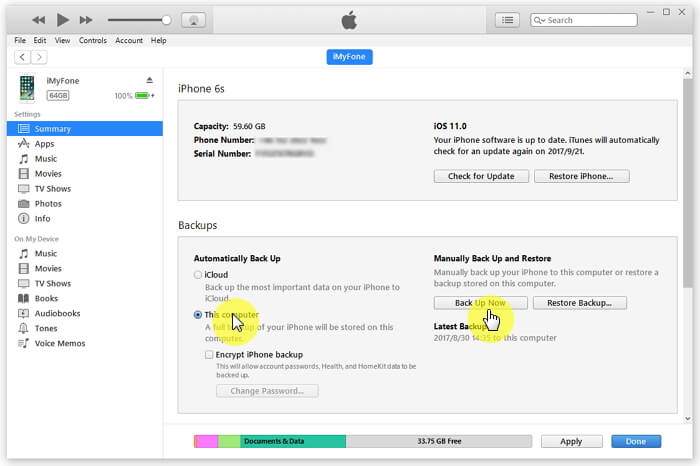
Step 2: When your iPhone appears in iTunes, select it. Then you should click on the "Back Up Now" button to continue. When the backup process is finished, the iTunes backup file will be saved on the computer.
Then follow these simple steps to restore the device and hence enable it:
Step 1: Connect the iPhone to the computer you synced with and then wait for iTunes to sync with your device and create a backup.
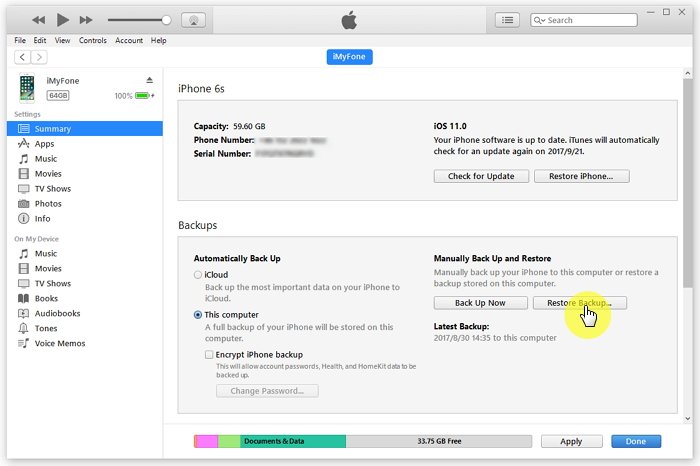
Step 2: Once the sync is done, click "Restore iPhone" and once you get to the Setup screen while restoring the iPhone tap "Restore from iTunes backup." Select the latest backup to restore the device.
Erase your Device with Recovery Mode
If you hadn't set up Find my iPhone on iCloud or sync your device with iTunes, you can erase the device in recovery mode. Here's how to do it.
Step 1: Connect the iPhone to the computer and launch iTunes.
Step 2: Force the iPhone to restart. You can do that by holding the Sleep/Wake and the Home buttons down at the same time until you see the recovery screen. (For iPhone 7, you hold the Sleep/Wake and Volume Down Buttons)
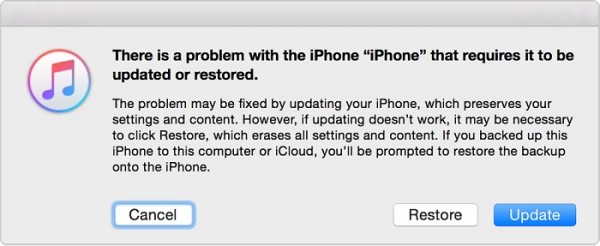
Step 3: When you see the option to Restore or Update the iPhone popup in iTunes, choose "Restore" and iTunes will download the software for the device.
Step 4: Wait for the process to finish and then set up the device as new. If the process takes more than 15 minutes, the device will exit recovery mode and you need to start again.
2Disabled iPhone has never synced with iTunes
If you've never synced with iTunes, you'll need to use recovery mode to restore your device. This will erase the device. Please make sure that you have set up Find my iPhone in iCloud before. Here's how to do it.
Step 1: From any other device go to https://www.icloud.com/find and then sign in with your Apple ID.
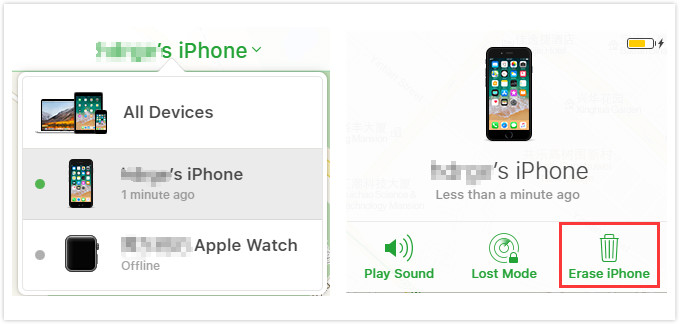
Step 2: Click on "All Devices" and then select the device you want to erase. Click "Erase iPhone" to erase the device.
Step 3: You can choose to restore the device or set it up as new.
Part 4: Tips for Some Specific Situations with iPhone Disabled
1Tips for users whose iPhone is disabled due to forgetting screen passcode:
Phase 1: Unlock your device:
The methods to unlock your device have already been described above. According to Apple's official recommendation, there are two ways to erase your iPhone without a password. But you need to know that if your device is erased, your current data will not be recovered directly. You must rely on your backup.
Phase 2: Recover data from disabled iPhone backup if losing data
If you have unlocked your device, you may need to restore your previous backup. Before restoring, you are not allowed to view the iTunes backup as you wish. Here iMyFone D-Back is highly recommended.
With D-Back, you are allowed to view the iTunes and iCloud backup before restore and extract them to a computer for keeping them safe. Of course, if your lost data are not overwritten, you can try it to recover data directly from your device to the computer. And it is compatible with iOS 14.
Steps on how to recover from iTunes backup
- Click "Start" from the "Recover from iTunes Backup" tab on the left.
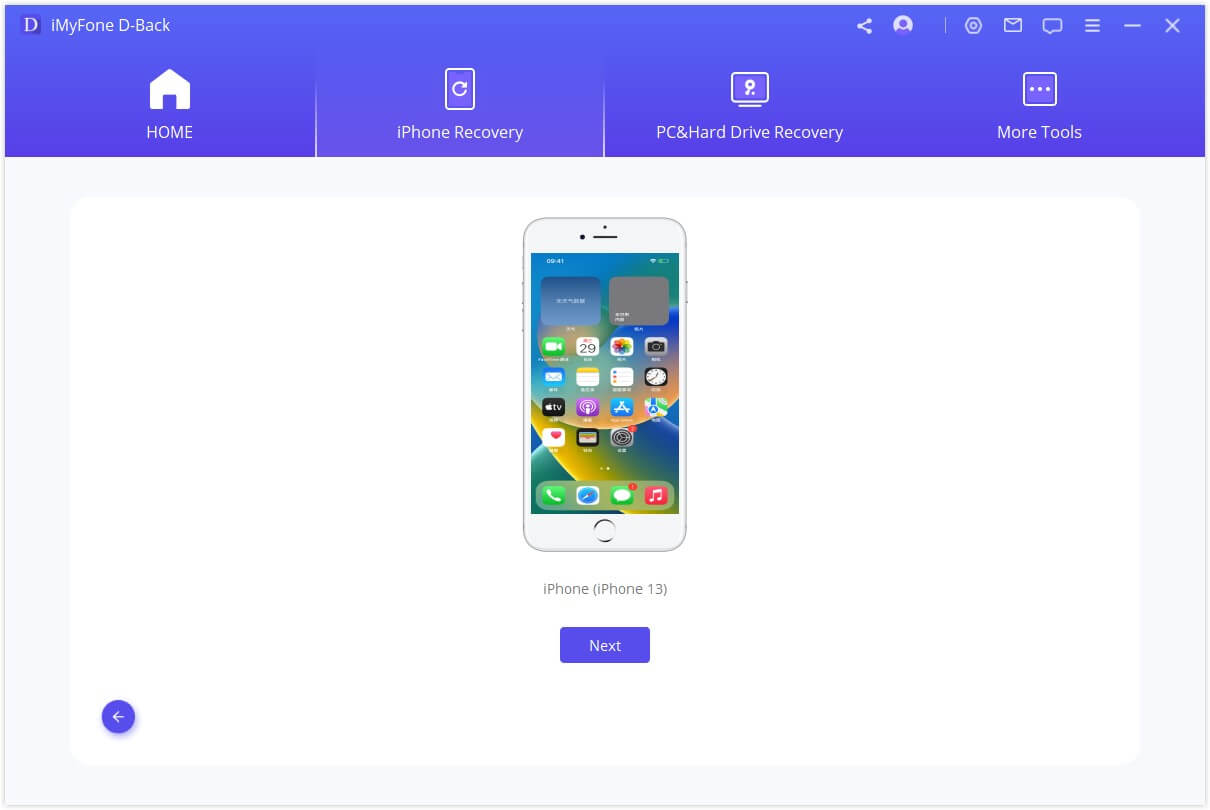
- Choose the data types you need.
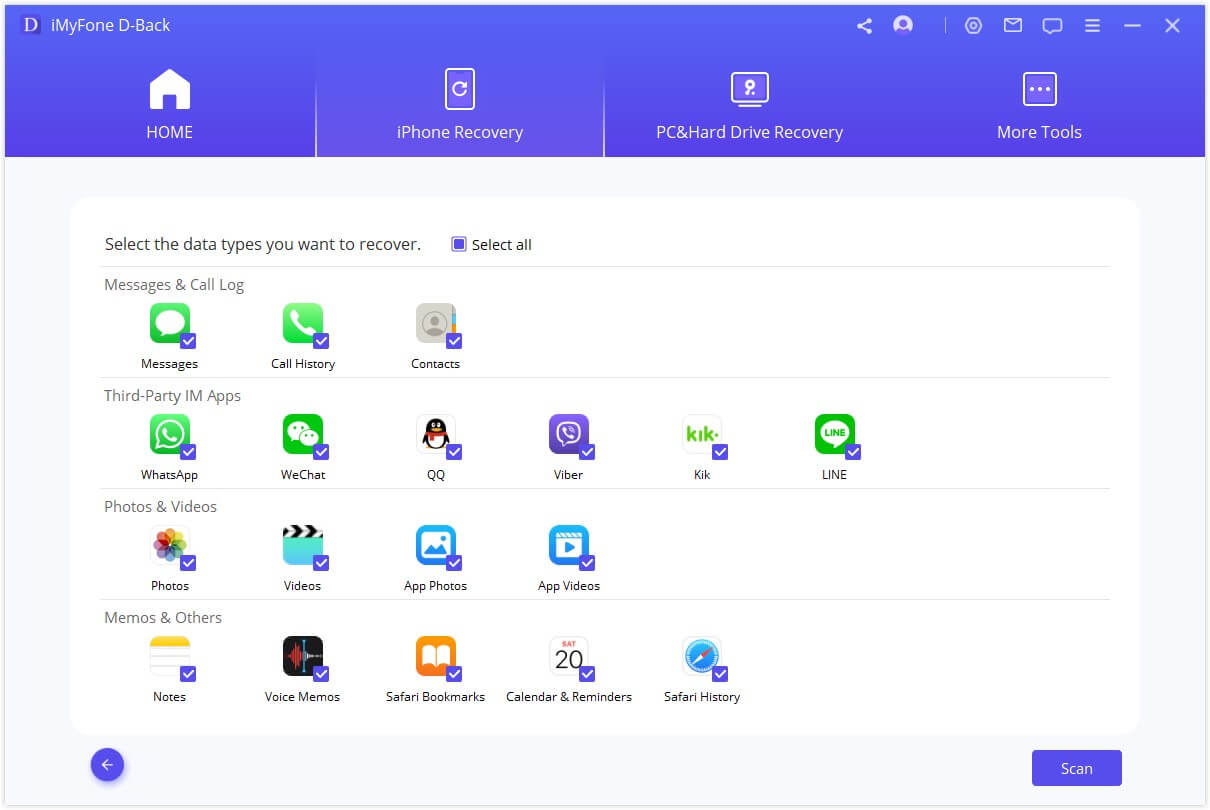
- Select the most relevant ones from the backup list and tap “Scan” to continue.
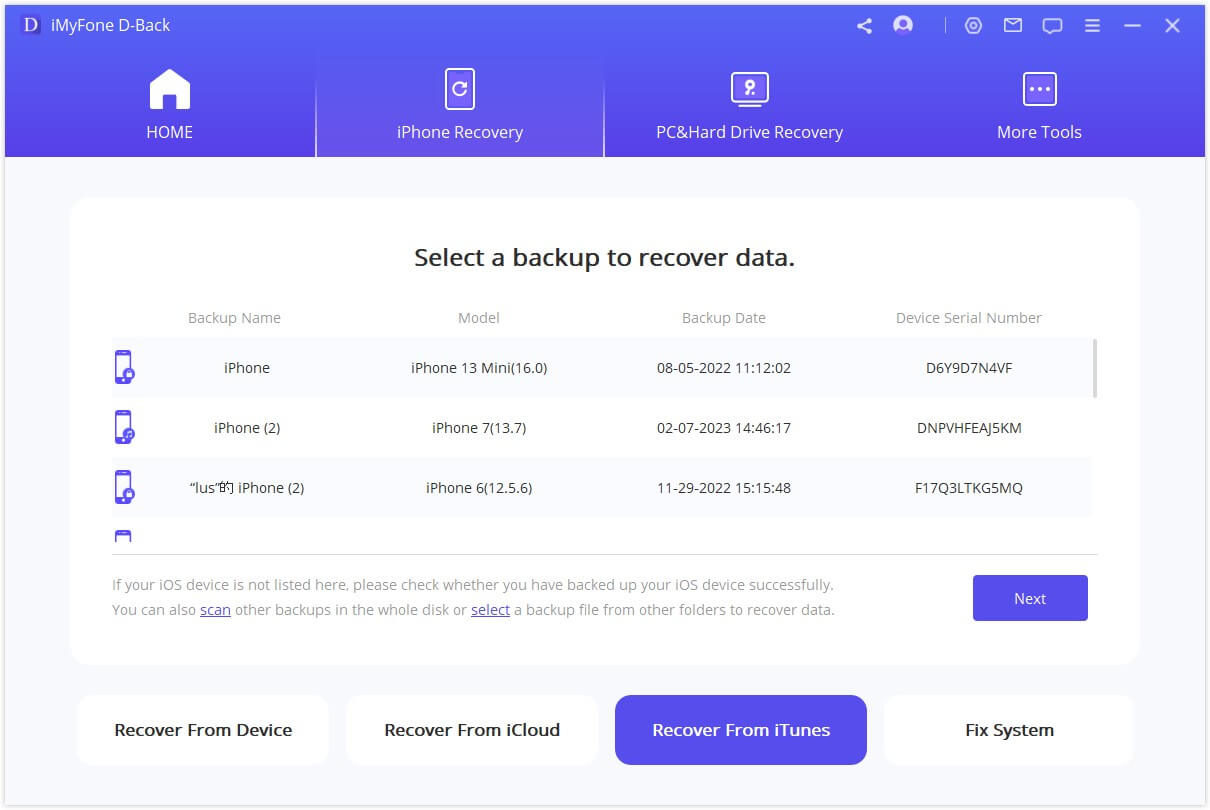
- Preview the data and choose what you need to save them to your computer.
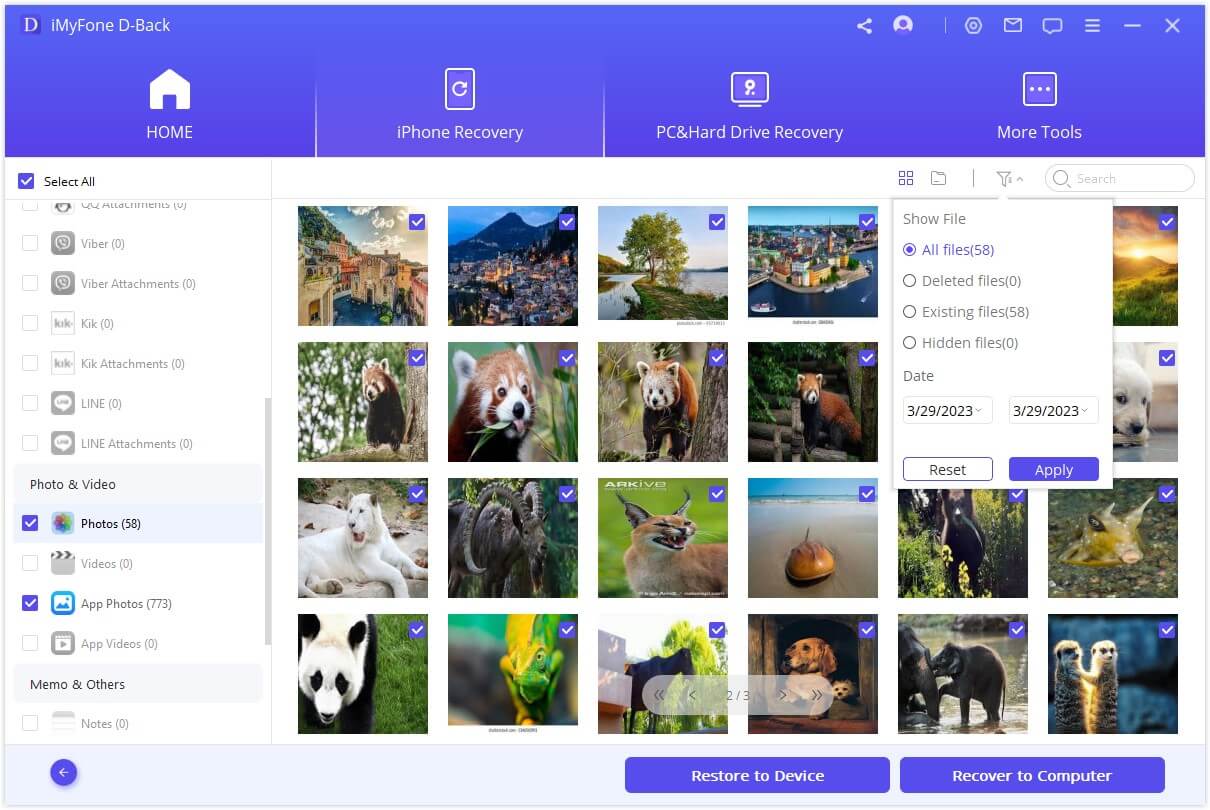
Steps on how to recover from iCloud backup
- Click "Start" at the "Recover from iCloud Backup" tab on the left.
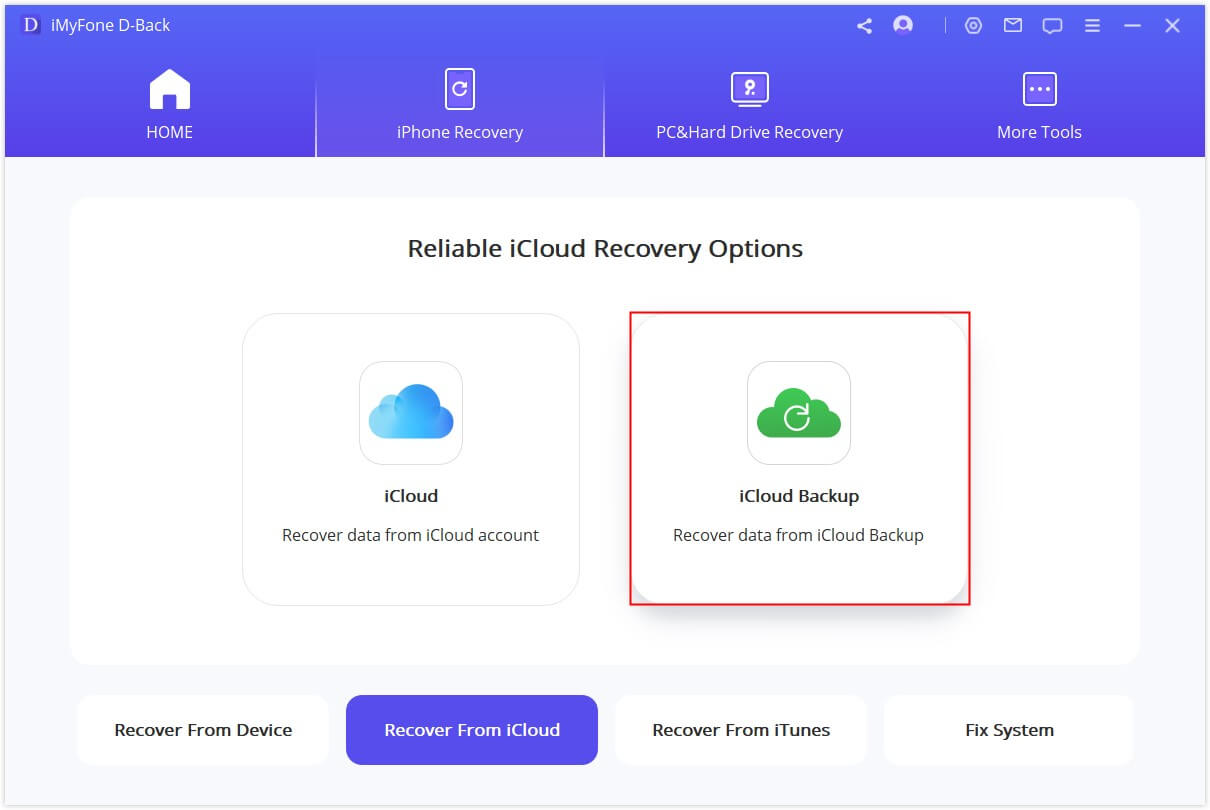
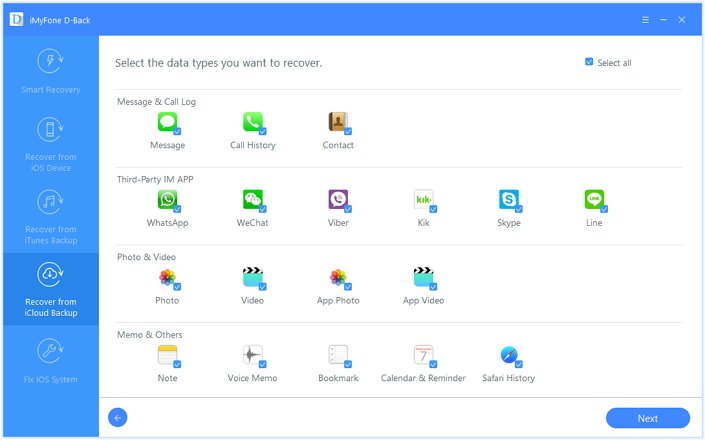
- Select the file types you want to recover.
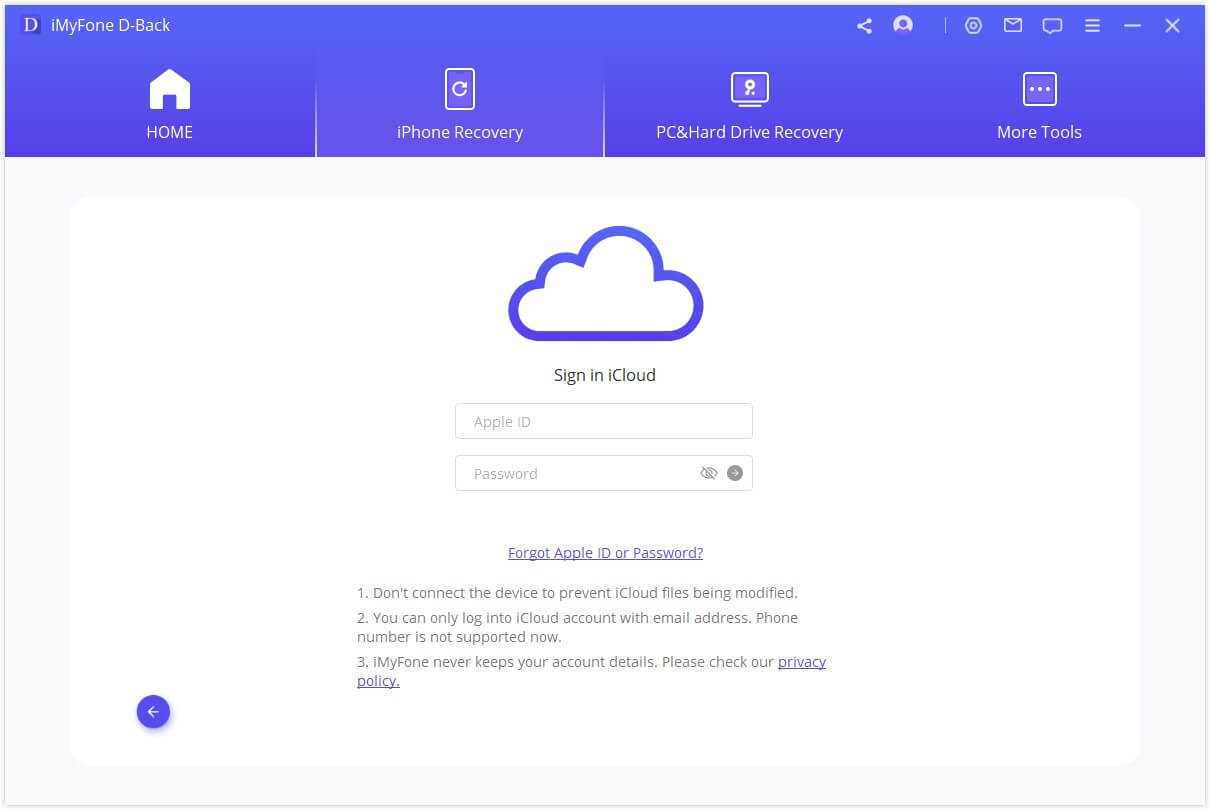
- Sign in to your iCloud account information and check the backup list. Select the iCloud backup you would like to recover data from. Click "Next" to start downloading.
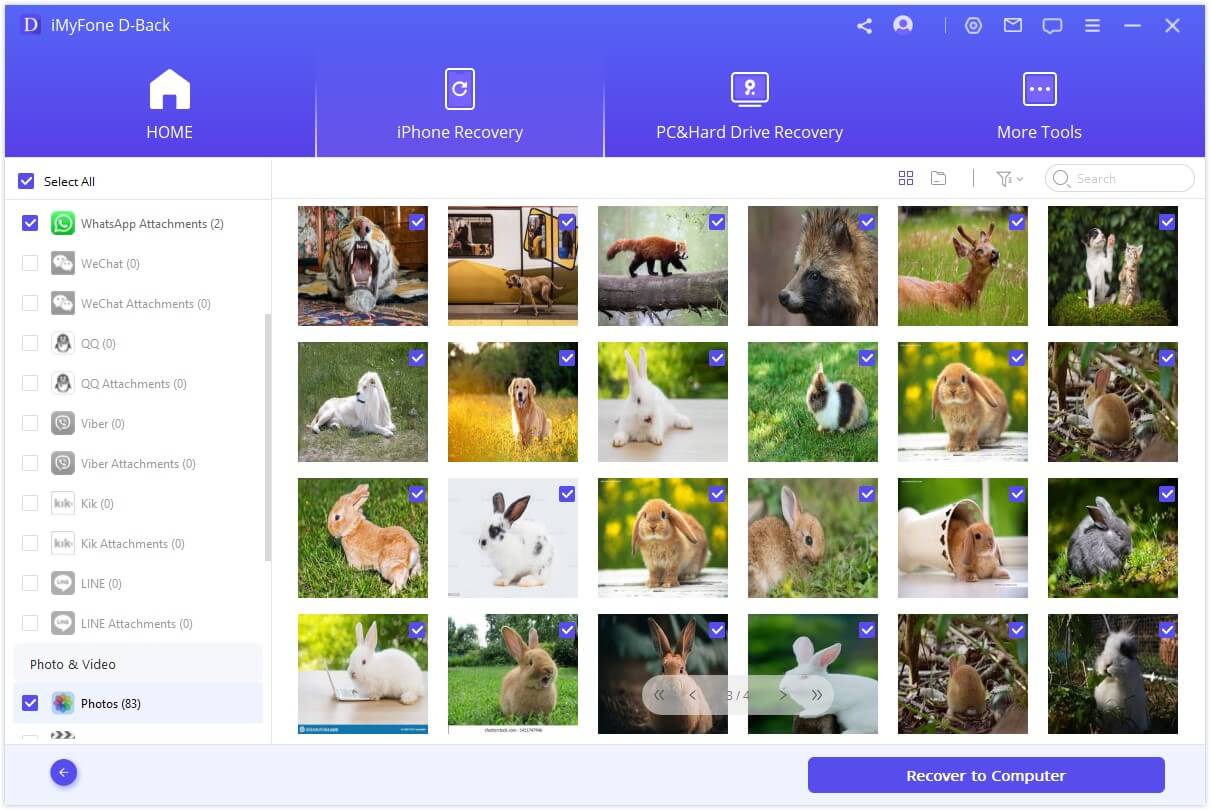
- Preview the downloaded data and save what you need to the computer.
2Tips for users whose iPhone is disabled due to iOS issues:
If there is something wrong with your iOS, do not worry. The all-in-one D-Back can also help you with this in a few clicks.
Steps on fixing software-disabled iPhone in the standard mode without data loss
- Enter your device into recovery mode or DFU mode by following the on-screen instructions.
- Download the suitable firmware.
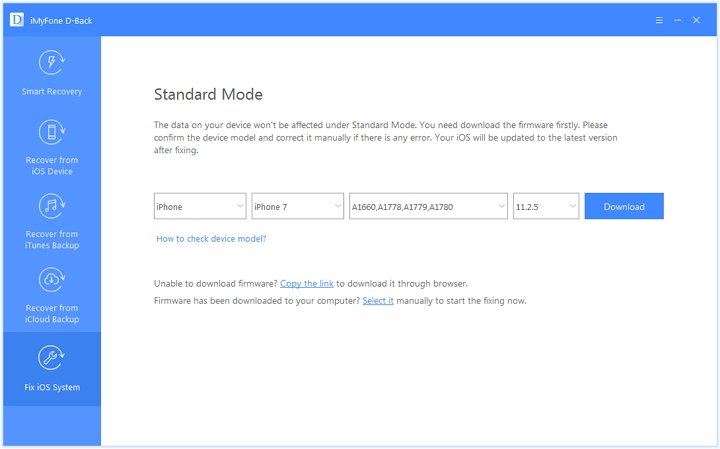
- Fix your iOS issue on your device and make your device back to normal.
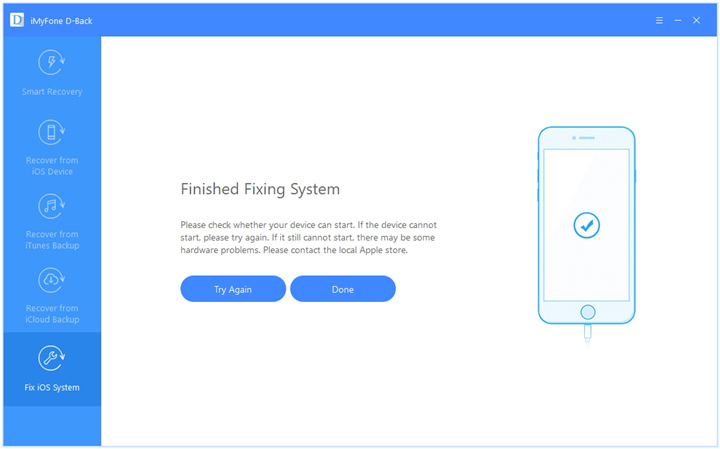
Note: You may need to move to the advanced standard mode if this standard mode does not work. The chances of losing data are much higher, but you will always be able to restore to the latest backup.
3 Tips for users whose iPhone is disabled due to hardware issues:
If your device is hardware-disabled, we are sorry that the only way for you is to ask Apple Store for help. The above third-party software we have mentioned can only fix iOS system issues, which means the hardware issues on iOS devices are beyond its capacity. In this case, you'd better do to Apple Support to have a check.
Note: You should make a point to regularly backup your iPhone to PC or Mac using iMyFone D-Back iPhone Data Extractor in case you ever face such an emergency. It is a great way to get back to normal as fast as possible after data loss.
iMyFone D-Back is an essential tool that can be regularly used for data backup as well as recover data to the computer to avoid data overwriting. So, make sure you attain the tool and prevent your iPhone from getting into sticky situations.


 January 12, 2023