Every iPhone user love to take pictures and videos on his or her iPhone. The iPhone camera, built with a number of features, is used for capturing important moments of your life.
Whatever you do, you can easily lose the images on your iPhone.
- Option 1. iPhone Image Rescue from Recently Deleted Album
- Option 2. iPhone Image Rescue from iTunes Fully Restore
- Option 3. iPhone Image Rescue from iCloud Fully Restore
- Option 4. iPhone Image Rescue without Backup & without Restore
- Option 5. Selective iPhone Image Rescue from iTunes Backup
- Option 6. Selective iPhone Image Rescue from iCloud Backup
Top 6 Ways for iPhone Image Rescue
There are chances of losing the images accidentally because of error in iOS update, formatting error, damaged or lost iPhone, etc.
You might also delete the images and then realize that it is a wrong move. But the image rescue from iPhone is possible using any of the top 6 ways we have given in this guide.
Option 1. iPhone Image Rescue from Recently Deleted Album
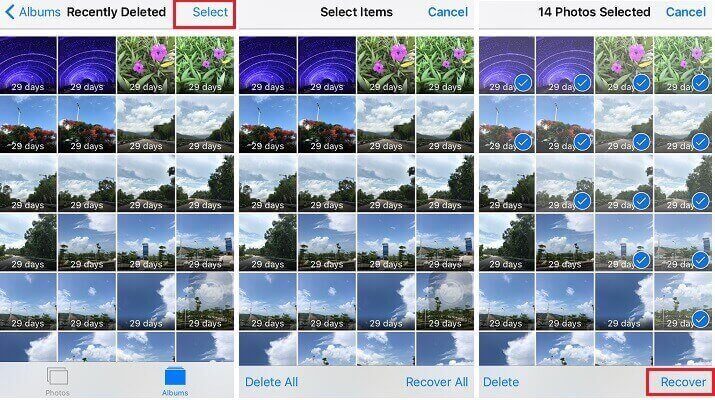
The image rescue is possible right from your iPhone. The photos that you delete from your device will be in the Recently Deleted album. However, the images that you delete within 30 days will only be stored in that album.
Step 1: Open Photos App on your iPhone.
Step 2: Scroll down and tap “Recently Deleted” album.
Step 3: All the photos that were deleted in the last 30 days will be shown.
Step 4: Select the photos you want to recover and tap Recover.
Option 2. iPhone Image Rescue from iTunes Fully Restore
As we all know this official method is free, but all your current data will be replaced by the restored backup content.
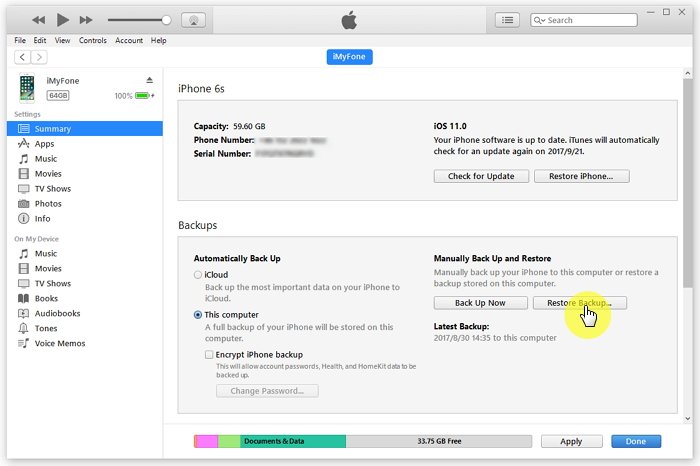
Step 1: Open iTunes on your computer that was used for back up. Connect your iPhone to it. Enter password if asked.
Step 2: Select your iPhone when it appears on iTunes on successful connection.
Step 3: Choose “Restore Backup” under Backups.
Step 4: Select the most relevant backup and click Restore.
Step 5: After the data is restored, all the data of your iPhone including photos will be rescued.
Option 3. iPhone Image Rescue from iCloud Fully Restore
This is another official and free way for users. Before fully restore, you need to erase all content and settings on your device. So the data which is not contained in the restored backup will be lost.
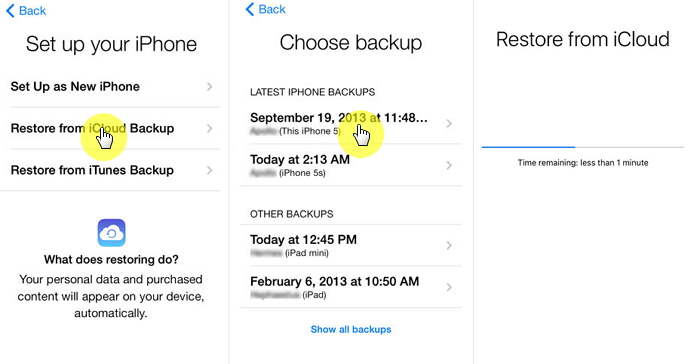
- Step 1: Go to Settings -> Apps & Data on your iPhone. Tap “Restore from iCloud Backup”.
- Step 2: Use your Apple ID and password to sign in to your iCloud account. Make sure you are connected to a Wi-Fi network.
- Step 3: Select the most relevant iCloud backup. The restoring process will begin as soon as you select the backup.
- Step 4: Sign in to your Apple account again to restore the apps and purchases, if any.
Option 4. iPhone Image Rescue without Backup & without Restore
Even if you do not make a backup of your device’s data, you can easily recover the iPhone images.
The data in your iPhone is stored on the SQLite database. When you delete something from your device, the data is not deleted; it only changes from “Allocated” to “Unallocated” state.
Later when new data is created in your device, the “Unallocated” entries are occupied first, overwriting the data in it.
So, the lost images are recoverable if you don’t save any new data in your iPhone after losing them. As the third-party data recovery software can access the iOS SQLite database, it can securely retrieve the lost data of your device.
iMyFone D-Back is one of the most advanced data recovery tools for iOS devices. So the iPhone image rescue is possible.
- D-Back will securely retrieve the lost data regardless of how it was lost.
- It works on all the iOS devices and supports all iOS versions.
- You can selectively recover the lost data of your iPhone when you use D-Back software.
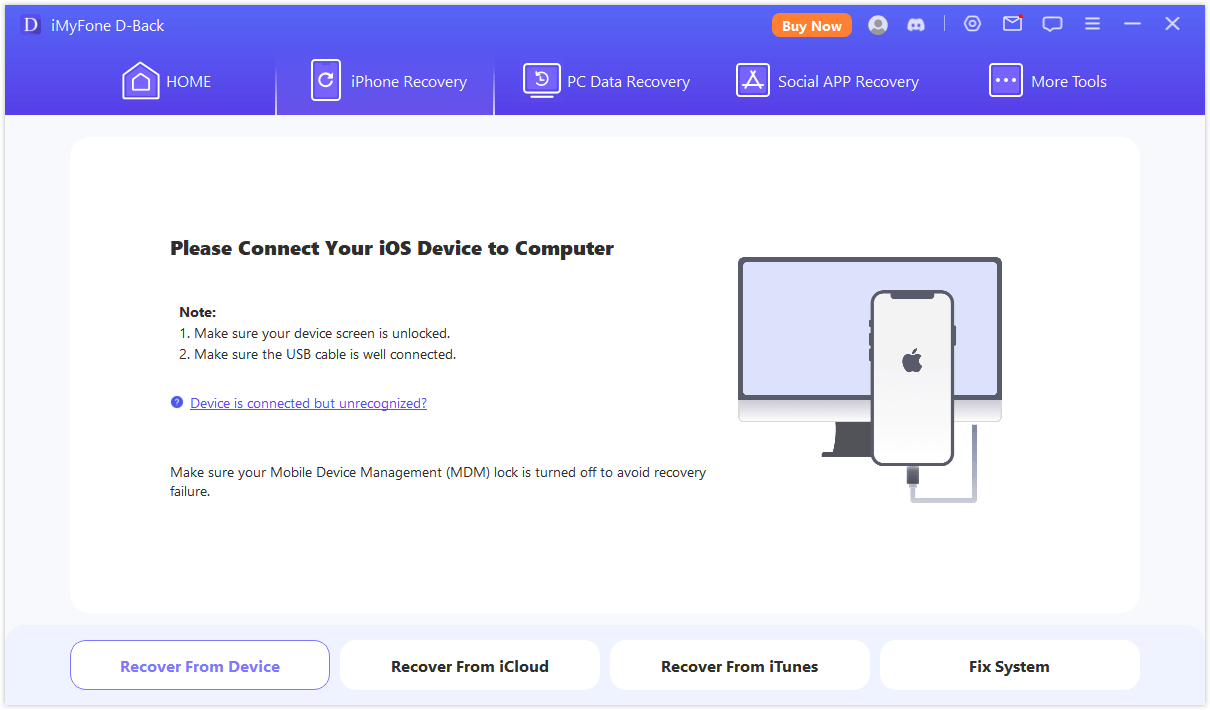
Step 1.Open iMyFone D-Back on your computer and select “Recover from iOS Device”. Press Start. Connect the iPhone to computer via USB cable. It will detect your device automatically. Now, click Next.
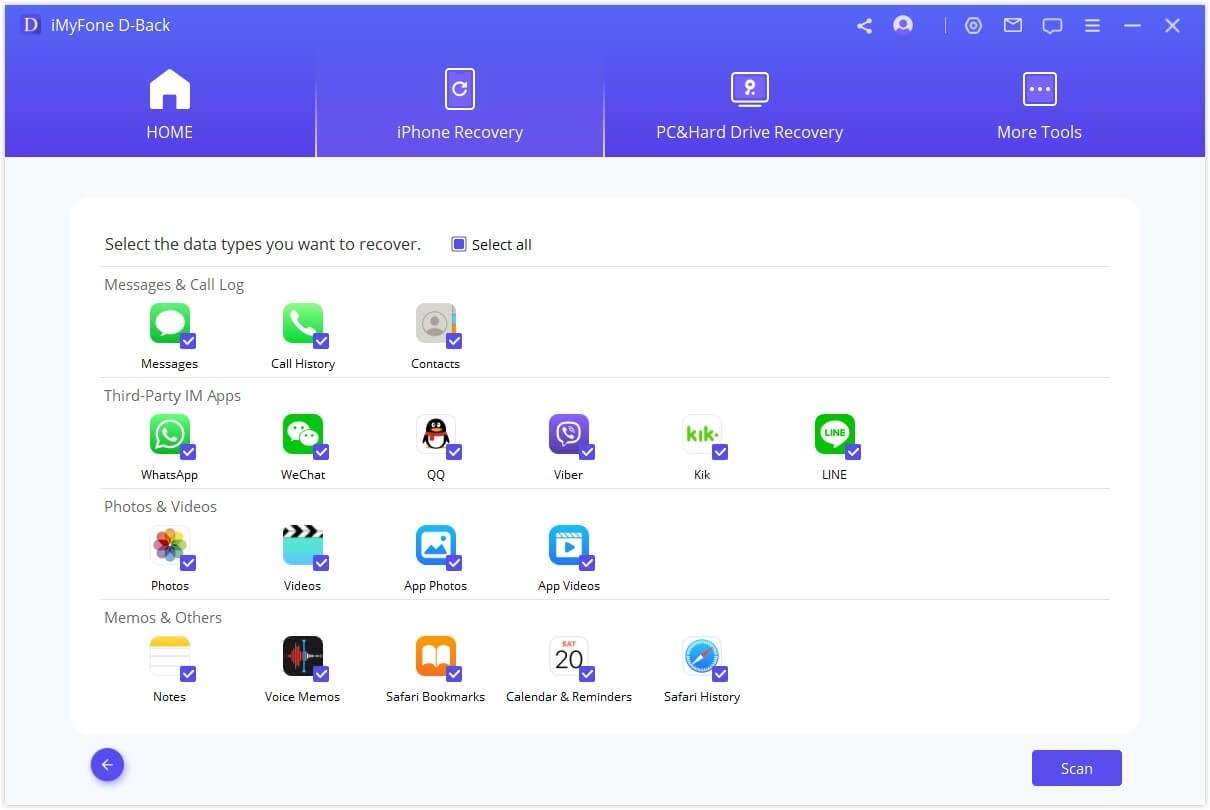
Step 2.Select “Photo” under “Photo & Video” from the list of data types shown and click “Scan”.
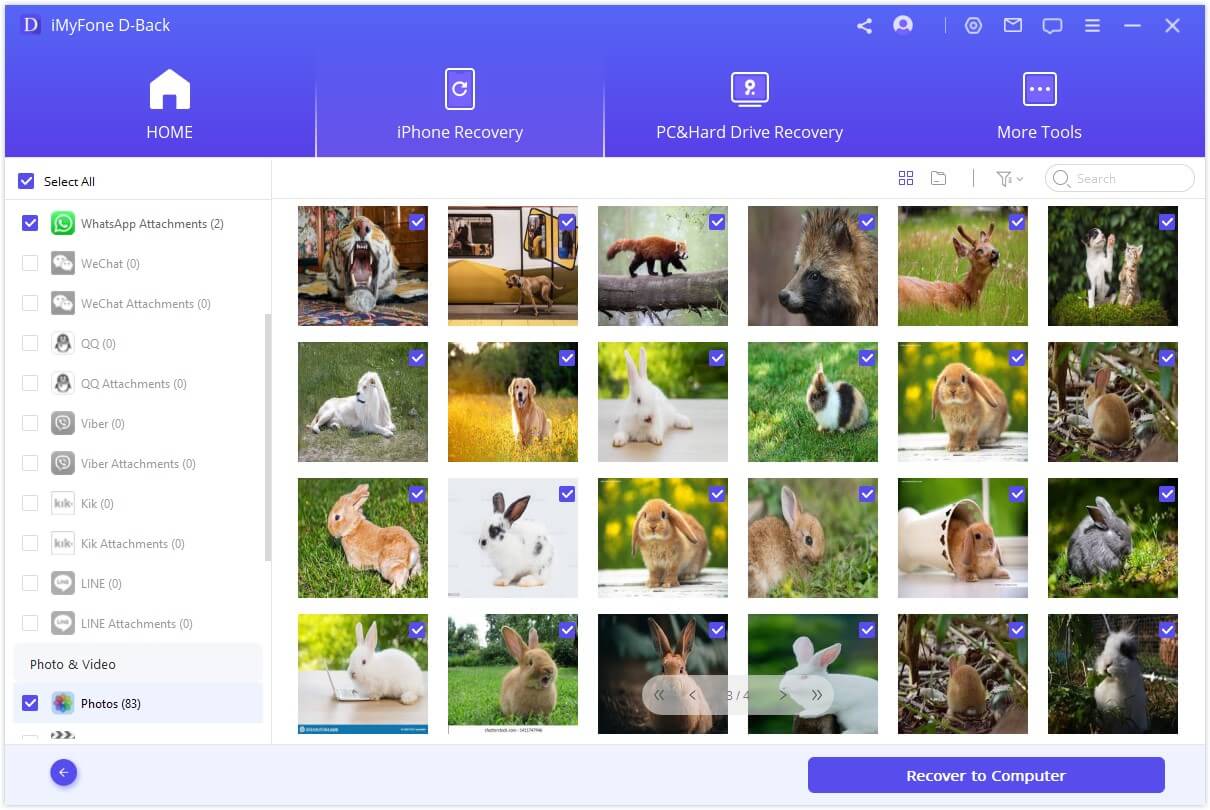
Step 3.All the recoverable images will appear once the scan is completed. You can select the ones you need and click “Recover”.
Option 5. Selective iPhone Image Rescue from iTunes Backup
Using the official iTunes restore, you have to fully restore the data to your device.
Luckily using iMyFone D-Back, you can recover only the files you need. The official iTunes restore will also overwrite the previous iPhone data, but D-Back will not overwrite the previous data.
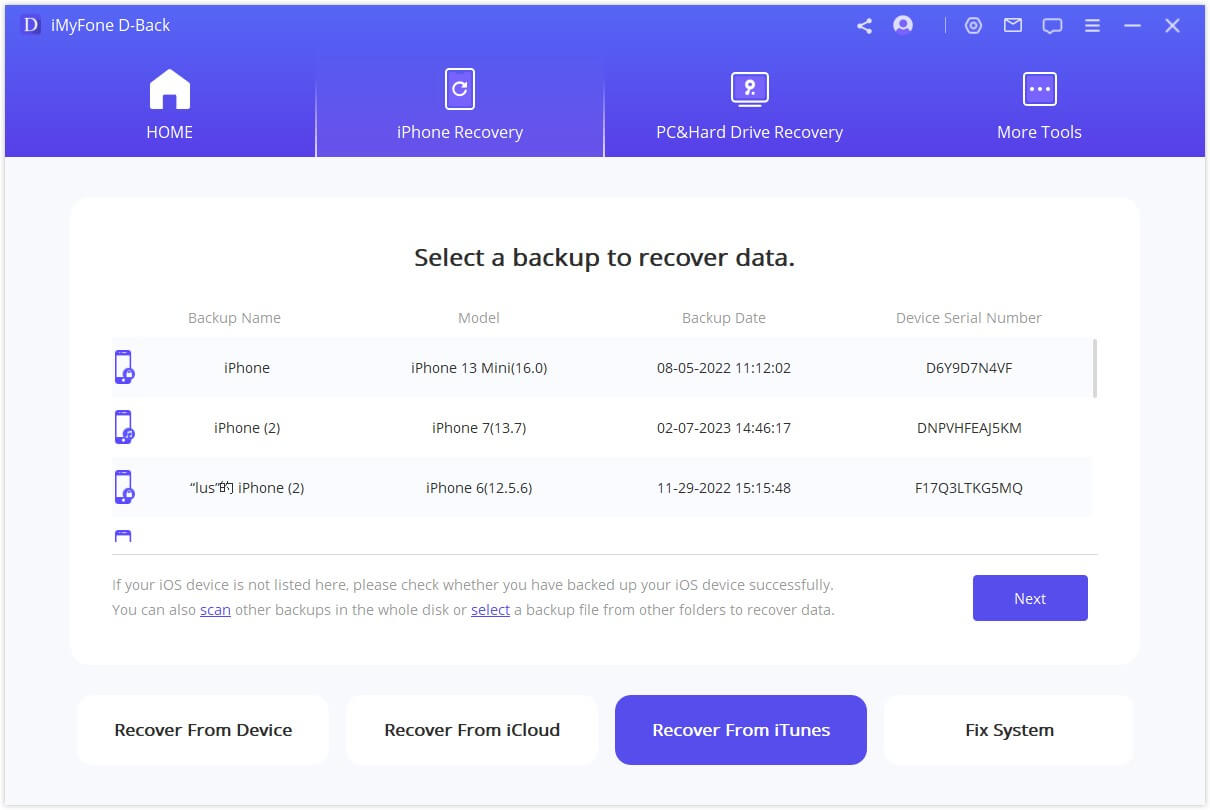
Step 1. Run iMyFone D-Back on your computer and select “Recover from iTunes Backup”. Press Start. The available iTunes backups will be displayed. Choose the most relevant one and click Next.
Step 2. Select “Photo” from the list of data types shown and click “Scan”.
Step 3. All the images will appear once the scan is finished. You can select the ones you need to rescue and click “Recover”. Choose a folder or create a new one for storing the rescued photos on your computer.
Option 6. Selective iPhone Image Rescue from iCloud Backup
When you restore the iCloud backup, the previous data of your iPhone will be erased. The device should also be connected to a Wi-Fi connection when you restore the data from iCloud.
If you want to overcome the shortcomings of the official iCloud restore, you can rely on D-Back.
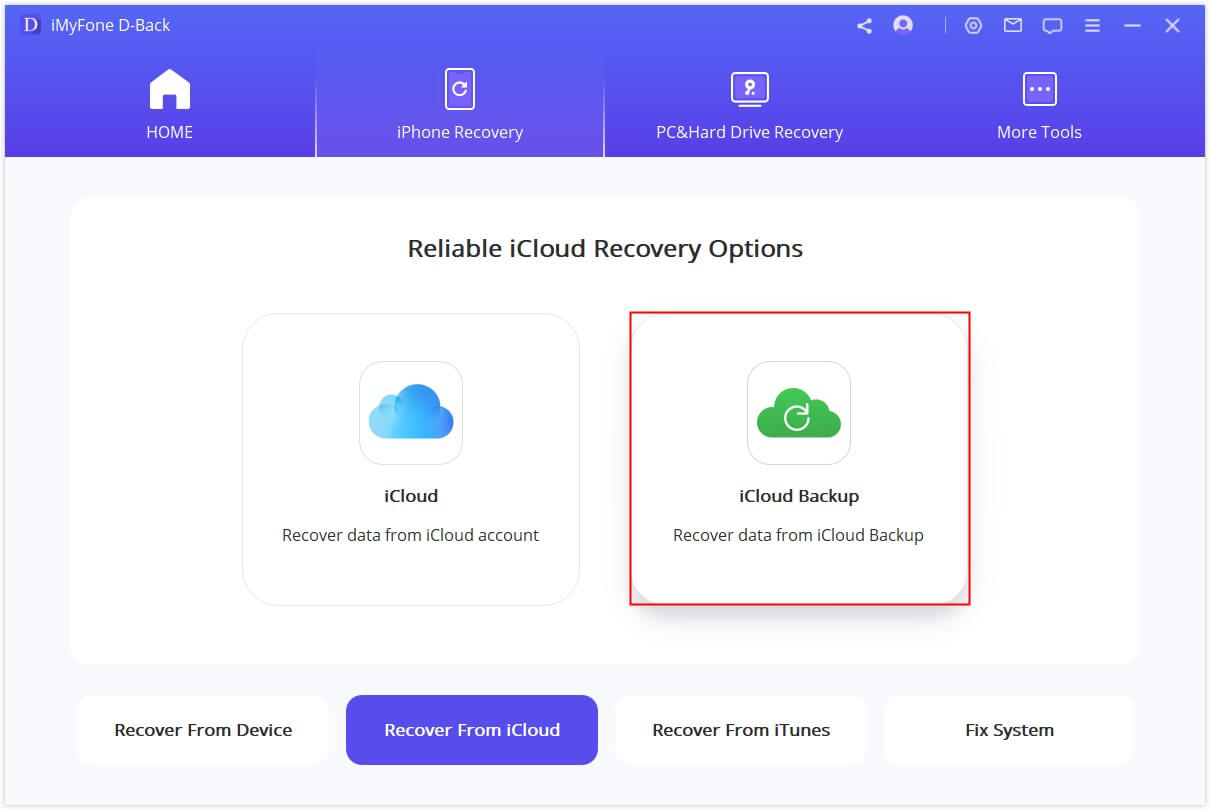
Step 1. Launch iMyFone D-Back on your computer and select “Recover from iCloud Backup”. Press Start. Using your Apple ID and password, sign in to your iCloud account.
Step 2. The available iCloud backups will be displayed. Choose the most relevant one and click Next.
Step 3. Choose “Photo” from the list of data types shown and click “Scan”.
Step 4. All the images will appear once the scan is completed. You can select the ones you want to rescue and click “Recover”. After this process, the images will be stored in the chosen folder.
Why Choose D-Back?
It is trusted by CNET, techradar, PCWorld and other professional websites., so you do not need to worry about its authority.

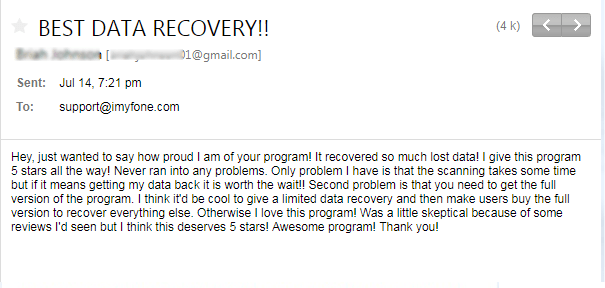
Many users have also sent the feedback to us and here is one of them.
Conclusion
If you are looking for ways to rescue the images on iPhone, you cannot miss the top methods given in this article. Try the methods and check if the image rescue is successful. You can leave your comments below and let us know which method works for you.


 January 12, 2023