Did you ever get in such a dilemma? Get screen broken and unable to unlock your phone, or enter a wrong passcode on your iOS device 10 times in a row and got it disabled. To add more trouble to the situation, have you forgotten to create a backup of your valuable photos and other files? Well, in this case, it can be obviously handy if you know the ways to retrieve the pictures off of the disabled phone without restore or backup.
Can I Recover Photos from a Disabled iPhone without Backup?
Yes, in somes cases. To recover photos from a disabled but workable iPhone, you have to unlock the iPhone and let tools gain access to your photos. There are some data recovery tools which are capable of fixing your disabled iPhone which stucks in recovery mode, Apple logo, etc., and recovering photos for you.
1. How Can I Recover Photos from Disabled iPhone without Backup?
There are surely some free apps to help you retrieve photos, but many of them are limited in recovery. So in this article, we'll show you several reliable way to do that. Let’s get to know how to recover photos from disabled iPhone without backup under different circumstances.
Recover Photos without Backup from Disabled but Workable iPhone
If your iPhone is disabled but still workable, you have a greater chance of recovering photos from it. However, to accomplish this task, you will have to seek the assistance of a special tool that can scan for the photos stored on your iPhone. This is exactly when a software like iMyFone D-Back comes to play.
Of all the tools that claim to have the ability to recover photos from iPhone, iMyFone D-Back stands out as a very promising option. It has the ability to scan for available data and recovering them at an exceptionally high success rate. If your iPhone is disabled but in working condition, this specific tool can recover data from it quicker and easier. Let’s take a quick look at the most notable features of iMyFone D-Back software.
iMyFone D-Back iPhone Data Recovery
Key Features:
- It can recover photos without backup of iPhone and won't affect your current data.
- Apart from photos, it can recover 18+ data types like Call history, Contacts, WhatsApp and etc.
- Thanks to the advanced technology, it can recover data with impressive success rate.
- It is compatible with all the iOS devices and iOS versions (including the latest ones).
If you have your iOS device disabled but it is still in workable condition, you can use the following steps to recover photos easily.
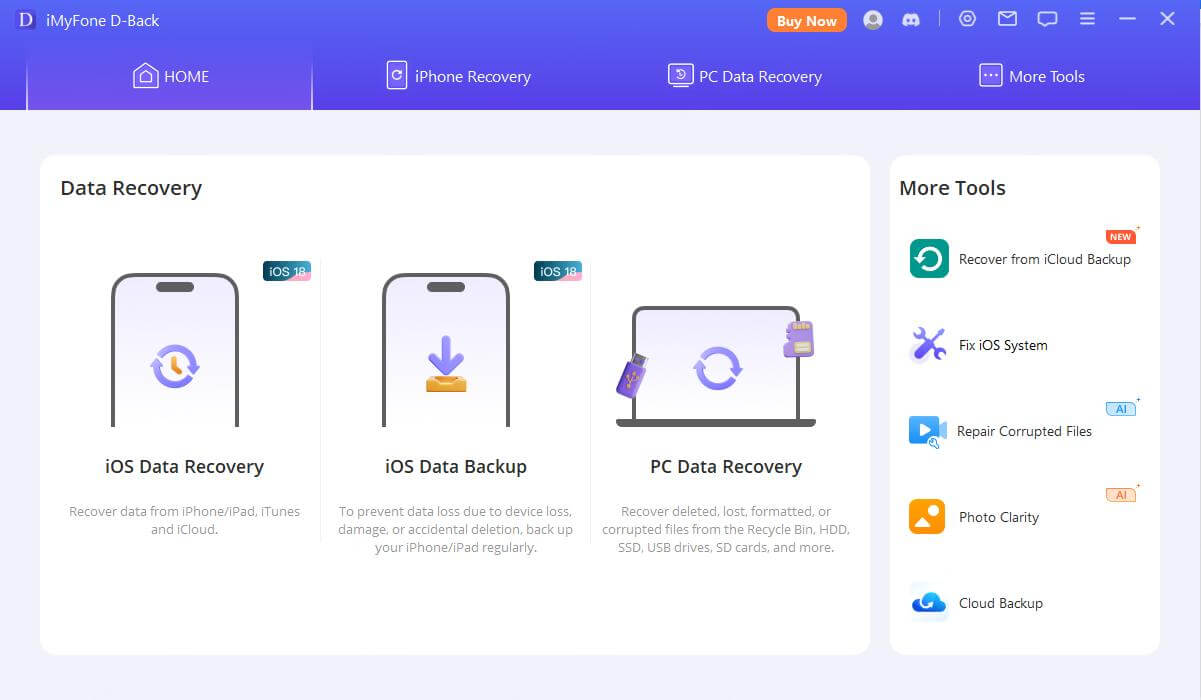
Step 1. Select recovery mode
In order to begin the process, you should launch iMyFone D-Back on your computer. Then, you should click on “Recover from iOS Device” option. Under this option, you can find “Start” button. Click on it.
Step 2. Start scanning
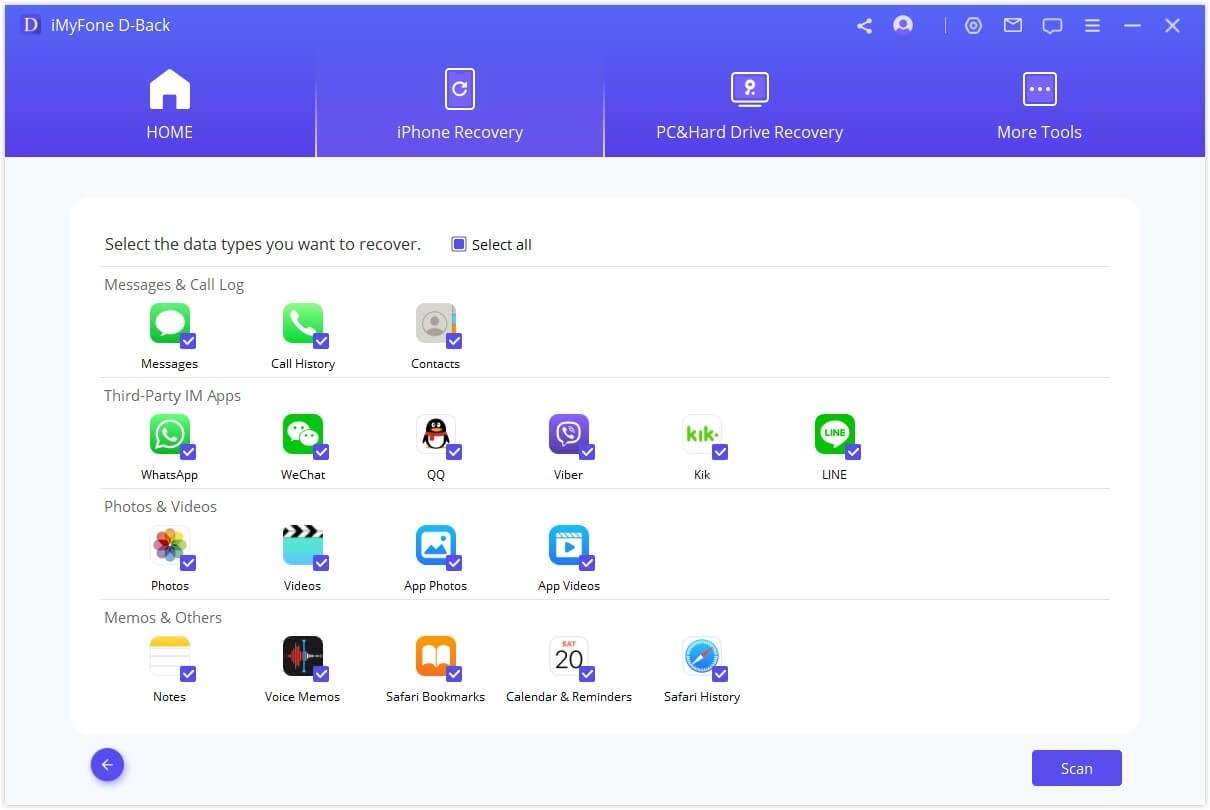
You can now connect the disabled iOS device to the computer. Make sure D-Back can detect your device successfully after connecting it. Then, you should click on “Next” option to proceed. In this case, you will have to select images. Then, you should click on “Scan” button. iMyFone D-Back will now perform a scan searching for the photos in your device.
Step 3. Recover data
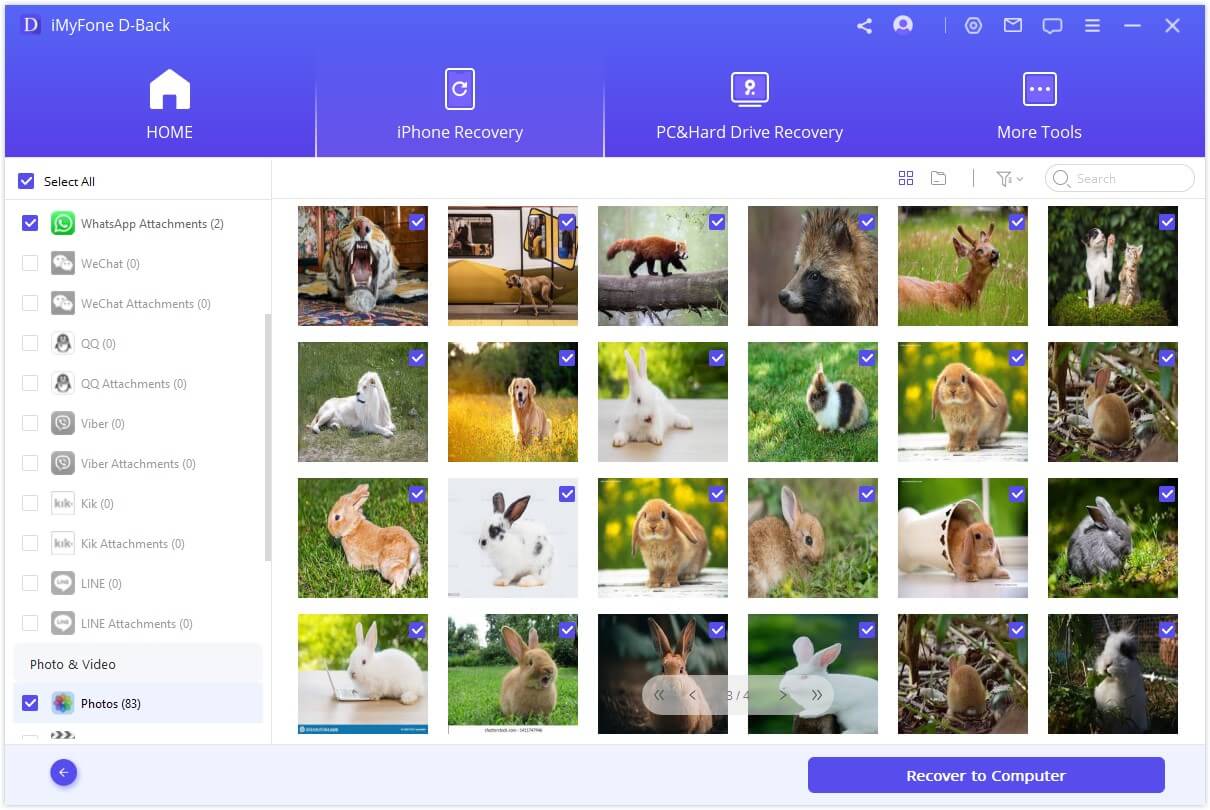
At the completion of the scan, you should see all the files that are recoverable from your disabled iPhone. You can check the photo files you need to recover. After selecting the files, you can click on “Recover” button. You will now see a pop-up window that lets you determine the location for the recovered files to be stored. Then, you should wait for the recovery process to be completed.
Note
Recover Photos without Backup from Totally Disabled iPhone
If your iPhone is completely disabled, not in working condition and there is no backup created, we are sorry that there is no way to recover your photos from it.
Video Guide on How to Recover Photos from Disabled iPhone without Backup
2. Tips on How to Deal with Disabled iPhone without Backup
In this section, let’s see how to deal with a disabled iPhone that doesn’t have a backup.
1 Fix Software-Disabled iPhone with Software
If your iPhone doesn’t work due to a software glitch or other issue, you should first try to fix it before recovering photos. Otherwise, recovering photos can be impossible. Fortunately, there are several tools to fix various issues associated with iOS devices and iMyFone D-Back is the best option, which is a versatile tool that can not only recover data but also fix various iOS glitches.
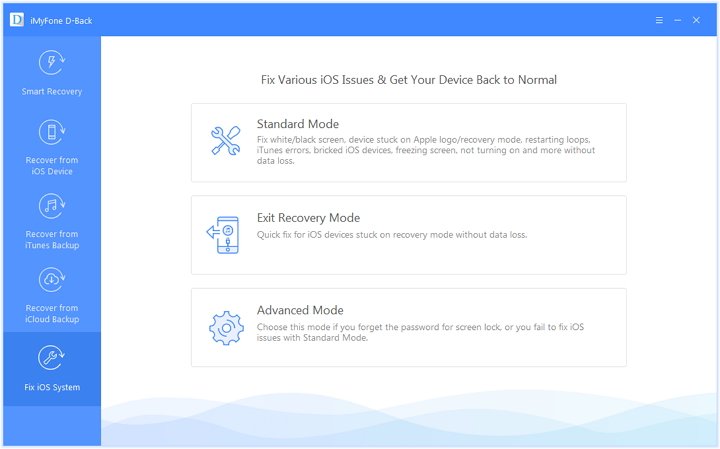
If your iPhone doesn’t work due to an iOS issue, you can use D-Back to fix it. The issues that cannot be fixed with standard mode can be addresses using advanced mode. Please note that the standard mode will not affect your data, but the advance mode will erase your data.
Step 1. Connect the device into the computer in which iMyFone D-Back is installed. Click on the option called Standard Mode on iMyFone D-Back’s home screen. It will proceed to next step if it detects your device, otherwide, you'll be prompted to put your device in DFU or Recovery Mode first.
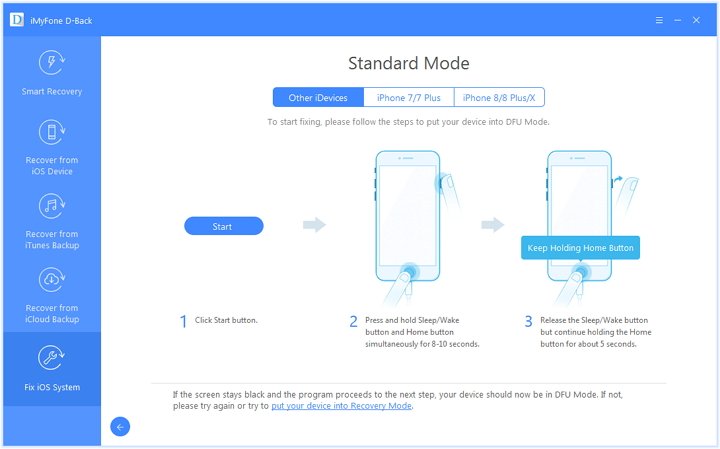
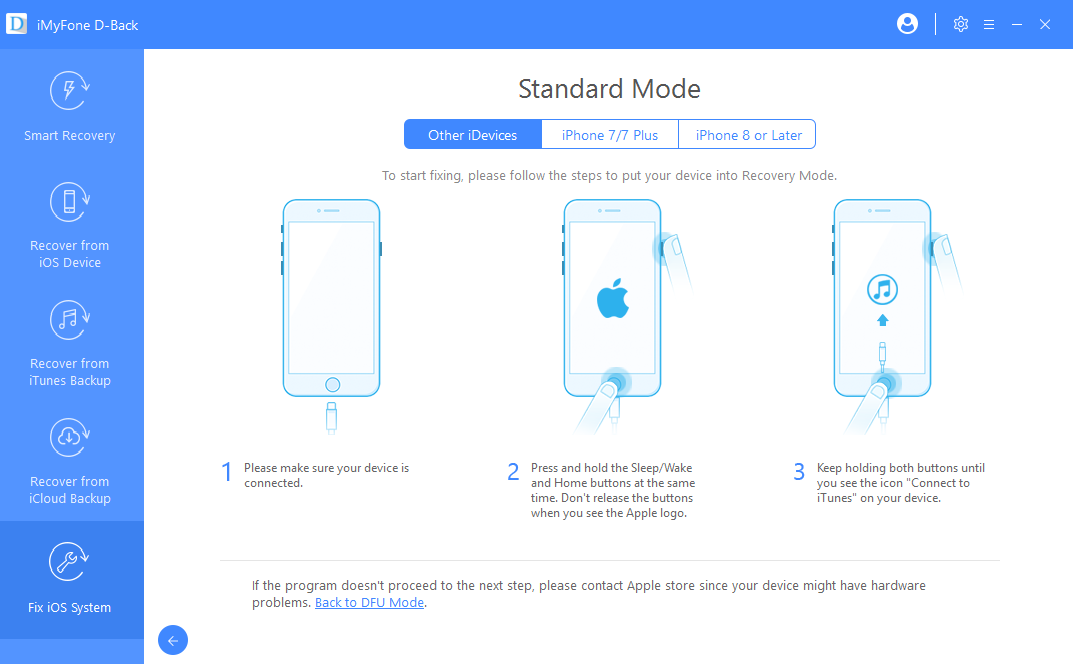
Step 2. When the device is on recovery mode or DFU mode, D-Back will start to download the respective firmware. Just click on "Download" and you're good to go!
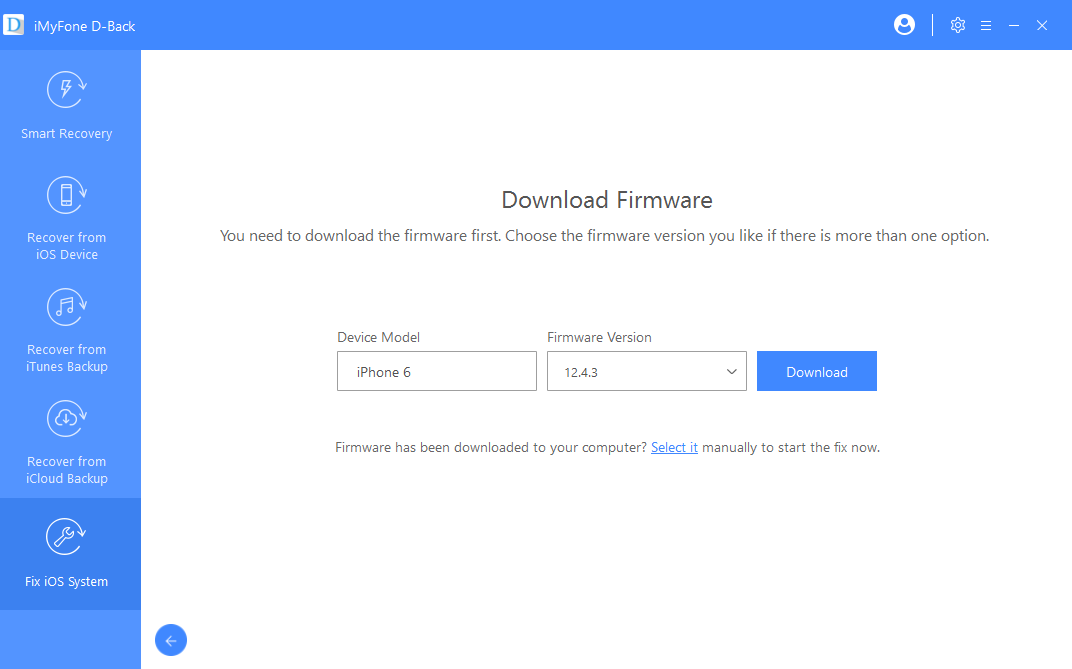
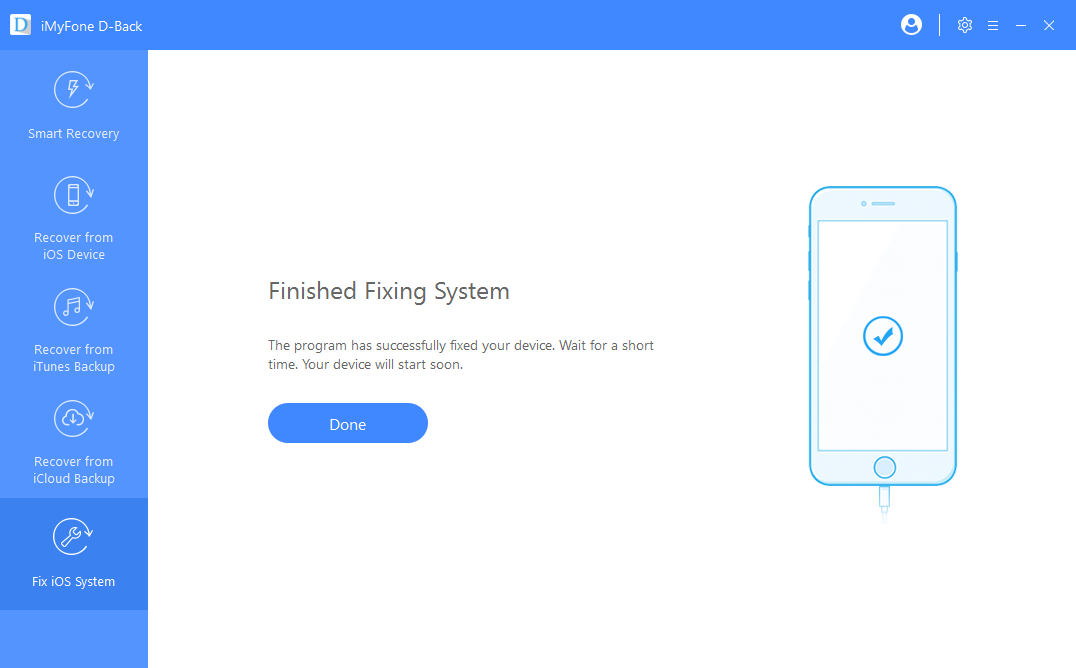
Step 3. After downloading the firmware, you can see a button labelled “Start to Fix”. Click on that and D-back will verify the firmware you downloaded and start to fix your device automatically. Now, the respective iOS device should start normally.
Step 4. Once the fixing process is finished, check whether your device can start, if still can't, please repeat the above steps.
2 Fix Hardware-Disabled iPhone with Apple Support
If you need to fix a hardware disabled iOS device, the best approach is to contact Apple Support. We strongly suggest that you shouldn’t try random solutions with your iPhone as they can worsen the situation.
3 Regular backups are Important
As an iOS device user, you should be careful enough to create regular backups of data stored on your iPhone. Such an approach increases your chances of recovering data in the event of an unexpected instance. You can consider using ways like iTunes/iCloud (which are default tools) or a professional tool like iMyFone D-Back to create backups locally.
Conclusion
We suggest you go through the details presented in this article carefully. You can apply this method on any iPhone and try to recover your precious photos from the disabled iPhone. We appreciate if you can leave your honest feedback in the comments section below.


 January 12, 2023
