


How to Delete iCloud Email Account? 4 Methods
Category: iOS Data Recovery

7 mins read
You've deleted emails and messages, but it's still not enough. iCloud's storage management tool suggests deleting emails from your phone or iCloud webmail, but this often proves ineffective. Many emails can't be directly deleted, and upon logging in to your inbox, you might find it empty, leaving you frustrated. Fear not! This article will guide you through permanently deleting iCloud email account and offer some pro tips on managing your iCloud email, address, and account.
In this article:
- Part 1: Things You Need to Know about iCloud Email
- Part 2. How to Delete iCloud Email Account
- 1. Remove Devices from Apple Account
- 2. Delete All iCloud Emails from Inbox on iPhone

- 3. Empty Trash on iPhone or Mac
- 4. Permanently Deleting Your iCloud Email Account
- Part 3. How to Recover Deleted iCloud Email
- Part 4. FAQs
Part 1: Things You Need to Know about iCloud Email
Note
- iCloud Email seamlessly supports all major email protocols, including SMTP, POP, and IMAP, ensuring compatibility with a wide range of email clients and services.
- Elevate your email management experience by configuring third-party email accounts, such as Gmail, AOL, or Yahoo, within your iCloud Email interface.
- As of today, iCloud Email imposes a daily sending and receiving limit of 1000 messages per account. This restriction aims to maintain server stability and prevent excessive email traffic.
- For emails containing attachments, iCloud Email enforces a maximum attachment size of 20 MB. This limitation ensures that large files don't clog up your inbox or exceed storage limits.
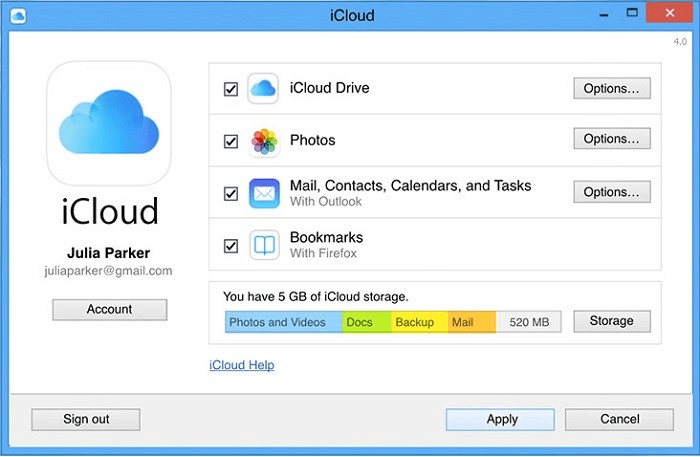
It's crucial to note that iCloud Email is integrated with your overall iCloud account, which provides you with a shared storage space of 5 GB. This limited storage can quickly become insufficient, especially for users with a large volume of emails or attachments.
Before proceeding with the step-by-step instructions on deleting an iCloud email account, let's first explore what happens after the account is deleted.
What Happen if I Delete iCloud Email Account?
Note
- Content or purchases in Apple iBooks and iTunes will become unavailable.
- Deleting your iCloud email account also erases all associated photos, videos, and documents.
- You won't be able to log in to receive iMessage and iCloud emails or receive FaceTime calls.
- Access to Apple Pay, iCloud Keychain, Find My Mac, Find My iPhone, Game Center, and Continuity will also be lost.
- Any third-party apps that store data in iCloud on your devices will be lost.
- Any appointments scheduled at the Apple Store will be canceled. Any open Apple Care cases will be permanently closed and inaccessible.
Deleting your Apple ID is permanent. Please note that deleting your iCloud email account is not a quick fix. The entire process of deleting an Apple account may take up to 7 days. This is because Apple needs to verify that it is you (and not someone else) requesting the deletion of the account.
If you anticipate needing access to your account in the future, consider temporarily disabling it instead of permanently deleting it.
Part 2. How to Delete iCloud Email Account
Now that you've grasped the fundamentals of iCloud Mail, let's delve into managing your inbox. We'll explore efficient methods for deleting all iCloud emails or even deleting your entire iCloud email account.
1. Remove Devices from Apple Account
Before deleting your iCloud account, take a moment to remove any devices you no longer use. This will streamline signing in with a new Apple ID in the future.
Here's how to remove devices:
Step 1: Sign in to your iCloud account at Apple.com.
Step 2: Scroll down to the "Devices" section.
Step 3: Click on each device image. A window will appear showing details.
Step 4: Click "Remove From Account" at the bottom of the window. Follow these steps to remove any other devices from your account.
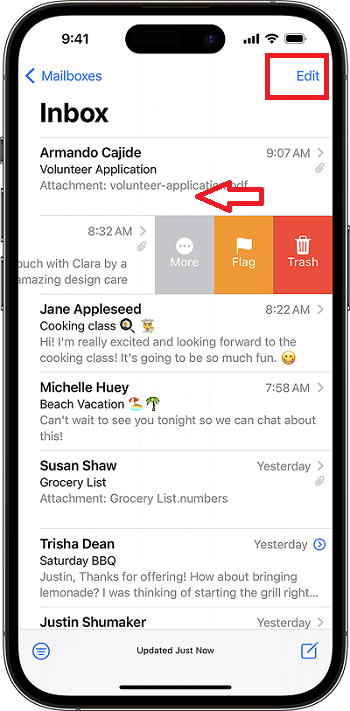
2. Delete All iCloud Emails from Inbox on iPhone
Step 1: Open the Mail app and navigate to your iCloud mailbox.
Step 2: Tap "Edit" in the top right corner.
Step 3: Tap "Select All" to choose every email in your Inbox.
Step 4: Tap "Delete" to send all emails to Trash.
3. Empty Trash on iPhone or Mac
- iPhone: Open Mail, go to Trash, tap "Edit" > "Select All" > "Delete".
- Mac: In Mail, go to Inbox, press "Command + A" to select all, then click the Trash icon.
Alternatively, Empty Trash on iCloud.com
Step 1: Sign in to iCloud.com with your Apple ID.
Step 2: Click Mail and open your mailbox.
Step 3: Tap "Mailboxes" (top left), then the Settings icon.
Step 4: Choose "Empty Bin..." and confirm by tapping "Empty Bin" again.
4. Permanently Deleting Your iCloud Email Account
Thinking of saying goodbye to iCloud email? It's important to understand that deleting your entire iCloud account will also disable all associated services like iCloud Mail, Find My iPhone, and Photo Stream.
Here's how to permanently delete your iCloud email account:
Step 1: Visit the iCloud website and log in with your Apple ID credentials.
Step 2: Once logged in, click on your Apple ID displayed at the top of the page. This will reveal various account options. Select "Manage Account" to proceed.
Step 3: Within "Manage Account," locate the "Data & Privacy" section and look for the option "Manage your Privacy." Scroll down and click the button labeled "Request to delete your account."
Step 4: This action will open a dedicated page outlining the data you'll lose upon deletion. Review this information carefully. Finally, enter a reason for deleting your account and confirm your choice to proceed with the permanent deletion process.
Part 3. How to Recover Deleted iCloud Email
While deleting unwanted emails is straightforward, accidental deletion can be stressful. Fortunately, there are data recovery tools available to potentially retrieve lost messages.
IMyFone D-Back can scan your storage devices, including your computer's hard drive, to locate and potentially recover deleted emails and their attachments. It typically support a wide range of data types, including photos, videos, documents, and of course, emails.
1,000,000+ Downloads
Key Features:
- iMyFone D-Back helps you retrieve lost or deleted iCloud emails, ensuring you don't lose important messages.
- D-Back's intuitive interface makes recovering your emails a breeze.
- Recover a wide range of data, including photos, videos, text messages, and more, all from your device.
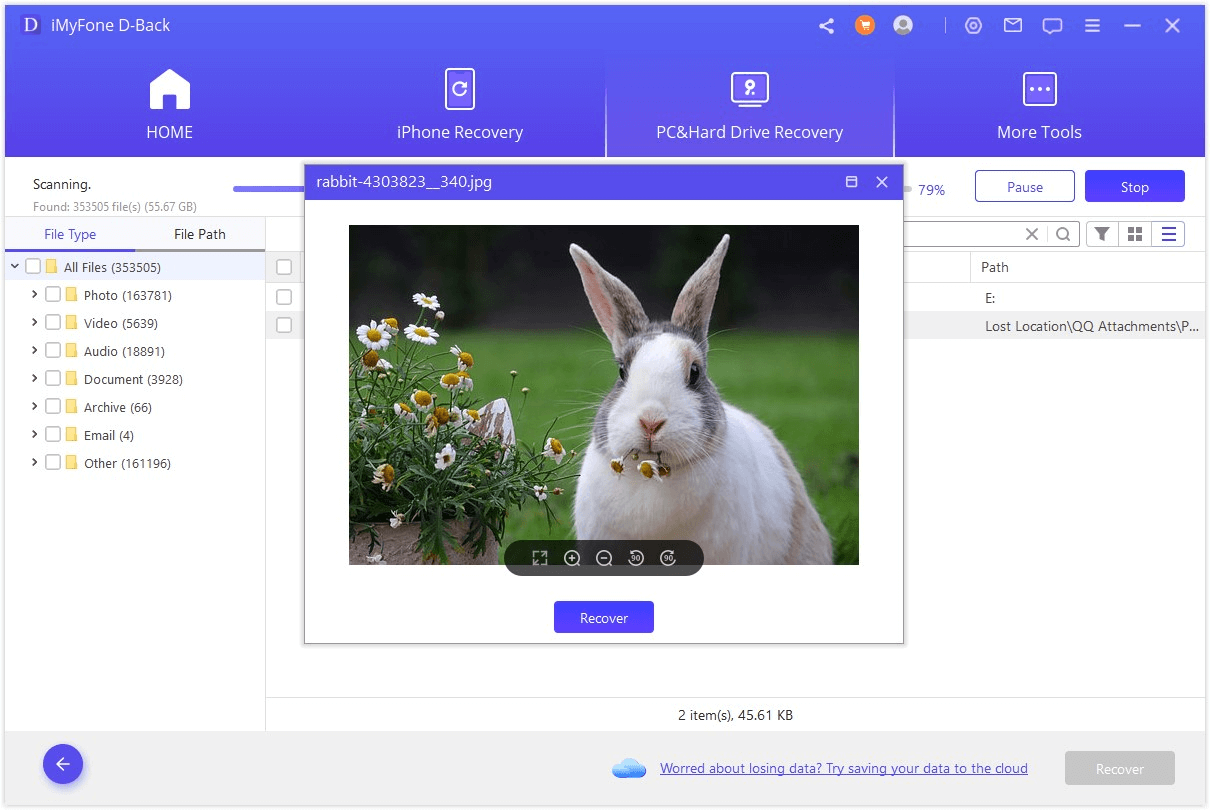
- Preview the content of recoverable files before you commit to restoring everything.
- Selectively choose specific emails or data to recover, rather than restoring everything at once.
Recover Lost iCloud Emails with iMyFone D-Back:
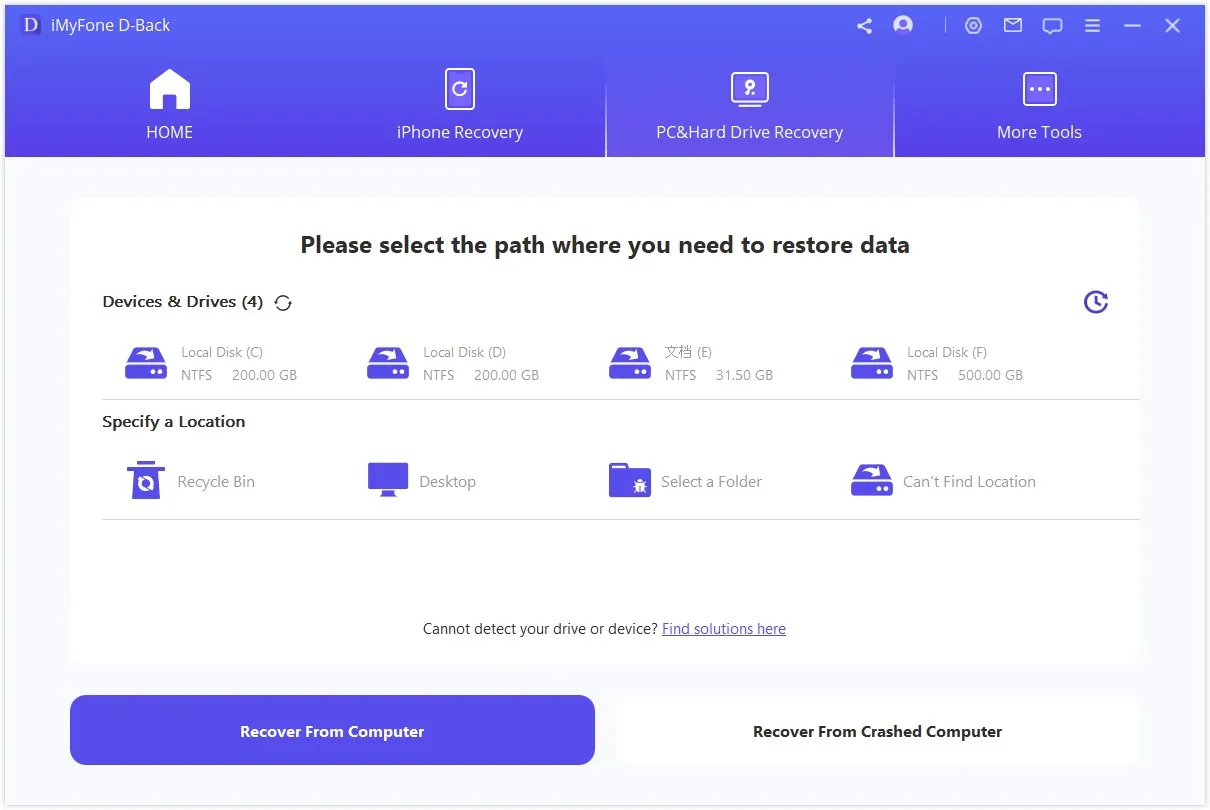
Step 1: Launch iMyFone D-Back on your computer. Select the location where you believe your lost iCloud emails were stored. This could be your entire computer hard drive, a specific partition, or even a folder where you previously saved iCloud emails.
Step 2: Once you've chosen the location, start the scan process. D-Back will scan the selected area and keep you updated on its progress. You can monitor the scan or choose to pause or stop it if you find the recovered data you need.
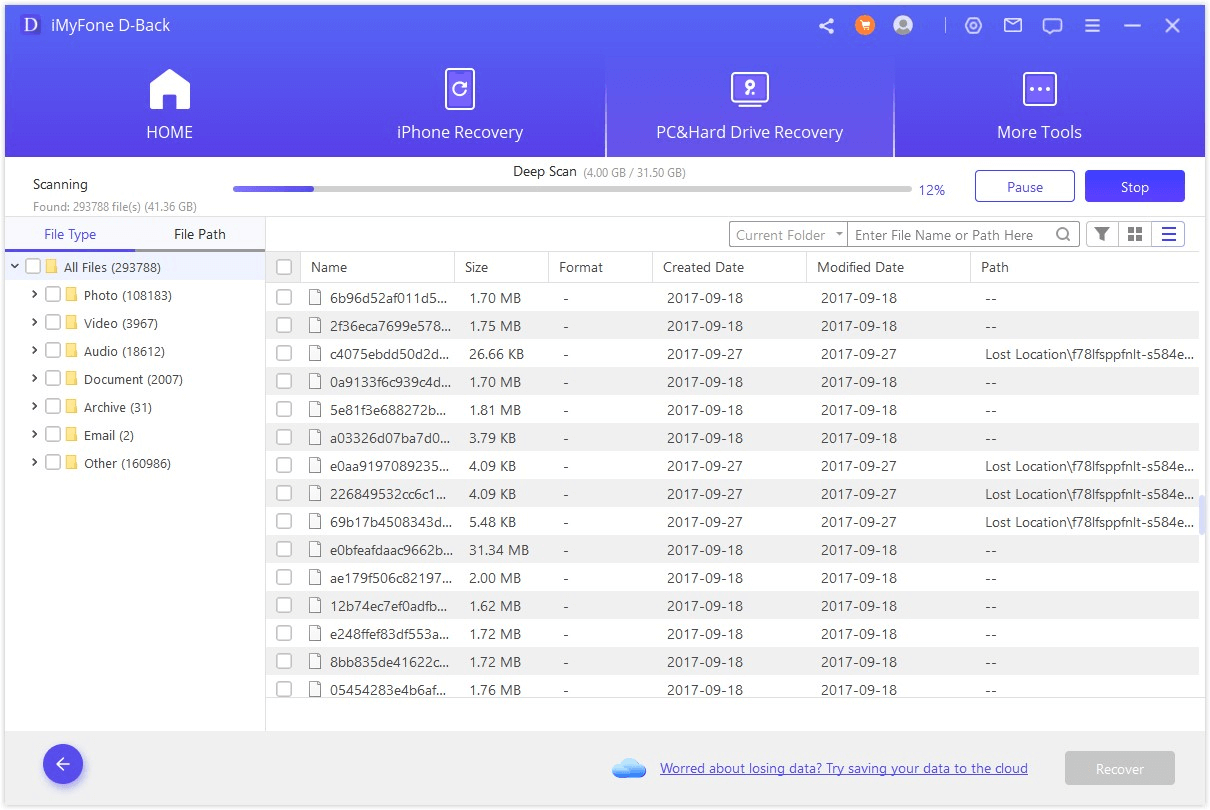
Step 3: After the scan, D-Back will categorize the recovered data in the sidebar for easy browsing. You can use built-in filters to narrow down the results based on factors like file size, date modified, or file type. This helps you quickly locate the specific iCloud emails you want to restore.
Part 4. FAQs
1 How to change iCloud email
Unfortunately, you can't change your iCloud email address directly due to security reasons. But there are alternatives:
Add an iCloud Email Alias:
Step 1: Go to Apple's website and sign in.
Step 2: Navigate to "Sign In & Security".
Step 3: Select "Edit" under "Reachable At".
Step 4: Choose "Add Alias" and follow instructions to create a new address.
Use a Different Email Provider:
Step 1: Open "Settings" on your device.
Step 2: Tap your name, then "Mail" and "Accounts".
Step 3: Select "Add Account" and choose your email provider.
Step 4: Enter your login details and follow the prompts to set up the account.
2 How to check iCloud email
There are two main ways to check your iCloud email:
1. Using the Mail App on Apple Devices:
This is the most convenient method if you're using an iPhone, iPad, or Mac. The Mail app comes pre-installed on all Apple devices and is specifically designed to work with iCloud email. Here's how to access it:
- On iPhone or iPad:
Step 1: Locate the "Mail" app on your home screen.
Step 2: Open the app. You'll see your iCloud email inbox by default, along with any other email accounts you've configured.
- On Mac:
Step 1: Click on the "Launchpad" icon in your Dock.
Step 2: Find the "Mail" app, which looks like a blue envelope icon.
Step 3: Open the app. Similar to the iPhone/iPad, you'll see your iCloud inbox by default.
2. Using the iCloud Web Interface:
This method allows you to check your iCloud email from any device with a web browser, even if it's not an Apple device. Here's how to access it:
Step 1: Go to iCloud website.
Step 2: Sign in with your Apple ID and password.
Step 3: Once logged in, click on the "Mail" icon. This will display your iCloud email inbox.
3 How to create a new iCloud email
While you can't directly create a new primary iCloud email address (the one ending in "@icloud.com" tied to your Apple ID), there are a couple of ways to achieve a similar outcome:
1. Add an iCloud Email Alias:
This lets you create a new email address that still delivers emails to your main iCloud inbox. It's like having a nickname for your email. Here's how to set up an alias:
Step 1: Go to Apple Website and sign in with your Apple ID.
Step 2: Navigate to the "Sign In & Security" section and click on "Apple ID".
Step 3: Under "Reachable At", select "Edit".
Step 4: Choose "Add Alias".
Step 5: Enter your desired alias address. You can choose a free alias ending in "@icloud.com" or use a custom domain name you own (requires iCloud+).
Follow the instructions on the screen to finish setting up.
2. Use a Different Email Provider:
If having a completely new email address separate from your Apple ID is essential, consider creating an account with another email provider like Gmail, Outlook, or Yahoo. You can then configure this new account within the Mail app on your Apple devices to access and manage those emails alongside your iCloud email.
Here's how to add a different email account to the Mail app:
Step 1: Open "Settings" on your iPhone or iPad.
Step 2: Tap on your name at the top.
Step 3: Select "Mail" and then "Accounts".
Step 4: Choose "Add Account" and select your desired email provider.
Step 5: Follow the on-screen instructions to enter your login credentials for that email account.
Conclusion
In conclusion, managing your iCloud email and storage doesn't have to be a daunting task. By following the steps outlined in this article, you can efficiently and permanently delete unwanted emails from your Apple Mail, ensuring your inbox remains clean and your iCloud storage is optimized. Remember to regularly check your storage usage, archive important emails, and utilize Apple's built-in tools for the best results. For those times when you need an extra hand, consider using iMyFone D-Back to recover deleted emails from iCloud more effectively.
- Supports a wide range of data types such as messages, photos, videos
- AI repair broken/corrupted files, photos and videos.
- 100% Work with a variety of data loss scenarios.
- Retrieve lost data from different types of devices
(Click to rate this post)
Generally rated 5 (256 participated)
Rated successfully!
You have already rated this article, please do not repeat scoring!