Voice Memo app is really a great app that helps us record something that cannot be noted down with a pen in a short time. It is widely used to record music, interviews and even lectures! Every memo records something interesting or important and may be useful in future, so it hard for us to delete any of them after recording. However, the storage space on iPhone is limited, and such files really take up space. Hence, it is necessary for us to transfer the voice memos to somewhere else.
Here are 2 ways for you to copy the memos from your iPhone to your computer to free up the space on your iPhone.
Copy Voice Memos to Computer Using iTunes
If you have created some important voice memos that you need to take elsewhere, you can easily transfer the memos from iPhone to computer in a few simple steps using iTunes.
1 Syncing Your Voice Memos
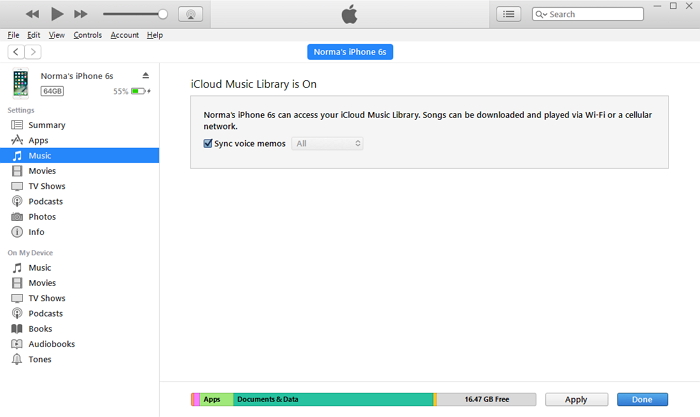
Step 1: Using a USB cable, connect your iPhone to your computer. Run iTunes on your desktop.
Step 2: On the iTunes interface, look for your Device’s name or icon at the top left.
Step 3: Select the “Music” option on the left.
Step 4: Check two options, ‘Sync Music’ and then ‘Include voice memos’
Step 5: Select the ‘Sync’option at the bottom of the interface. Your memos will then be successfully synced and transferred to your computer.
2 Find Your Voice Memos On Your Computer
Once the sync is complete, your voice memos will be saved in a specific folder.
Step 1: Right click on the recorded file in iTunes and click on ‘Show in Windows Explorer’.
Step 2: Play the file from the specific destination. Your memos will be there on you windows computer: C:Users(your username)MusiciTunesiTunes MediaVoice Memos. If you have a Mac, you can find the voice memos in the folder: Macintosh HD > Users > username > Music > iTunes > iTunes Media > Voice Memos.
Selectively Copy Voice Memos from iPhone to Computer
A better way would be using the iMyFone D-Port iPhone Data Extractor software. It takes only a couple of minutes to get the job done and you can selectively choose the voice memos you want to copy to your computer. Then you can easily play your voice memos on your computer. It is capable of transferring, copying or extracting up to 20 data types including your photos, videos, contacts, voice memos, and even the data of the third-party apps from your iPhone or iTunes/iCloud backups to your PC. Besides, you can also use it to backup your iPhone device completely including all the data and settings, or just backup messages, WhatsApp messages, WeChat Messages. You can also have a trial of the new function "Restore Backup to Device".
Note: All iOS devices including iPhone 8/X and all iOS versions including iOS 11 are supported.
Here is how you can do using iMyFone D-Port to copy voice memos by just a few clicks.
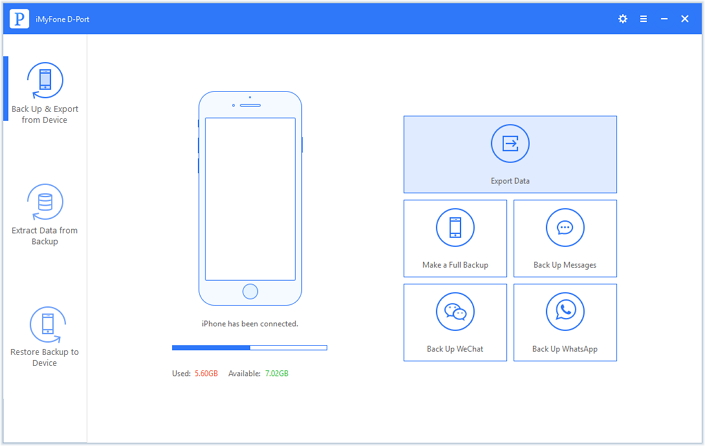
1 Download and install the iMyFone D-Port on you computer. Launch the program and connect your device to the computer. On the interface, click on "Back Up & Export from Device" in the left panel and then click on "Export Data".
2 Choose the file type that you want to copy. It is "Voice Memo".
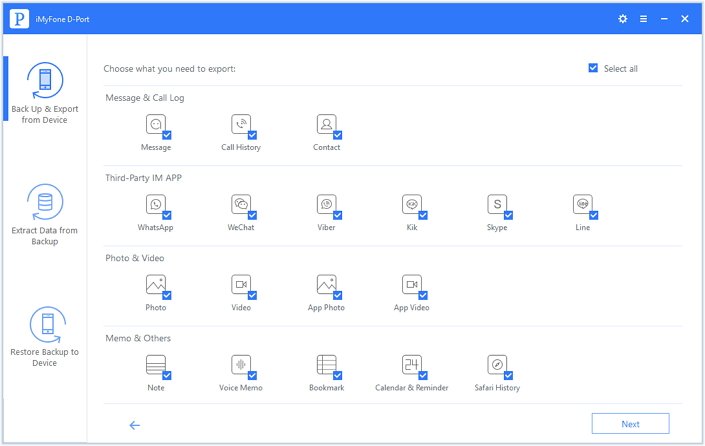
Click "Next" and the program will start the scanning process.
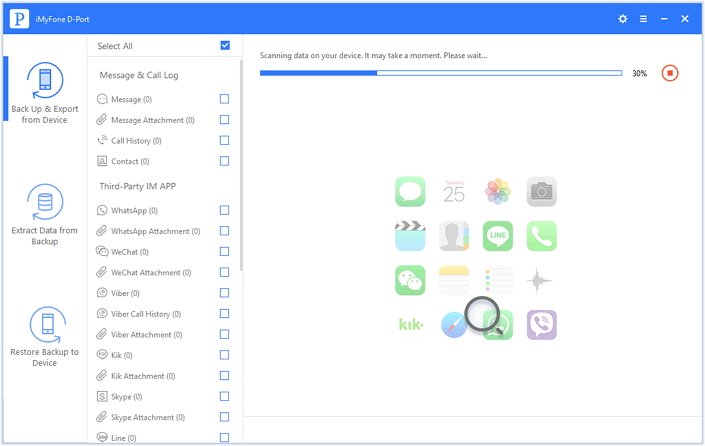
3 On the next interface, you can preview all your voice memos. Select the ones you wish to copy and click on the ‘Export’ button at the bottom right corner.
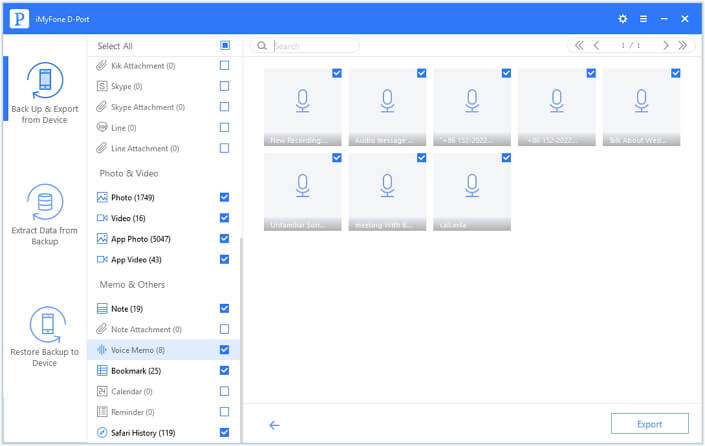
4 On the pop-up that appears, choose a folder to store the voice memos. They will then be successfully copied to your computer.
These are all that you need to do to copy the voice memos from your iPhone to your PC. If you are in the trouble of the increasing voice memos on your iPhone, why not try iMyFone D-Port iPhone Data Extractor to remove them to your computer?


 September 13, 2021