Issues related to voicemails are quite common across iPhone. Most users delete voicemails after listening, but sometimes due to some unknown reasons the voicemail on the iPhone won't delete no matter what you do. And if it gets deleted, it comes back after some time. Fortunately, there are some solutions available. Following are some effective solutions:
Method 1: Set Your Phone to Airplane Mode
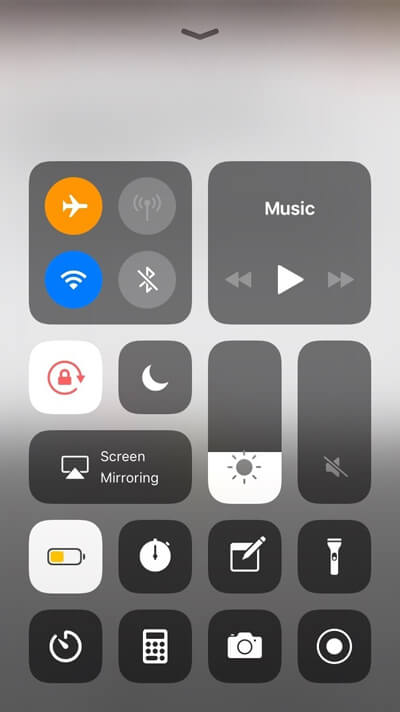
This is one of the easiest solutions for "iPhone won't delete voicemail" issue. Many users have succeeded in deleting voicemails via this method. The method is quite simple as all you have to do is set your phone to Airplane mode. Follow these instructions:
- On your iPhone Home Screen, swipe up from the bottom. A new window will appear. Tap the "Airplane mode".
- Now open the Phone app and tap "Voicemail" and then delete the voicemail messages.
- Turn off the "Airplane mode". Your deleted voicemail messages won't come back.
Method 2: Delete from Network
Sometimes deleting voicemail messages from your iPhone solves the problem. However, if the Airplane mode method doesn't solve the problem, then you will need to delete those messages directly from server or network. Follow these instructions:
- Open the Phone app on your iPhone.
- From the bottom of the screen, tap the "keyboard" icon. The dialer will appear.
- Now use the dialer to dial your own telephone number. It will allow you to access your voicemail. Or dial "*86" if you are using Verizon Wireless or hold the "1" key if you are using "AT & T".
- Once you have access to your voicemail, press "1" to listen to your voicemail messages.
- The system will play your new messages first and then play the old, stored messages. You can also select the voicemails and delete them during that call.
Method 3: Reset Your iPhone
If none of the above-mentioned methods worked, then there is one solution that will definitely work i.e. resetting your iPhone. Keep in mind that resetting your iPhone will erase all your settings and configurations as well as delete all your iPhone data. So, it is recommended that you back up your data before proceeding.
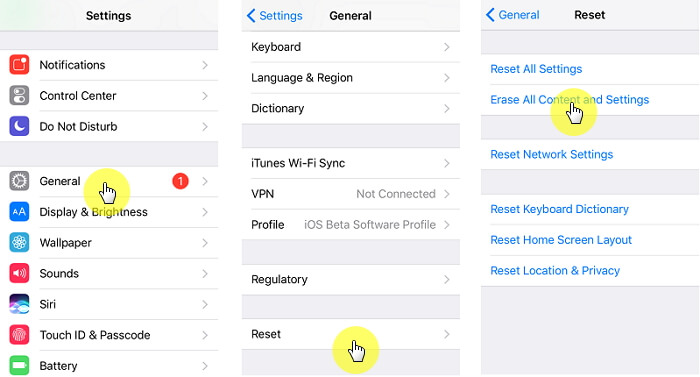
- On your iPhone, open the "Settings" app.
- Navigate to "General" -> "Reset" and then tap on "Erase All Content and Settings".
- Confirm your action by inputting your passcode. After that, tap the "Erase iPhone" option. Your Apple ID and password may also be required for the reset.
Method 4: Clear Deleted Voicemail Messages
If you have successfully deleted your voicemail messages but they reappeared after some time, this means that the messages you delete are not actually erased from your iPhone storage. Since the messages are still available, it is likely that they will reappear in your inbox after some time. The solution to this problem is to clear the deleted messages. Here are the steps to do this:
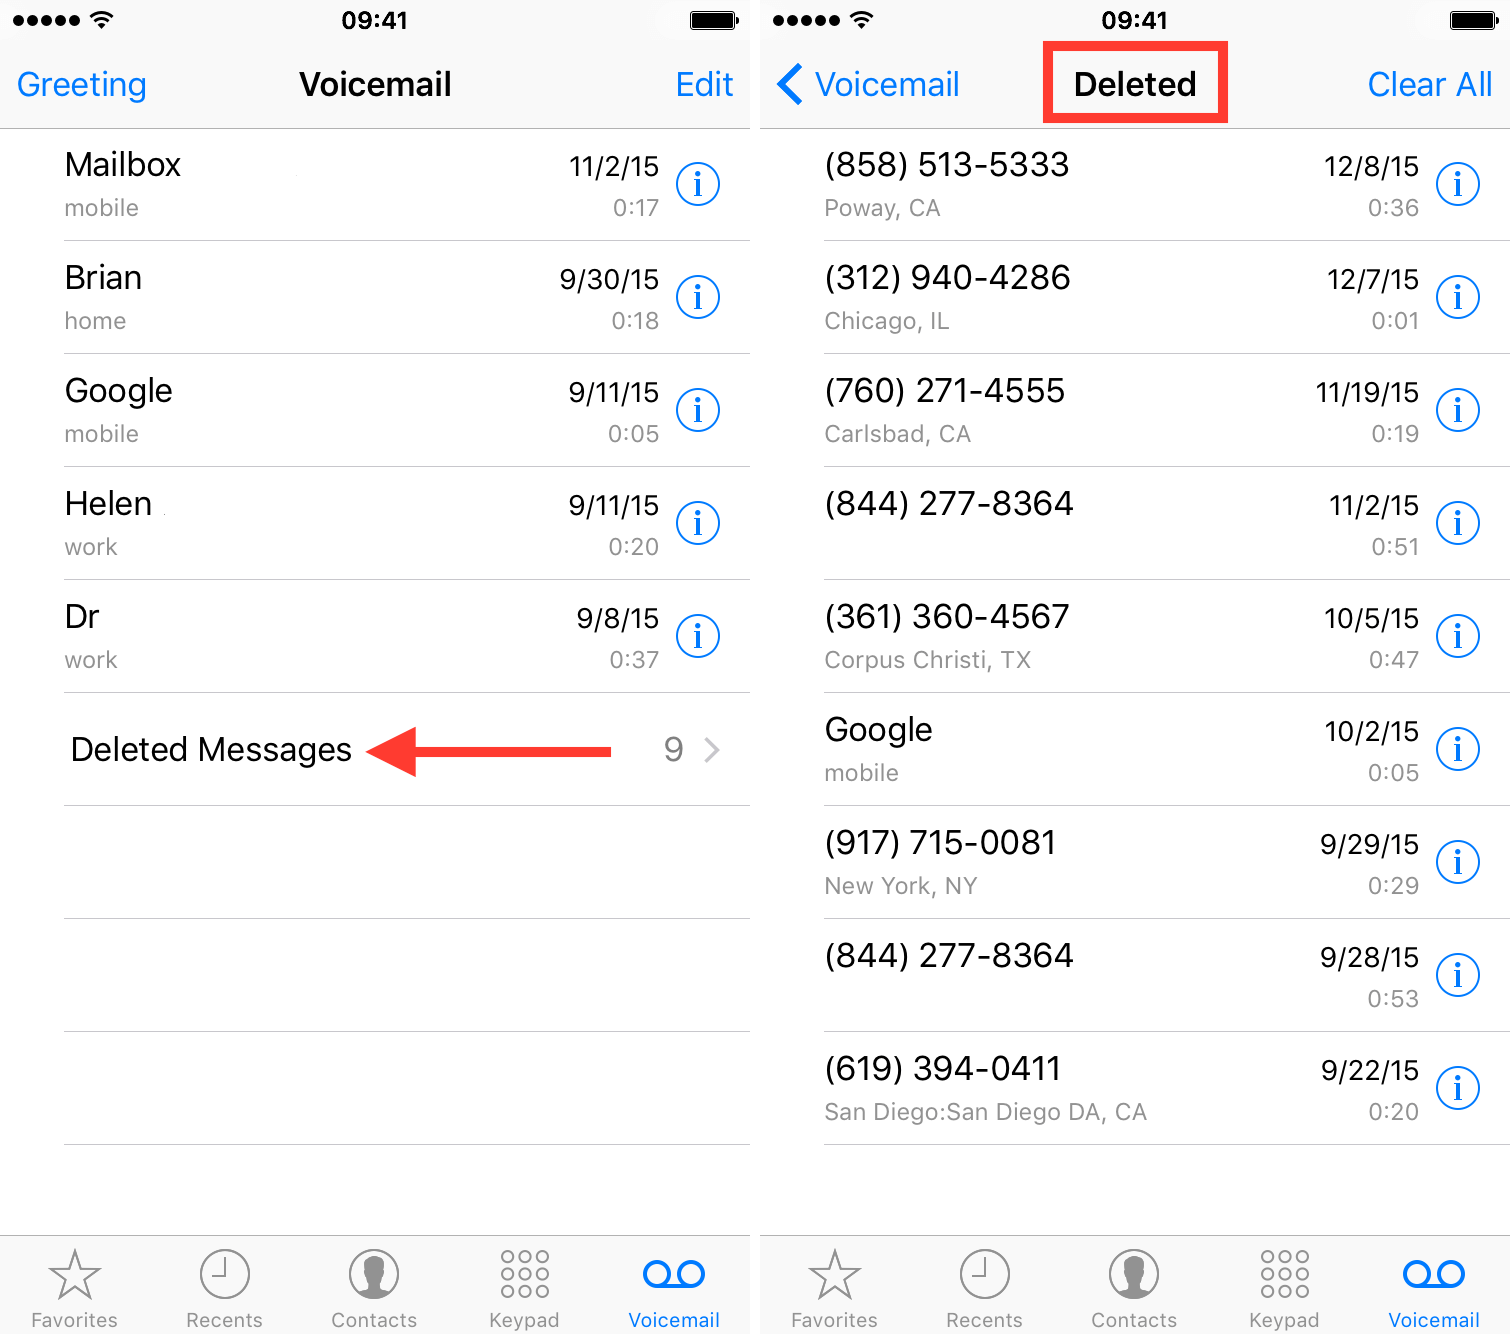
- Open your iPhone, tap the "phone" icon and then select the "voicemail" icon shown in the bottom right corner of the screen.
- If you have already deleted some of your voicemail messages but they haven't been cleared yet, then you will need to visit the "Deleted Messages" section to clear them.
- Once in that section, select the "Clear All" option and your deleted voicemail messages will be cleared.
Method 5: Update Your iOS Version
Have you verified that you have the latest iOS version isntalled on your iPhone? This may fix the iPhone wont delete voicemail issue. You can follow the steps below to update your iOS version.
- Connect your device with Wi-Fi and plug it into power.
- Go to "Settings" -> "General" -> "Software Update".
- Tap "Download and Install" and then tap "Install".
- It may ask you for your passcode, enter it to continue.
For more details and ways to update iOS version, you can go to support.apple.com.
Method 6: Update Carrier Settings
This is also a method to fix the iPhone won’t delete voicemail issue. You can manually check for and install a carrier settings update following the steps here.
- Connect your device to a Wi-Fi or cellular network.
- Go t "Settings" -> "General" -> "About".
- You’ll see an option to update the carrier settings if an update is already available.
For more information about how to update carrier settings on iPhone, you can also go to support.apple.com.
Method 7: Reboot Your Device
It is easy to reboot your iPhone and it may fix some minor issue that exist in your iPhone. Please try the following steps to reboot your device.
- Press and hold the "power" button until the power off page shows.
- Drag the slider to turn off your device.
- After it turns off, press and hold the "power" button again to restart your device.
Method 8: Permanently Delete Private Data on iPhone
iMyFone Umate Pro is the ultimate tool for resetting iPhone. Many people are aware that despite deleting their private data, they still run the risk of their deleted files being recovered. This is why there have been so many identity theft incidents where personal info get leaked on the internet and soon enough everyone has seen them.
It can erase iPhone data with just 1 click. Then, free up more space for your iPhone. It can clean up hidden garbage and corrupted files on your iPhone. And, some key features are shown below.
Here are the simple steps to delete private data, erase deleted data and data of third party apps.
- To permanently delete private data: Launch iMyFone Umate Pro, then click on "Erase Private Data". Select what you want to delete, photos, videos or other things.
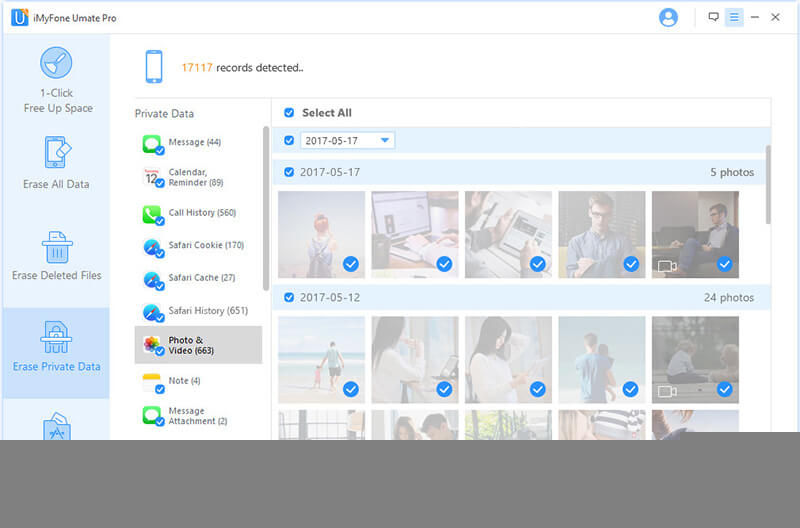
- To erase deleted data completely: Launch iMyFone Umate Pro, then click on "Erase Deleted Files". Select what you want to erase, wechat files, LINE files or other files.
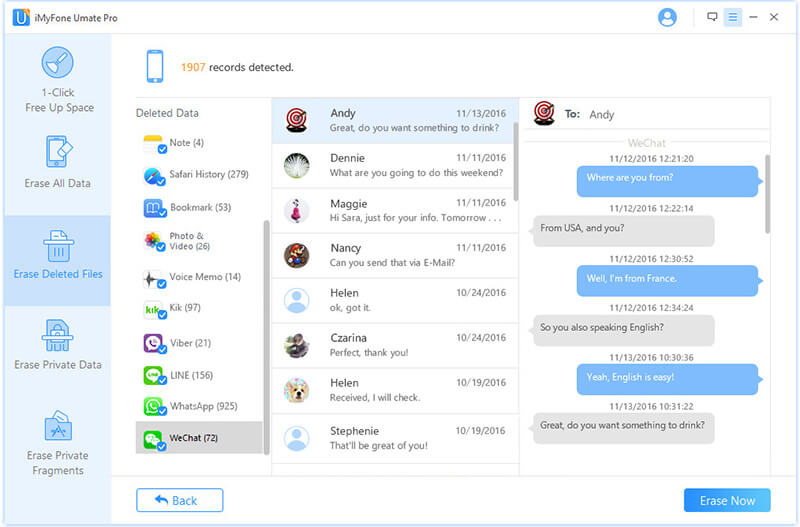
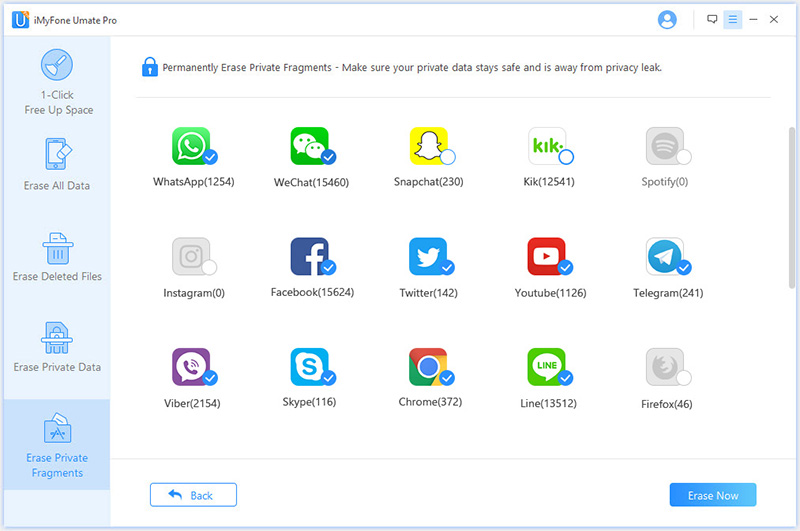
- To erase data of third-party apps: Launch iMyFone Umate Pro, then click on "Erase Private Fragments". Choose what you want to delete.
Conclusion
If you truly want to protect your privacy then there is no better way to do it than using iMyFone Umate Pro. This is a state-of-the-art iPhone data erasing software that allows you to erase any kind of data from your device with ease. Data erased by iMyFone Umate Pro is permanent and cannot be recovered.


 March 12, 2024

