Storage on your iPhone is extremely important. You can’t store anything important if the storage is already full. It is not uncommon for iPhone users to have the iPhone photo storage full but no photos issue. This keeps you from taking more photos while there are no photos on the device. This article will help you fix the iPhone photo storage full but no photos problem. We will provide you with top 4 ways to eliminate "iPhone Photo Storage Full but No Photos" Problem.
Method 1. Empty the Recently Deleted Album
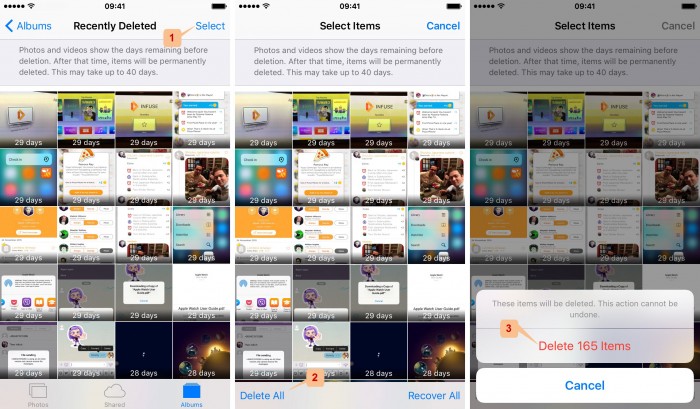
When you delete your photos on iPhone, iOS simply moves them into the Recently Deleted Album. The photos will still remain on your iPhone for the next thirty days after which they are auto-deleted. To clear your photo storage completely, empty the Recently Deleted Album by following the simple steps below:
Step 1: Launch the Photos App and click "Albums" at the bottom. Choose the "Recently Deleted Album".
Step 2: In the top-right corner, click Select. Click "Delete All" in the bottom left corner. You can also manually select pictures to delete. Tap "Delete [number of photos] Items on the popup to confirm.
Method 2. Stop the Photos from Reappearing on Your Device
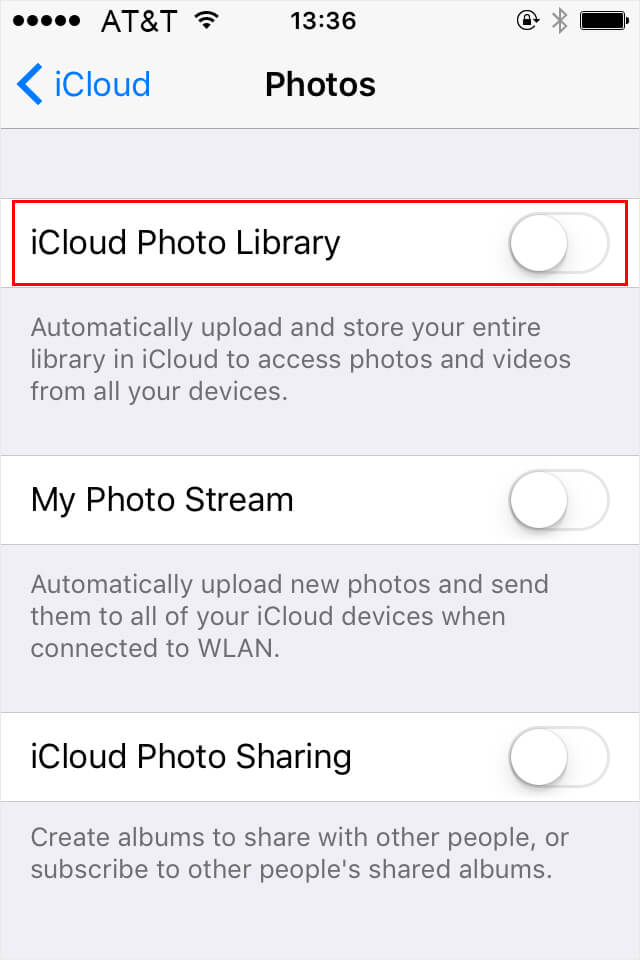
If your iCloud Photo Library is turned on, your photos will keep appearing on your iPhone even after you delete them. This is because the device is syncing with iCloud where the photos you deleted on your iPhone will still be available. This will lead to the “iPhone photo storage full but no photos” problem. To turn off iCloud Photo Library and keep the photos from reappearing, follow the steps below:
Step 1: On your iPhone home screen, click "Settings" and then tap iCloud.
Step 2: Under iCloud, click Photos and then toggle the "iCloud Photo Library" switch off.
Methods 3. Get More Storage for Your iPhone And Speed It Up
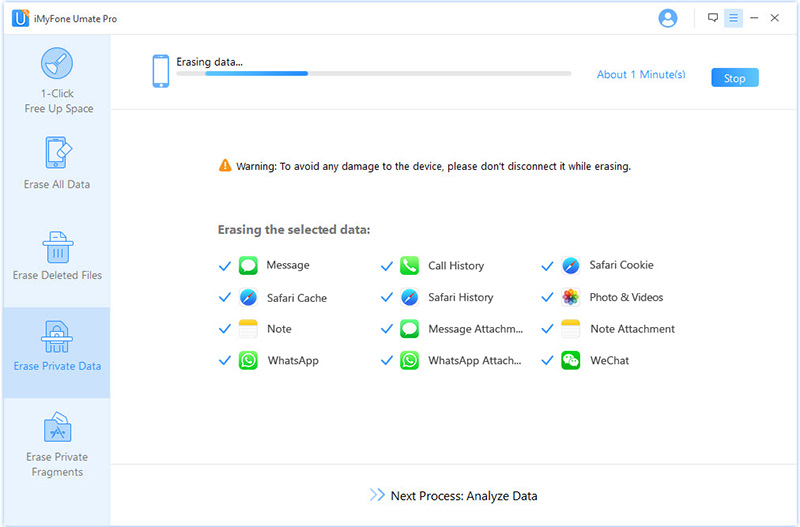
If your iPhone storage is too low, the iPhone will become slow. To optimize the device speed, you need to clear your storage. iMyFone Umate Pro can help you do this. This tool will scan your iPhone for Photos, Temp & Junk files and clear them. Also, it will help you locate and delete huge files on your iPhone. You can also make use of Umate Pro to remove applications available on your iPhone in bulk. These are applications you probably do not need and they could be consuming your precious space.
Key Features:
- You will be helped by erasing iOS device photos permanently to protect your privacy.
- You can erase your iPhone photos in bulk. It is much faster than any other method.
- You can scan and locate the pictures you deleted via conventional means. You can erase the deleted pictures using Umate Pro to make them irrecoverable.
- You can export your photos to your computer and then erase them from your iPhone with a single click.
- You can compress your pictures using Umate Pro to save space on your iPhone without losing anything.
Bonus. Permanently Erase Deleted Photos from iPhone
Deleting the pictures available in your Recently Deleted Album will clear your photo storage. This is great if you were looking to only create more space for more data on your iPhone. However, let’s look at a different scenario. Maybe, you are deleting your iPhone photos to protect your privacy before you resell, recycle or even give away your iPhone.
To erase the photos you have deleted on your iPhone using Umate Pro, follow the steps we have outlined below:
Step 1: After launching Umate Pro on your computer, connect the iPhone to the PC and trust the computer.
Step 2: On the left-hand column, click Erase Deleted Files and then click Scan.
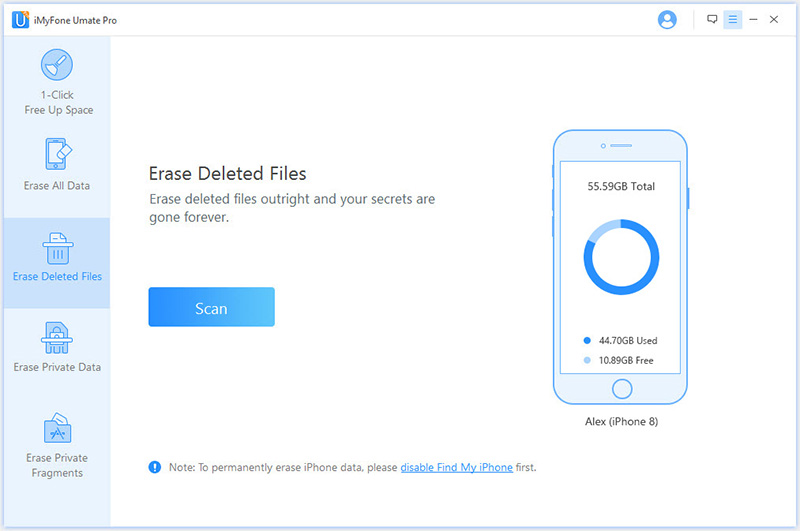
Step 3: After the scanning, you can preview all the deleted data available on your device and can be recovered. Select the files you wish to delete and then tap Erase Now.
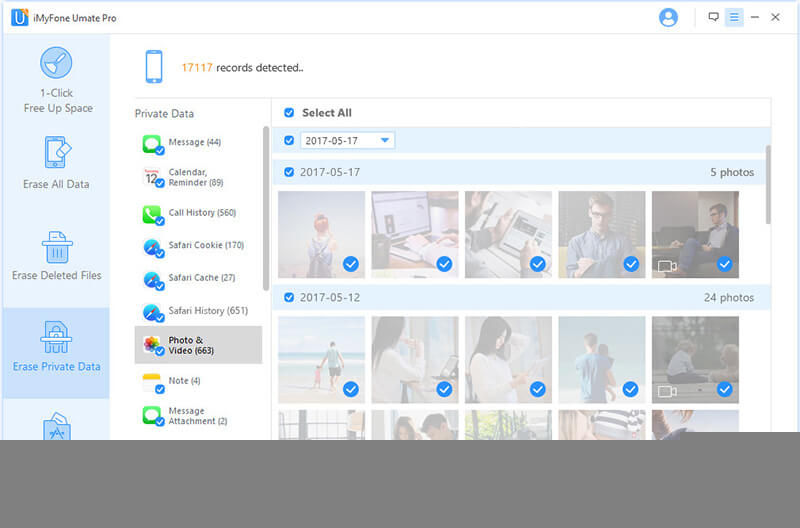
Step 4: Choose a security Level and then type “delete” in the textbox. Tap Erase Now and keep the device connected to your PC until the erase process is complete.
Conclusion
After Methods 1 and 2 above, the iPhone photos will still be available on the device. The only thing your iPhone will do is move them from the allocated to the unallocated space. They will stay in the unallocated space where they can be easily recovered using third-party tools. To safeguard your privacy, you have to erase the photos in such a way that there is a 0% chance of their recovery. This can be achieved using iMyFone Umate Pro.


 March 12, 2024

