Have a friend who likes to check your phone behind you? Is there a way to make sure no one sees the file on your phone without you knowing about it? Yep, there is. If you want to stop this, just set your iPhone to erase all the data after 10 failed attempts. But one of the other things we’d like to talk about apart from enabling this setting is how one can recover the lost “data” if iPhone erase data after 10 attempts.
How to Set Your iPhone to Erase All Data After 10 Failed Attempts
It’s no gainsaying that Apple has done a magnificent job with the security of iPhone. So if you have some files that you want to keep it private and don’t want anyone to see it, you can put a password on the iPhone to make sure no one else can access it without you knowing, and you can even set your phone to erase all data after 10 failed passcode attempts. Though it means you will have to start all over again, it is a sure way to save your files. Question is, how do you set your iPhone erase data after 10 attempts.
How to Set Your iPhone to Erase All Data After 10 Failed Attempts
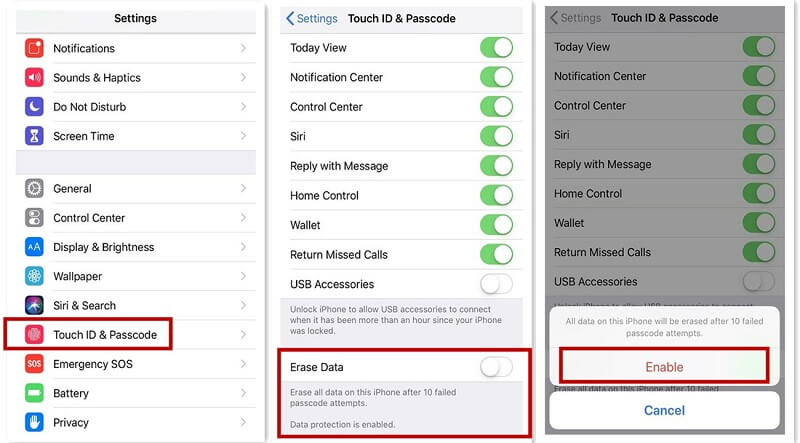
Step 1: Go to the Settings on your iPhone.
Step 2: Scroll down till you see the Touch ID and Passcode option.
Step 3: Click on it and you will see the Erase Data option at the bottom of your iPhone screen, just enable it and it's done.
How to Get Your Data Back after Erasing All Data
Its one thing to be able to set your iPhone erase data after 10 attempts, but the question is, how do you recover your data after it seems to have been deleted? There are basically two ways to recover your data back if you have backups.
1 iCloud
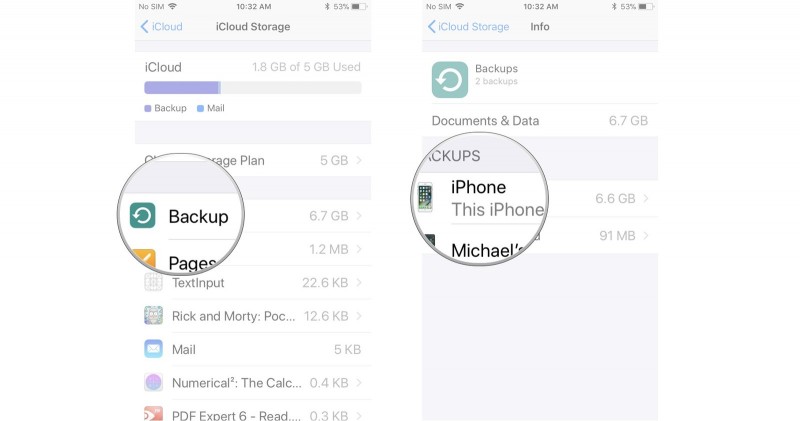
If you have backed up in iCloud, then you can get your data back from iCloud:
- On your iPhone, go to Settings.
- Click on “your name” then iCloud followed by clicking on Storage.
- Then go to Manage Storage (or Settings) à iCloud, and go to Storage and Manage Storage.
- You can then tap a device that’s been listed under Backups to check for the date and size of its latest backup, you just have to make sure you have a file that you’ve backed up recently, if yes you can restore them.
2 iTunes
If you have backed up in iTunes, then you can get your data back from iTunes:
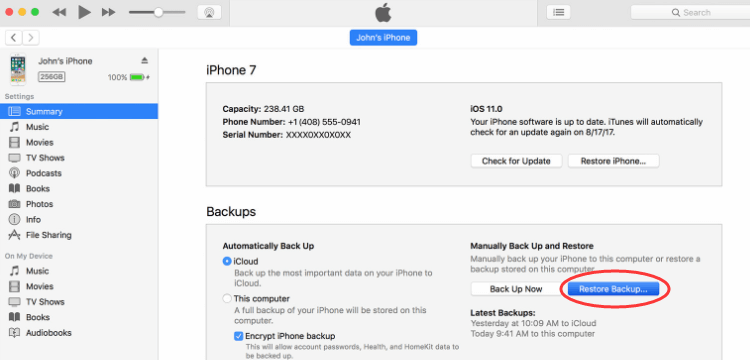
- For iTunes users, open the iTunes software on your Mac or PC that you’ve used to back the files up.
- Next, connect your iPhone to your computer by using a USB cable. Make sure you trust your device while at that.
- You should select your iPhone immediately it appears on iTunes.
- Select the ‘Restore Backup’ in iTunes.
- You can then check out the date and size of each of the backup and pick the relevant one amongst all of them.
- Finally, click the restore and wait for the restore time to finish.
How to Better Protect Your Personal Privacy on iPhone
Is there any better way than setting iPhone erase data after 10 attempts? Do you have personal information stored on your iPhone but you can’t find it, I know how scary that sounds. What this means is that if you can’t find these files, how can you delete and secure them? That’s one of the things the iMyFone Umate Pro for Windows or iMyFone Umate Pro for Macwas designed for. It helps to delete all the residual information on your mobile completely, so it won’t be recoverable for a third party.
Key Features:
- It can help you protect your personal information including your messages, call logs, safari history, photo, note etc.
- It can erase all your unneeded data on your phone completely without any chance of recovery.
- It can help you find out your already deleted files and erase them completely without traces.
- It can also help you protect personal information of third-party apps.
How to use iMyFone Umate Pro to protect your personal information:
Step 1: Connect your iPhone to your Mac or PC.
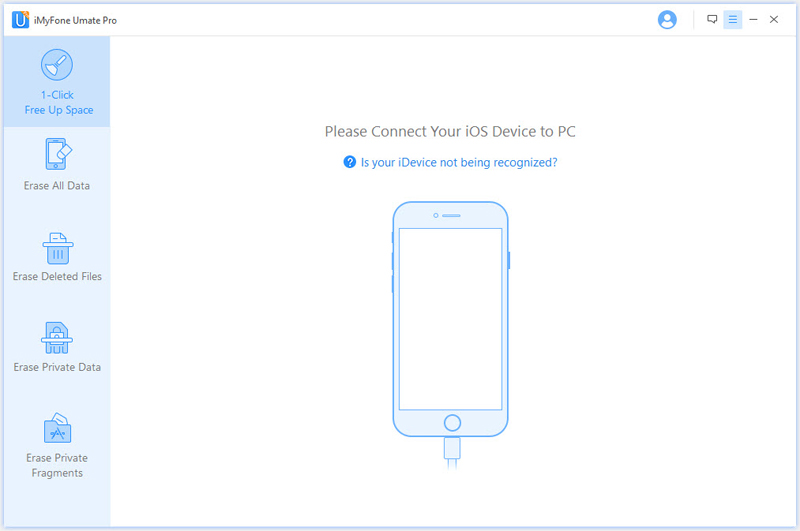
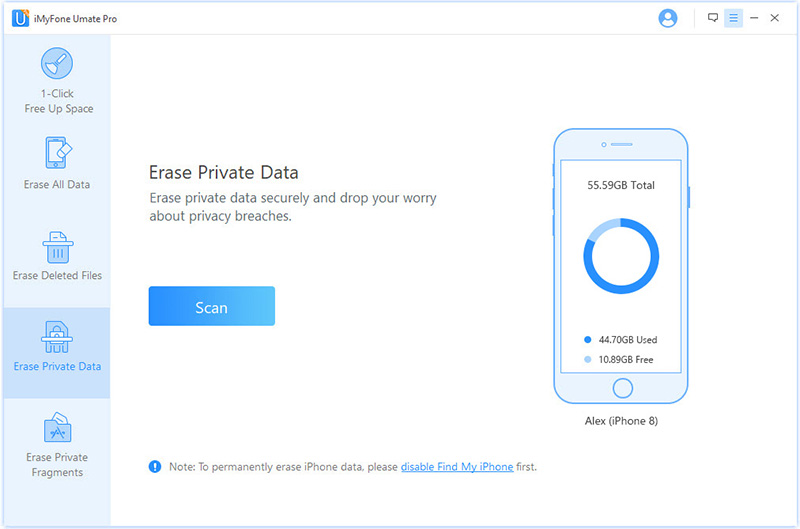
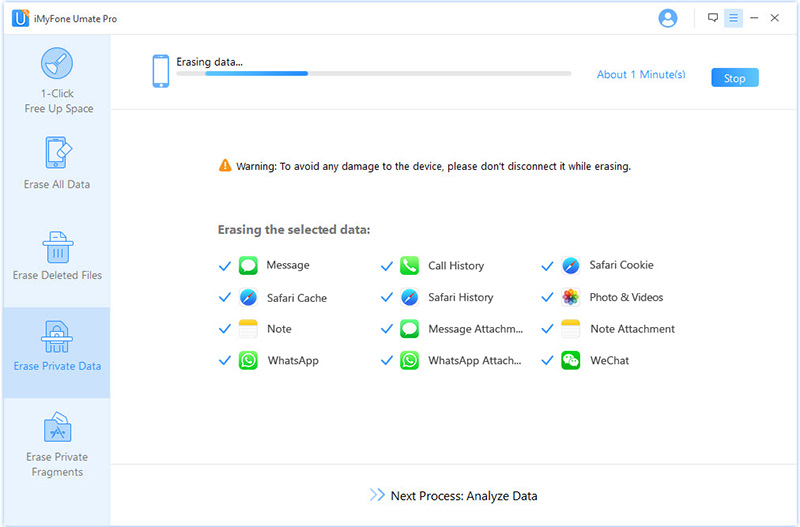
Step 2: Next, click the Erase Private Data tab, and “Scan”, once this is done, iMyFone will start to scan your iPhone (this might take several minutes).
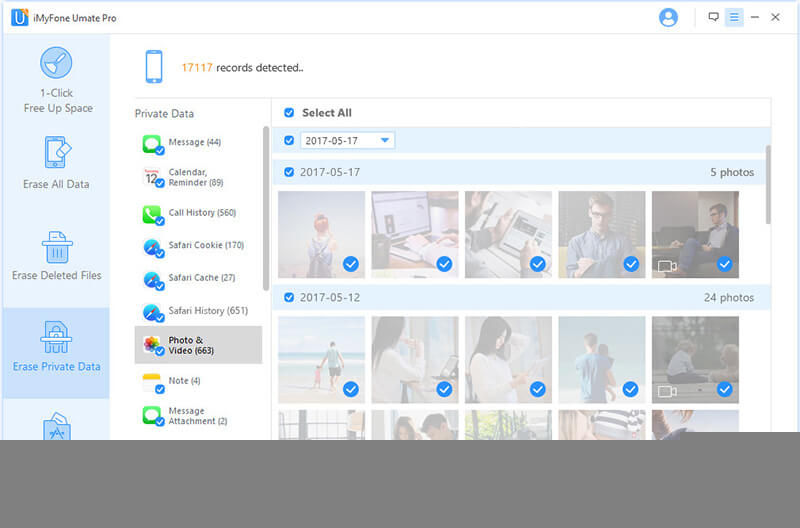
Step 3: Once you are done scanning, the iMyFone Umate Pro will list of your Private data (Images, Messages, and Call history). Preview all of them and choose the one you’d like to erase, click on the Erase Now Button.
Step 4: To complete the process, you will need to type ‘delete’ into a textbox that will pop up on your screen.
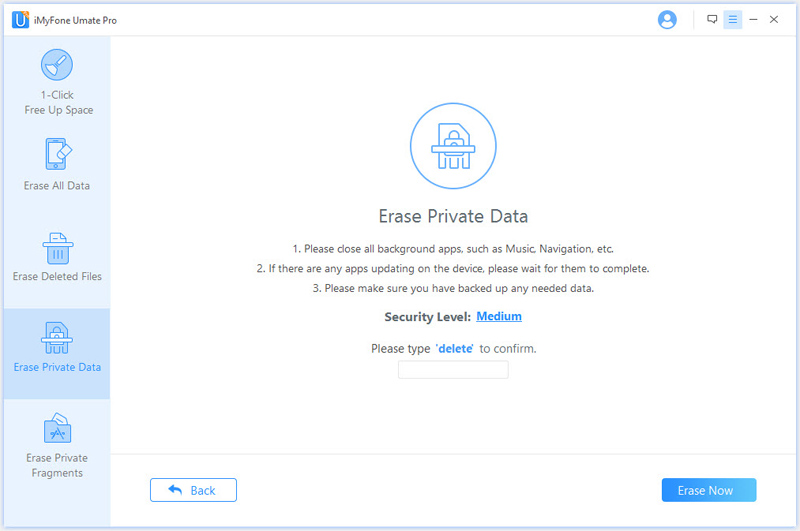
Step 5: Once you’ve typed ‘delete’ into the textbox and confirmed it, click the Erase Now Button to erase all of the private data.
You can set your iPhone erase data after 10 attempts to keep your personal data safe. But you can also try iMyFone Umate Pro to protect your sensitive information from all sorts of information, identity theft or fraud.
Related Tips
- 1. iPhone Eraser Software with Free Downloads
- 2. Erase Deleted Files on iPhone


 March 12, 2024

