Backing up iPad pictures via iTunes and iCloud are great options for those who want to rely on Apple software to store their photos/pictures. But if you are tired of the incessant error issues associated with Apple software especially iTunes, then you can use some of the options we’ve discussed such as iPhoto, Apple iCloud services and other backup options to save your iPad files on your Mac or PC.
#1. How to Backup iPad Pictures to Computer via iCloud
Backing up photos from iPad to a computer or to a cloud server is usually a critical task, and many people fear losing their files during file restoration process. But iCloud is a bit safer and easier than other cloud backup services. So, if you prefer to use iCloud in archiving your photos on a laptop, then follow these steps:
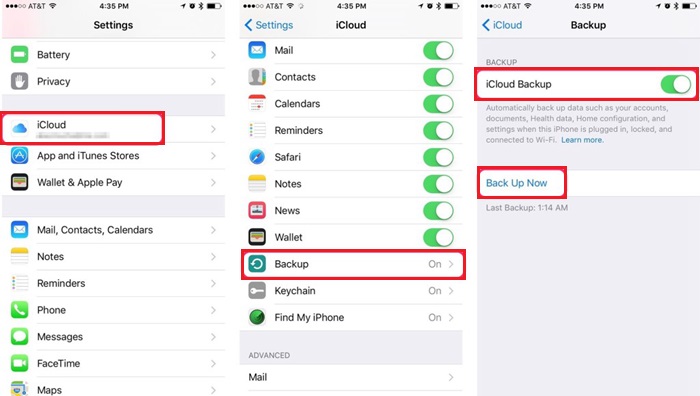
Step 1: Download iCloud for Windows on your PC, then turn on iCloud Photo Library on all your mobile devices by clicking Settings > iCloud > Backup. All your Pictures will be uploaded to iCloud Photo Library.
Step 2: Download your Photos and Videos from iCloud Photo Library to your PC/Mac by opening File Explorer window > iCloud Photos > Download Photos and Videos. You can choose the photos and videos to download, then click Download to finish.

#2. How to Backup iPad Photos to Computer via iPhoto
If you are using a Mac computer, there is a free backup option for you known as iPhoto. It can be set up to automatically backup/import iOS device pictures whenever you are connected to your device.
iPhoto is free and offers a good way to organize your photos and videos on your Mac. However, for Mac owners with OS X Yosemite 10.10.3, your Mac will support Photos and not iPhoto app. You may need to update your iPhoto to Photos app to keep enjoying its features. However, if you’re still using other versions of macOS, then follow these steps to manually backup iPad pictures on your Mac.
Step 1: Connect your iPad to your Mac using a USB cable.
Step 2: Launch the iPhoto app, and select your iPad in the sidebar under device list.
Step 3: Click “Import Photos” button. You can choose to erase the photos from your iPad after importing by clicking Delete.

#3. How to Backup iPad Pictures – iMyFone Umate Pro
If you are enabling iCloud or iPhoto backup features, you may have to wait over 24 hours before your picture will be fully uploaded. But there is a great way to backup iPad pictures instantly, this process is iMyFone Umate Pro.
iMyFone Umate Pro for Win or for Mac is a simplified tool for erasing iOS device data to recover storage space. It erases iOS device with 0% recovery. It can erase all types of iOS data be it messages, contacts, call history, photos, videos, etc. And it's highly recommended by lots of media, like MacWorld, iPhoneinCanada, APPKED, etc.
Key Features:
- Backup and delete photos: It enables you to preview and selectively erase iPad pictures before backing up or erasing them.
- Permanently erase current photos and deleted photos from your iPad to protect your privacy.
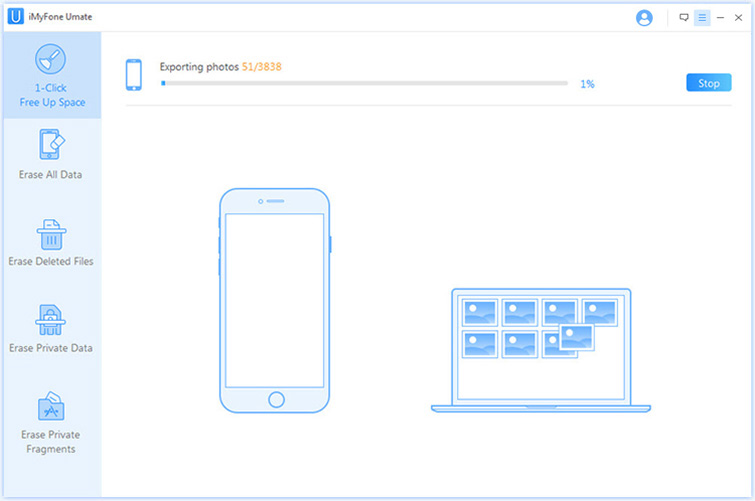
- Harness the data exporting feature of Umate Pro in exporting your iPad photos to PC/Mac.
- Secure your privacy when recycling, selling or giving out your iPhone, iPad or iPod touch.
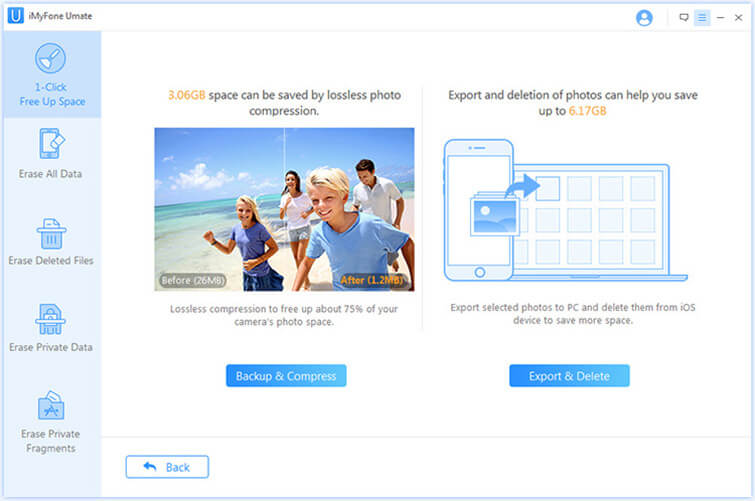
- Lossless compress your iPhone, iPad or iPod touch photos to release storage space.
Using Steps:
Step 1: Download and install iMyFone Umate Pro on your PC, and connect your iPhone, iPad, or iPod touch to your PC/Mac using a USB cable.
Step 2: Click Photos tab on the left hand menu and the program will list out all the photos.

Step 3: You can choose between Backup & Compress or Backup & Delete options.
Step 4: Click Start to complete the process.

#4. How to Backup iPad Pictures to Computer via Photo Stream
Setting up My Photo Stream on iCloud would make your new photos to automatically appear on all your iOS devices, computers, and Apple TV. It doesn’t matter which device you used to take the photo, in as much as you added all your devices while setting up the iCloud photo streaming service.
To backup iPad pictures on PC via iCloud Photo Stream, you will need to turn on photo streaming on all your devices. Here is how to do it:
- iOS 10.3 or later: Click Setting > Your Name > iCloud > Photos. Then turn on Upload to My Photo Stream.
- iOS 10.2 or earlier: Click Setting > iCloud > Photos & Camera. Then turn on Upload to My Photo Stream.
- On Windows PC: Install iCloud for windows and launch it. Click Options and turn on My Photo Stream. Then click Apply.

We’ve shared these tips to help you backup your iPad photos successfully. If you want more tips on how to backup iPad pictures on Mac or Windows PC, you can check our recent articles for more tips.


 March 12, 2024
