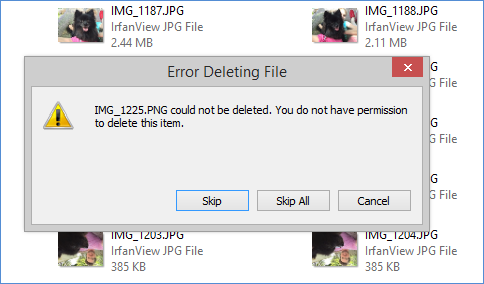
Before the release of iOS 8.3, it was quite easy to connect your iPhone to the computer and manage and delete photos. But with the iOS 8.3 release, iCloud Photo Library was added that changed things. Now you can no longer delete photos via your computer as it gives you an error that you don't have permission. Fortunately, there are ways to solve this issue.
The Best Solution for "don't have permission to delete photos from iPhone"Issue
If you cannot delete iPhone photos in DCIM folder, why not try an alternative? One of the best way to manage and delete your iPhone photos on your computer is by using a third-party software.
Here recommend iMyFone Umate Pro. An iOS eraser which can allow you to delete all kinds of iPhone photos (including .heic photos) permanently. It is better than the other common deletion methods because iMyFone Umate Pro deletes data permanently, which means no one can recover it once it is erased. You can effectively protect your privacy with it. And it's fully compatible with iOS 15.
Here are some top features of iMyFone Umate Pro:
Key Features:
- Erase your personal and private photos permanently from your iPhone. Data deleted by Umate Pro is permanent, so there is no chance of recovery.
- One-click back up your iPhone photos to your computer and delete them from your iPhone.
- Scan and find your previously deleted files (photos, videos, contacts, call history, etc.) and then erase them permanently to prevent recovery.
- Apart from erasing photos, Umate Pro is also capable of permanently erasing other types of data including videos, messages, contacts, call history, third-party app data such as WhatsApp data, Safari's cache and cookies, etc.
- Preview the scanned files and delete your iPhone data selectivity.
- It's recommended by lots of noted media arround the world: MacWorld, iPhoneinCanada, APPKED, macworld.co.uk etc.
Steps to Erase Photos Via Umate Pro
Step 1. Open iMyFone Umate Pro on your Windows PC or Mac, and connect your iPhone to the computer.
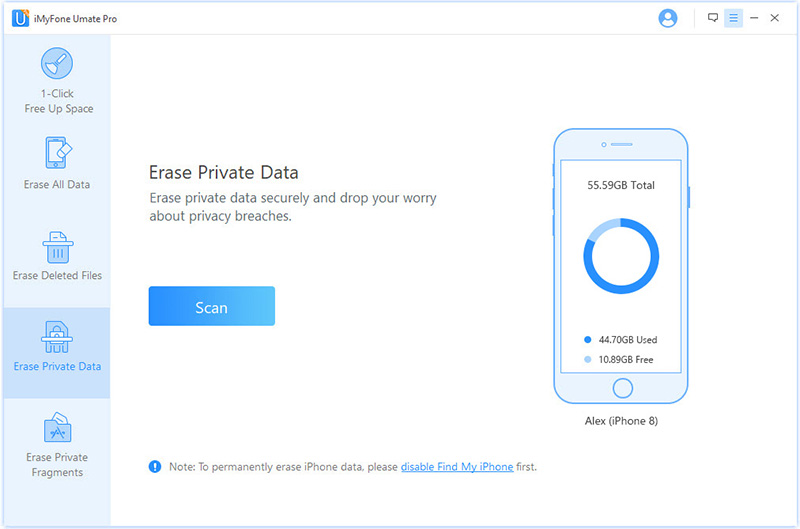
Step 2. From the home screen of iMyFone Umate Pro, select the Erase Private Data mode, then click the Scan button.
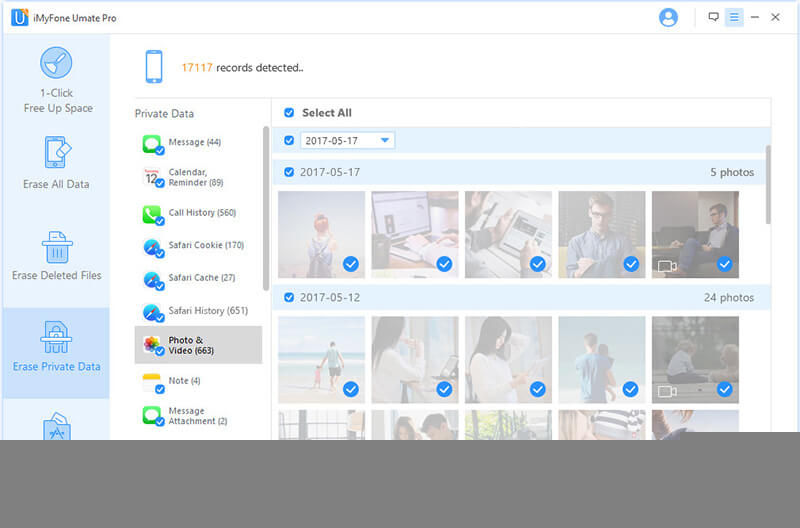
Step 3. From the scan result, select the photos that you want to erase and then click Erase Now.
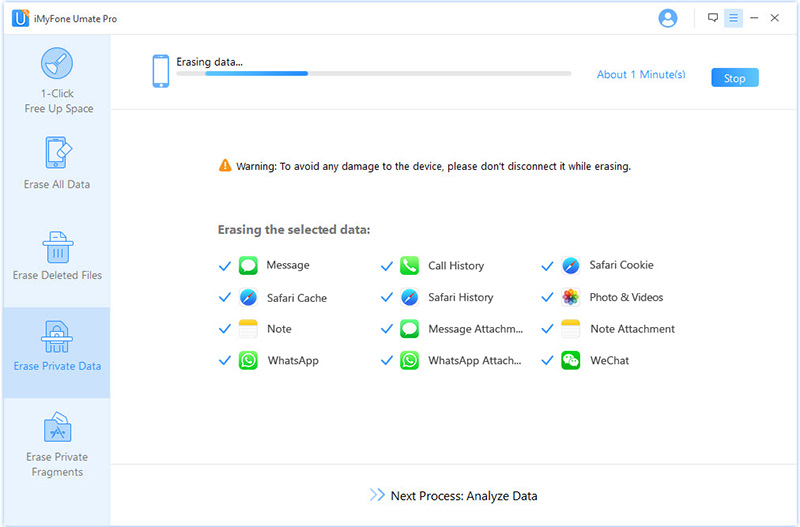
Step 4. Then, the selected files will be erased permanently, none of the recovery software can retrieve them.
Other Tips That May Work for You
Disable "iCloud Photo Album"
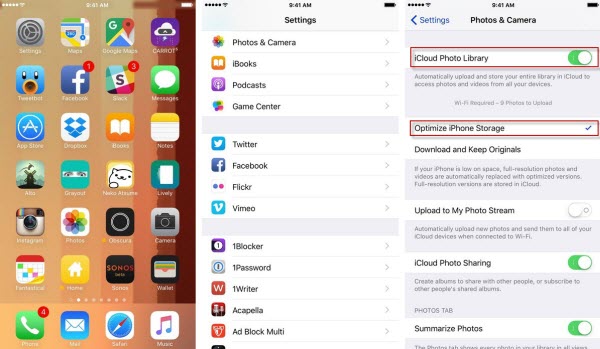
Since the problem occurs due to the iCloud picture management feature, you will need to disable it in order delete your iPhone photos on your computer. You don't need to disable the entire iCloud (such as iCloud for calendar and other features); you just need to disable iCloud Photo Album. Follow these steps to fix "don't have permission to delete photos from iPhone" issue:
- Open Settings app on your iPhone.
- Navigate to Photos &d Camera.
- Find and uncheck the option called 'iCloud Photo Library'. Now you should be able to delete your iPhone photos without any issues.
Delete Photos One by One Using Photos App on iPhone
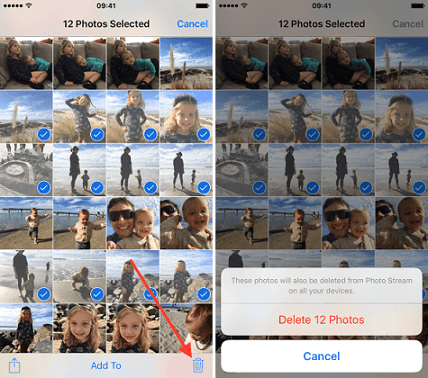
You can delete your iPhone photos conveniently from the Photos app on your device.
- Open Photos app on your iPhone.
- Find the photo that you wish to delete and open it. You will see several options i.e. Edit, Share, Delete, etc.
- Click on the trash can to delete the opened photo and then confirm your action.
- Repeat these steps for other photos that you wish to delete.
Note
Cons of This Method
One major con of this method is that photos deleted are not permanent and can be recovered. That's why it is recommended that you use iMyFone Umate Pro to permanently delete your iPhone photos and protected your privacy.


 March 12, 2024

