When users make search queries on search engines, these search terms are stored on the device through the browser used. There are a range of scenarios that will warrant users to however delete search history on iPhone. These include: not wanting people to have a clue of your online activities, when you have accessed sensitive information or pages and you have children who use your device occasionally, and when you want to gift out or sell your device and you simply don’t want your private information used in the wrong way.
Part 1: How to Clear iPhone Search History
1 Browse in Private Mode on Safari
One of the best way to delete or better put, avoid having to delete search history on your iPhone is to browse in private mode on Safari or such mode in other browsers you use.
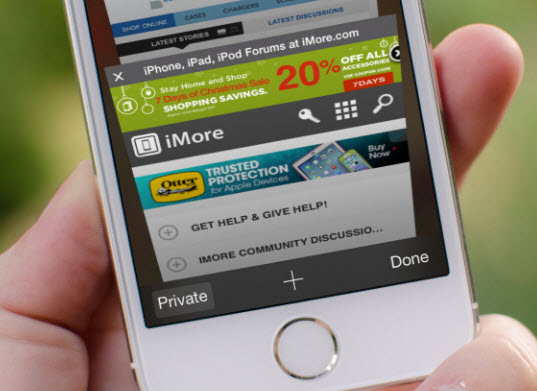
To use a private tab or window in Safari, while browsing, tap the icon that looks like two flat sheet overlapping one another as if you want to open a new tab. Tap the “Private” button on the bottom-left of the screen and tap “Done” to start browsing in the new private window.
2 Delete iPhone Search History Manually
You have two options to clear your search history and overall browsing history. Either from Safari itself, or by using the ‘Settings” app. We recommend using the ‘Settings” app because it is more through and will also remove cookie data as well as any auto fill data that might exist.
To do these, go to Settings > scroll till you locate the Safari icon and tap > select “Clear History and Website Data” > confirm the delete from the prompt that pops up.
3 Permanently Erase Search History iPhone to Avoid Privacy Leak
While the options discussed above will delete the data from been seen on the iPhone, your data is not yet safe. iMyFone Umate Pro or iMyFone Umate Pro for Mac on the other hand has a powerful data erasing technology that erases all data forever, making the files erased cannot be recovered by any data recovery tool.
Benefit A Lot from Umate Pro:
- Completely erase Safari cache, history, cookies from iPhone, leaving no chance of recovery.
- Previews and selection are available before erasing.
- Previously deleted Safari history which are still recoverable will be fully wiped.
- Erase private messages, photos, videos, notes, call logs, Whatsapp, Line, Viber, Kik, etc.
- Advantages: 100% privacy security, easy to use, quick to run.
So, you have to be sure to be really wanted to erase that file in the first place. For this purpose, the modes to use are the “Delete Private Data” and the “Delete Deleted files” because of data that you have cleared in the past can still be recovered. To permanently delete your search history on iPhone, do the following:
Step 1: Download iMyFone Umate Pro to your computer, run the downloaded file and click “Install”, then connect your iPhone to it.
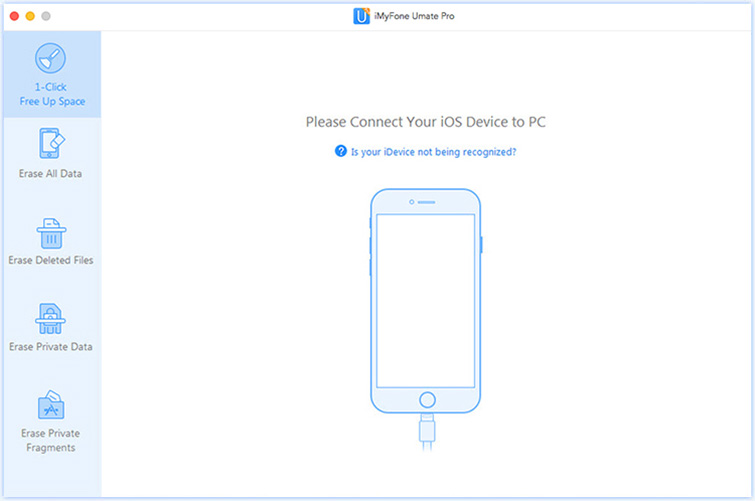
Step 2: Choose the “Erase Deleted files” tab to first erase files you’ve previously deleted and then erase private files.
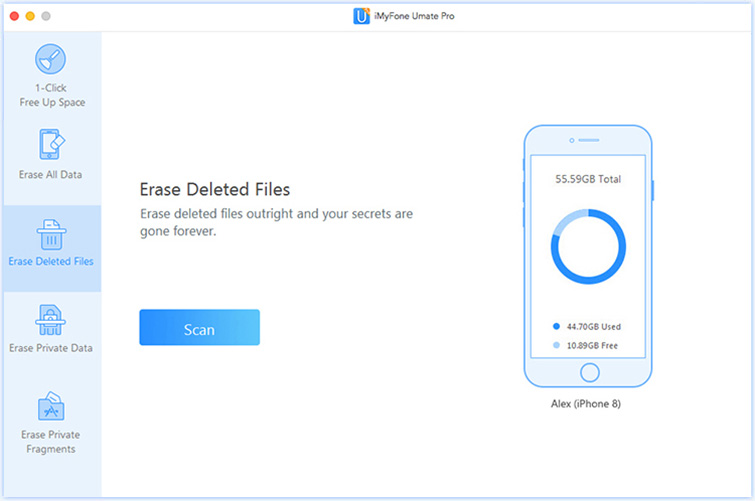
Step 3: Click “Scan” to preview and select the files that you want to delete permanently.
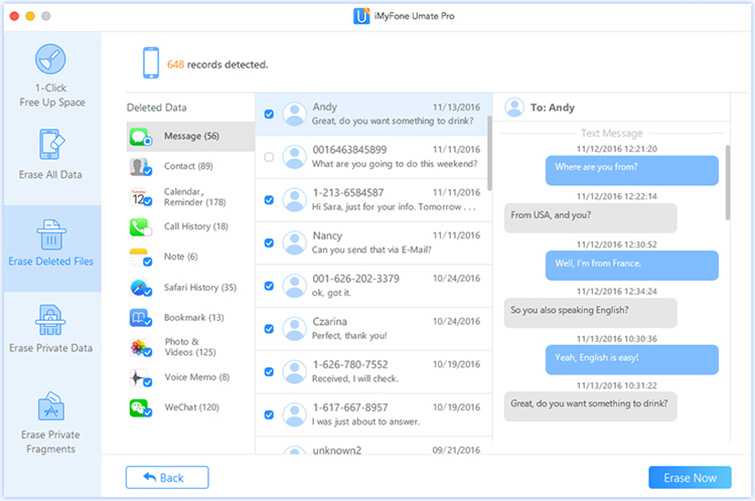
Step 4: Click “Erase Now” to erase data from your device permanently.
Five Things You Can Do with iMyFone Umate Pro
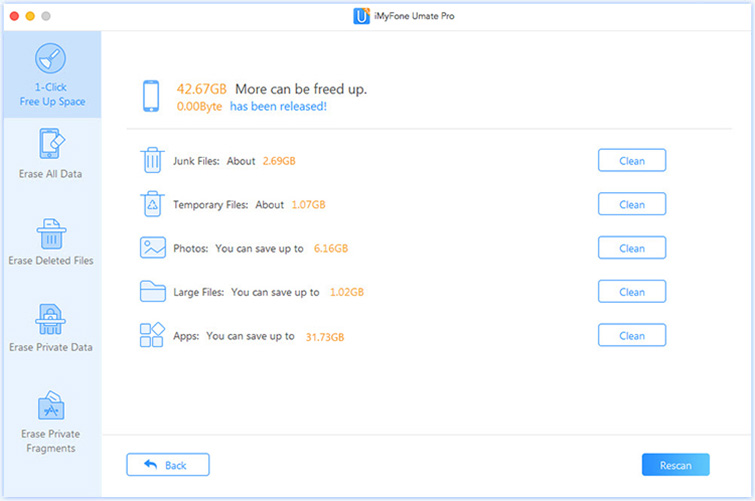
1. Clear Junk and Temporary Files for Free
This process is designed to help users free up space and speed up iOS devices. Temporary and junk files are one of the primary reasons iPhone become slower. It is therefore imperative to clear them out regularly. The “1-Click Free Up Space” is the mode you will select to perform this optimization.
2. 1-Click Free Up Space to Fix Storage Issues
Are you confused on how to create more space for new games, videos, and apps? I know how this can be especially with the fixed storage policy of iPhones. This mode helps users optimize their storage. Sub-options under this mode include compressing photos without losing their qualities to a fraction of their original size, managing apps, and managing large files.
3. Erase All Data
With this option, all data and files on the device are erased permanently without any chance of recoverability. This is especially necessary for those who want to sell their device or gift it out, or return it as a company property. After using this mode, you are confident that all your data won’t fall in the wrong hands.
4. Erase Deleted Files
Every now and then, our interaction with the iPhone means we have to delete files; some more private than the other. What happens in the case where the files be seen by another person? Well this mode is designed for such scenarios. If you have deleted files in the past and want to make sure the files are deleted for good, then use this mode. You can preview these files and proceed to erase the some files you want, or erase all.
5. Erase Private Data
Private files are so called because they should always remain private. These include bank details, safari cache, web history, search history, and other forms of private data. With this mode you can scan your device for all existing private files. The mode also allows you to preview the files and select the files you want to erase permanently. This option also erases your files without the option to recover them. Your privacy remains private with this utility.


 March 12, 2024

