If you are one of those people who don’t like to store their map search and destination history, then you will be glad to know that there are a number of ways to clear map history on iPhone. Clearing map history is also helpful in protecting your privacy.
How to Clear Maps History on iPhone with iOS 15/14/13?
Here are some ways to clear map history on iPhone with iOS 15/14/13:
#1: Clear Apple Maps History on iPhone
Clearing the search and destination history from Apple’s official maps app is very easy and shouldn’t take a lot of time to do so. Follow these instructions:
Step 1. Open Maps app on your iPhone.
Step 2. Touch the Search bar in the app and hold it, then swipe up. The search card will be displayed.
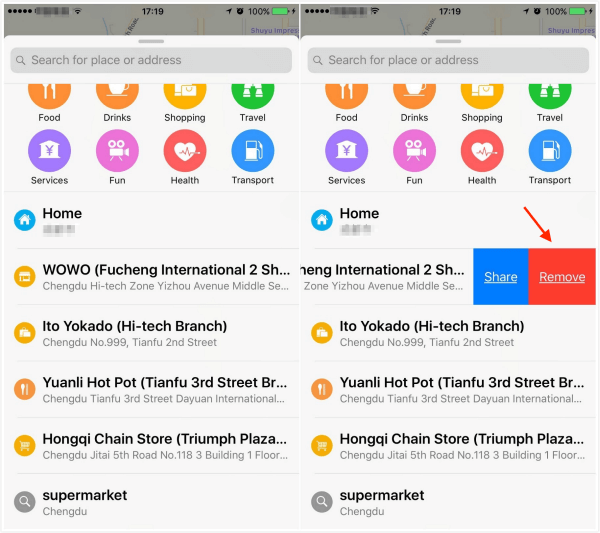
Step 3. Now swipe left over an entry that you wish to remove and then tap Remove to clear it.
Note
When you remove an entry from the Maps app, that entry is permanently deleted from your list. And if there are more than one device linked to your Apple ID, then that particular entry will be deleted from other linked devices as well.
#2: Clear Google Maps History on iPhone
Google Maps is a great app on iPhone that helps find local points of interest, offers turn-by-turn navigation, and more. If you use this app a lot and want to clear your search and directions history, then you will be glad to know that the method to do this is quite straightforward. Follow these instructions:
Step 1. Open Google Maps on your iPhone.
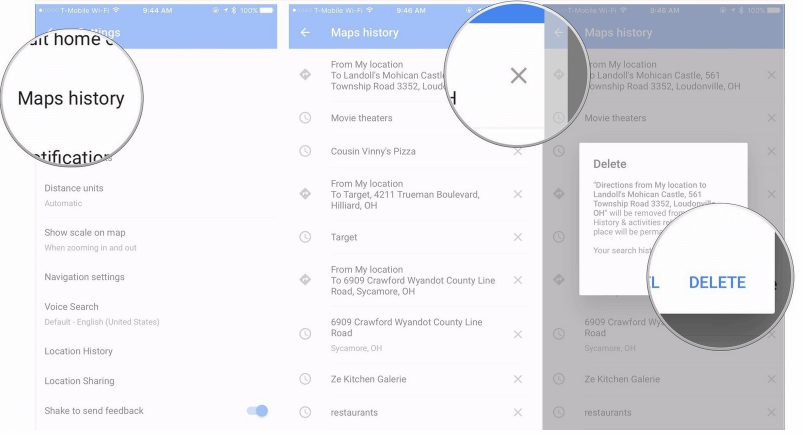
Step 2. From the app menu, navigate to Settings > Map History.
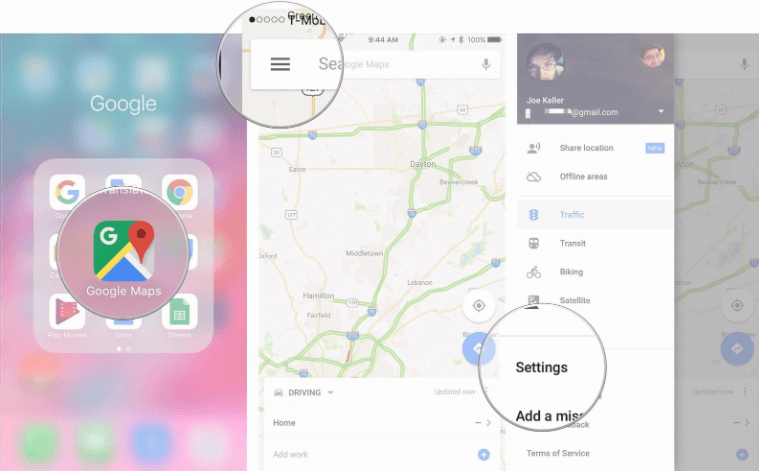
Step 3. In this section, you will see all your search and destination history. Tap the ‘x’ next to the entry that you wish to delete and then tap Delete to confirm.
#3: How to Stop Your iPhone from Tracking Locations You Frequently Visit?
By default, your iPhone records and tracks the places that you frequently visit in order to provide better location-based data and suggestions. While this feature can be very helpful, you may want to protect your privacy by disallowing your device to track the locations you frequently visit. This feature can be easily disabled via the Settings app of iPhone. Here are the steps:
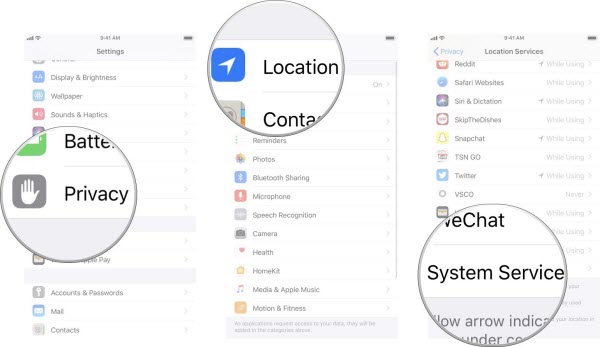
Step 1. From the Home Screen of your iPhone, open the Settings app.
Step 2. Navigate to Privacy > Location Services > System Services.
Step 3. Now find and select Significant Locations.
Step 4. Input your passcode, use Face ID, or Touch ID, to authenticate access.
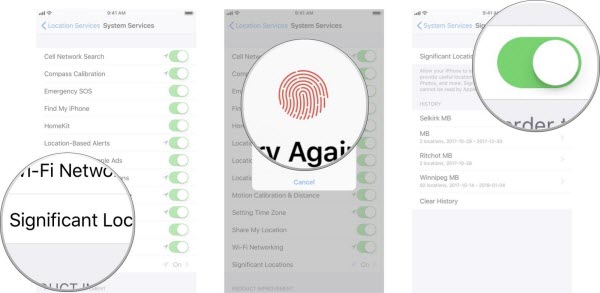
Step 5. Now switch the Significant Locations to Off. The switch will turn gray, displaying that the feature has been turned off.
Advanced Tip: The Best Way to Prevent Privacy Leak
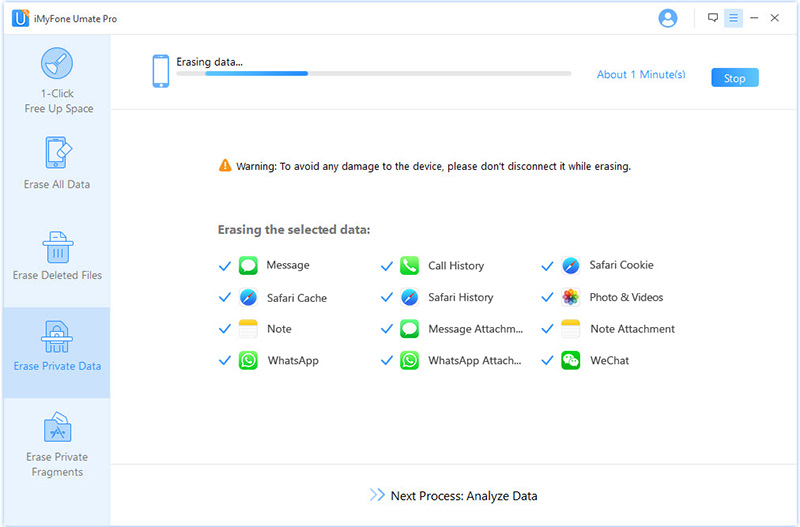
If protecting your privacy is your primary goal, then it is recommended that you use iMyFone Umate Pro to manage your private data. This method is better than deleting your private data (messages, contacts, call history, photos&videos, safari data, third-party app messages, etc) via the default method because Umate Pro erases data permanently, preventing it from ever being recovered. Not to mention, it is also very easy and convenient to do.
Key Features:
- Umate Pro is a great tool when it comes to erasing private data permanently and protecting your privacy.
- Scan deleted files and permanently erase their traces to make them 100% unrecoverable.
- Private data from third-party apps can also be permanently erased via Umate Pro. These apps include WhatsApp, Viber, Kik, etc.
- Completely reset any iDevice and erase all its data permanently within a few minutes.
- Boost the performance of your iDevice via 1-Click Free Up Space mode.
Steps to Erase Private Data Permanently
Step 1. Launch Umate Pro on your Windows PC or Mac, and connect your iDevice.
Step 2. Select Erase Private Data tab on Umate Pro. Click the Erase button shown on the next screen.
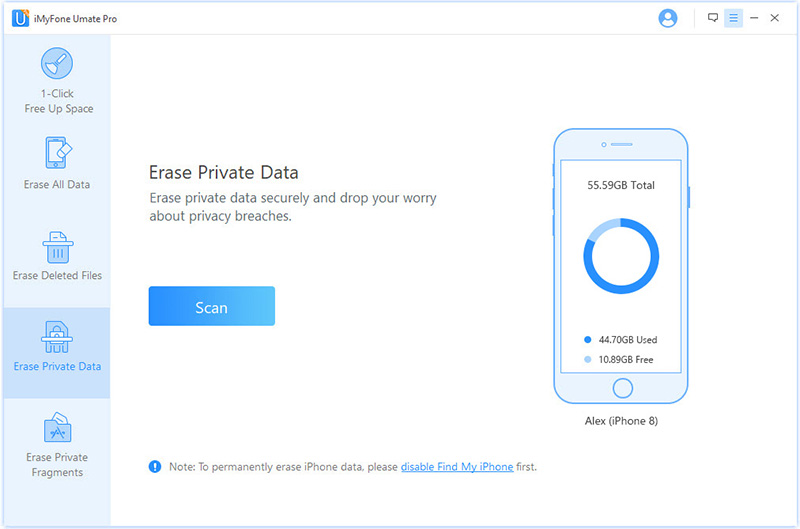
Step 3. After the scan process, you will see all the private data in your iDevice. Choose one of them you want to permanently erase and click on Erase Now button.
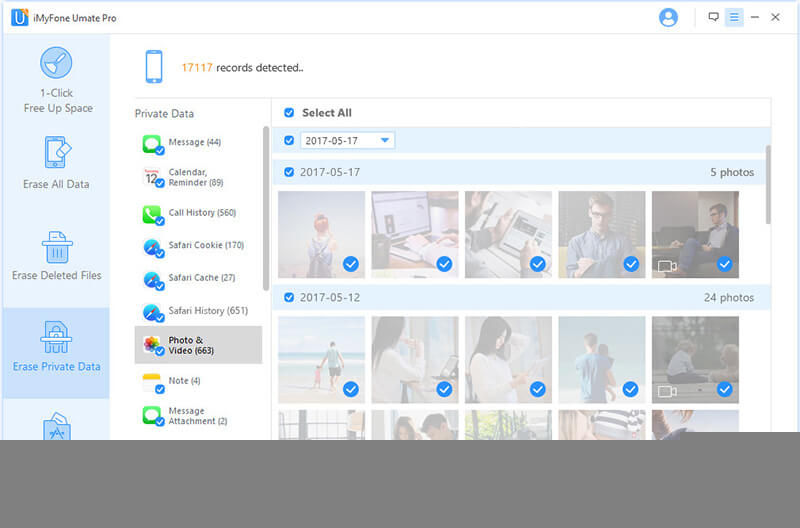
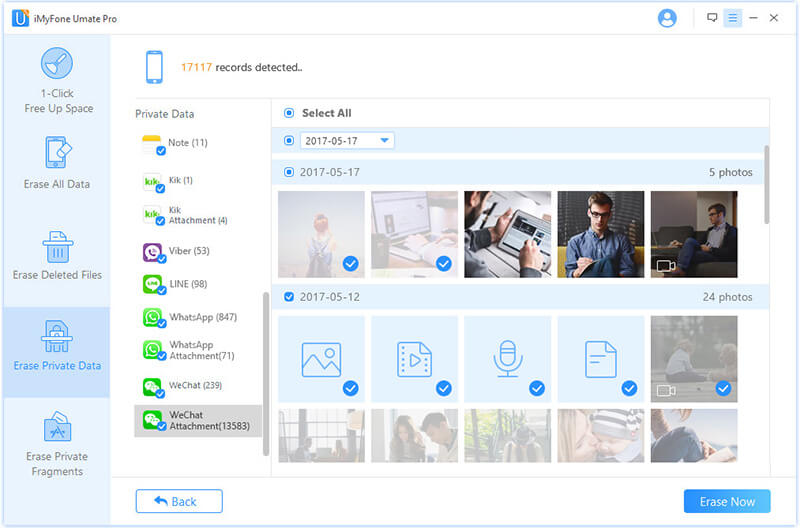
Step 4. Choose one of them you want to permanently erase and click on Erase Now button.


 July 29, 2024

