“How do I avoid ‘message could not be moved to the mailbox trash’ on iOS? After updating to iOS 11.4, I could not delete some certain messages in Apple mail. When I tried to deleted, I got such error message.”
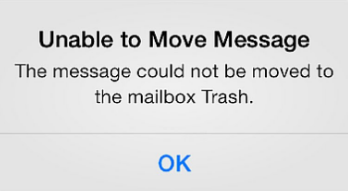
This is a known bug in iOS and you’re not the only one to have faced it. While this can be frustrating, there is a way to solve this problem. Below are a few tips on how to fix this error as quickly as possible, as well as some advice on how to protect your privacy better when you delete your email messages.
4 Tips to Fix iPhone "Message Cannot Be Moved to Mailbox Trash"
There are a few random reasons why you may find that you cannot move your messages to mailbox trash. If you’ve already tried a few times, and keep getting the same error, try these tips:
Tip #1: Reboot your iOS device
This should be your first resort whenever you encounter any sort of error on your device. Often, this will clear up random bugs, but if you still cannot move your messages to the trash, then move on to the next tip.
Tip #2: Disable your e-mail account, and then reboot
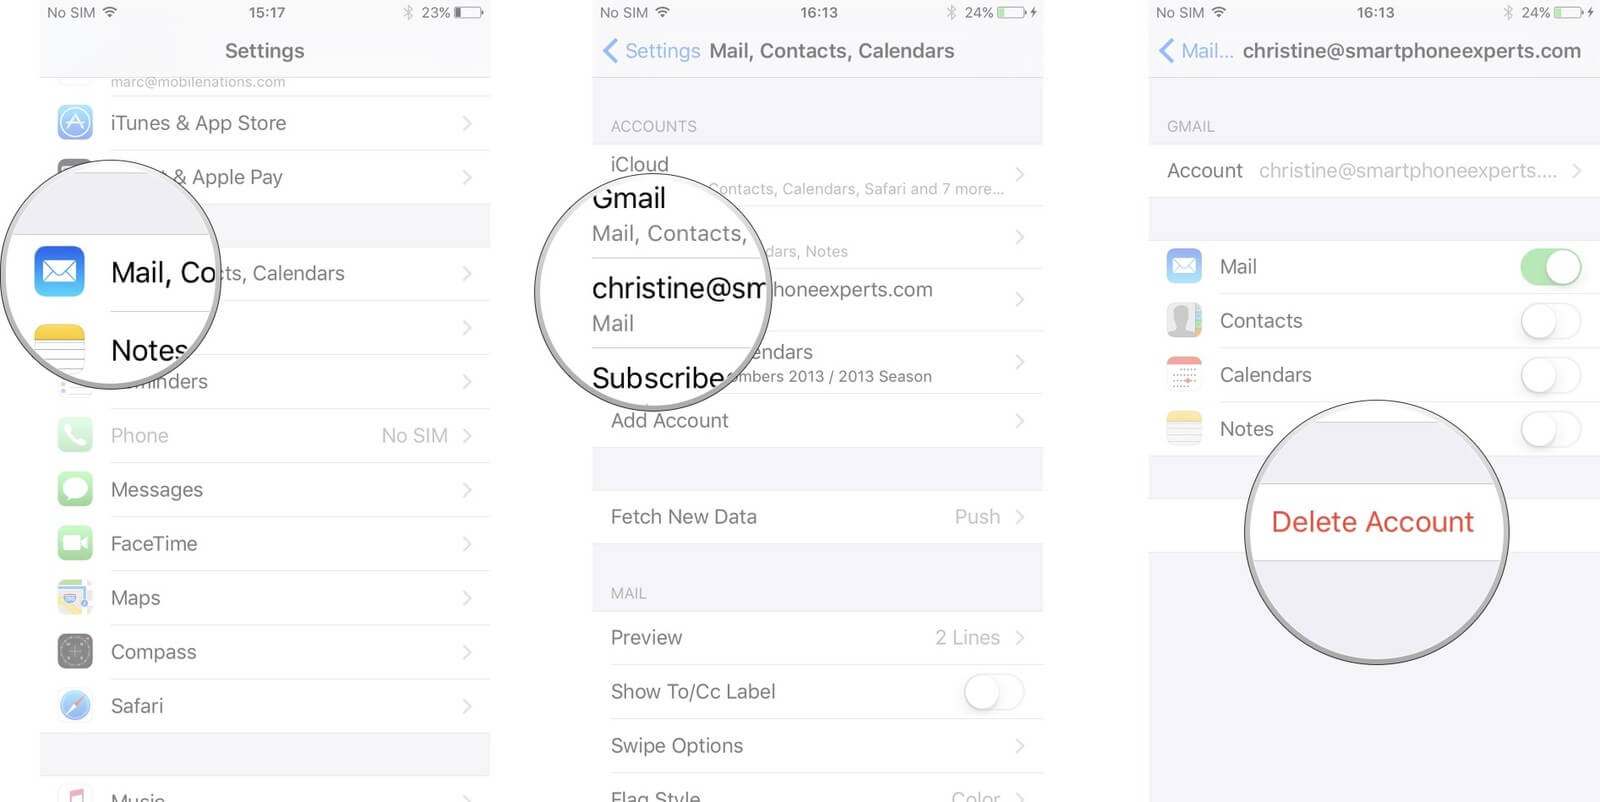
On your iPhone, open up Settings, then tap Mail, Contacts, Calendar > Accounts, then tap on your email account. You will have an option there to disable Mail. If it is an iCloud account, you can just turn off “Mail”. Do that, and then reboot your device. Afterwards, enable your mail again, then try to delete your email normally. If this doesn’t work, move on to Tip #3.
Tip #3: Delete your accounts
Again go to Settings > Mail, Contacts, Calendar > Accounts. Tap your email account and then click on “Delete Account”. Reboot your iPhone just to be on the safe side, then open up Settings again, go to Mail, Contacts, Calendar > Accounts > Add Account, then add your email account once again. Try deleting your mail, and if this still doesn’t work, then move onto Tip #4.
Tip #4: Check if your deleted mail is set to go to trash on your server. Also, try deleting your trash folder
Go to Settings > Mail, Contacts, Calendar > Accounts > [Your Account] > Account > Advanced, and where it says Deleted Mailbox. Be sure that it is set to Trash on the mail server.
If that doesn’t work, go to your Mail app and tap Accounts. Go through your accounts and look at the different mail folders. If you find that you have multiple trash folders, tap on each one and examine the contents. If one of them has a folder that is named Error, then delete that trash folder.
Now try to delete your mail like you normally would.
How to Permanently Delete iPhone Messages?
If you’re concerned about your privacy and want to protect yourself from identity thieves, then you should know the truth: Manually deleted messages can be recovered with certain kinds of data recovery software. In fact, these kinds of tools are so common and easy to use now that nearly anybody could recover your messages after you delete them, not just elite hackers.
So if you have sensitive emails that you don’t want anyone to find out about, it’s in your best interest to use an application like iMyFone iOS Eraser Win/iMyFone iOS Eraser Mac to permanently delete your emails. iMyFone is specialized data eraser that erases your files without a trace.
Main features:
Key Features:
- Delete your private data from iPhone and leave no trace. Messages are included.
- Erase private data: messages, call logs, contacts, browsing history, Photos, videos, etc.
- Permanently erase files that you previously deleted by hand.
- Erase private fragments left by third-party apps, 100% safe: Snapchat, WhatsApp, Facebook, Twitter, etc.
- Clear iOS junk files that is taking up huge space on iPhone for free.
iMyFone Umate pro: as an outstanding program for iPhone it receives a lots of review and recommendation for other websites and medias.

How to Erase Previously Deleted iPhone Messages
Did you delete your messages manually without using iMyFone iOS Eraser, and now you’re worried that they will be recovered? Well, it’s not too late! iMyFone has a function that allows you to search for data that is still lingering on your iPhone/iPad even after you’ve deleted it. From there, you can erase it.
Beat the hackers and snoopers to your data and erase it before they can breach your privacy with these steps:
Step 1: Download and install iMyFone iOS Eraser. Connect your iPhone to computer and open up iMyFone.
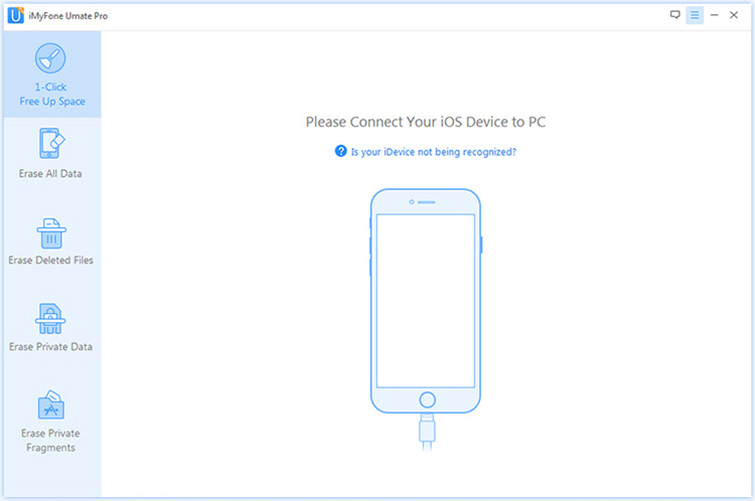
Step 2: Choose the Erase Deleted Files mode and then “Scan”.
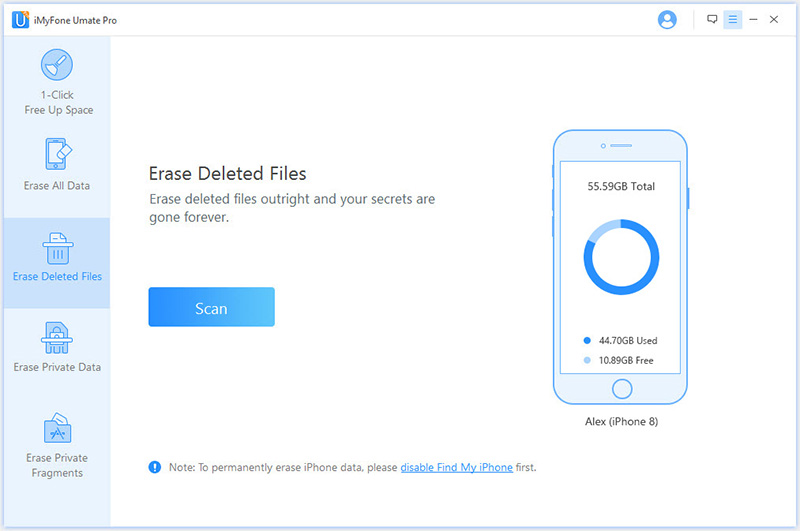
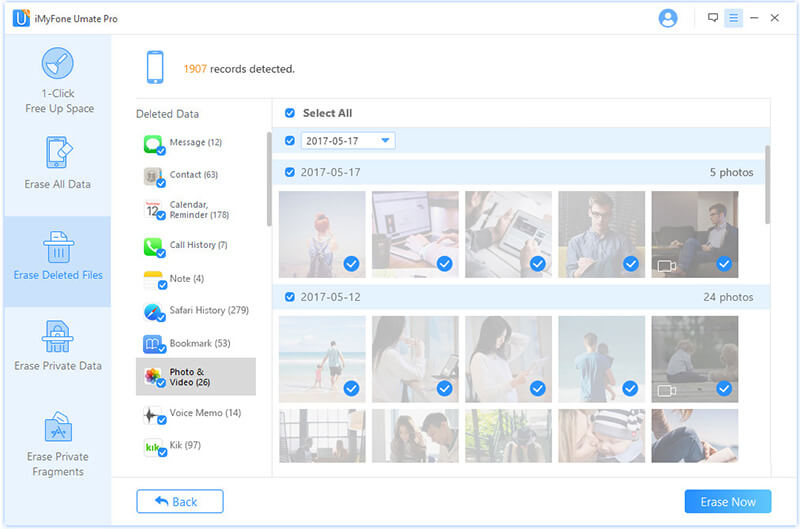
Step 3: You will now see a list of deleted data that iMyFone detected, like “Messages” and “Messages Attachments.” Select the data that you want to permanently delete and click Erase Now.
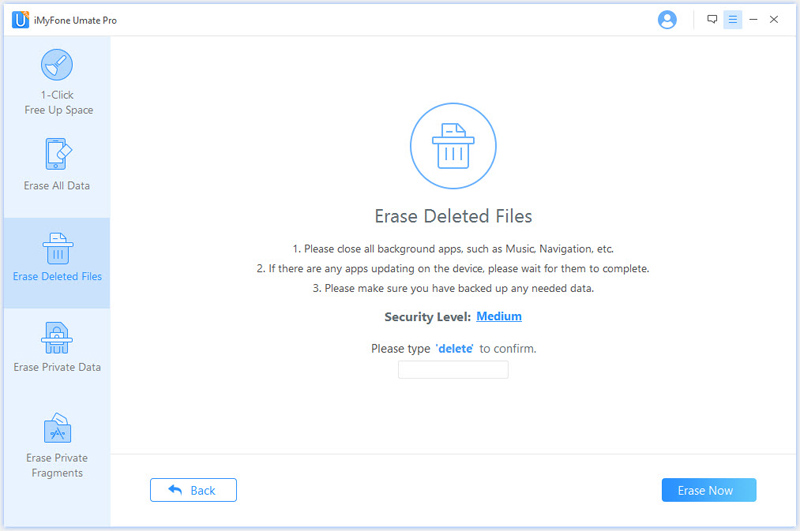
Step 4: Confirm that you want to delete the data permanently by typing “delete” into the text box and clicking Erase Now.
Final Verdict
If you cannot move messages to trash, there are a few different solutions that you can try to get around this bug. Keep in mind, however, that even if you get it working again, the emails that you delete manually will often be recoverable by special software. To avoid this, use iMyFone iOS Eraser to delete your emails permanently and with no chance of recovery.


 March 12, 2024
